Some of you may recall our earlier article on Installing VirtualBox on MX Linux. This article is an add-on to that one, but not quite a “Part II.”
By following along with the article, we’ll perform several tasks (hopefully learning a great deal). Among these tasks:
- Download Manjaro
- Create A New VirtualBox VM
- Perform Prudent and Useful Pre-Installation Housekeeping Tasks
- Install Manjaro in VirtualBox
- Perform Essential Post-Installation Housekeeping Tasks
However, before we begin, let me first explain why I chose Manjaro as our host VM.
Why Manjaro?
I chose Manjaro as the OS for our VirtualBox VM for a slue of reasons, but mainly because:
- It’s an Arch-based Linux OS using the XFCE desktop environment for its flagship variant, so it is abnormally lightweight for a Linux OS, an excellent characteristic for any VM. It is also available in GNOME and KDE versions.
- It is one of the few Arch-based installs that work out of the box, scanning your system for necessary drivers
- The Pacman package manager is one of my favorites
- Kernel management is excellent, always up to date with the latest kernel
- Many Linux newbies users feel Arch Linux (fairly or unfairly) is just too difficult for new users. I wanted to prove that it’s not. Manjaro is the perfect vehicle for that.
- Manjaro is rolling-release (which ensures newer software faster and no need to reinstall)
- The Manjaro Architect gives the user a great deal of control
- Access to the Arch User Repository (AUR) ensuring easy access to a vast array of applications without the complication of PPA or compiling
- Manjaro is gaining in popularity, actively developed, and well supported
Before we get started creating our new VM, please download the latest Manjaro 18.4.0 XFCE Stable version.
Create a New VM in VirtualBox
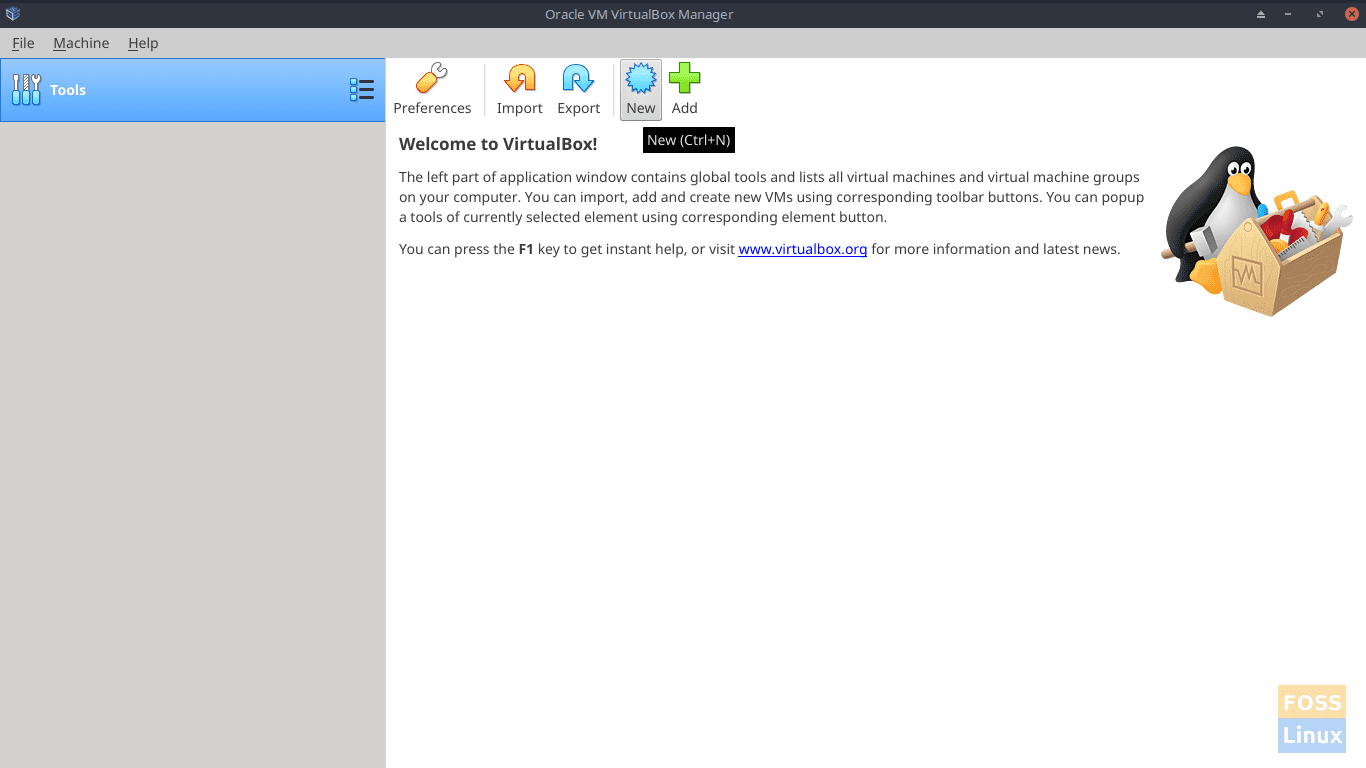
Launch VirtualBox. If you don’t have an icon on your desktop, your Panel, or the MX Linux Application Menu under Accessories, open a terminal window and launch the Oracle VM VirtualBox Manager window. Use the command below:
# virtualbox
Once we are at the newly installed Oracle VM VirtualBox Manager window, select the New icon (blue starburst) at the top center of the window.
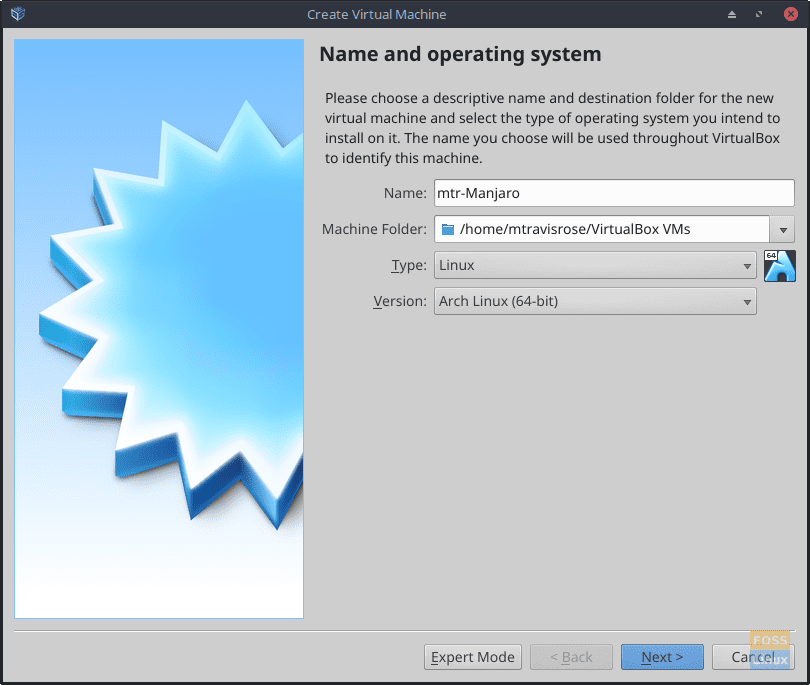
Enter a name for your new Operating System in the Name box.
To quickly and easily identify my installed virtual machines, I like uniquely identifying the names of my VM. (In this case, mtr-Manjaro – mtr for my initials, and Manjaro for the OS).
Accept the default path for Machine Folder.
Select Linux for Type.
Choose Arch Linux (64-bit) for Version.
While we could choose Expert Mode, there is no need for our purposes.
Click Next.
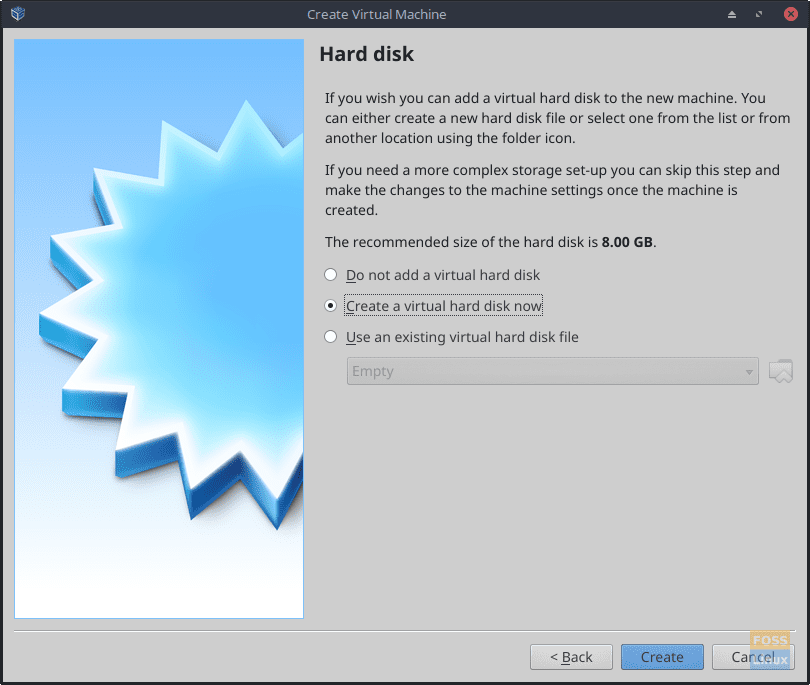
Accept the default option Create a virtual hard disk now. (Please note the “The recommended size of the hard disk is 8.00 GB.” statement.)
Click Create.
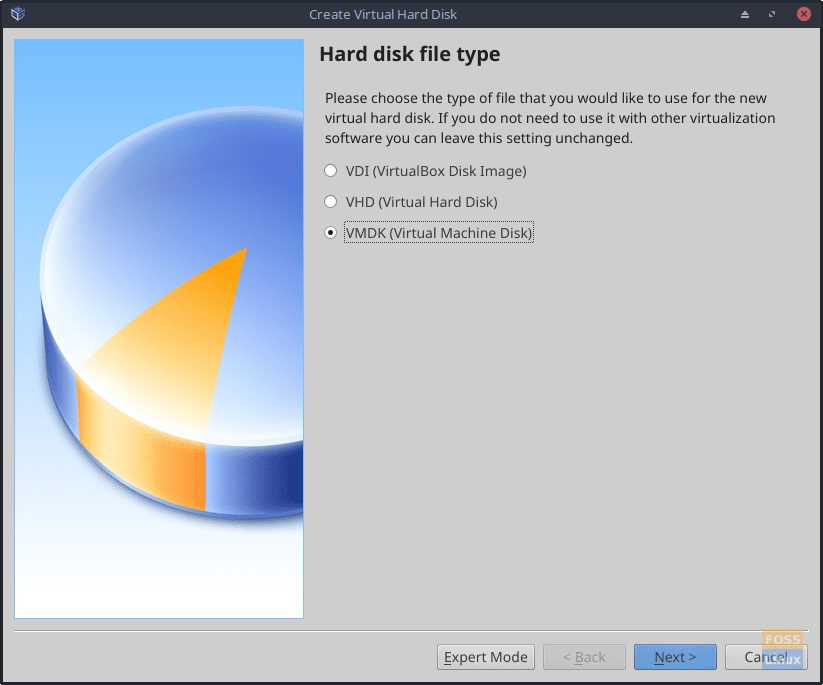
While VDI (VirtualBox Disk Image) is usually the default and the standard Hard Disk file type for VirtualBox VMs, I chose VMDK (Virtual Machine Disk) instead. I hope to use the VMDK option for a later article on VMWare Player.
VMDKs are easiest to use when transferring VMs between Oracle VirtualBox and VMWare Workstation Player.
VHD (Virtual Hard Disk) is the hard disk default file type used by Microsoft.
Different Virtual Machine applications use different default hard disk file types, but the major players offer support for most of the significant hard disk file types.
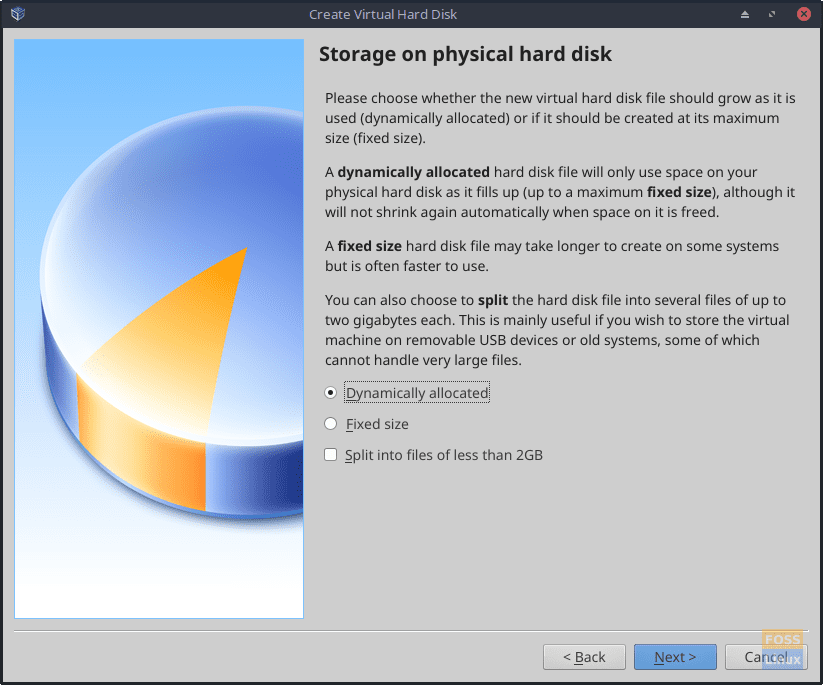
Select the default, Dynamically allocated.
Click Next.
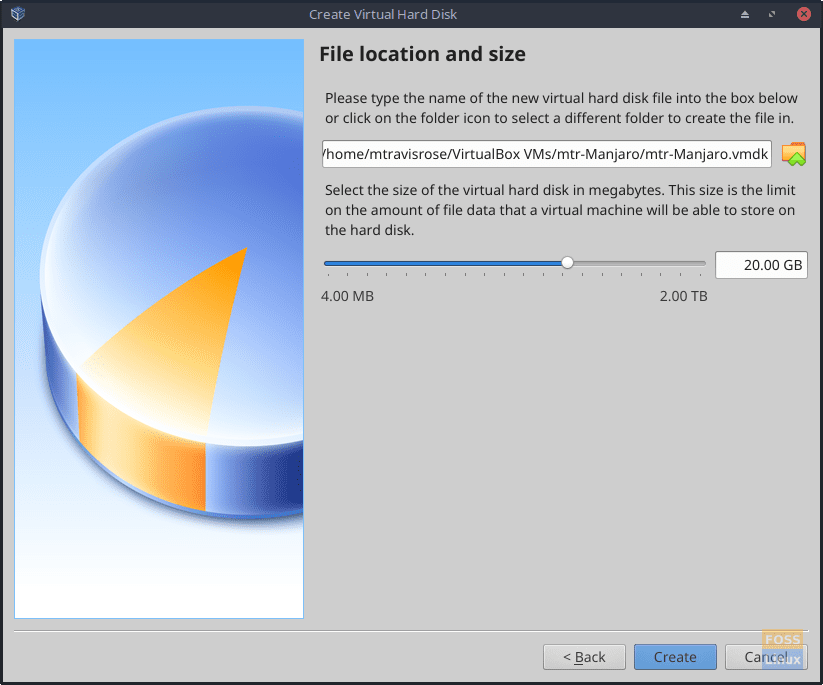
The default size 8.00GB (remember a few steps earlier on the Create Virtual Machine – hard disk window, the Oracle VM VirtualBox Manager made a note of this).
However, I increased the size of my hard drive to 20.00GB as I have the space available.
Click Create.
VirtualBox Manager Pre-Installation HouseKeeping
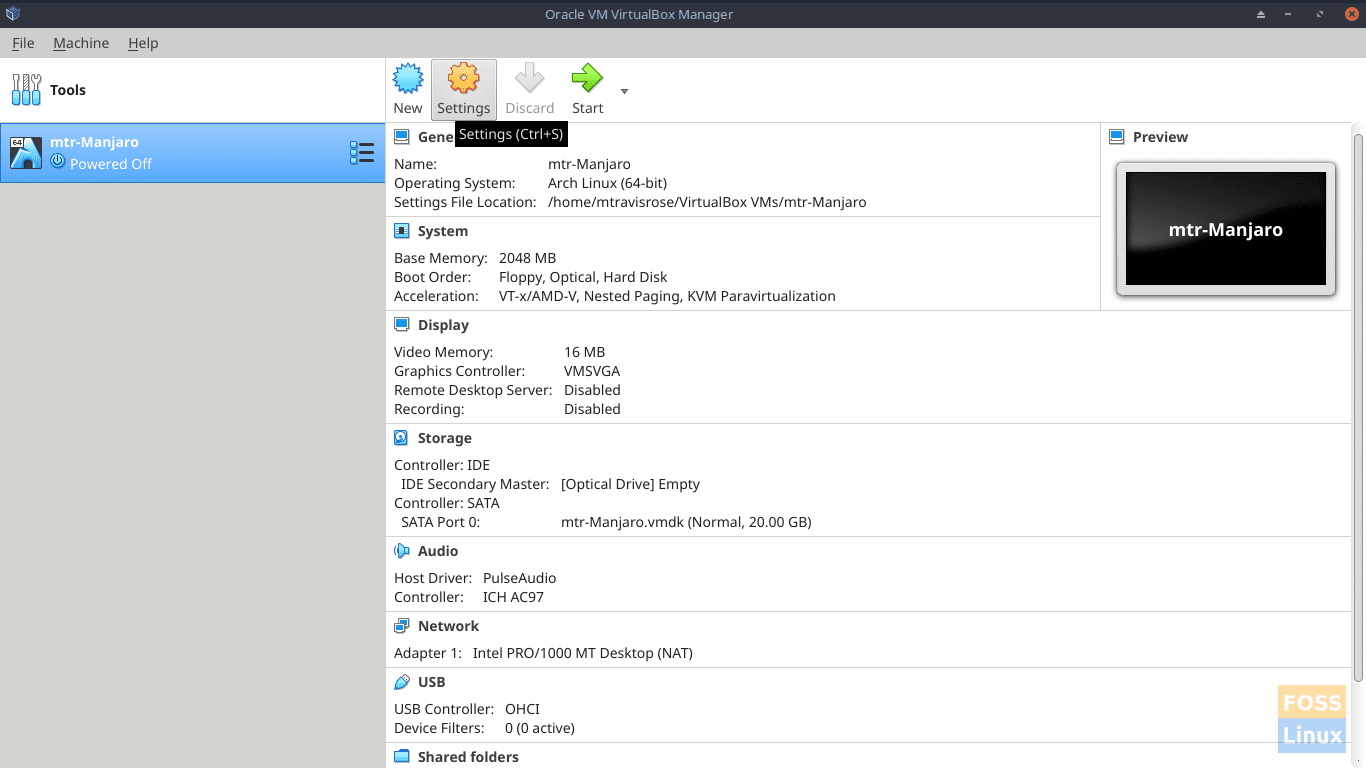
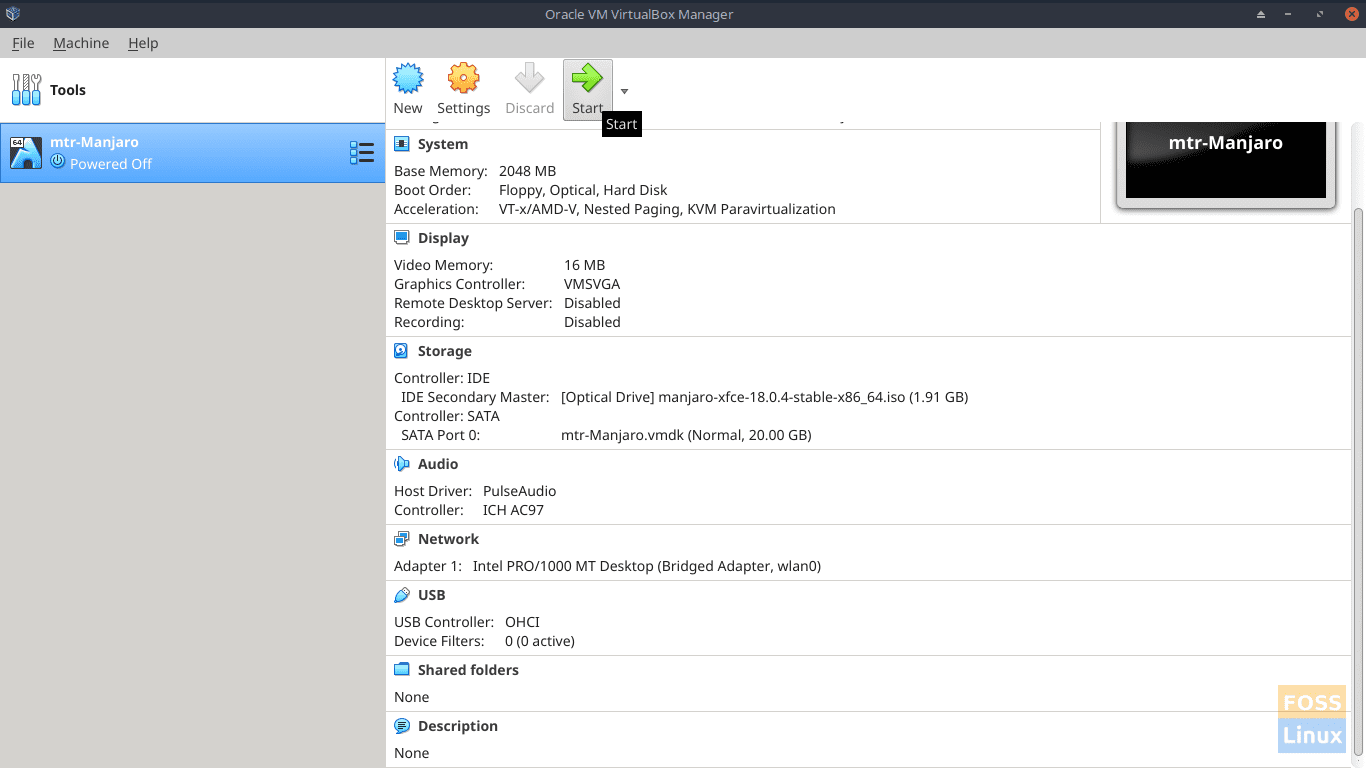
Back at the Oracle VM VirtualBox Manager window, we see our newly created VM. However, we have not yet installed an OS.
Before doing this, let’s first do a bit of housekeeping.
With your newly created VM highlighted in the column on the left, select the Settings icon from the top of the Oracle VM VirtualBox Manager window (gold machine gear).
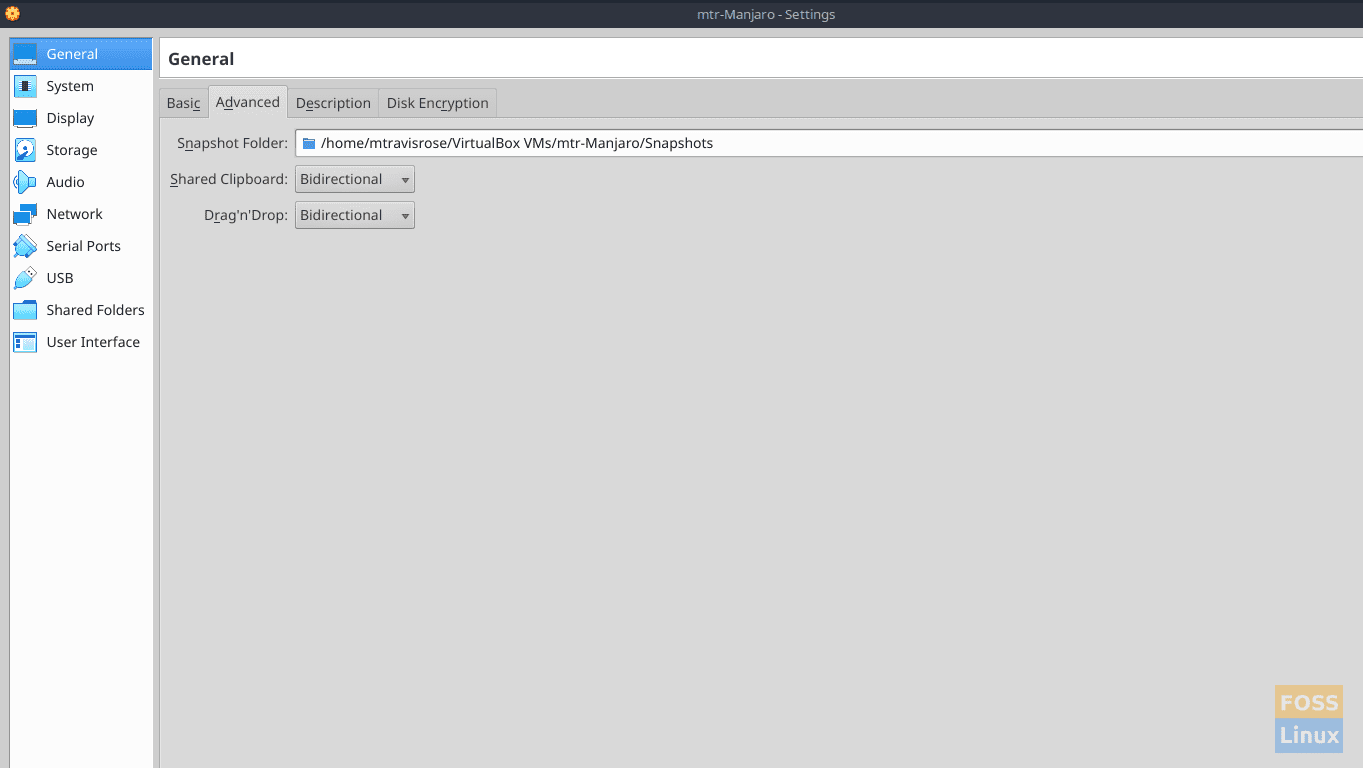
Select the Advanced tab and set both the Shared Clipboard and Drag’n’Drop to Bidirectional.
This enables us to share our clipboard and drag-and-drop files between our host machine and our VM effortlessly.
Leave the Snapshot Folder with the default setting.
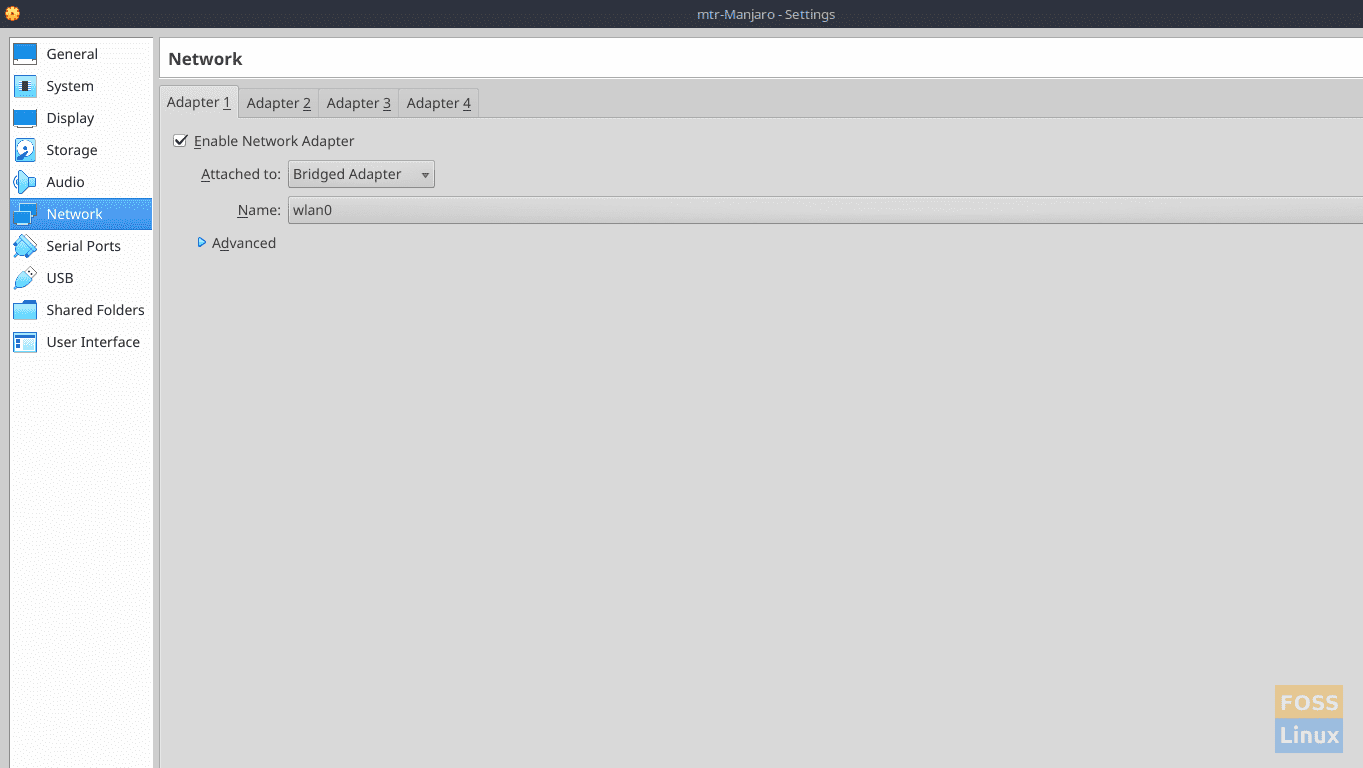
Select the Network from the left-hand column, and ensure that Enable Network Adapter is checked.
Change Welcome to the Manjaro Linux 18.0.4 “Illyria” Installer option to Bridged Adapter. This ensures that both the VM and host machine are on the same subnet and networking is fluid without modifications to your router or any other changes.
Leave all other settings at their defaults.
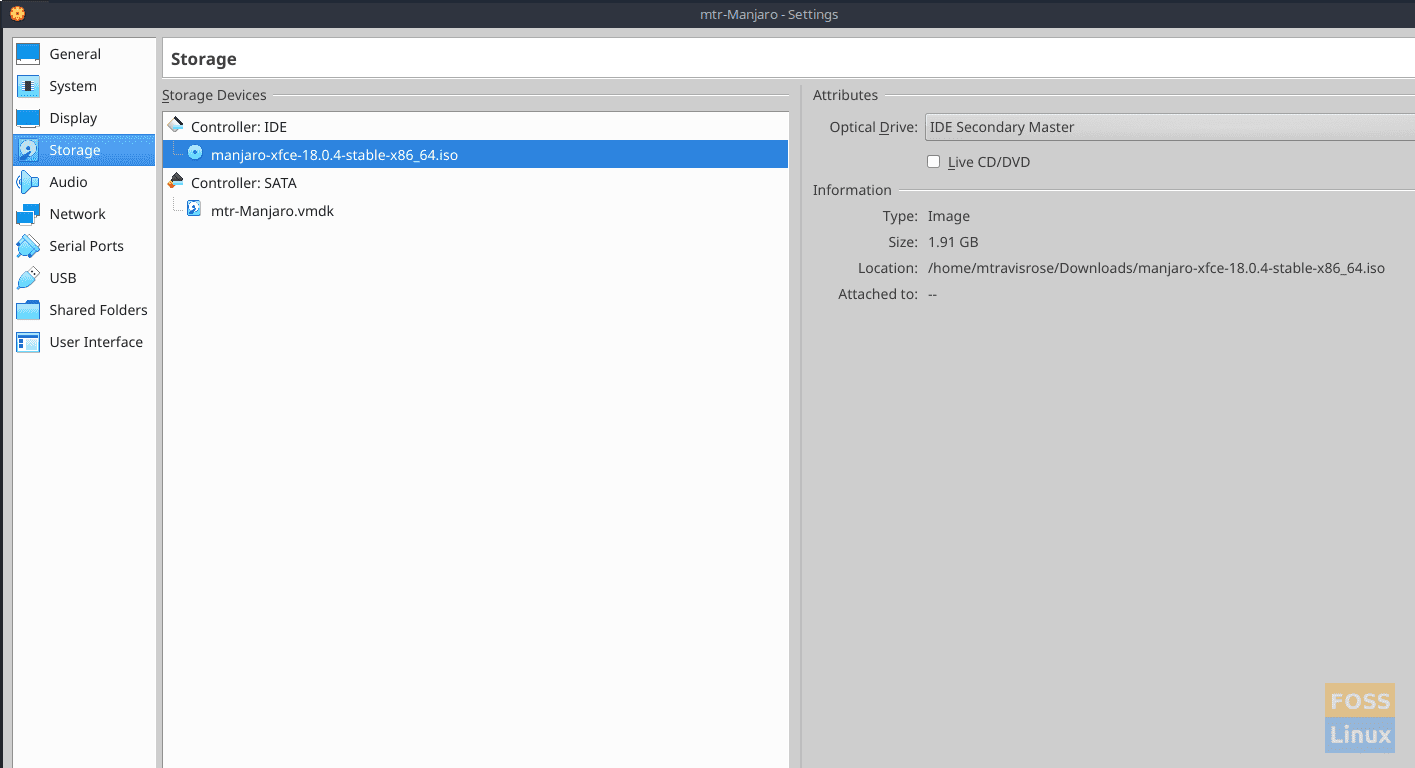
Select Storage from the left-hand column.
Change the Empty (CD) icon under Controller: IDE in the Storage Devices box to the manjaro-Xfce-8.0.4-stable-x86_64.iso we downloaded earlier.
Leave all other options as the defaults.
Click OK.
Manjaro 18.0.4 Installation on VirtualBox VM
We are now ready to install our new OS on our new VirtualBox VM.
From the Oracle VM VirtualBox Manager window, select the Start icon (green arrow from the upper-row).
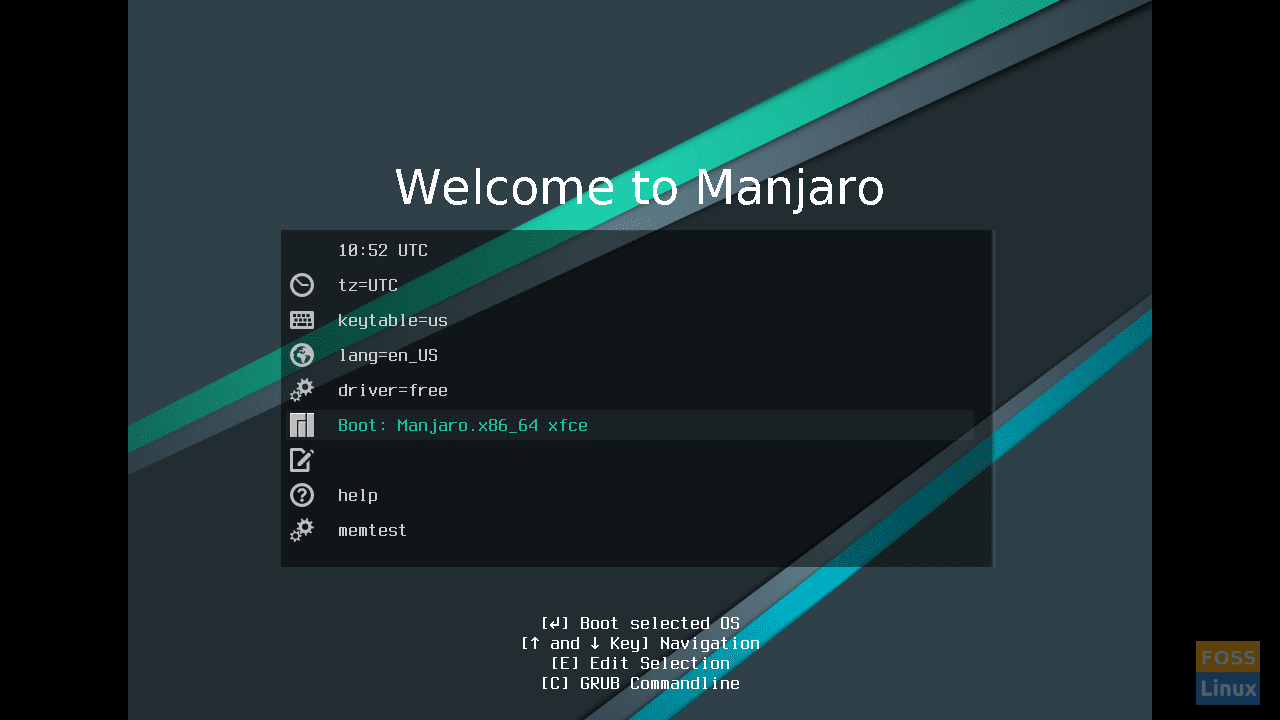
At the Welcome to Manjaro screen, I accept the defaults and choose Boot: Manjaro.x86_64 Xfce.
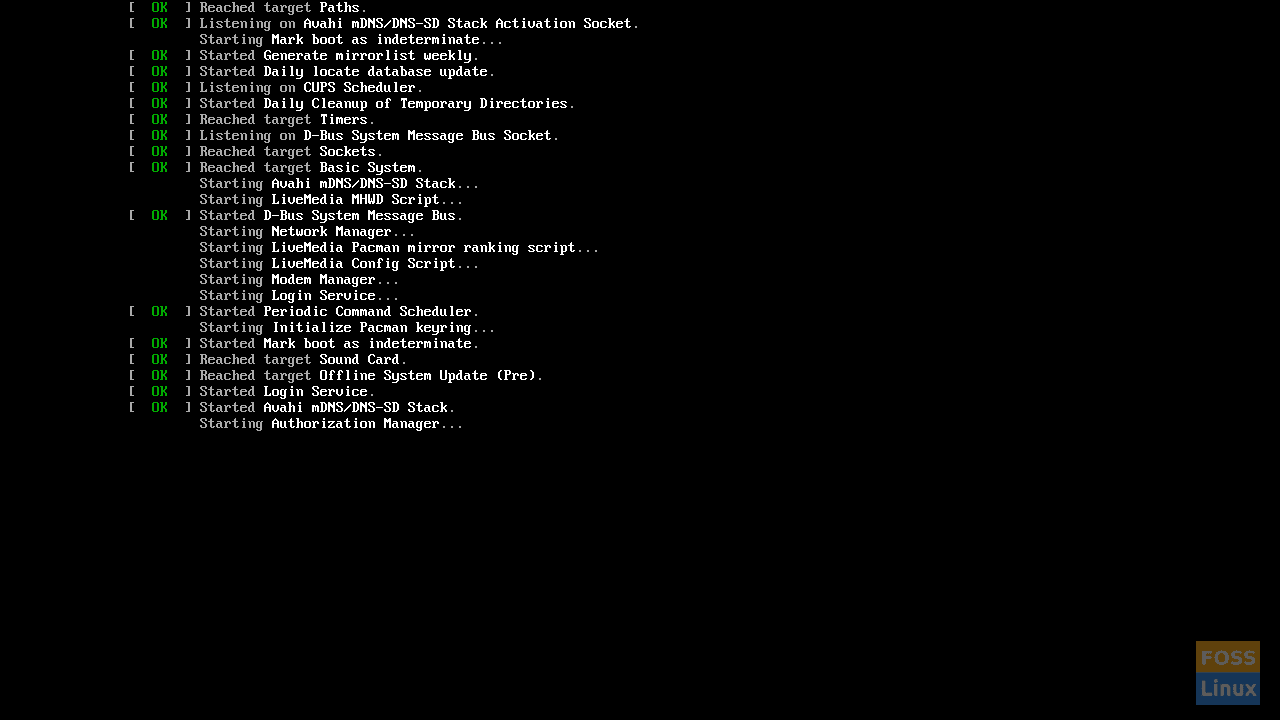
Please be patient as Manjaro Linux (Live) boots.
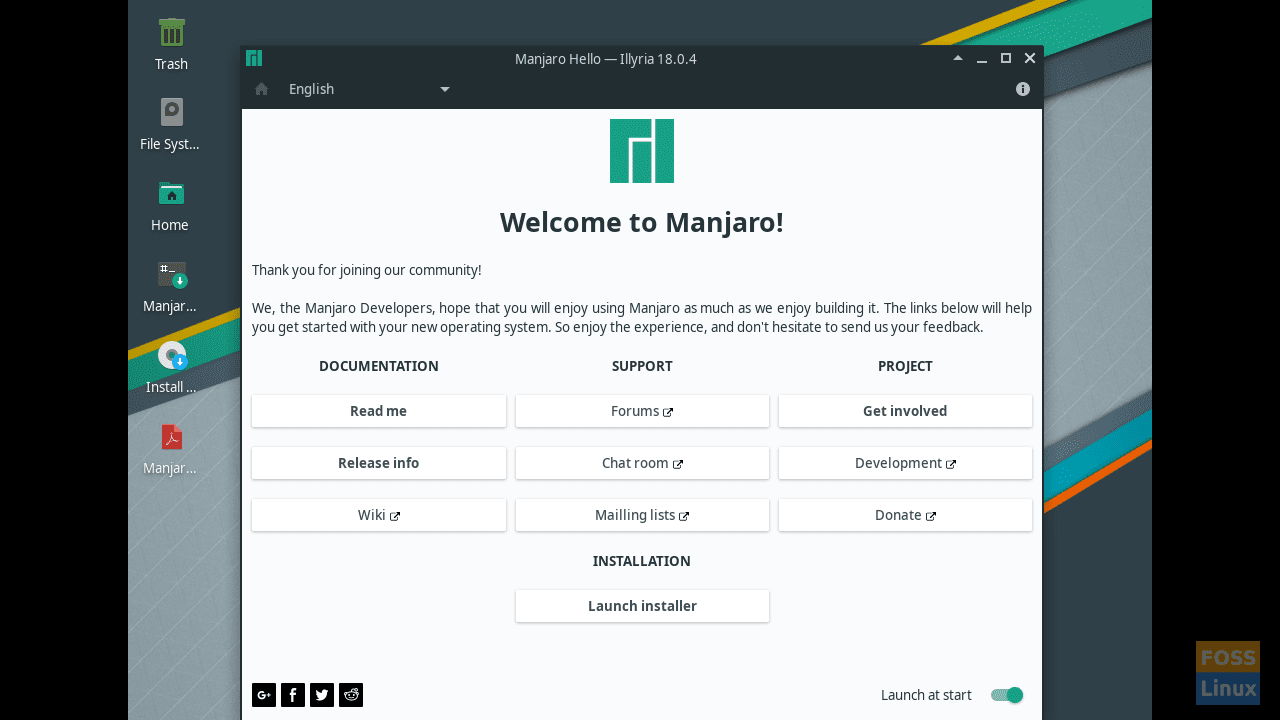
After Manjaro (Live) boots, we can ‘play’ with the live distro, or we can choose Launch installer at the Welcome to Manjaro! window.
Let’s choose the latter.
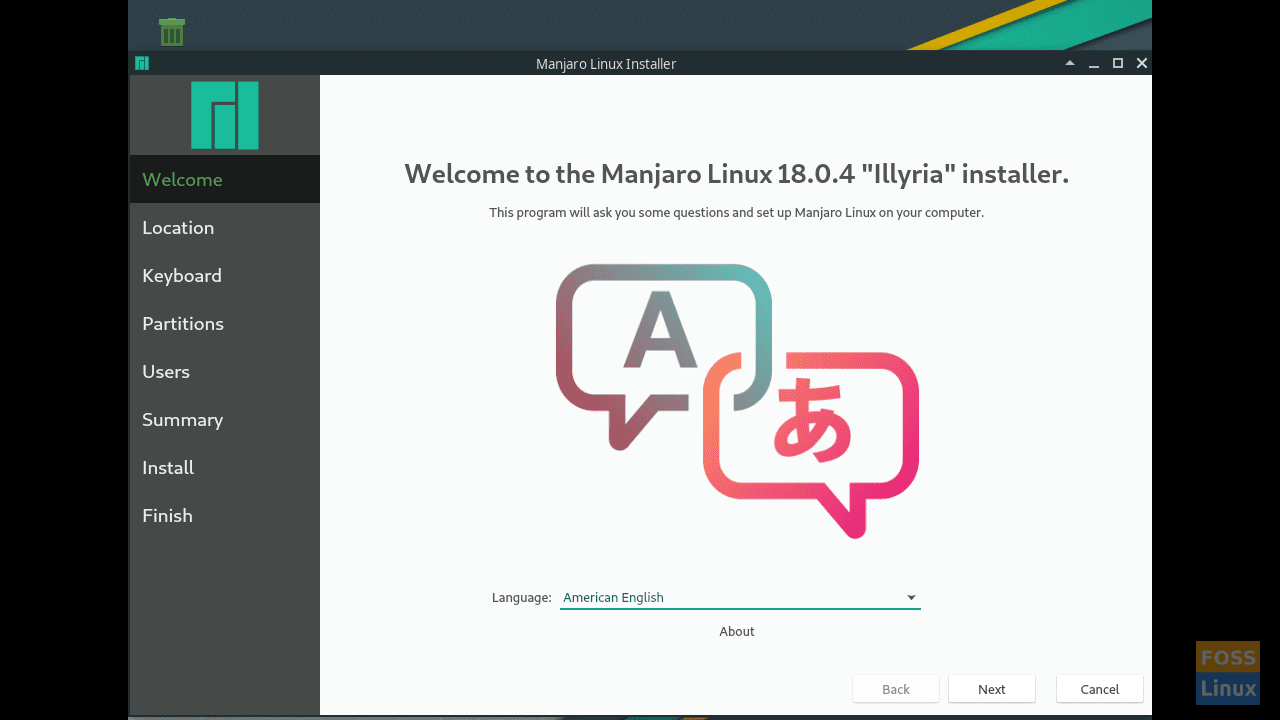
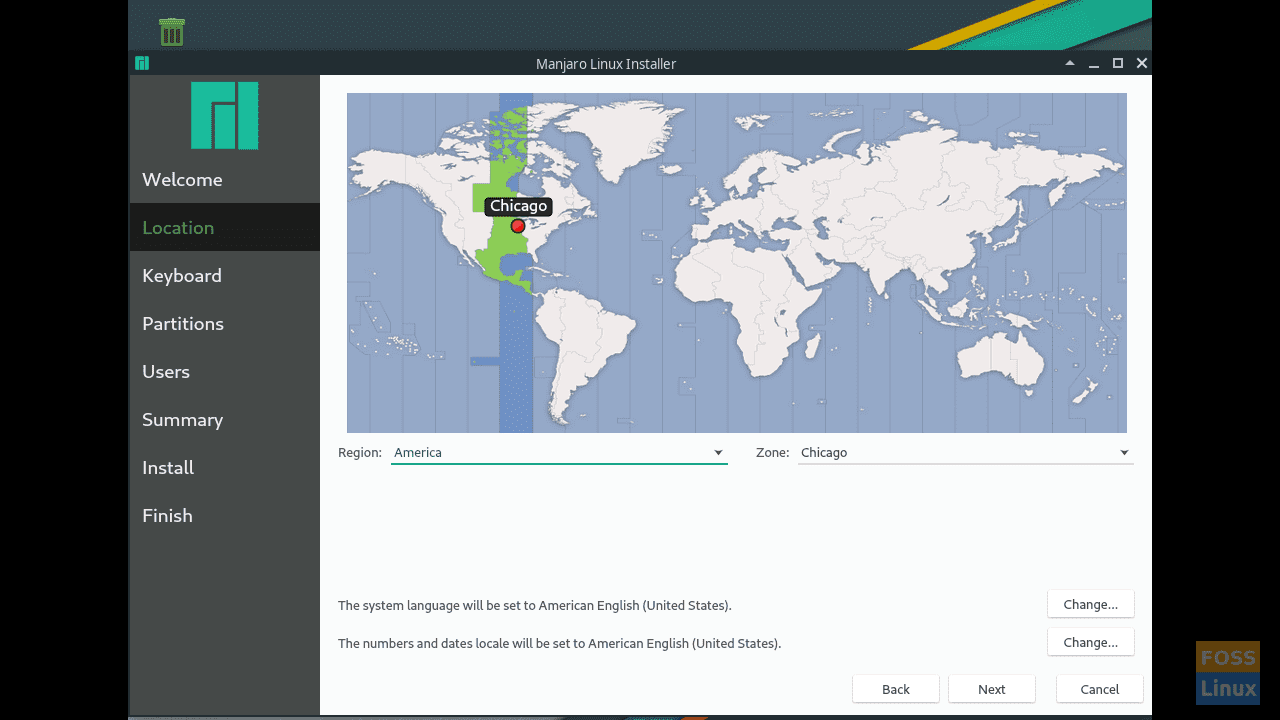
At the Welcome to the Manjaro Linux 18.0.4 “Illyria” Installer window, enter your preferred Language.
Click Next.
Select your desired Region and Zone.
Click Next.
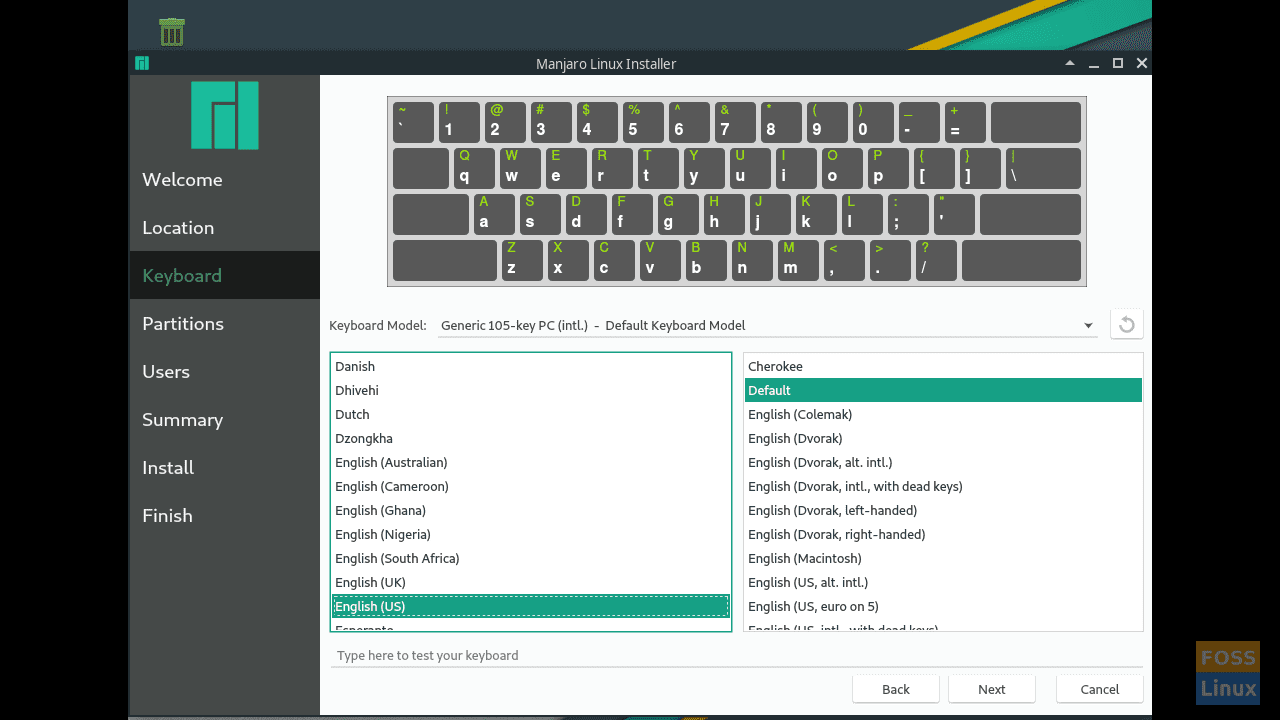
Select your desired keyboard settings.
Click Next.
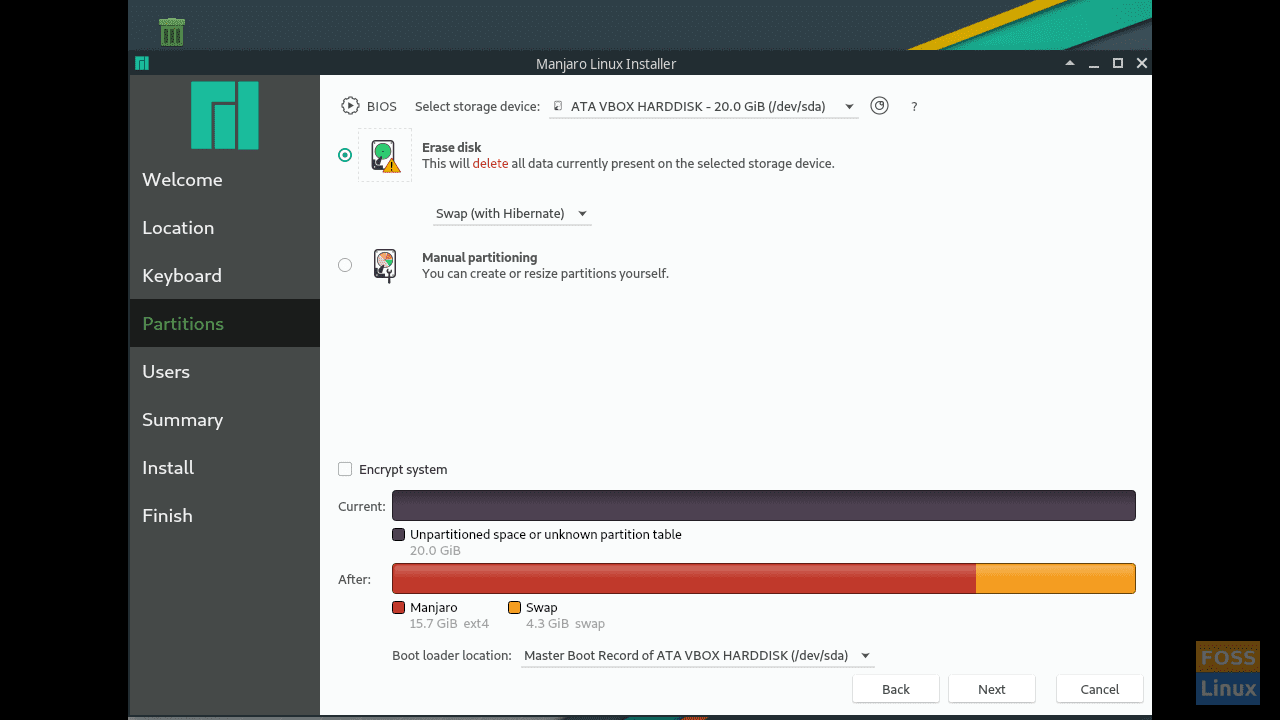
As this is a VirtualBox VM installation, the Erase disk option will not harm and is our best option.
I prefer Swap (with Hibernate), so that’s my choice. The Swap/No Swap, Hibernate/No Hibernate pros and cons are too intricate to include in this article, but FOSS Linux readers wishing further information should visit the Arch Linux wiki.
Once satisfied with your settings, click Next.
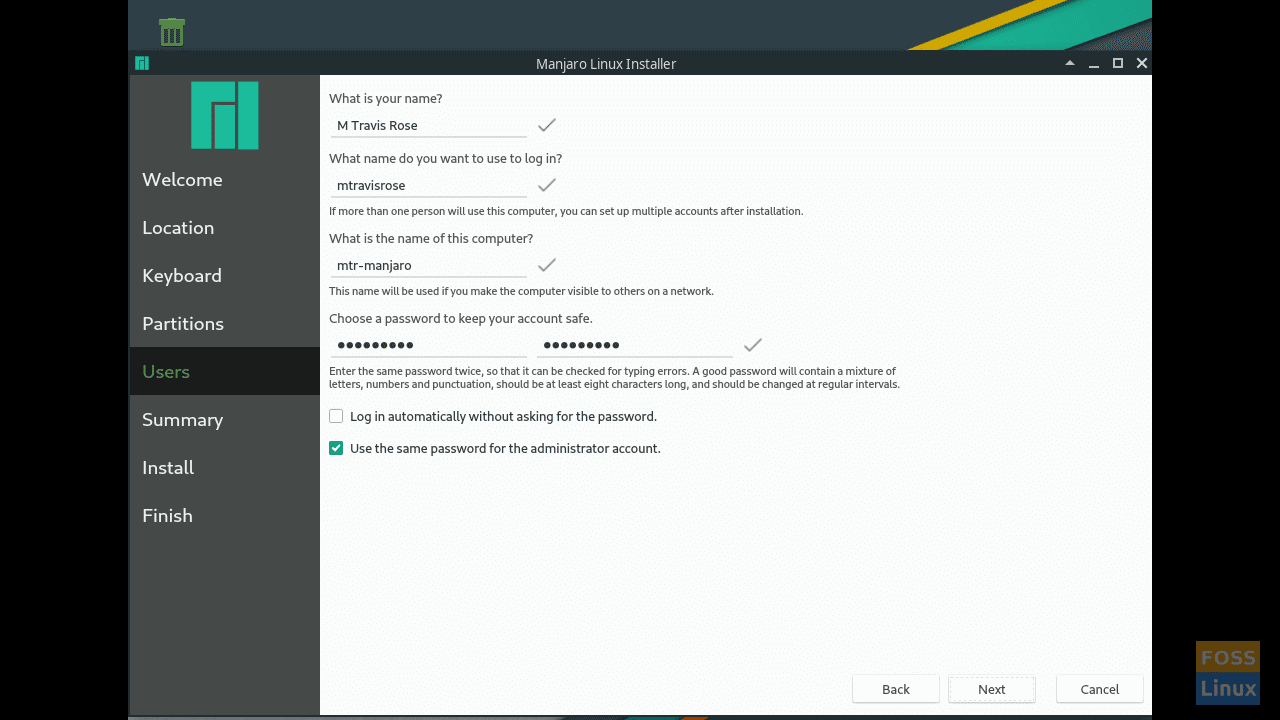
The Users Creation/Screen settings you choose are entirely your choice. However, I prefer as much detail, consistency, and security as possible.
Per my preference, I use my entire name, choose the same name as the VirtualBox VM (mtr-Manjaro in this case), a secure password, and choose not to login automatically without asking for the password.
I do, however, allow for the same password for the administrator (root) account.
When satisfied with your settings, click Next.
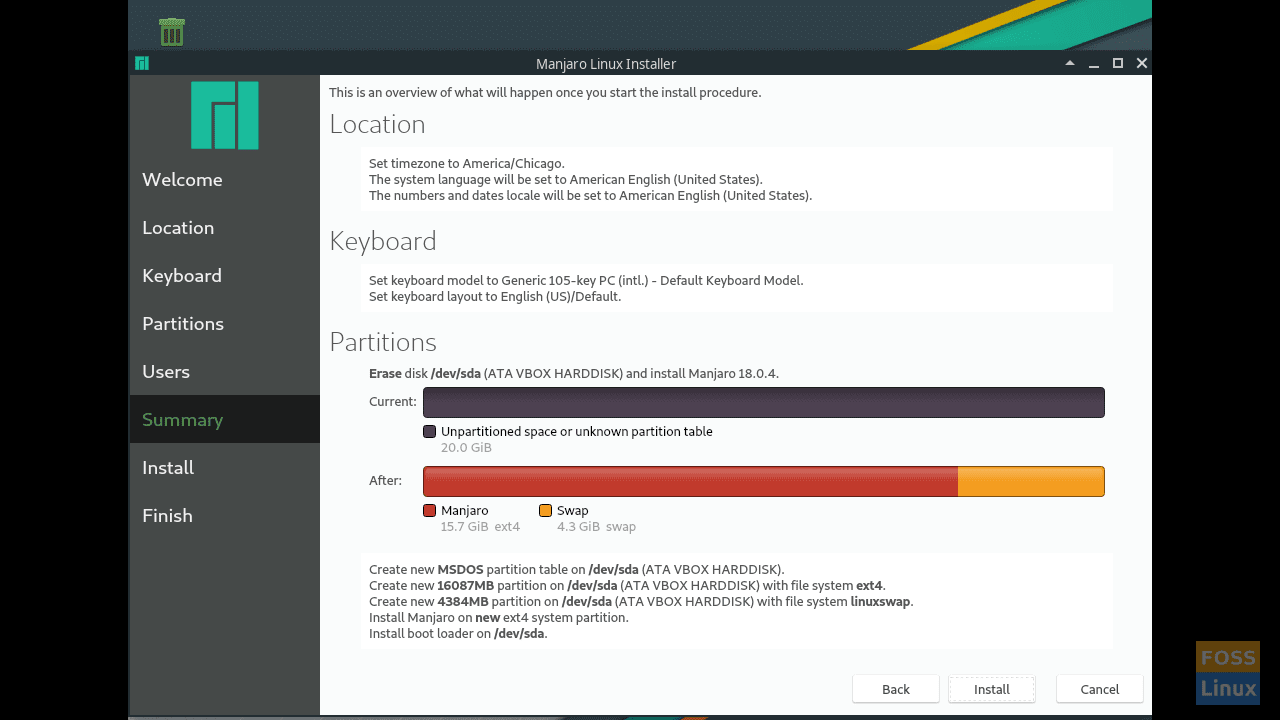
Review your settings on the Summary screen.
If you notice errors or changes you’d like to make, click Back to return to the relevant window.
When satisfied with your settings, click Next.
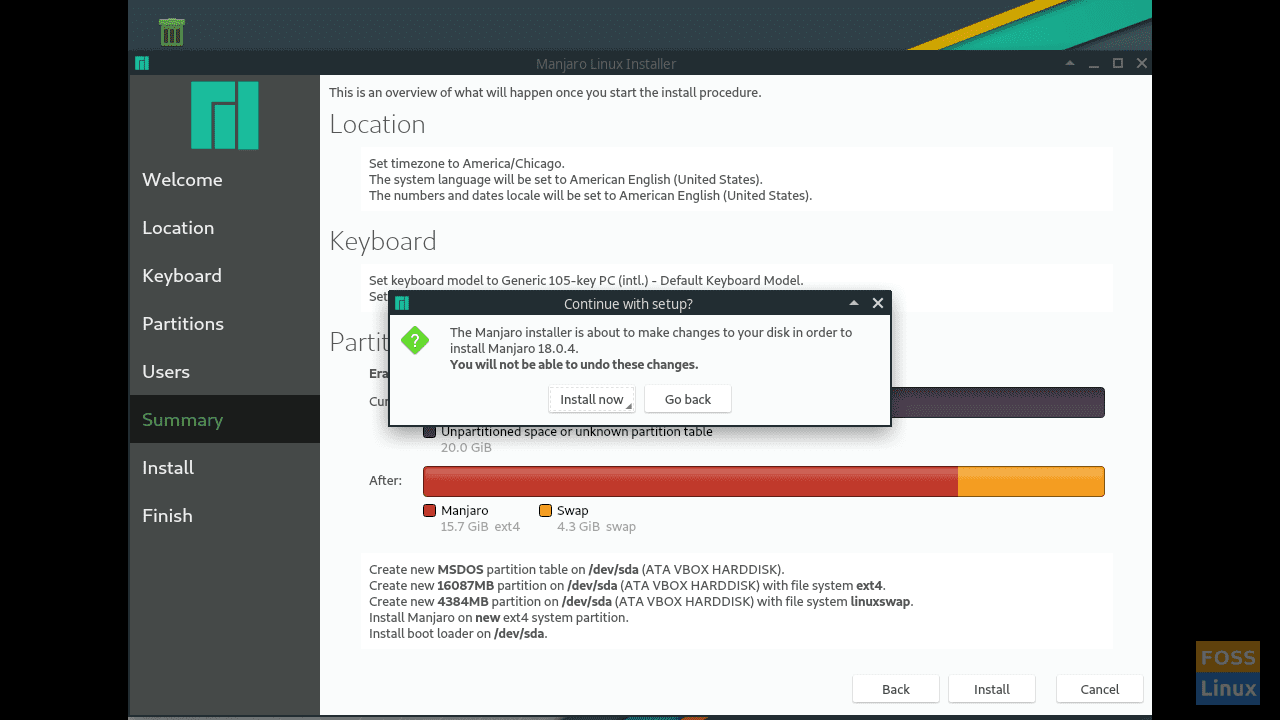
Click Install now button when presented the Continue with setup? box.
If your screen locks during the installation process, use the following to unlock:
- Username: manjaro
- Password: manjaro
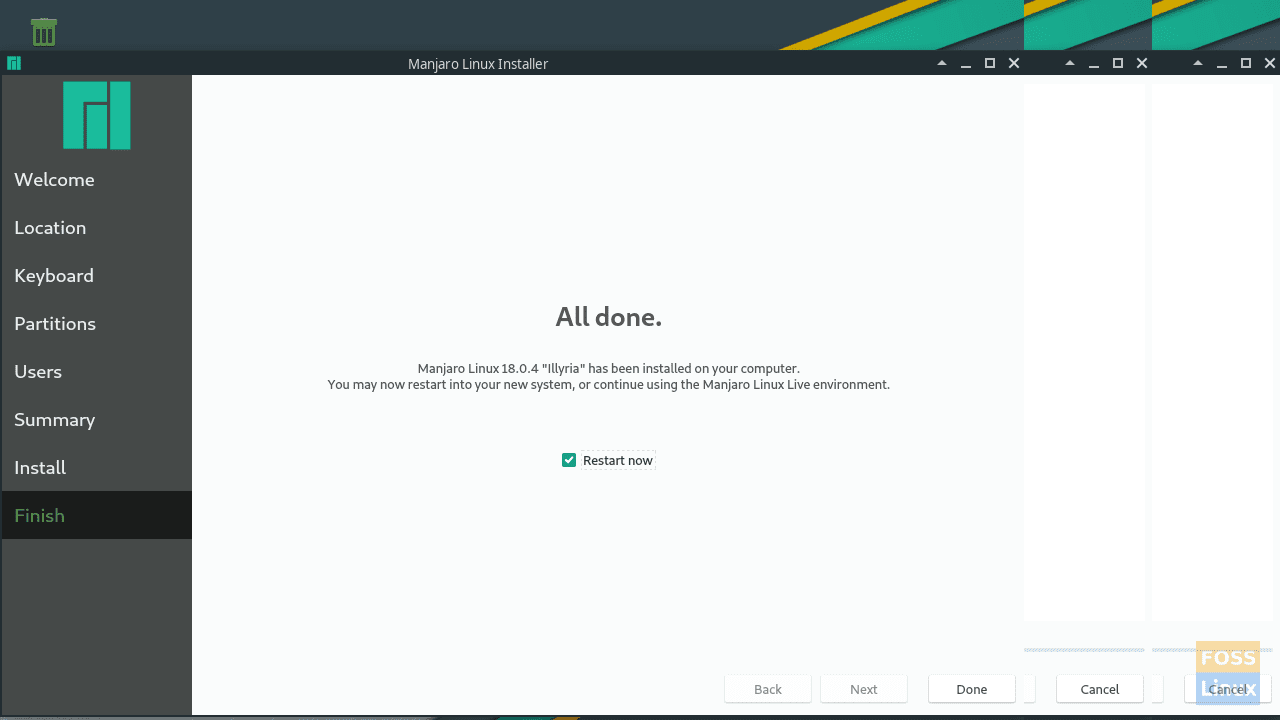
After installation completes, check Restart now.
We must remove the Manjaro ISO from the Virtual Optical Drive before rebooting (lest we reboot into Live Manjaro again).
Accomplish this by selecting the Devices tab in the <Machine Name> [Running] – Oracle VM VirtualBox window.
Choose Optical Drives, and select Remove disk from virtual drive. Choose Force Unmount if prompted.
Click Done.
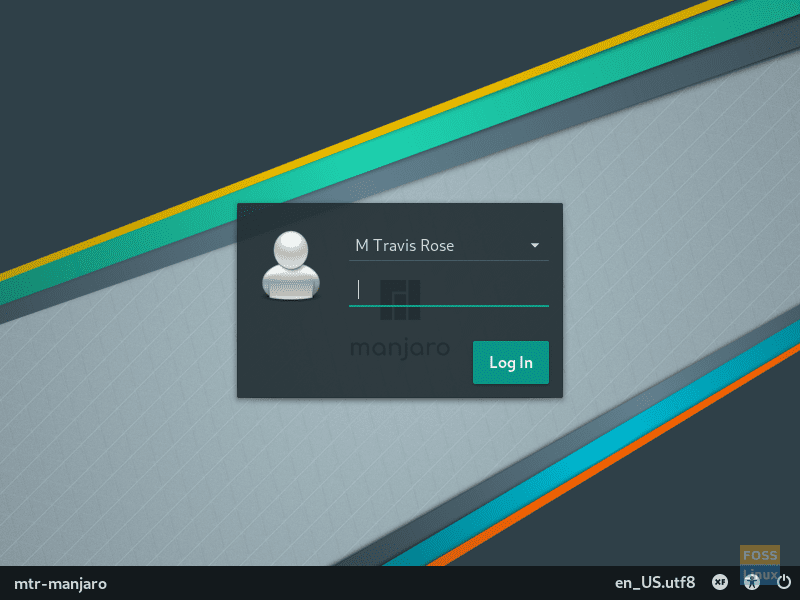
When your VM reboots, you’re greeted with the Manjaro Log In screen.
Congratulations! You have successfully installed Manjaro 18.0.4 XFCE on your VirtualBox.
Next, we need to perform some essential post-installation housekeeping tasks.
Manjaro 18.0.4 Post-Installation Housekeeping
There are many more post-installation housekeeping functions desirable after a Manjaro installation than contained below. However, these are those I believe vital to a new Manjaro installation.
Since this is a VirtualBox installation, we first need to install Guest Additions.
Oracle’s VirtualBox Guest Additions are VM-specific and designed for installation inside the virtual machine after installation of the guest operating system.
The Guest Additions affords VirtualBox users a host of extra features, including:
- Mouse Pointer Integration
- Shared Folders
- Better Video Support
- Seamless Windows
- Generic Host/Guest Communication Channels
- Time Synchronization
- Shared Clipboard
- Automated Logins
The Oracle VM Virtual Box User’s Manual provides specific information on features of Guest Additions.
Although our Manjaro installation (on VirtualBox) already contains the Guest Additions CD image, we want the latest and greatest version available.
The installation of updates should be the first housekeeping step performed on any new OS installation. This ensures your OS is up-to-date, but it also ensures that your OS contains the latest security updates available.
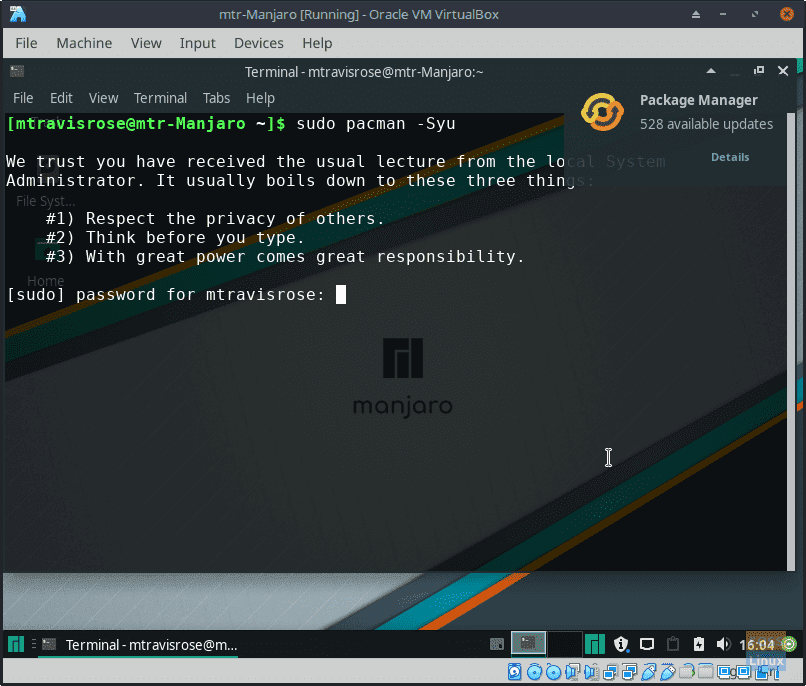
So first let’s update our Manjaro installation.
Launch the terminal.
Enter the following commands:
# sudo pacman -Syu
Enter the root password when prompted.
Select the default provider when prompted.
Click Y when asked if you would like to Proceed with the installation?.
After all the updates install, reboot if prompted.
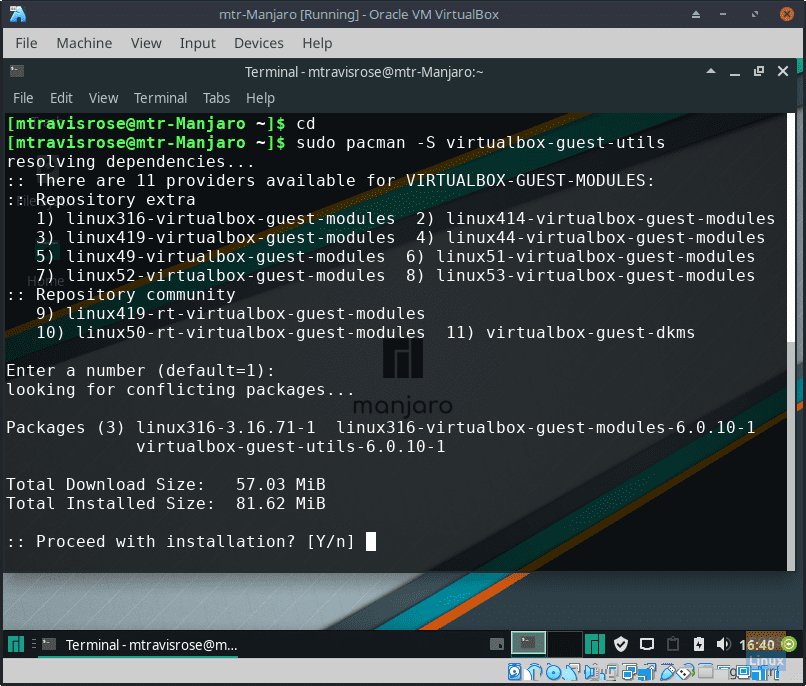
Enter the following commands:
# cd
# sudo pacman -S virtualbox-guest-utils
Enter the root password if prompted.
Select the default provider when prompted.
Click Y when asked if you would like to Proceed with the installation?.
There are hosts of other tweaks that I like to perform after a successful installation such as favorite software installations, setting the GRUB timeout to 0, among others. However, we covered the essentials.
Hopefully, in this article, you’ve learned not only the benefits and appeal of Manjaro Linux along with the steps required for a successful installation of an OS (specifically Manjaro) within VirtualBox but also the need for post-installation housekeeping, whether within VirtualBox or a physical machine.
We encourage you to test not only the ins and outs of your new Manjaro installation but also the various options and functionality of your VirtualBox installation. Snapshots, the Network Operations Manager, the Recording option, are few useful ones to name.
We’d love to hear of your experiences here at FOSS Linux.

2 comments
I think there is a typo in your command to install guest additions… should be:
sudo pacman -S virtualbox-guest-utils
Thanks much, Rich! You are right. It’s much appreciated and been corrected.
Have a great day, and as always, thanks for reading FOSS Linux!
Travis
Comments are closed.