When using Ubuntu, it’s crucial to have access to system information for troubleshooting, identifying hardware components, and understanding how the system is performing. System information refers to an Ubuntu-based computer system’s various details and specifications, including hardware and software components. This information can be used to troubleshoot system issues, identify hardware components, monitor system performance, and decide about system upgrades or maintenance.
Ubuntu system information typically includes the CPU type and speed, amount of RAM, graphics card, storage capacity and usage, network interfaces, and operating system version. This information can be accessed through various methods, including the graphical user interface, command-line interface, and third-party tools. Users can better manage and optimize their computer system for optimal performance and efficiency by understanding Ubuntu system information.
Checking Ubuntu System Information
This guide will cover several ways to check Ubuntu system information.
Method 1: Using the GUI
The graphical user interface is the simplest way to check Ubuntu system information. In addition, the Ubuntu system settings provide easy access to the most commonly used information. Here’s how you can access this information:
Step 1. Launch the “Settings” app from the applications menu. Click the “Activities” button on the top-left and search for “settings.”
Step 2. On the “Settings” window, scroll to the bottom and click the “About” option. You will see a screen displaying information about your computer’s processor, memory, graphics, and storage. Check the image below.
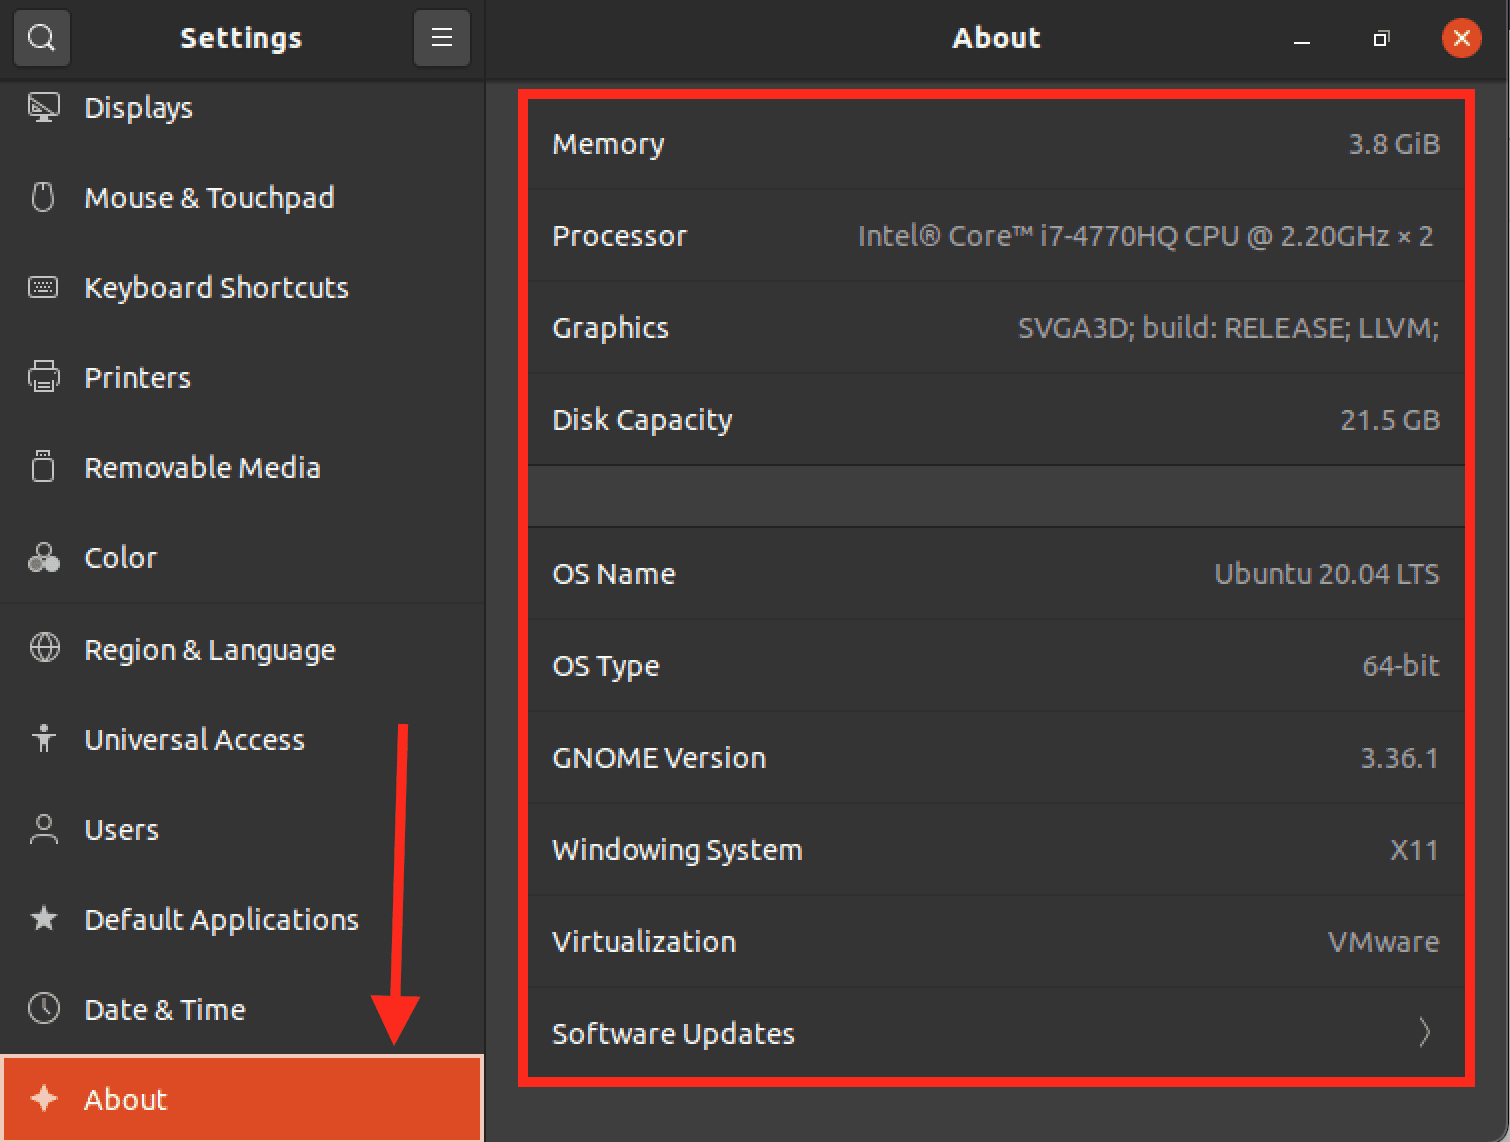
System information
Method 2: Using the command-line interface
If you prefer to use the command line, there are several commands that you can use to check Ubuntu system information.
Here are some of the most commonly used commands:
1. uname -a: This command provides information about the Linux kernel version, which is the core component of the Ubuntu operating system. The output includes the kernel version number, the processor type, and the system architecture. This command can display other system information, such as the hostname and operating system version.

The uname -a command
2. lsb_release -a: This command displays information about the Ubuntu release version, including the version number, code name, and distribution description. This can help determine whether you have the latest version of Ubuntu installed and which updates or upgrades may be available.

The lsb_release -a command
3. free -m: This command provides information about the system’s memory usage, including the total amount of RAM installed, the amount of RAM currently in use, and the amount of free RAM available. This can be useful in identifying memory-intensive applications or processes that may be slowing down the system.

The free -m command
4. df -h: This command displays information about the disk space usage on the system, including the total amount of disk space available, the amount of space used, and the amount of space free. This can help identify which directories or files occupy the most space and manage disk usage accordingly.
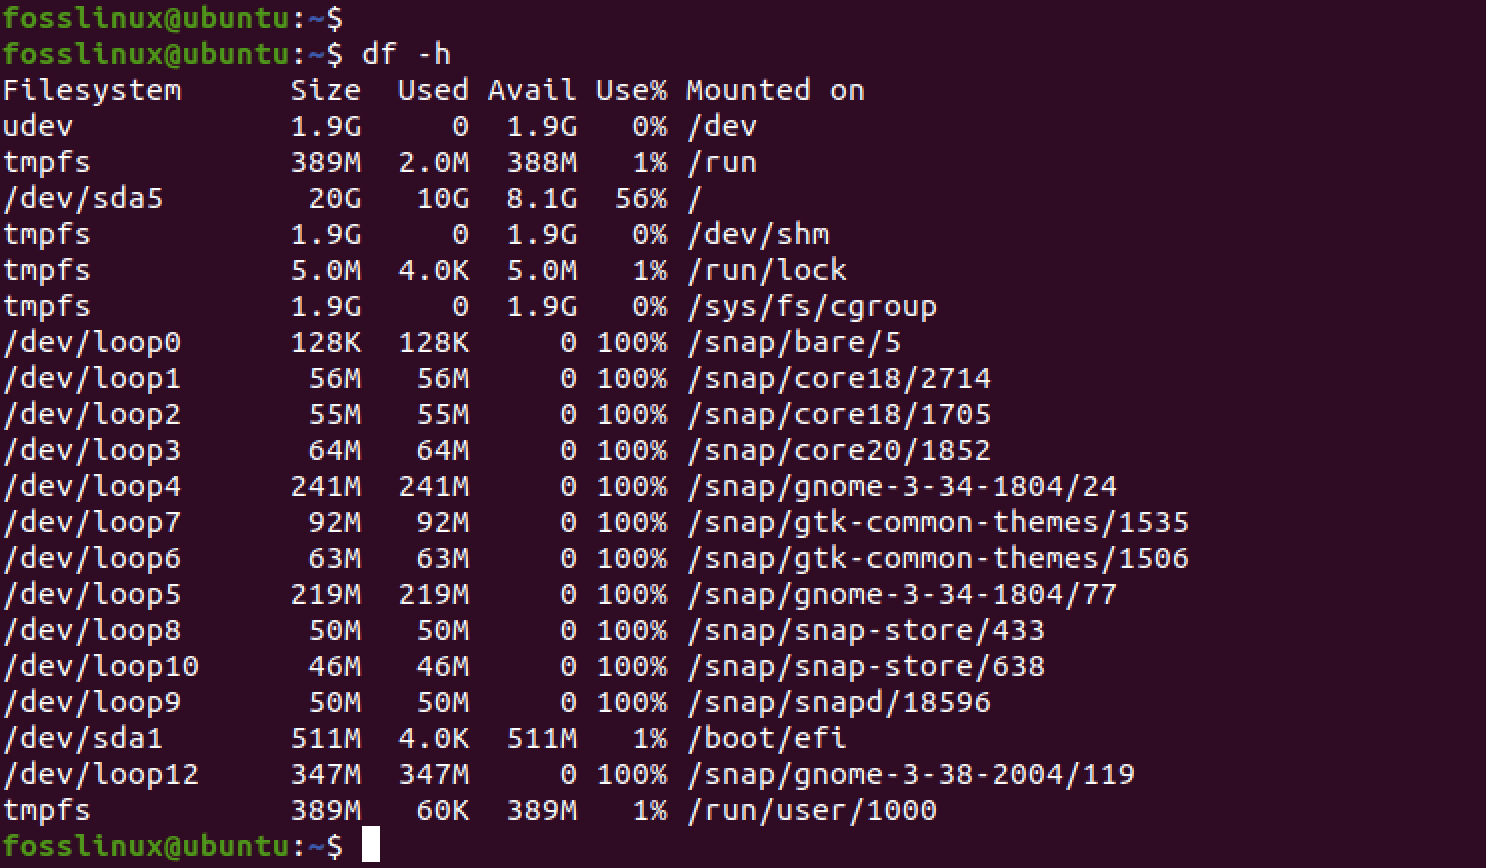
The df -h command
5. lspci: This command displays information about the PCI devices connected to the system, such as network adapters, sound cards, and graphics cards. This can be useful in identifying hardware components and troubleshooting issues related to device drivers.
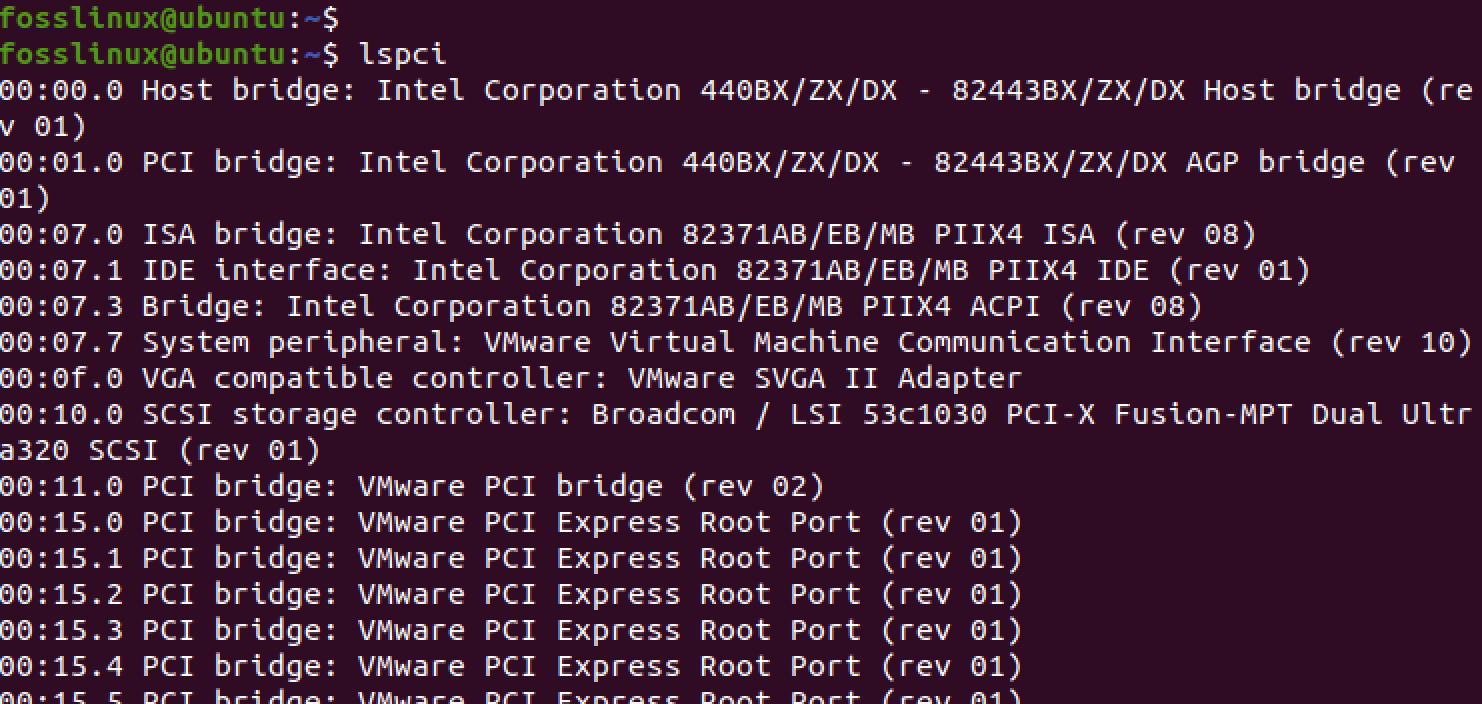
The lspci command
6. lsusb: This command displays information about the USB devices connected to the system, such as external hard drives, cameras, and printers. This can help identify which USB devices are currently connected and troubleshoot any device drivers or connectivity issues.

The lsusb command
7. top: This command displays real-time information about the system’s CPU and memory usage, including the percentage of CPU usage for each running process, the amount of RAM in use, and the amount of free memory available. This can be useful in monitoring system performance and identifying processes that may be causing high CPU usage or memory usage.
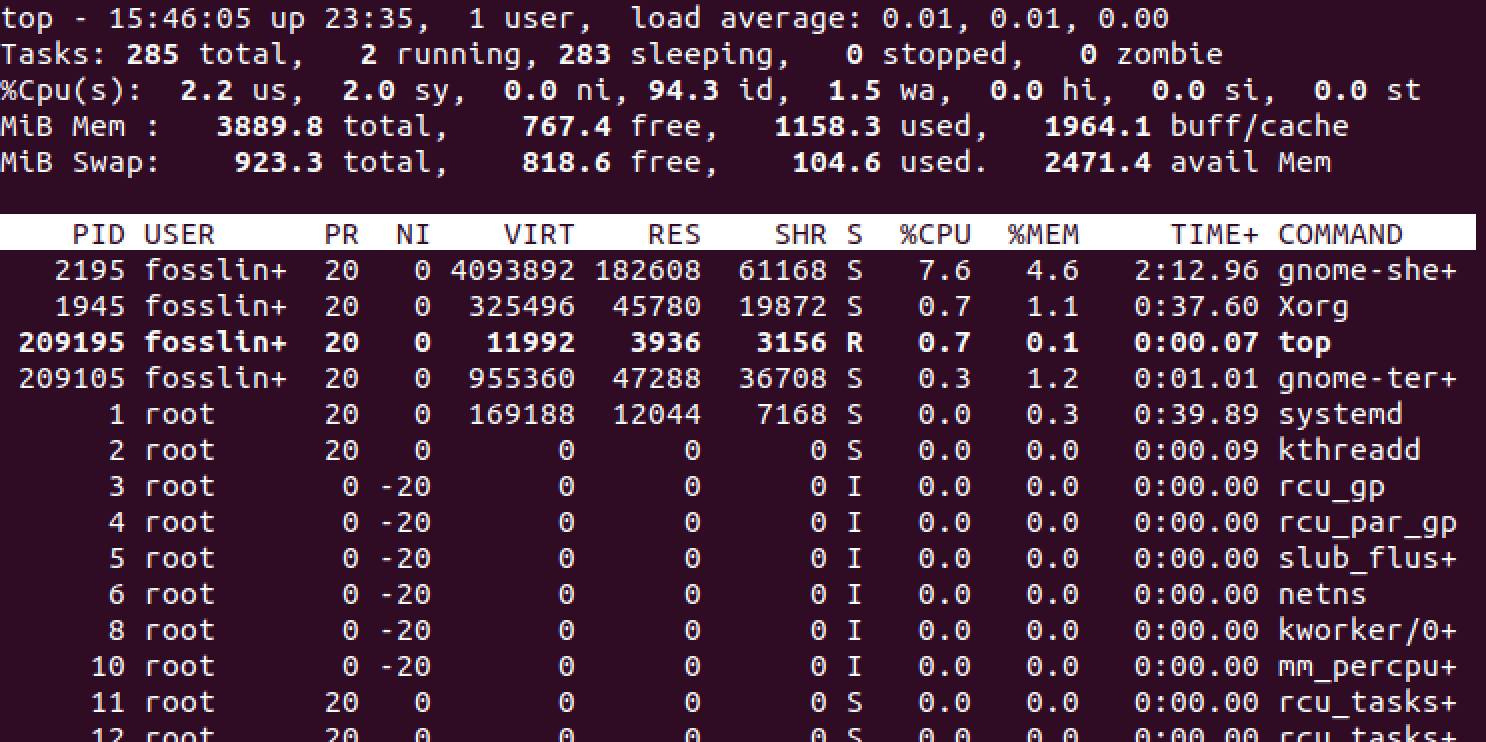
Top command output
8. htop: This command provides the same information as the top command but with a more user-friendly interface. It allows for more straightforward navigation and sorting of processes and also includes color-coded displays for easier readability. This can be useful for users who prefer a more intuitive and visually appealing interface for monitoring system performance.
The htop utility doesn’t come pre-installed on Ubuntu. However, you can install it using the command below.
sudo apt install htop
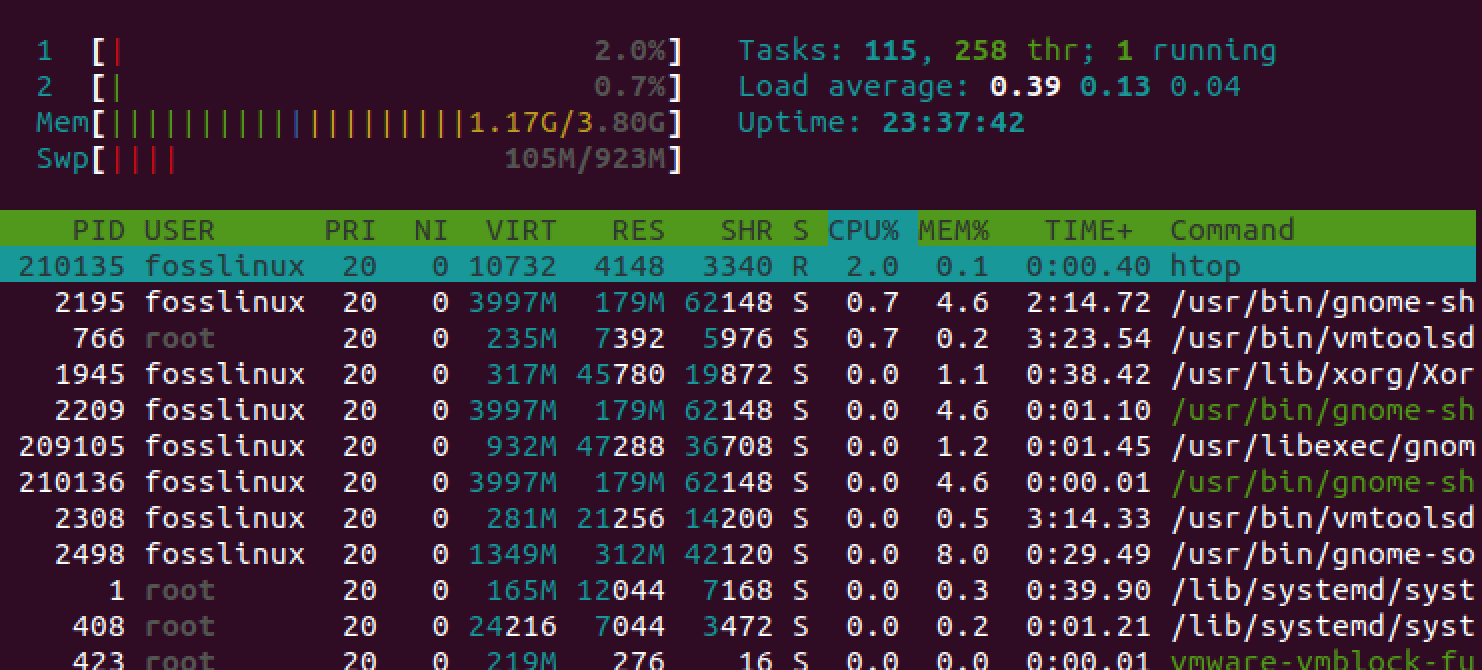
The htop command
Method 3: Using third-party tools
There are also several third-party tools available that can be used to check Ubuntu system information. Here are some of the most popular ones:
1. Neofetch: This is a command-line tool that displays system information in a visually appealing and colorful way. It can display a wide range of system information, including the operating system, kernel version, CPU and GPU information, memory usage, disk usage, and more. Neofetch is highly customizable and can be configured to display information in various formats and styles.
Use the command below to install Neofetch on Ubuntu
sudo apt install neofetch
You can launch the utility by executing the command below on the terminal.
neofetch
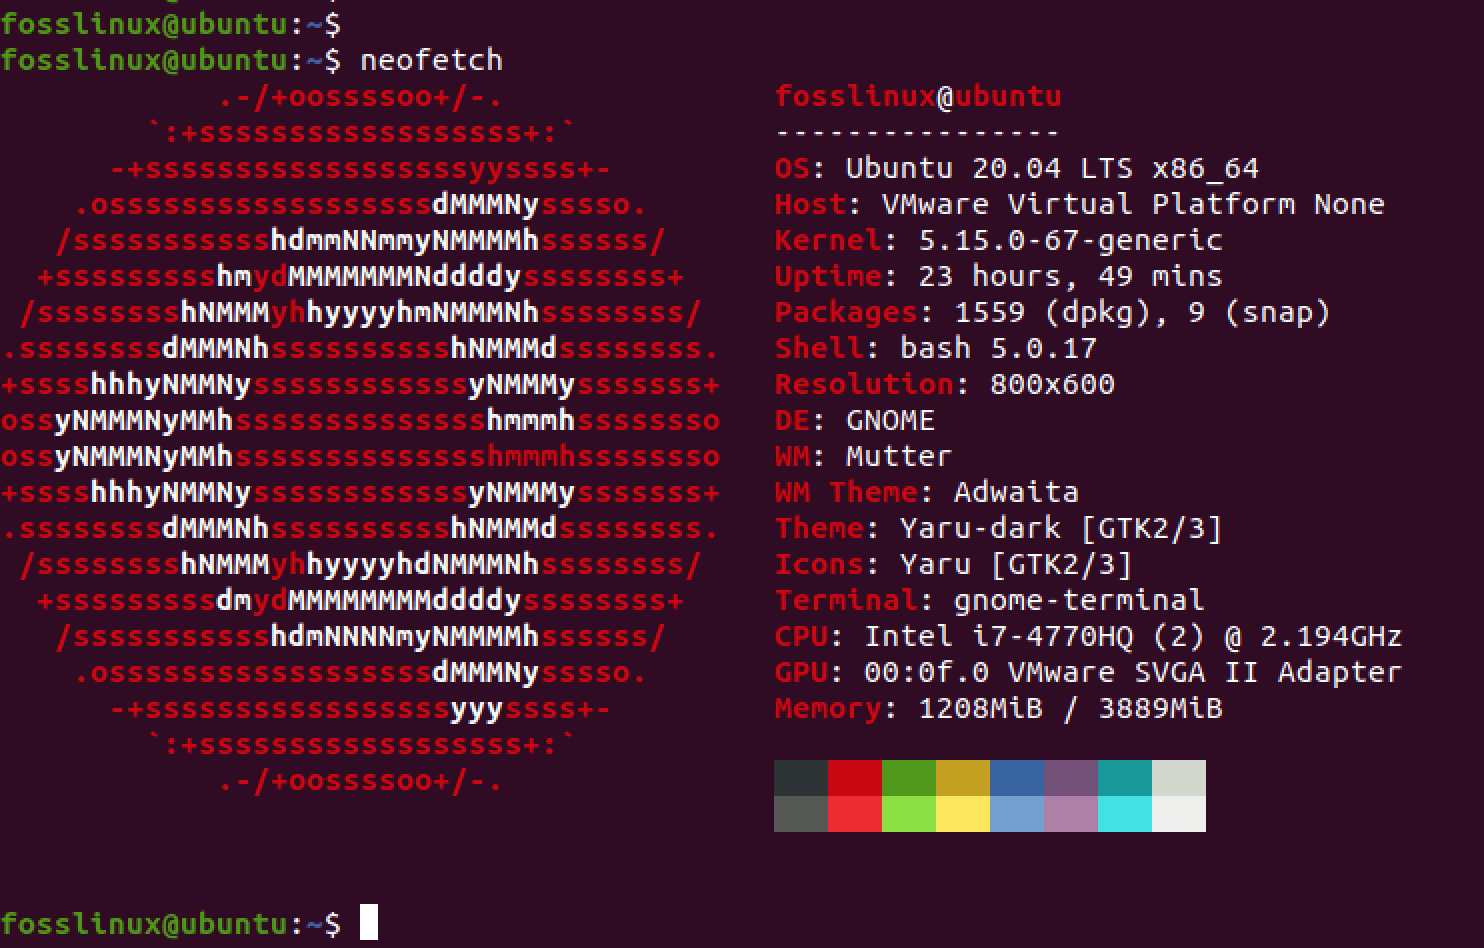
Neofetch
By default, Neofetch displays system information in a colorful ASCII art style, but you can customize its appearance and behavior using various command-line options and configuration files. For example, you can change the color scheme, the logo style, and the information displayed by editing the configuration file located at ~/.config/neofetch/config.
You can also use command-line options to display specific information or change the output format.
2. GNOME System Monitor: This is a graphical tool that displays real-time system performance information, including CPU, memory, and disk usage. You can launch the system monitor by clicking the “Activities” button on the top-left and searching for “system information.”
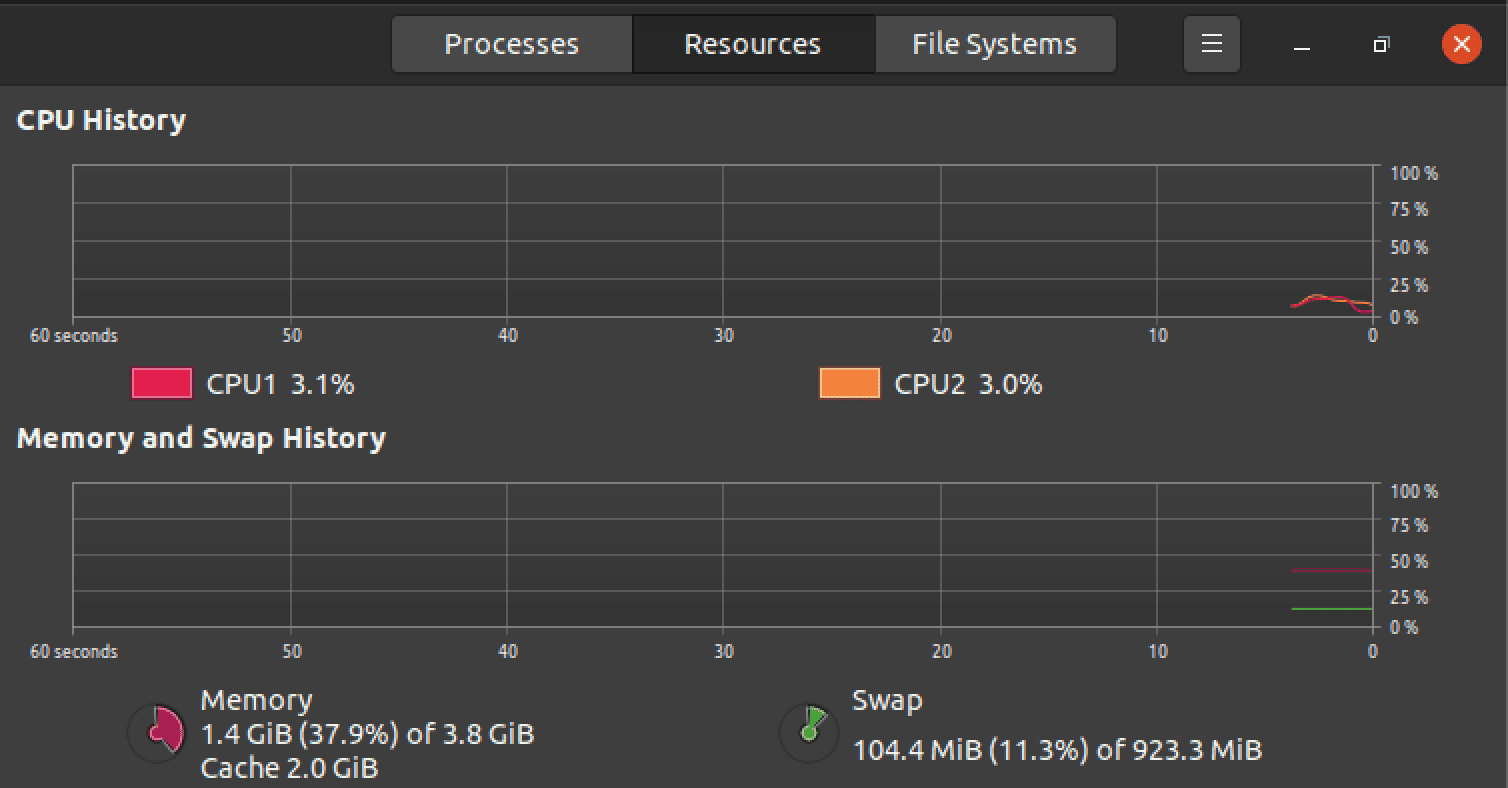
System information
3. Hardinfo: Hardinfo is a graphical tool that provides detailed information about the hardware components of a Ubuntu system. It displays information about the CPU, memory, graphics, storage devices, and more. Hardinfo also provides benchmarks to compare the performance of different hardware components and can generate reports in various formats.
Use the command below to install Hardinfo n your Ubuntu system.
sudo apt install hardinfo
Once the installation is complete, you can launch Hardinfo from the Ubuntu applications menu by searching “System Profiler and Benchmark”. Hardinfo can also be run from the command line the hardinfo command. This can be useful for automating system information gathering or generating reports in a batch mode.
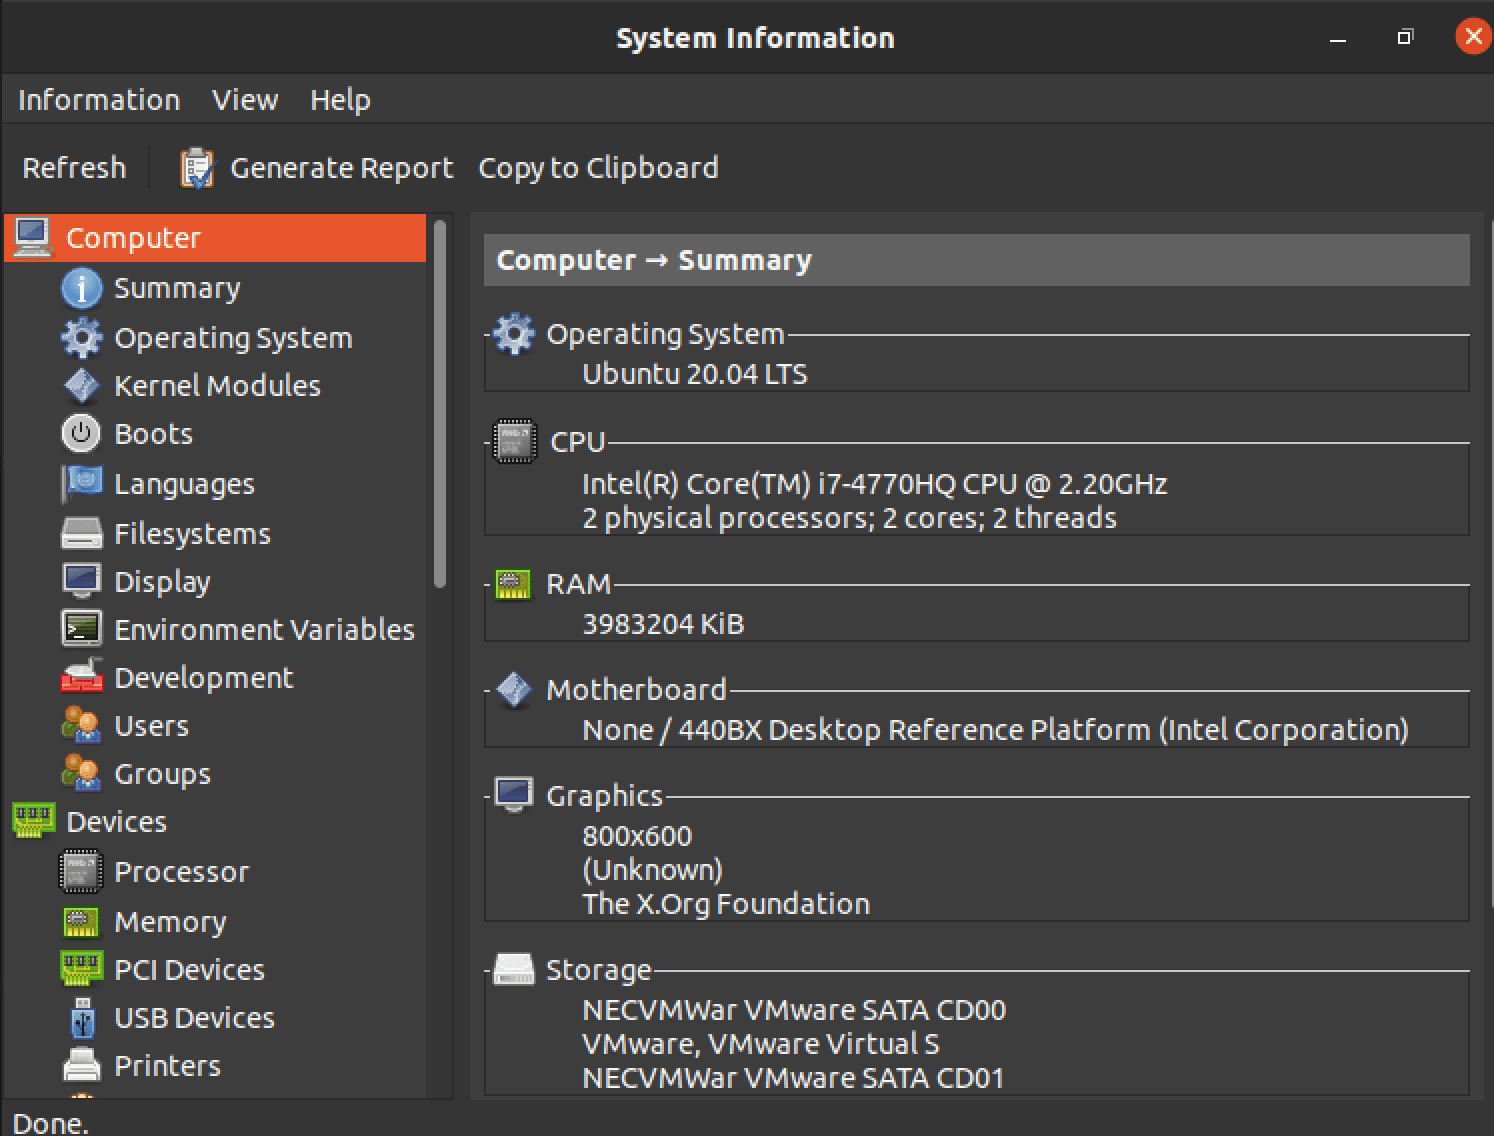
System Profiler and Benchmark
4. Screenfetch: This tool displays system information in a terminal window, including the Ubuntu release version, kernel version, CPU, memory, and disk usage.
Use the command below to install Screenfetch on Ubuntu.
sudo apt install screenfetch
After a successful install, launch Screenfetch from the Terminal using the command below.
screenfetch
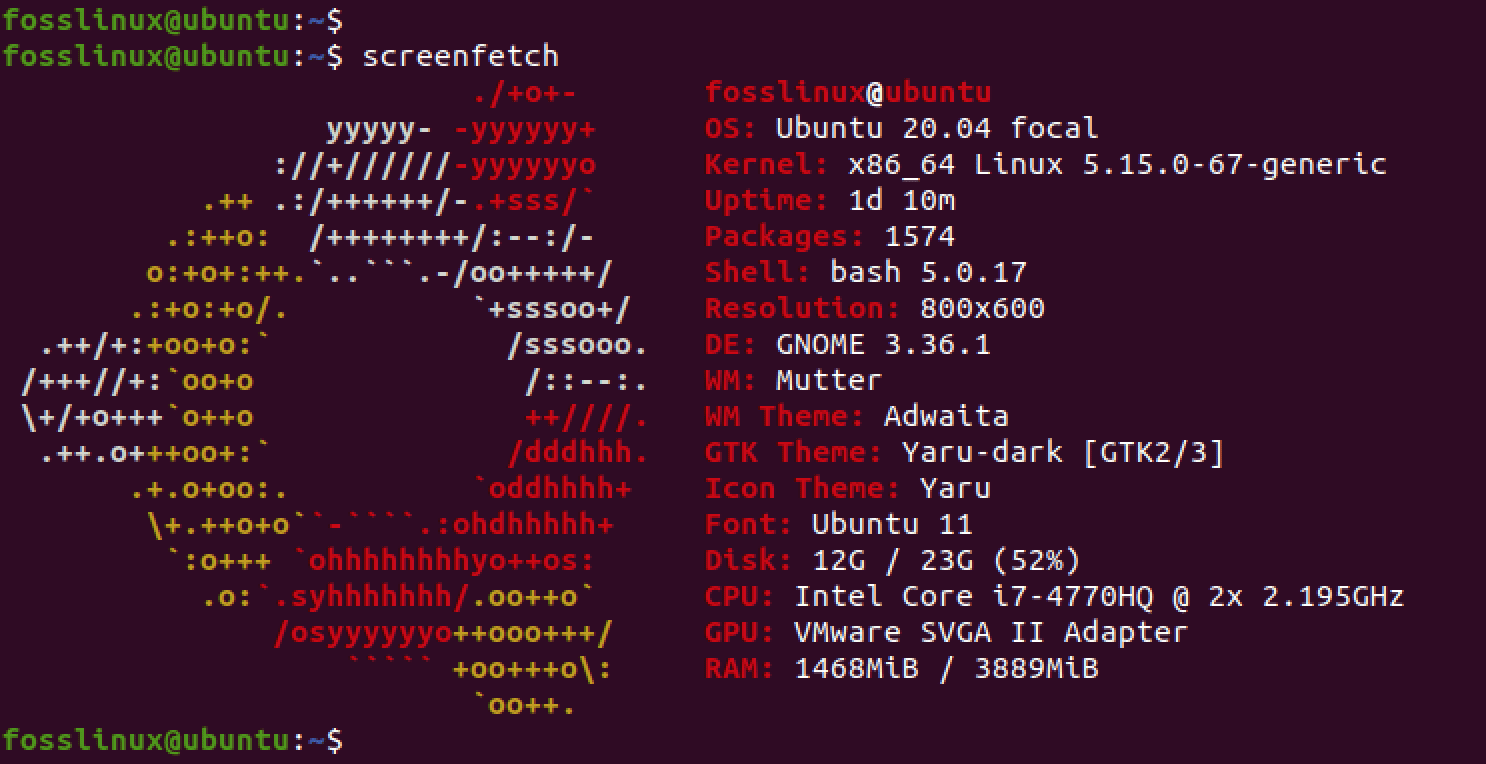
Screenfetch
Conclusion
Checking Ubuntu system information is a crucial part of maintaining and optimizing your Ubuntu system. By using the tips and tricks shared in this article, you can quickly and easily find the information you need about your system’s hardware and software specifications. Whether you prefer using the command line or graphical tools, there are many options available for checking Ubuntu system information. We hope that this guide has been helpful in providing you with the knowledge and skills to check your Ubuntu system information efficiently. By understanding your system’s specifications, you can make informed decisions about troubleshooting issues, optimizing performance, and planning upgrades.

