Are you a Linux user looking to maximize your productivity when using the terminal? Then look no further than Terminator Terminal! While the Linux terminal is already a powerful tool, Terminator takes things to the next level by allowing you to arrange multiple terminals in a grid-like setting, handle multiple commands with tabs, and even drag and drop tabs. Plus, with keyboard shortcuts, the ability to save layouts, and support for plugins, Terminator is a must-have for anyone who spends a lot of time in the terminal.
Installing and using Terminator Terminal on Ubuntu
This guide will walk you through the easy steps to install and use Terminator Terminal on Ubuntu. So, let’s get started and take your terminal game to the next level!
Step 1: Installation
The first step is to install Terminator on your Ubuntu system. You can install it using the Ubuntu package manager by opening the terminal and typing the following command:
sudo apt-get install terminator
Once the installation is complete, you can open Terminator by searching for it in the Applications menu.

Launch Terminator
Alternatively, you can launch the app by executing the command below on the default Ubuntu Terminal.
terminator
When you first look at the Terminator window, you won’t easily distinguish between Terminator and the normal GNOME terminal pre-installed on Ubuntu. However, that should not trick you into thinking Terminator is just a regular terminal. This utility has many impressive features you need when performing your daily tasks.
Step 2: Customization
Terminator supports various customization options. You can customize the font, font size, and color scheme to suit your preferences. To customize the Terminator terminal, right-click anywhere on the terminal window and select Preferences.
That will open the Terminator preferences window, similar to the image below.

Terminator preferences
The “Terminator preferences” window allows you to customize various settings related to the Terminator terminal emulator application. The menus at the top of the window allow you to access different settings categories. Let’s have a look at each menu in detail.
1. Global: This menu allows you to configure general settings that affect the behaviour of Terminator as a whole. For example, you can choose the default font and font size, enable or disable various features like scrollback or blinking text, and specify the default window size and position.
2. Profiles: Terminator allows you to create multiple profiles, each with its own set of settings. The “Profiles” menu lets you manage and configure these profiles. You can create new profiles, duplicate ones, and delete ones you no longer need. You can also set a default profile when opening new windows and specify various settings for each profile, such as the terminal colour scheme, the initial working directory, and the command to run when the terminal starts.
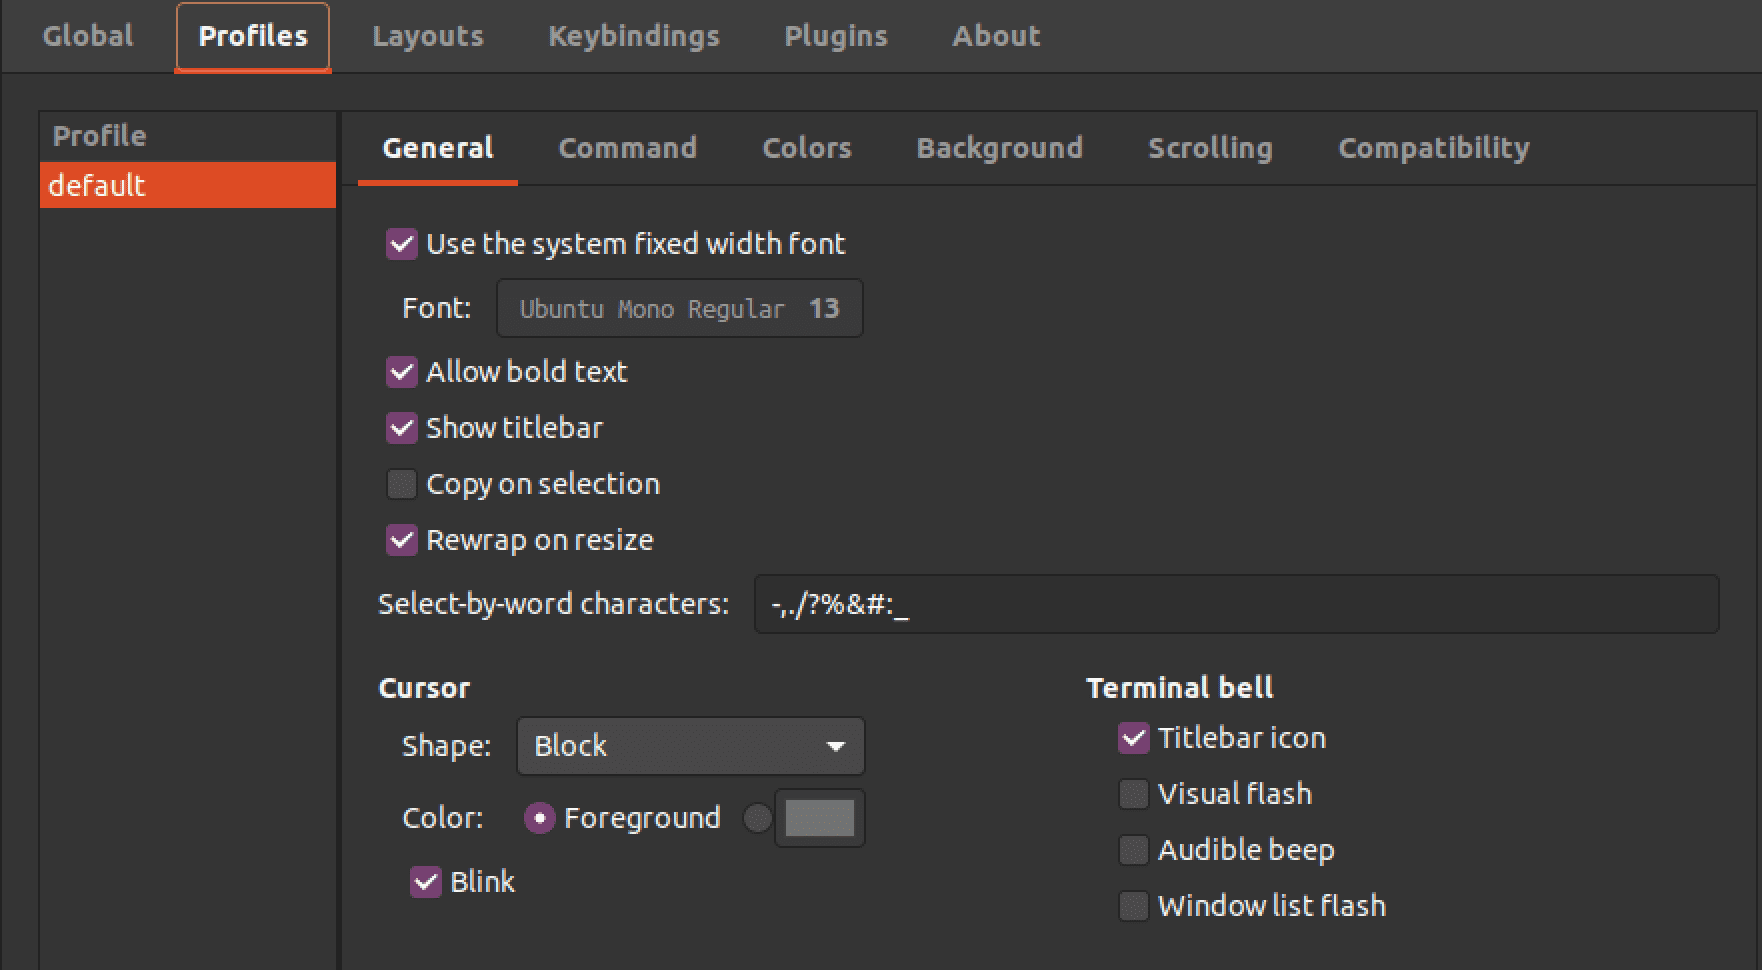
Profile settings
3. Layout: This menu allows you to configure the layout of the Terminator window, including the number of rows and columns of terminals, their size and position, and whether they should be arranged horizontally or vertically. You can also save and load different layout configurations to quickly switch between various terminal arrangements.

Layout settings
4. Keybindings: This menu lets you configure Terminator’s keyboard shortcuts. You can customize existing shortcuts or create new ones to perform specific actions, such as splitting the current terminal vertically or horizontally, switching between terminals, or toggling full-screen mode.
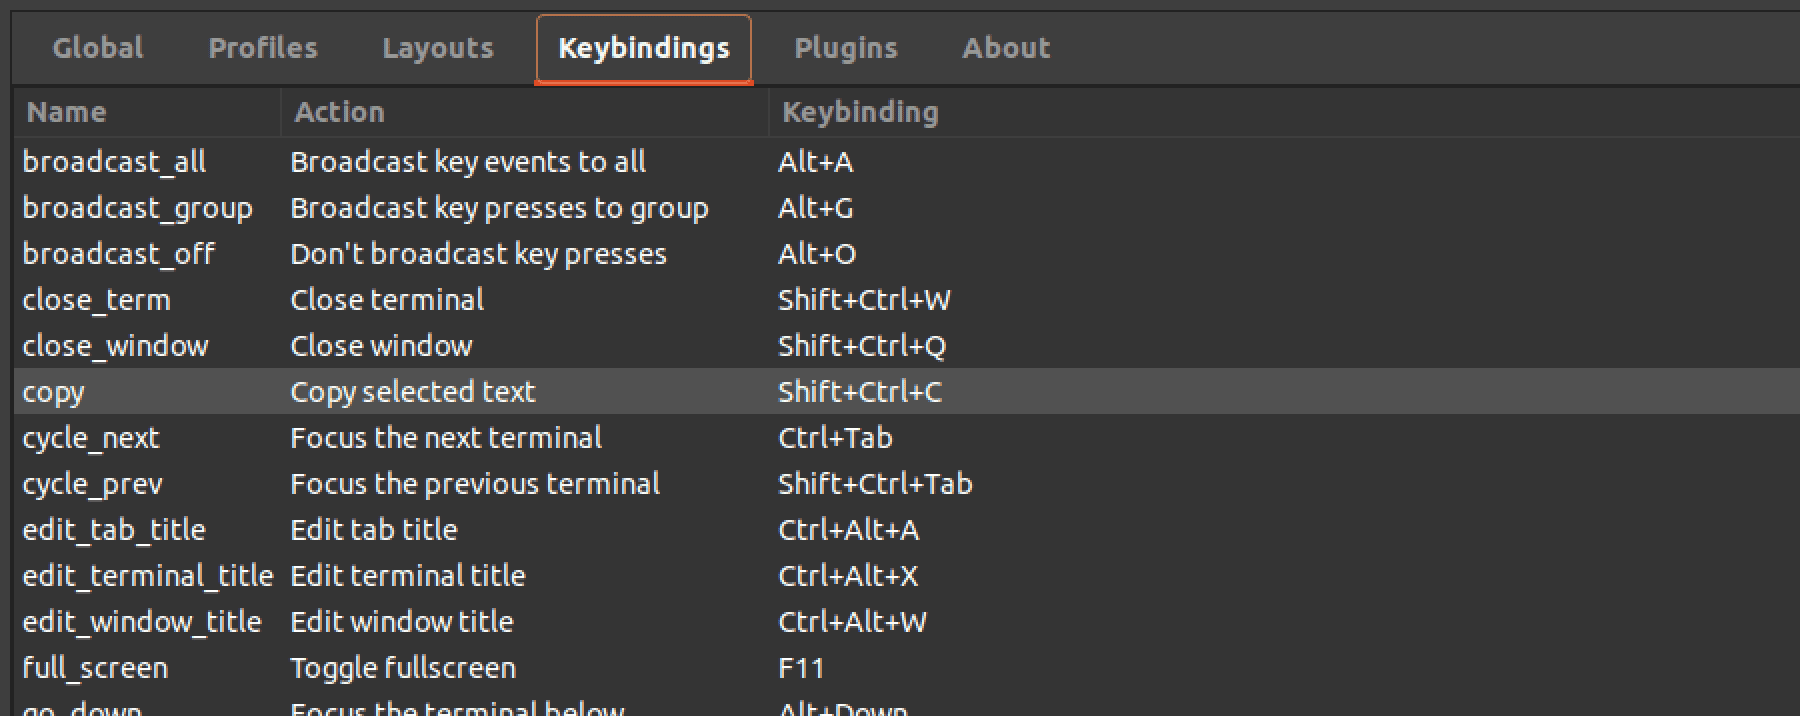
Keyboard shortcuts
5. Plugins: Terminator supports a variety of plugins that add extra features and functionality to the application. The “Plugins” menu lets you manage and configure these plugins. You can enable or disable specific plugins, specify plugin-specific settings, and install new plugins from online repositories.
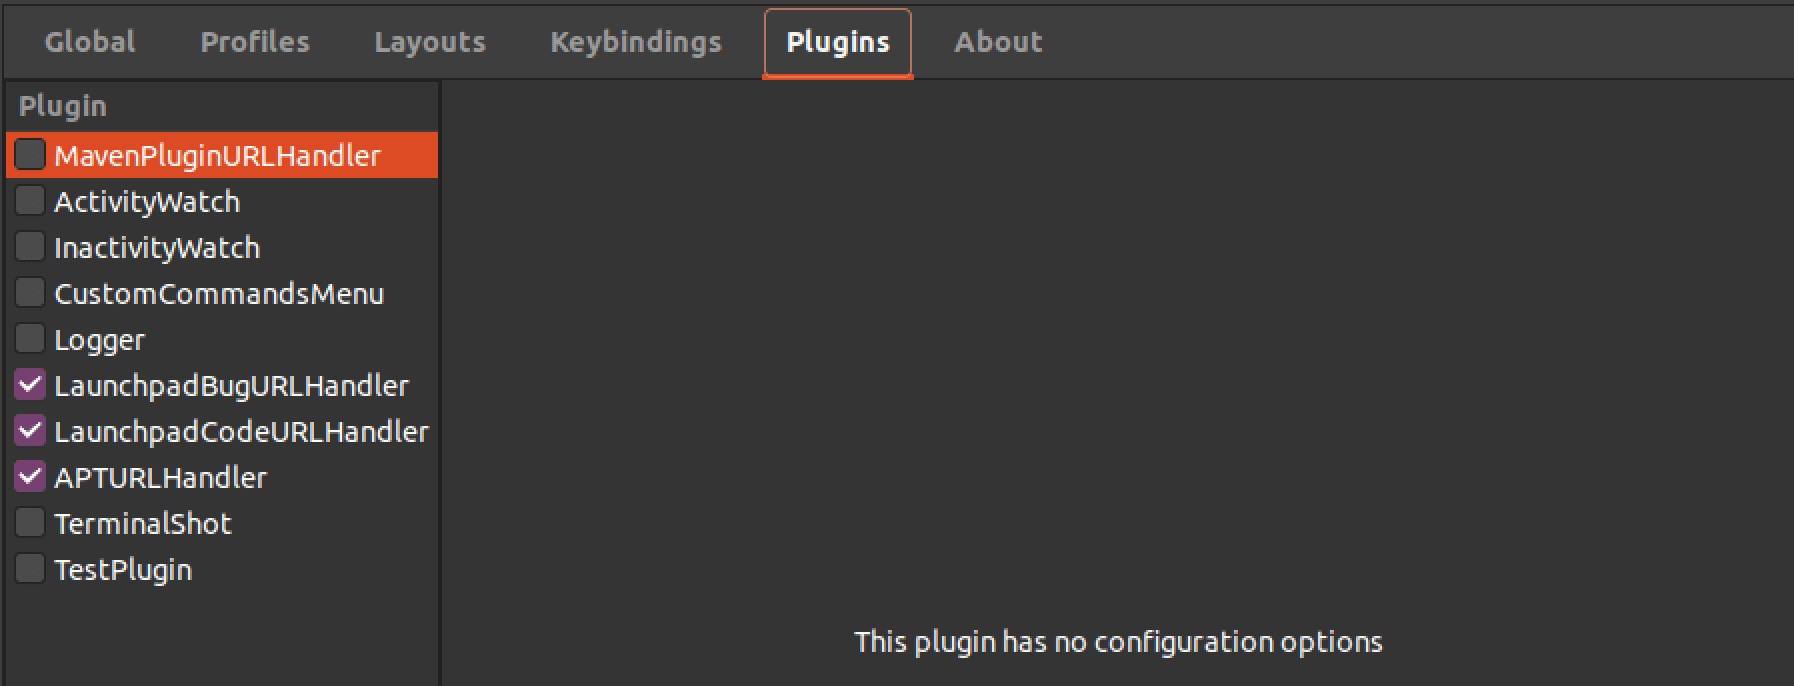
Plugins
Step 3: Using Terminator
Terminator is easy to use. First, launch Terminator from the applications menu or execute the command “Terminator” on the default Linux terminal.
You can open a new terminal tab by pressing Ctrl+Shift+T. Alternatively, you can right-click any empty place on the Terminal and select the option – “Open Tab” to open a new tab. You can switch between tabs by pressing Ctrl+PgUp or Ctrl+PgDn. You can also use the cursor to navigate between the different open tabs.
The image below shows Terminator with three open tabs.

Terminator tabs
To split the terminal window horizontally, press Ctrl+Shift+O; to split it vertically, press Ctrl+Shift+E. Alternatively, you can right-click inside the Terminal and select “Split Horizontally” or “Split Vertically.” You can resize the terminal panes by dragging the divider between them.
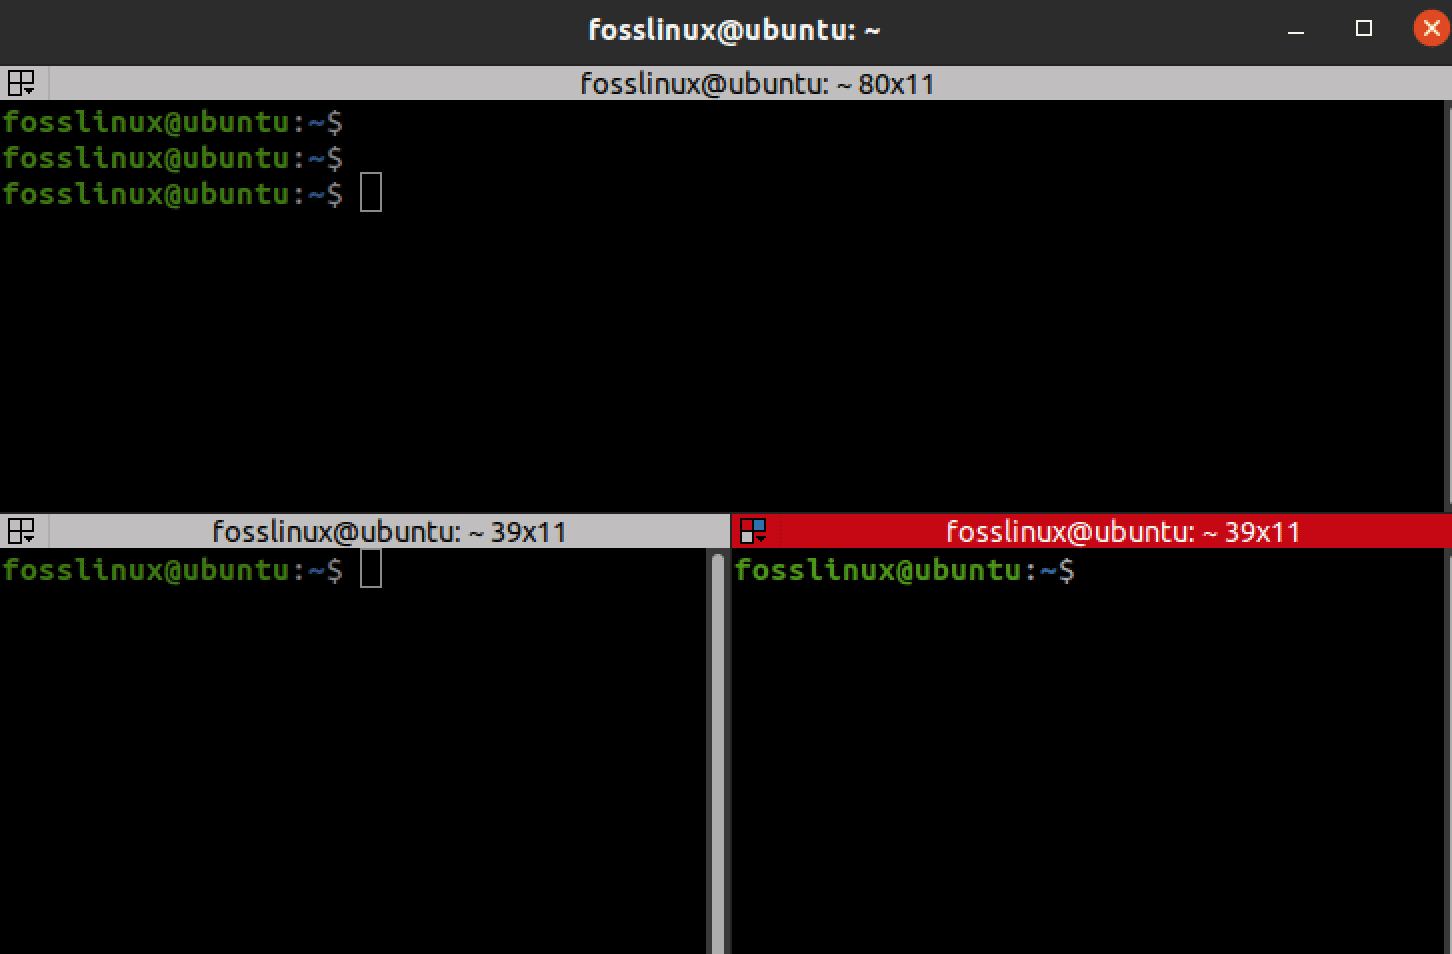
Split Terminator0
Terminator also supports copy and paste. You can copy text by selecting it with the mouse and pressing Ctrl+Shift+C. To paste text, press Ctrl+Shift+V.
The Group button
The button on the top left of the Terminator window is known as the “group” button, allowing you to manage and manipulate terminals in Terminator. When you click on the group button, you’ll see the following options:
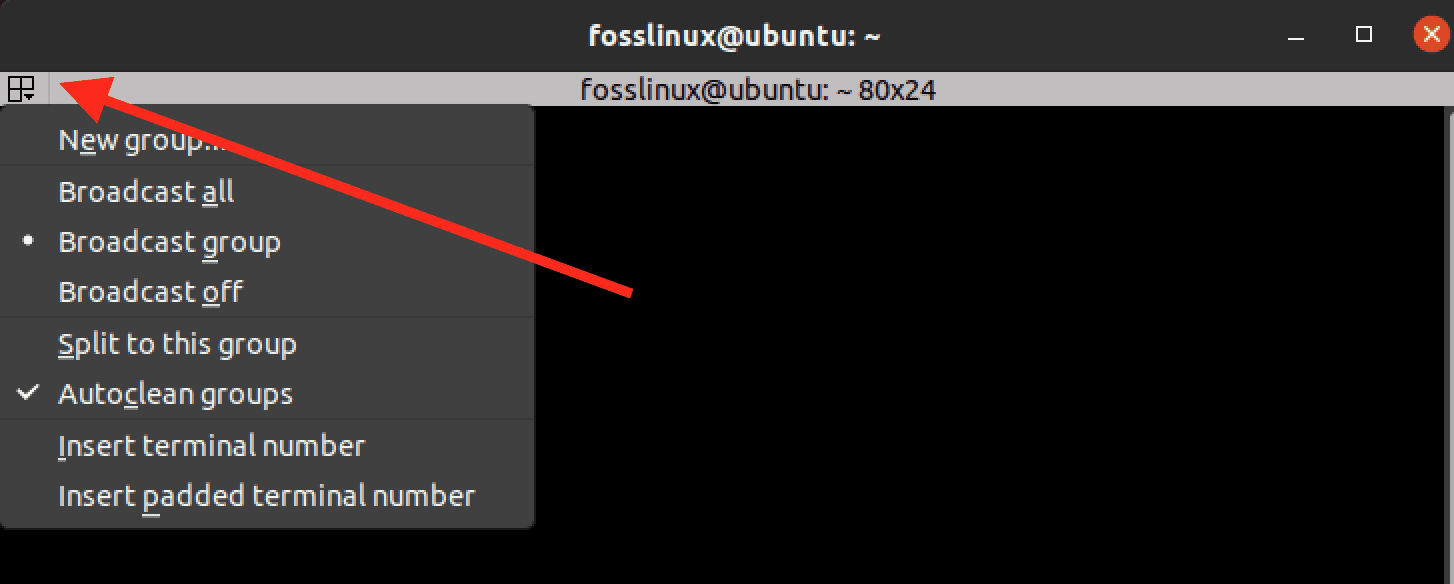
Group button
1. New group: This option allows you to create a new group of terminals. When you select this option, a new tab with a single terminal will appear at the top of the Terminator window. You can add terminals to this group using the “split horizontally” or “split vertically” options.
2. Broadcast all: This option sends the same input to all terminals currently open in Terminator. This can be useful if you want to execute the same command across multiple terminals simultaneously.
3. Broadcast group: This option sends the same input to all the terminals in the currently active group. This is similar to the “broadcast all” option but only affects terminals within the same group.
4. Broadcast off: This option stops the broadcast function that was previously enabled using the “broadcast all” or “broadcast group” options.
5. Split to this group: This option allows you to split the currently active terminal into two new terminals, which will be added to the same group as the original terminal.
6. Autoclean groups: This option automatically removes empty terminal groups when they are no longer in use. This can help to keep your Terminator window organized and clutter-free.
7. Insert terminal number: This option inserts a new terminal with a specific number into the currently active group. This can be useful if you want to quickly navigate to a specific terminal using the “Ctrl + Alt + Number” shortcut.
8. Insert padded terminal number: This option is similar to the “insert terminal number” option, but it adds leading zeros to the terminal number. This can be useful if you have many terminals and want to keep them organized.
Uninstalling Terminator
If you no longer want to use Terminator or prefer a different terminal emulator, you can easily remove it from your system. To uninstall Terminator, you can use the following command:
sudo apt remove terminator
This command will remove Terminator from your computer, but it may leave behind some dependencies installed along with it. If you want to remove Terminator and all of its associated packages completely, you can use the following command instead:
sudo apt remove --auto-remove terminator
After running this command, the uninstall process will begin and remove all the mentioned packages. Once the process is complete, you can close the terminal window and open a new one to confirm that Terminator has been uninstalled and the default terminal emulator is back.
Conclusion
Terminator is a powerful terminal emulator that can greatly enhance your Ubuntu experience. By following the steps outlined in this guide, you can easily install and start using Terminator on your system. We covered various features of Terminator, such as customizing your layout and using keyboard shortcuts, giving you a comprehensive understanding of how to use it effectively.

