I have always admired Linux’s robust and flexible file permission system. If you’re new to Linux or need a refresher, this article will provide a detailed guide on giving user permission to a folder in Linux. We’ll explore why granting permissions is necessary, some handy tips and tricks, and troubleshooting suggestions to make your Linux experience more enjoyable and secure.
Why give permissions?
In Linux, file and folder permissions are crucial for maintaining the security and integrity of the system. By assigning appropriate permissions, you can control who has access to specific folders and the actions they can perform. This can help prevent unauthorized access, data corruption, and the accidental deletion of critical files.
For example, let’s say you have a folder containing important documents you want to share with a colleague. Instead of giving them access to your entire system, you can create a user account for them, assign them to a specific group, and then provide them with access to that particular folder. This way, you have complete control over what they can and cannot access on your system.
Giving permissions to users ensures that the system operates smoothly while also maintaining a secure environment for your data. This level of control is one of the reasons I love working with Linux.
Giving folder permissions to a user
1. Use the chmod Command
The chmod command is used to change file permissions in Linux. To give a user permission to a folder, you must use the chmod command followed by the username and the folder’s name.
In this practical example, we’ll use the chmod command to set specific permissions on a folder for a user. Let’s say we have a folder named “projects,” and we want to set the following permissions:
- Read, write, and execute for the owner
- Read and execute for the group
- No permissions for others
Here’s how you can do that:
Open the terminal on your Linux system
Navigate to the directory containing the project folder. For example, if the project folder is located in /home/username/documents, you would use the following command:
cd /home/fosslinux/projects
Use the chmod command to set the desired permissions. In this case, we want to set the permissions to rwxr-x—, which can be represented numerically as 750. To learn more about Linux permissions, please refer to the Tips & Tricks section below. Run the following command to set the folder permissions:
chmod 750 projects
You should see no output. Now, the project folder will have the specified permissions:
- Owner: read, write, and execute (rwx)
- Group: read and execute (r-x)
- Others: no permissions (—)
You can verify the permissions using the ls -ld command followed by the folder name:
ls -ld projects
The output will display the folder permissions, similar to this:
drwxr-x--- 2 username groupname 4096 Apr 5 16:49 projects
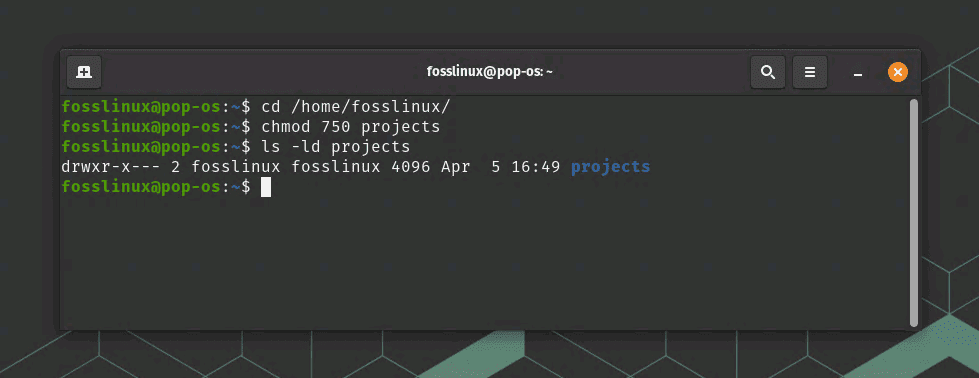
Applying permissions to a folder using chmod command
This output confirms that the project folder has the desired permissions (rwxr-x—) for the owner, group, and others.
Allowing a user to access the folder
I want to explain this with an illustration. To allow a user named “divya” to access the “projects” folder, you can add “divya” to the folder’s group. Here’s how you can do that:
First, check the group owner of the “projects” folder by using the ls -ld command:
ls -ld projects
The output will look something like this:
drwxr-x--- 2 username groupname 4096 Apr 5 12:00 projects

Checking group owner
In this example, “fosslinux” is the group owner of the folder.
Add “divya” to the group using the usermod command. You will need root or sudo privileges to run this command:
sudo usermod -a -G fosslinux divya

Adding a user to a group using usermod command
This command appends (-a) the specified group (-G) to the user’s list of supplementary groups, ensuring that “divya” remains a member of her existing groups.
Ask “divya” to log out and log back in for the changes to take effect. Once logged back in, “divya” will have the group permissions (read and execute) for the “project” folder.
Note: The steps provided above assume that “divya” is not the owner of the “project” folder. If “divya” is the owner, she will have the owner’s permissions by default.
2. Use the chown Command
The chown command is used to change the ownership of a file or folder, not to set permissions. However, changing the ownership can indirectly affect a user’s permissions to access a folder based on the folder’s owner, group, and other permissions. Here’s a practical example of using chown to change the ownership of a folder:
Let’s say you have a folder named “projects” that currently belongs to the user “divya” and the group “fosslinux”. You want to change the ownership of the folder to the user “kiran” and the group “vibrantleaf”.
Open the terminal on your Linux or Unix-based system.
Navigate to the directory containing the “projects” folder. For example, if the folder is located in /home/fosslinux/Documents/, you would use the following command:
cd /home/fosslinux/Documents/
Check the current ownership and permissions of the “projects” folder using the ls -ld command:
ls -ld projects
The output will look something like this:
drwxrwxr-x 4 divya fosslinux 4096 Apr 5 19:03 projects
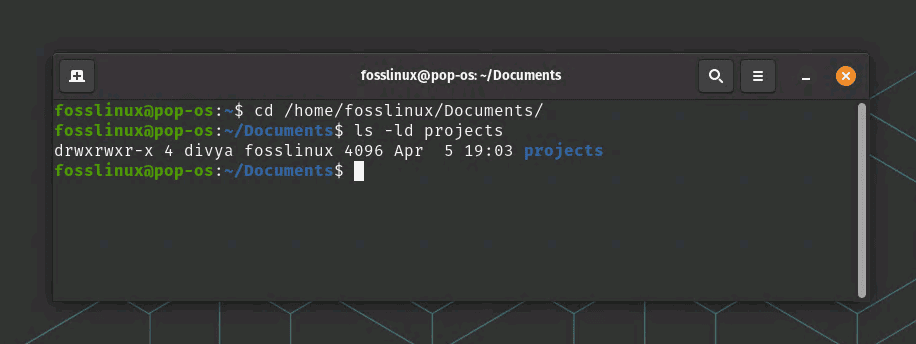
Checking current folder permissions
Change the ownership of the folder using the chown command. You will need root or sudo privileges to run this command:
sudo chown kiran:vibrantleaf projects
This command changes the owner to “kiran” and the group to “vibrantleaf”.
Verify the new ownership and permissions using the ls -ld command again:
ls -ld projects
The output should now display the updated ownership:
drwxrwxr-x 4 kiran vibrantleaf 4096 Apr 5 19:03 projects
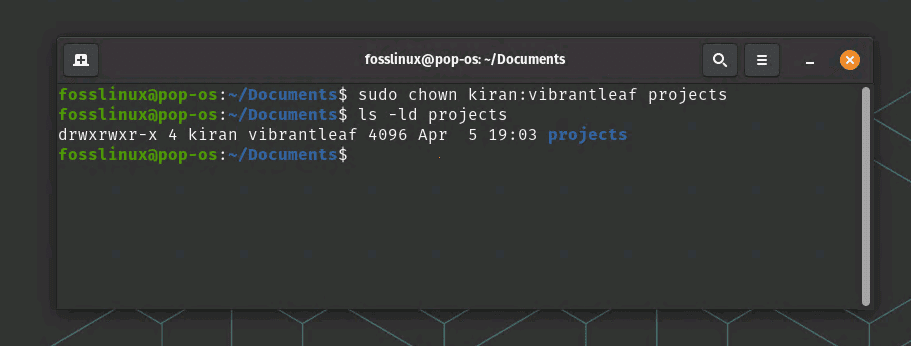
Changing folder permissions using chown
Now, the “projects” folder belongs to the user “kiran” and the group “vibrantleaf”. Remember that the chown command only changes ownership, not permissions. The folder’s permissions remain the same (rwxr-xr-x) in this example.
3. Use the chgrp command
The chgrp command changes the group ownership of a file or directory in Linux. By default, the group owner of a file is the primary group of the user who created it. To change the group ownership of a folder, you need to use the chgrp command followed by the group name and the folder’s name.
Let’s say you have a folder named “projects” that belongs to the group “vibrantleaf”. You want to change the group ownership to the “fosslinux” group.
Open the terminal on your Linux or Unix-based system.
Navigate to the directory containing the “projects” folder. For example, if the folder is located in /home/fosslinux/Documents, you would use the following command:
cd /home/fosslinux/Documents
Check the current ownership and permissions of the “designs” folder using the ls -ld command:
ls -ld projects
The output will look something like this:
drwxrwxr-x 4 kiran vibrantleaf 4096 Apr 5 19:03 projects
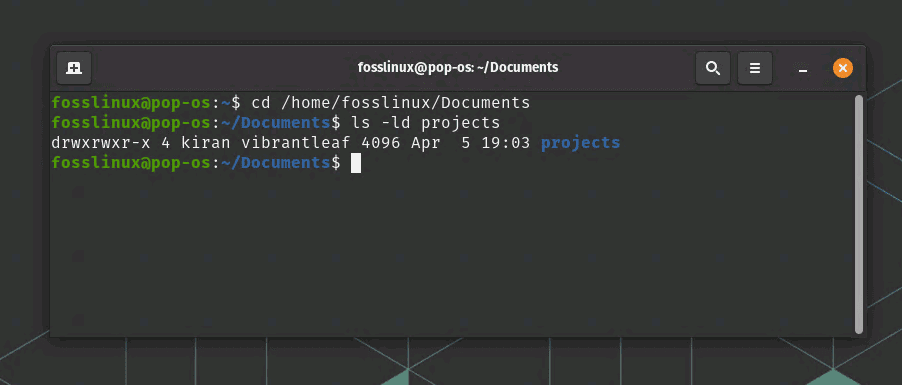
Checking current folder permissions of the projects folder
Change the group ownership of the folder using the chgrp command. You may need root or sudo privileges to run this command, depending on the folder’s permissions:
sudo chgrp fosslinux projects
This command changes the group ownership to “fosslinux”.
Verify the new ownership and permissions using the ls -ld command again:
ls -ld projects
The output should now display the updated group ownership:
drwxrwxr-x 4 kiran fosslinux 4096 Apr 5 19:03 projects
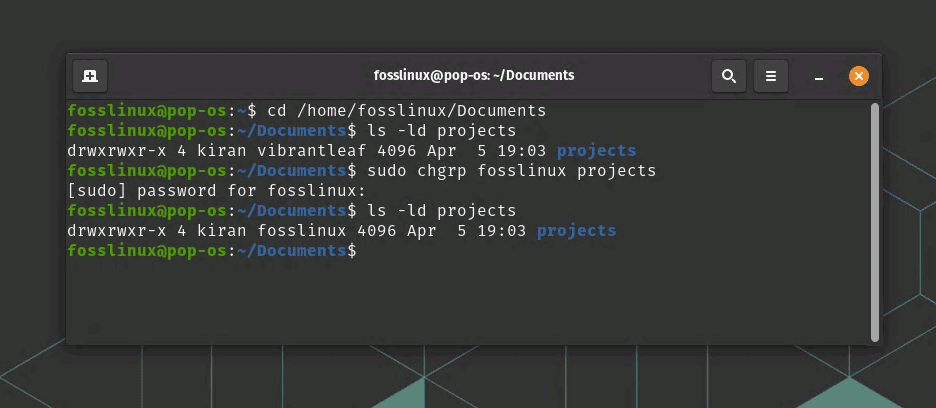
changing group
Now, the “projects” folder belongs to the group “fosslinux”. The chgrp command only changes the group ownership, not the permissions or user ownership. The folder’s permissions and user ownership (username) remain the same in this example.
Tips & tricks for giving permissions
Understanding Permission Types: There are three types of permissions you can grant to users in Linux: read (r), write (w), and execute (x). Knowing which permission to give is essential for maintaining the right level of access.
Each permission can be either granted (1) or not granted (0). These three bits together form an octal (base-8) number.
Here’s a quick overview of the permission bits and their corresponding octal values:
- Read (r): 4
- Write (w): 2
- Execute (x): 1
You can calculate the octal representation for each permission type (owner, group, others) by adding the octal values for each permission that is granted.
Here are the octal values for all possible permission combinations:
- rwx: 4 (read) + 2 (write) + 1 (execute) = 7
- rw-: 4 (read) + 2 (write) = 6
- r-x: 4 (read) + 1 (execute) = 5
- r–: 4 (read) = 4
- -wx: 2 (write) + 1 (execute) = 3
- -w-: 2 (write) = 2
- –x: 1 (execute) = 1
- —: 0 (no permissions) = 0
When setting permissions with chmod, you specify the octal values for the owner, group, and others, in that order. For example, chmod 754 would set the permissions as follows:
- Owner: rwx (7)
- Group: r-x (5)
- Others: r– (4)
Use the ‘chmod’ command: The ‘chmod’ command is used to modify the permissions of a file or folder. You can use symbolic mode (e.g., ‘chmod u+r folder_name’) or numeric mode (e.g., ‘chmod 755 folder_name’) to set permissions. I personally prefer the numeric mode, as I find it more intuitive.
Be cautious with ‘sudo’: You grant administrative permissions when using the ‘sudo’ command. Be careful not to misuse this command, which can lead to system-wide changes or damage.
The power of groups: Instead of giving permissions to individual users, consider creating a group and assigning permissions to the group. This makes managing access for multiple users much easier.
Troubleshooting tips
If you encounter any issues when giving permissions to a user, there are a few troubleshooting tips you can try:
Check the folder’s permissions
Before giving permissions to a user, ensure the folder’s permissions are set correctly. You can use the ls command to view the permissions of a folder:
ls -l /path/to/my_folder
This will show you the folder’s owner, group, and permissions.
Check the user’s permissions
Ensure that the user you are giving permissions to has the appropriate permissions to access the folder. You can use the id command to view the user’s groups:
id jane
This will show you the user’s groups.
Check for typographical errors
Make sure that you have entered the correct commands and file paths. Typos and mistakes can cause permissions to be set incorrectly.
Conclusion
Understanding and effectively managing file and folder permissions in Linux is essential for maintaining a secure and efficient system. By following the tips and tricks outlined in this article, you’ll be well-equipped to grant user permissions and troubleshoot any issues that may arise.
As a Linux user myself, I can’t overstate the importance of mastering these concepts. The flexibility and control that Linux offers regarding file permissions have always been my favorite feature. By learning to manage permissions efficiently, you can take full advantage of the powerful capabilities Linux has to offer.

