As a Linux system administrator for more than a decade, I’ve grown to appreciate the importance of keeping my systems running smoothly. One aspect that I’ve found essential, though not always given the attention it deserves, is the maintenance of system log files. Over the years, I’ve developed some personal preferences for clearing and emptying log files on Linux systems, and I’m excited to share these with you today.
In this post, I’ll walk you through some effective ways to empty or clear system log files in Linux. While there are several methods available, I’ll focus on my tried and tested favorites. We’ll also take a moment to discuss the importance of log management and why I think it’s crucial for every system administrator to master.
Why log management matters
As you know, log files are the bread and butter of any Linux system administrator. They are essential for diagnosing and troubleshooting system issues, tracking user activity, and monitoring system performance. However, log files can also grow in size and consume valuable disk space, which can lead to performance issues or even system failures.
That’s why I’ve always been a fan of regularly managing log files to ensure that my systems remain in tip-top shape. Let’s dive into my favorite techniques for clearing log files on Linux systems.
Clearing system log files in Linux
Method 1: Manually emptying log files
I’ll start with the most basic, yet effective, method: manually emptying log files using the command line. As an old-school sysadmin, I find this method oddly satisfying, and I appreciate the control it offers. Here’s how you do it:
Open your terminal.
Navigate to the /var/log directory:
cd /var/log
Identify the log file you want to empty. For this example, I’ll use the “syslog” file. To empty it, run the following command:
sudo sh -c 'echo > /var/log/syslog'

Clearing the syslog file
The above command will empty the contents of the /var/log/syslog file without deleting the file itself. Let’s break down the command to understand each part:
sudo: This command is used to run the following command with root (administrator) privileges. Since log files are typically owned by the root user, you need these privileges to modify them.
sh: This is a shell interpreter (Bourne shell). By using sh, you can run a shell command. In this case, you’re running the shell command within single quotes as an argument to sh.
-c: This flag is used to tell the shell interpreter (sh) to execute the command specified within the single quotes.
‘echo > /var/log/syslog’: This is the command that you want the shell interpreter to execute. It consists of the following parts:
a. echo: This command is used to output text to the terminal or a file. When used without any arguments, it outputs an empty line.
b. >: This is the redirection operator. It takes the output of the command to its left (in this case, echo) and writes it to the file specified to its right (in this case, /var/log/syslog). If the file already exists, the > operator overwrites the file with the new content, effectively emptying it.
By running sudo sh -c ‘echo > /var/log/syslog’, you are executing a shell command with root privileges that overwrites the /var/log/syslog file with an empty line, thus emptying the file.
How to check if the command worked?
To check if the command worked and the /var/log/syslog file has been emptied, you can use the cat command, which displays the contents of a file. Here’s how to do it:
Open your terminal.
Run the following command:
cat /var/log/syslog
If the command to empty the syslog file worked correctly, you should see no output or just an empty line after running the cat command. This indicates that the /var/log/syslog file is now empty.

Checking syslog content
If you still see content in the syslog file, it might be because new log entries were added after you emptied the file. This log file is a very busy file! In such cases, you can repeat the process to empty the file again, but keep in mind that it’s normal for log files to be continuously updated with new entries as the system operates.
Method 2: Logrotate
As much as I love doing things manually, I understand the need for automation. Logrotate is a powerful Linux utility that can automatically manage, compress, and clear log files. It’s definitely one of my favorite tools, especially when dealing with numerous log files.
To set up logrotate, follow these steps:
Install logrotate if not already installed:
sudo apt-get install logrotate
Here are the steps to create a custom logrotate configuration file and set it up to manage specific log files:
Open the terminal.
Create a new file called “my_logs.conf” in the /etc/logrotate.d/ directory:
sudo nano /etc/logrotate.d/my_logs.conf
This command opens the “my_logs.conf” file using the nano text editor with root privileges.
Add your custom configuration to the file.
/var/log/syslog
/var/log/auth.log {
su root root
daily
rotate 7
compress
delaycompress
missingok
notifempty
create 640 root adm
}
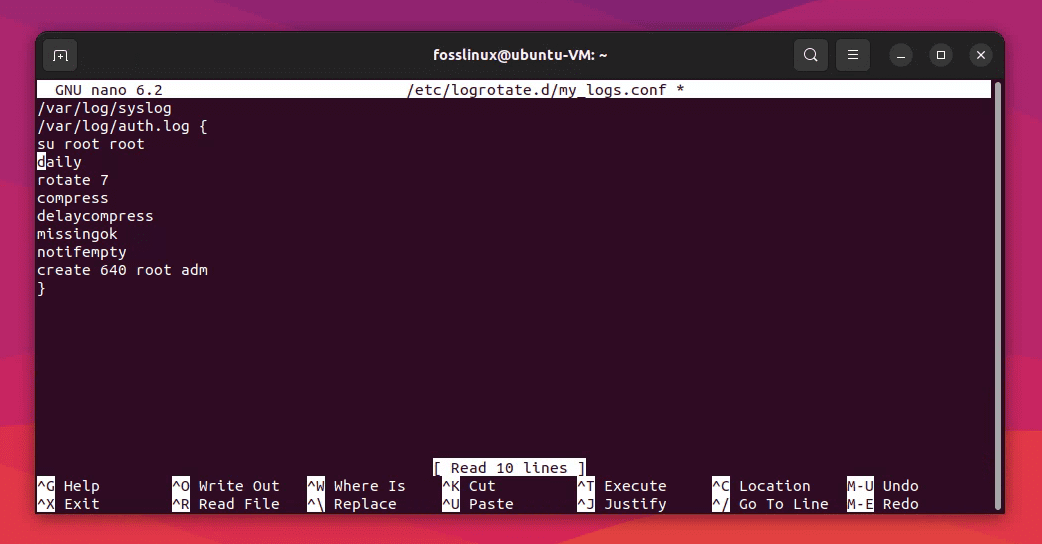
Creating a custom script
This configuration tells logrotate to manage the /var/log/syslog and /var/log/auth.log log files, with the specified directives.
More about how the script works:
This logrotate configuration script is used to manage the /var/log/syslog and /var/log/auth.log log files with the specified directives. Let’s go over each directive in detail:
- /var/log/syslog and /var/log/auth.log: These lines specify the log files you want to manage using this configuration. In this case, we’re managing two log files: syslog and auth.log.
- { … }: The curly braces are used to enclose the directives that apply to the specified log files. All directives within the braces apply to both /var/log/syslog and /var/log/auth.log.
- su root root: This directive specifies the user (root) and group (root) that logrotate should use when rotating the log files. This is necessary when the parent directory of the log files has insecure permissions.
- daily: This directive tells logrotate to rotate the log files every day. Other options include weekly, monthly, and yearly.
- rotate 7: This directive specifies the number of log files to keep after rotation. In this case, 7 rotated log files will be kept. Older log files beyond this number will be removed.
- compress: This directive indicates that the rotated log files should be compressed to save disk space. By default, logrotate uses gzip for compression.
- delaycompress: This directive tells logrotate to delay compression of the most recent rotated log file until the next rotation cycle. This is useful for programs that may continue to write to the log file even after it has been rotated.
- missingok: This directive instructs logrotate not to raise an error if a specified log file is missing. This is helpful when you have a configuration that manages multiple log files, some of which may not always be present.
- notifempty: This directive tells logrotate not to rotate the log file if it is empty. This can help save disk space by avoiding the creation of unnecessary rotated log files.
- create 640 root adm: This directive instructs logrotate to create a new log file immediately after rotating the old log file. The new log file will have the specified permissions (640), ownership (root), and group ownership (adm).
So, by using this configuration file, logrotate will manage the syslog and auth.log files according to the specified directives. This means that these log files will be rotated daily, with up to 7 rotated log files kept, compressed, and created with the specified permissions and ownership.
Save the changes and exit the text editor. For nano, press Ctrl + X, followed by Y (to confirm saving changes), and then press Enter.
Verify that the new configuration file is valid. Run the following command:
sudo logrotate --debug /etc/logrotate.d/my_logs.conf

Verifying if the script is working as intended – Part 1 of Terminal screenshot
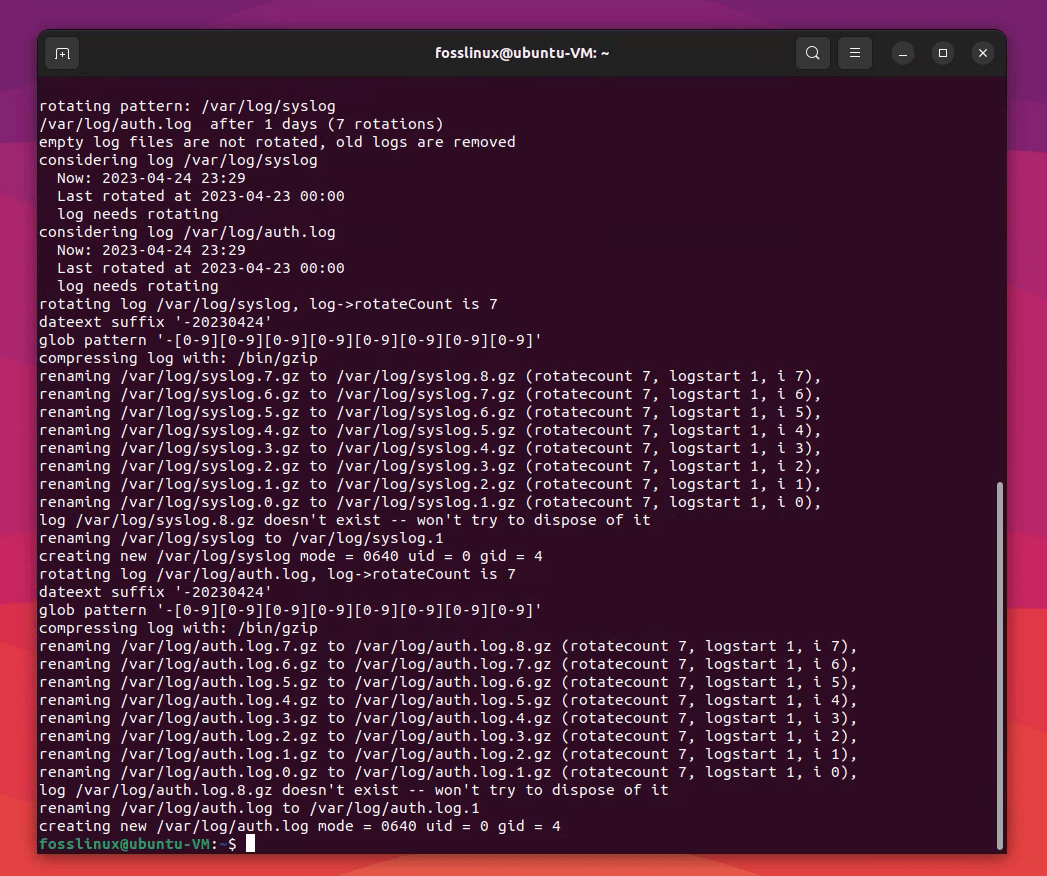
Verifying if the script is working as intended – Part 2 of Terminal screenshot.png
This command checks the custom configuration file for errors and shows the actions logrotate would take without actually executing them.
If there are no errors, logrotate will use your custom configuration file during its next run. By default, logrotate is executed daily via a cron job located at /etc/cron.daily/logrotate. The custom configuration you’ve created will now be used to manage the specified log files according to the directives provided.
That’s it! You’ve now created a custom logrotate configuration file and set it up to manage specific log files on your Linux system.
Method 3: Using Stacer (GUI app)
Stacer is an open-source system optimization and monitoring tool that offers a user-friendly graphical interface for managing various aspects of a Linux system, including log files. If you’re looking for a modern and more visual approach to clearing logs, Stacer might just be the perfect solution for you.
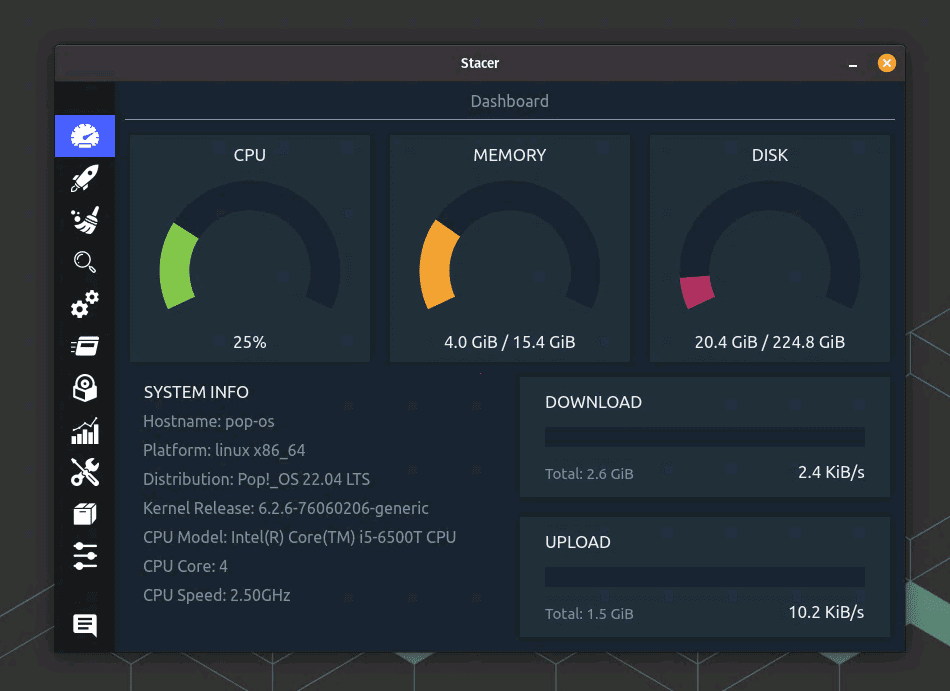
Stacer User Interface
Step 1: Install Stacer
First, you’ll need to install Stacer on your Linux system. You can download the latest version from the official GitHub repository: https://github.com/oguzhaninan/Stacer/releases. Choose the appropriate package for your distribution and install it using your package manager.
For Ubuntu or Debian-based systems, you can use the following commands:
wget https://github.com/oguzhaninan/Stacer/releases/download/v1.1.0/stacer_1.1.0_amd64.deb
sudo dpkg -i stacer_1.1.0_amd64.deb
Alternatively, you can also use apt:
sudo apt install stacer
For Fedora-based systems, you can use these commands:
wget https://github.com/oguzhaninan/Stacer/releases/download/v1.1.0/stacer-1.1.0.x86_64.rpm
sudo dnf install stacer-1.1.0.x86_64.rpm
Alternatively, you can also use dnf:
sudo dnf install stacer
Step 2: Launch Stacer
After installing Stacer, launch the application from your system’s application menu, or run the following command in the terminal:
stacer
Step 3: Clear log files
In Stacer’s main window, click on the “System Cleaner” tab located on the left side of the interface.
Under the “Select Items to Clean” section, check the box next to “Log Files” to select all log files for cleaning.
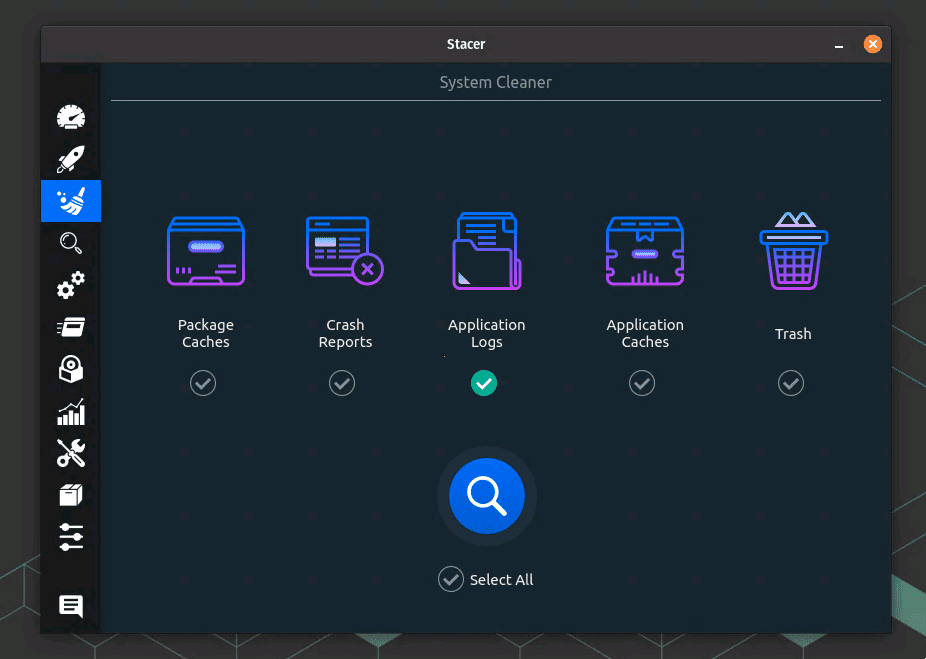
Cleaning Application Logs using Stacer
Click on the “Scan” button at the bottom of the window. Stacer will then scan your system for the selected log files and display the total size of the files to be cleared. You can use “Select all” or clear only the logs you need.
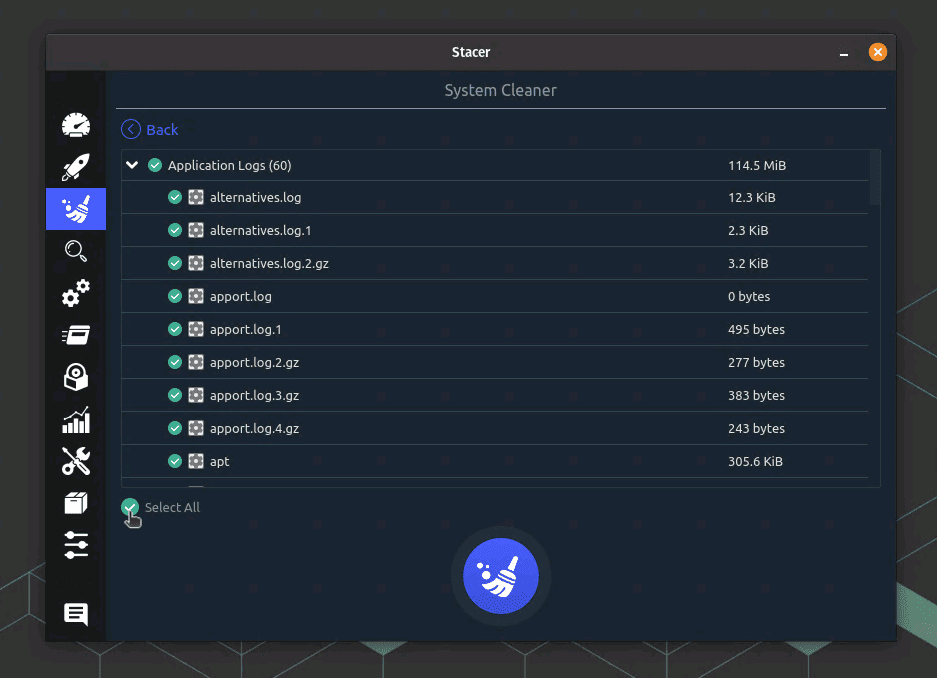
Selecting logs to be cleaned
After the scan is complete, click on the “Clean” button to clear the selected log files. Stacer will remove the files and display a summary of the cleaned items.
And that’s it! You’ve successfully cleared your log files using Stacer. This modern and visually appealing tool provides an intuitive and easy-to-use approach to log file management, making it a great option for those who prefer a graphical interface over the command line.
My personal take on log management
I believe that each system administrator should have their unique approach to log management. Personally, I prefer combining manual and automated methods, as they complement each other well. I use manual methods for one-off log file clearings, while logrotate takes care of regular maintenance.
Although some may argue that automation should be the default, I find value in occasionally taking a hands-on approach. This not only helps me stay familiar with the command line, but also allows me to keep an eye on the log files’ content, helping me stay informed about any potential issues.
Additionally, I’m a strong advocate for log monitoring and analysis tools, such as Logwatch or Graylog. These tools help me keep track of important system events and alerts, which is critical for maintaining a healthy and secure system.
When it comes to log management, my personal motto is “Stay proactive, stay informed.” By regularly clearing and monitoring log files, I can prevent disk space issues, quickly detect any anomalies, and ensure that my Linux systems run like a well-oiled machine.
Conclusion
In this post, we’ve discussed the importance of log management and explored two of my favorite techniques for clearing system log files in Linux: manual emptying and logrotate. As a seasoned sysadmin, I believe that a combination of manual and automated methods, coupled with a proactive approach to log monitoring, is essential for maintaining efficient and secure Linux systems.
Feel free to try out these methods, experiment with different tools, and develop your own personal preferences for log management. After all, every sysadmin’s journey is unique, and finding what works best for you is key to mastering the art of Linux system administration.

1 comment
Very thorough. Thanks!