Metadata of an audio file like album name, artist’s name, release year and much more are stored inside ‘tags’ of the audio file. For digital music, the tags mostly used are ID3 tags. Most importantly, the most widely used digital audio format, MP3 files also use that format of audio tagging.
What is the importance of tagging? You would not have any information about the song’s properties if it weren’t for these tags. You would not be able to arrange these files in the format of their artist name, or album name, or genre because that information would not exist. Even though not much of an issue for computers and phones, but on MP3 players, that information is integral; otherwise everything will be categorized under an ‘Unknown’ category for any given field.
ID3 tags have existed in two versions, ID3v1 and ID3v2. The ID3v2 adds the bonus of more significant than long names for all fields, addition of album art and many more genres. What’s the best way to edit and configure these tags? Kid3.
Kid3 ( ‘K’+ ‘ID3’) is an audio tag editor, which can change both v1 and v2 tags easily. Just a few clicks and you can edit the tags of a single, or even multiple files. Below are some of its significant features.
Kid3 Audio Tagger Features
1. Interface
The interface of Kid3 may look overwhelming with a lot of stuff. The jargon may look intimidating initially, but one starts to look around, all of those makes sense. The song’s name, technical properties, and both tagging systems are displayed when a song is selected. Users can edit the fields directly from there.
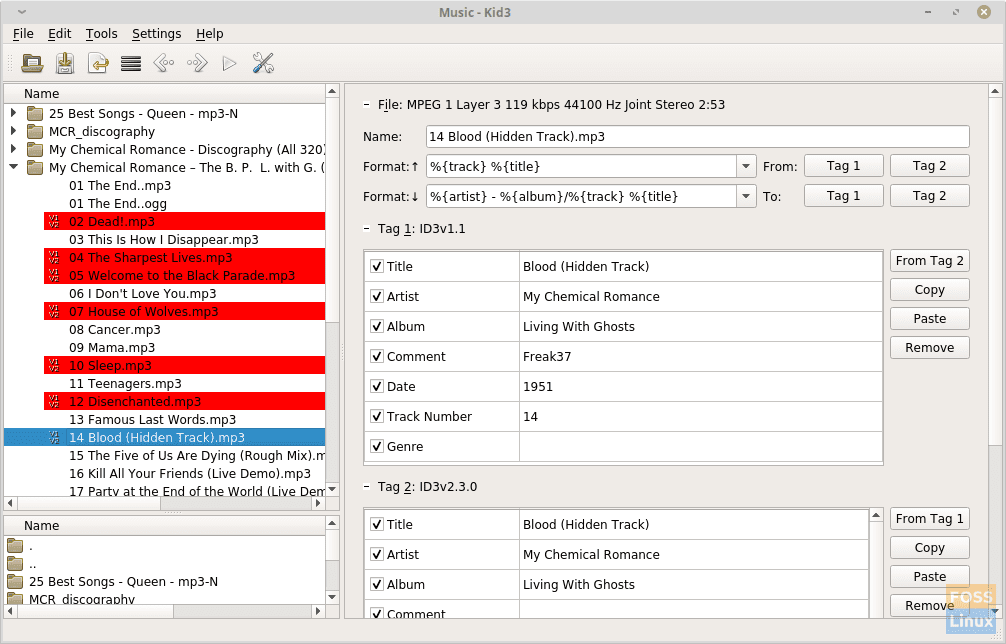
Kid3 Interface
As seen in the image, the audio files that are selected are colored red, which makes it easier for users to sort the files.
2. Editing Fields and additional Tags
There are options to delete existing fields in both ID3v1 and ID3v2 boxes. Optionally, users can even add other fields. This makes management of those audio files much more straightforward, which do not have any metadata previously.
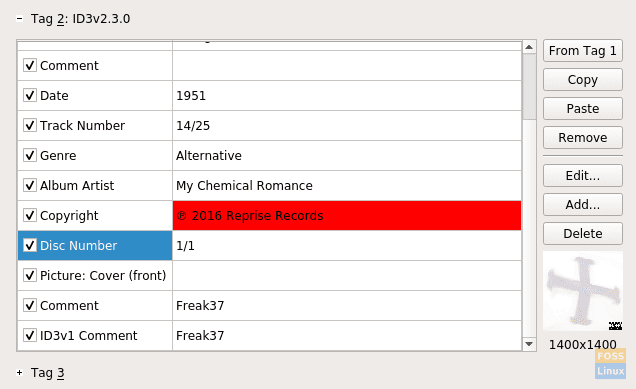
Kid3 fields and tags
You can add tags other than the ID3s. To do that, you can click and configure the ‘+ Tag 3‘ box. It is possible to use common fields that are already provided by Kid3, or even add custom ones.
You can also add custom fields to the ID3 tags, but it might sometimes mess with some systems or media players. It will probably not be required, as ID3v2 covers whatever you may need. Users can just add any required unique data in the ‘Comments‘ field.
3. Tagging Multiple Files
Editing multiple files that are selected is made very easy in Kid3. Just select the files, and it will show a not-equal-to sign wherever the values are different for different files. If you want to add a common field, say album name, you have to select the files and type the album name in the space provided.
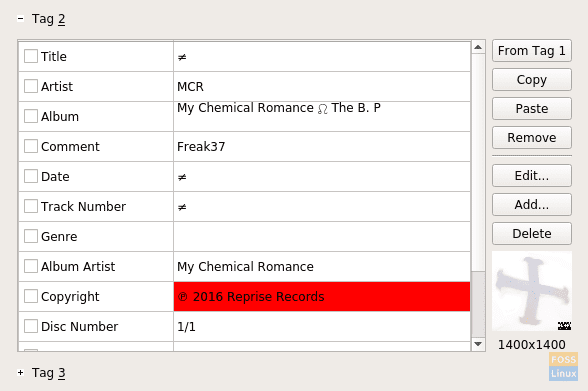
Tagging multiple files
4. Renaming Audio Files
Users can select or create a format in the ‘Format <Upper Arrow>’ field to rename multiple files in a specific format. Users get the freedom to choose whether they want to copy the data from the Tag1 or Tag2 (ID3v1 or ID3v2).
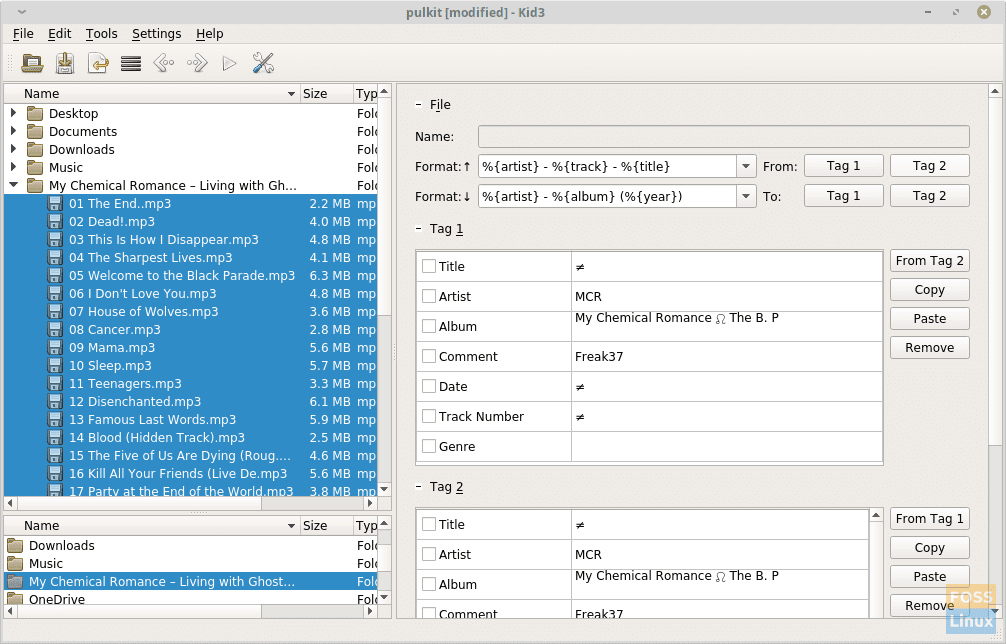
Renaming files in a format
5. Generating Tags
Like the names of the files can be changed using the existing tags, tags can be set using the filenames. If the filenames are in a specific order, say “Artist – Song Name”, you can set the ‘Format <Downward Arrow>’ to “%{artist} %{title}“, and Kid3 will set the artist and song names accordingly.
6. Converting Tags
This does not actually convert tags, but copies the information of the fields to the other tag. The boxes of tags have an option of importing information from other tags (shown in the picture below).
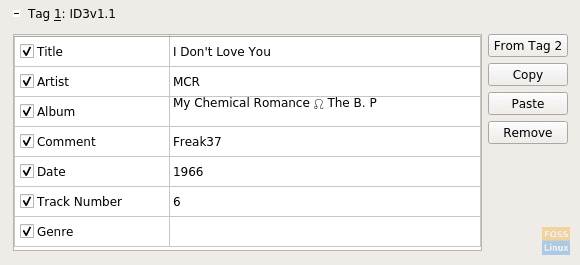
‘Converting’ tags
Just click on ‘From Tag 2‘ in this case, and all fields of ID3v2 that are filled will also be set to fields of ID3v1.
7. Creating Playlists
Creating playlists is also made easier by Kid3. Just import the songs that you need to add, and perform any necessary actions, and after that, click on the button on top that looks like three horizontal lines and stands for ‘Create Playlist‘. Specify the properties, and click on ‘Ok‘.
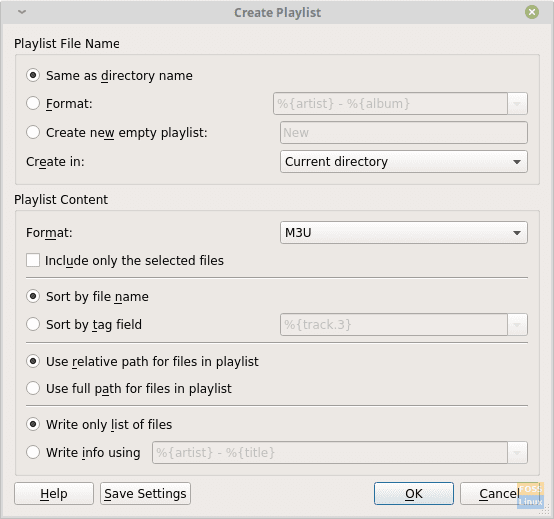
Creating playlist
Installing Kid3
On Ubuntu, Linux Mint, and derivatives
Launch Terminal and enter the following commands:
sudo add-apt-repository ppa:ufleisch/kid3
sudo apt-get update
For KDE users:
sudo install kid3
Without KDE dependencies:
sudo apt-get install kid3-qt
For the command-line interface:
sudo apt-get install kid3-cli
Installation can be done in with two ways, one by installing from a source package, and other by using a repository.
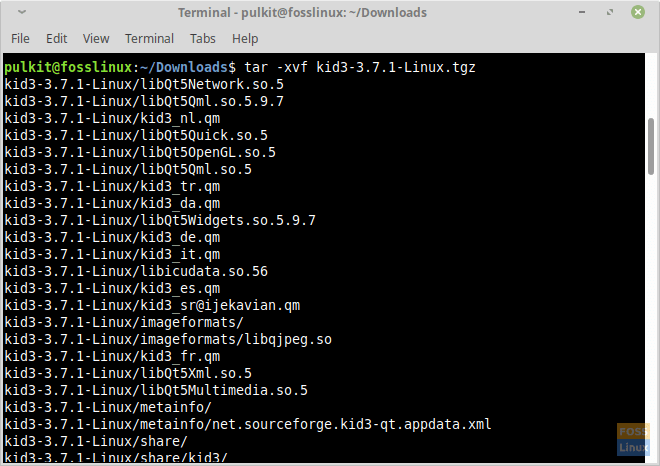
Extracting Kid3 TAR package
For other distros, you can compile from the source. If you have installed the source package, click on the kid3-qt file to launch the program. Visit this link to download source in the .tar.gz format, and follow steps to compile and install it.
Conclusion
Kid3 is excellent to edit audio tags and promises excellent functionality. Management of digital audio is made easier with Kid3, and even if it is a bulk material, editing can be done swiftly, which is the goal of the team of Kid3. For more information on the usage of this great program, visit this site (Kid3 Handbook). Let us know about your thoughts on Kid3 in the comments.

