Updating the programs is a great way to keep your system top notch with all the new toys and tricks. Updates are significant. They provide new features, features you think are amazing, and often comes with revamped interfaces too.
They continuously spread their support for new devices and devices not previously supported. If you had one of those devices, the updated app could bring new life to that device.
Amid all this greatness, there are also issues with some new updates. Sometimes updated versions of some programs don’t work, but older versions do. Other times, you just don’t like the program’s new version, maybe due to a new interface or removing a specific feature. In these situations, the program may be downgraded. Here is a guide on how to downgrade programs in Linux Mint.
There are two ways of doing this, one using the command line interface, and other using Synaptic Package Manager.
1. Command-line Interface (CLI) Method
To use the CLI method, you first have to know about all the available versions of the program. It uses a simple command, in the following syntax:
sudo apt-cache showpkg <program_name>
For example, I will show the downgrading of wget, which is a tool that is used to download any file on the internet, using the CLI.
sudo apt-cache showpkg wget
At the end part of the output, under the heading “Provides:”, the available versions of the program are listed.
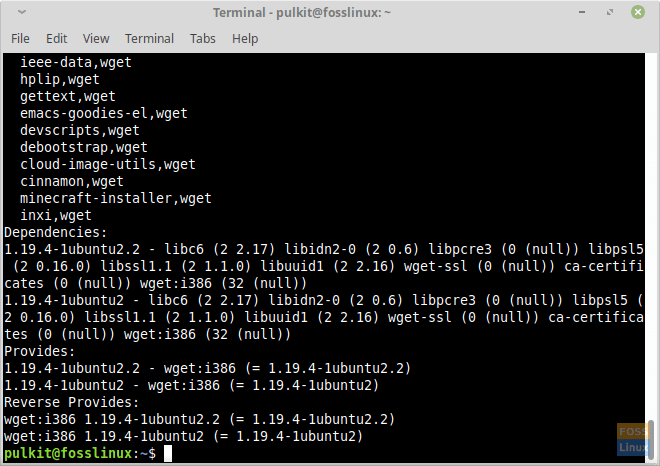
Showing all available versions
Now, to install one of the listed versions of the program, install it using the following syntax:
sudo apt-get install <program_name>=<program_version>
In this case, the command is:
sudo apt-get install wget=1.19.4-1ubuntu2
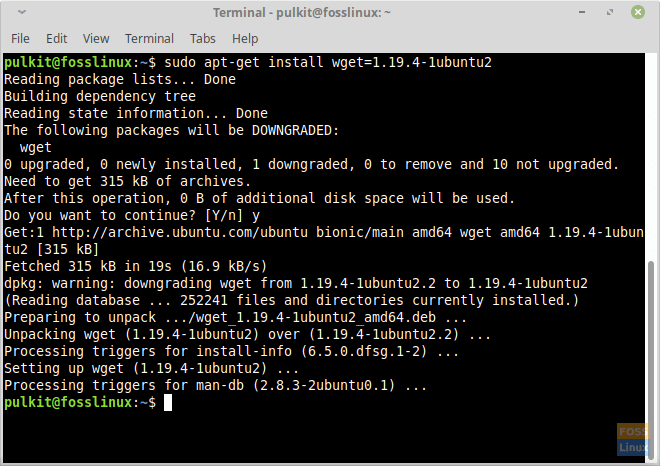
Downgrading program
The terminal will ask for confirmation and will proceed when you enter ‘y‘. This will successfully downgrade the program.
2. Graphical User Interface (GUI) Method
In the GUI Method, we are going to show how to downgrade package by using the Synaptic Package Manager. This program comes installed by default in Linux Mint.
Open the program, enter the password when prompted, and click on the ‘Sections‘ button of the left panel. Go into the ‘Installed‘ sub-category, and you’ll find a list of practically all programs on your system. Look for the program that you want to downgrade. You can also search for the program.
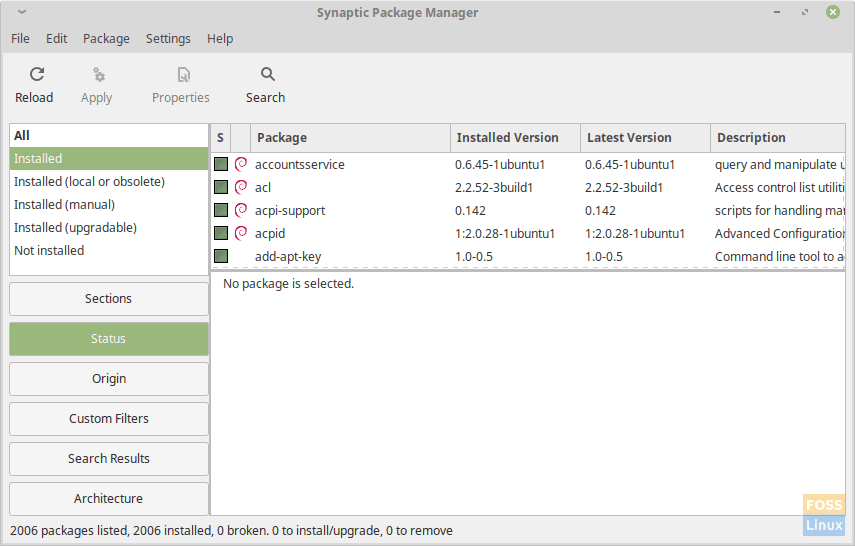
Synaptic Package Manager.
I will again use wget as an example. Select the program, and click on ‘Package‘ in the menu bar. Now click on ‘Force Version…‘ option, and you’ll get a dialogue box displaying the list of available versions of that program.
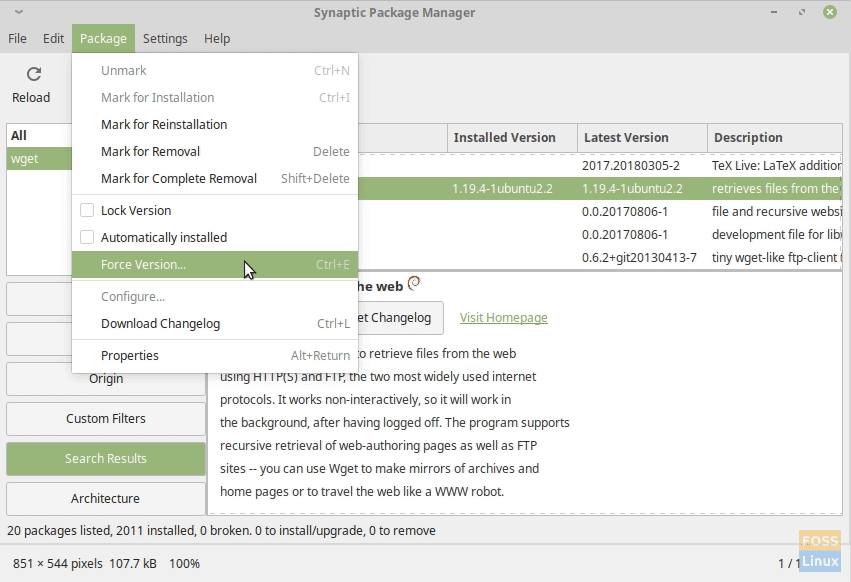
Force version option.
Select a version, and click on ‘Force Version.’ Now click on ‘Edit‘ in the menu bar and click on ‘Apply Marked Changes‘. This will accomplish the downgrading of the program.

Downgrading packages
One advantage of using Synaptic over the command line is that for programs with a lot of dependencies, the CLI method doesn’t work well. It gives off an error saying that the dependencies need to be installed, and does not install them on its own. You can install every dependency individually, but it is too tedious and impractical. For example, downgrading VLC Media Player gives off this error:
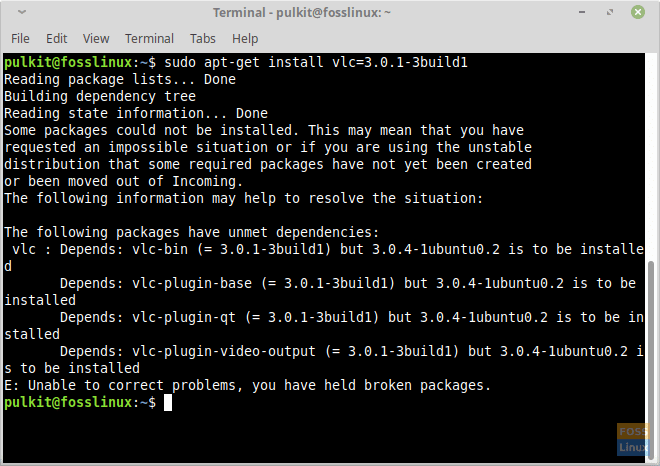
Downgrading error
But downgrading is made easy using Synaptic, as it installs all required dependencies by itself after selecting the version.
Conclusion
Specific situations still require downgrading programs, although rare. It’s also made harder because of some more factors. For example, to downgrade a program A that depends on a program B. Older A version will require a specific older B version. But if that B version isn’t available, you can’t downgrade A as the dependencies aren’t met.
Although a bit tricky, if you’re lucky, you’ll find and install an older version of the program you want. If you have any questions or comments, please consult the comment section. Cheers!

