Oracle VM VirtualBox is a free, open-source, and powerful virtualization product for enterprise and personal use. With frequently released versions, VirtualBox is actively being developed and has a growing list of features, supported guest OS, and platforms.
For those new to virtualization software, it installs on your existing computer, whether running Linux, Windows, or Mac OS X and extends your current computer’s capabilities so that it can run multiple OSes simultaneously in numerous virtual machines. You can install as many virtual machines as you like. The only practical limits are disk and memory.
Installing VirtualBox on Ubuntu
There are a couple of ways to install VirtualBox on your computer. The easiest method is to install it from the Ubuntu Software Center, but usually, these are updated slowly, so you will often find older versions. The best way to install the latest VirtualBox on Ubuntu is by downloading it directly from the Oracle website.
Step 1) Head over to this link and download the .deb file corresponding to your Ubuntu version. In my case, I’m using Ubuntu 19.04, so the downloaded file is “virtualbox-6.0_6.0.6-130049_Ubuntu_bionic_amd64.deb” as of today. Your downloaded version may be different depending on when you are downloading.
Step 2) The file is directly executable in Ubuntu. Simply double-click on it.
Step 3) Click “Install.”
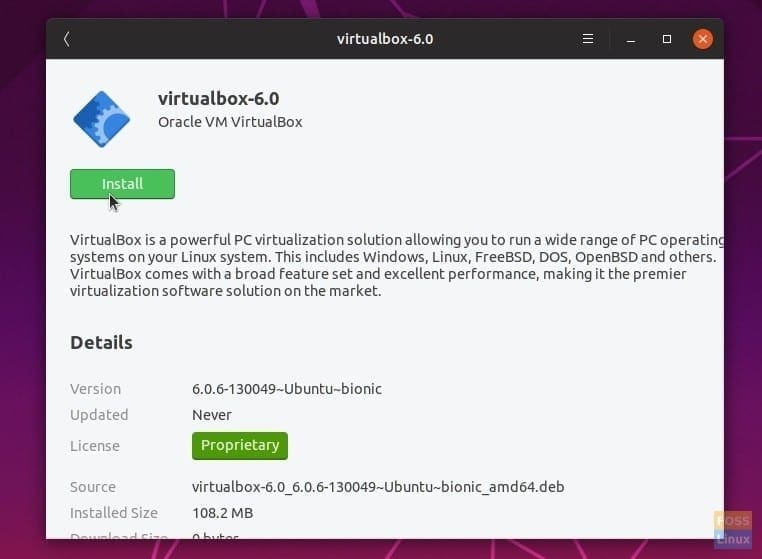
Installing VirtualBox 6.0 on Ubuntu 19.04
Step 4) Enter the root password when prompted to complete the installation.
Step 5) You can launch Oracle VirtualBox from the Applications menu.
That’s it! Go ahead and create your first Virtual machine by clicking on “New”.
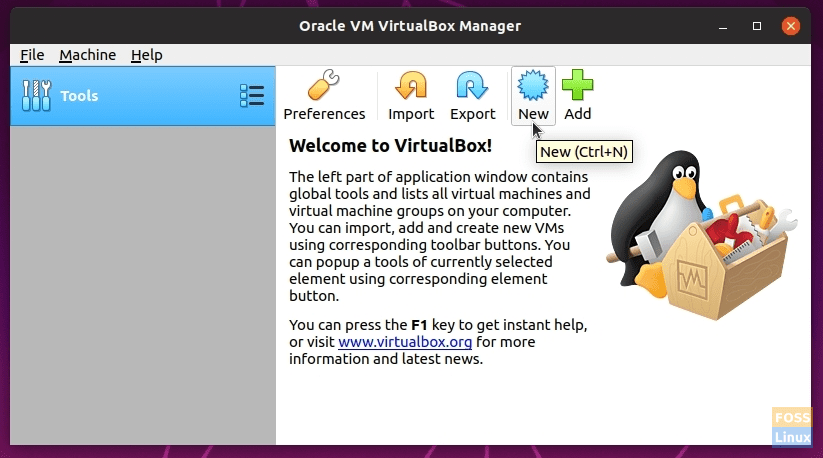
Create a New Virtual Machine
Installing VirtualBox Guest Additions on Ubuntu
The VirtualBox Guest Additions are composed of device drivers and systems applications to improve the performance and usability of the operating system. Installing this package is highly recommended to get the best out of your Virtual Machine. Please note that guest additions are installed on the Virtual machine, and you must, therefore, install them on each of the virtual machines you have created.
In this example, I’m installing the Guest Additions package on Ubuntu 19.04 virtual machine.
Step 1) Click-through “Devices”>”Insert Guest Additions CD image…”
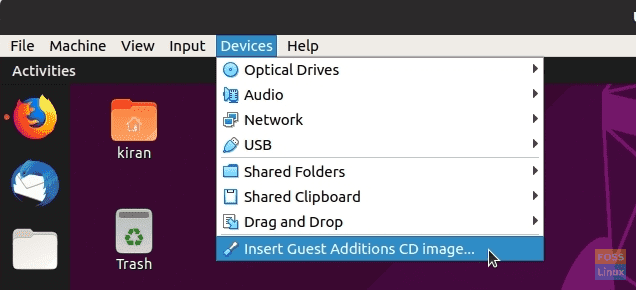
Install Guest Additions CD Image
Step 2) Click “Run.”

Continue Setup
Step 3) Follow the on-screen instructions to complete the installation.
Getting this error while installing the VirtualBox Guest Additions?
This system is currently not set up to build kernel modules. Please install the gcc make perl packages from your distribution.
To fix this problem, launch a new terminal and enter the below command to install the missing packages:
sudo apt install linux-headers-$(uname -r) build-essential dkms
After installing the essential packages, restart your Ubuntu on the VirtualBox and then try Step (1) and (2).
Bonus tips for a better experience with VirtualBox
For the best experience, we suggest you check out the following features of the VirtualBox.
1. Enabling Shared Clipboard
While working between the host and the virtual machine, you may feel the need for copying and pasting the text. For achieving this, you must enable “Shared Clipboard.”
To enable the feature, right-click on the virtual machine and select “Settings.”
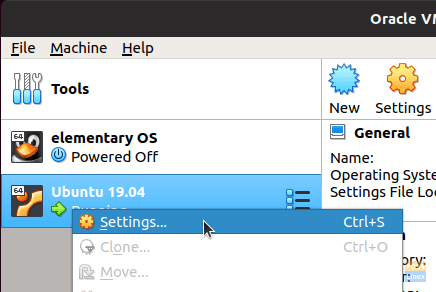
Next, click on the “Advanced” tab and select “Bidirectional” for both “Shared Clipboard” and “Drag’n’Drop.”
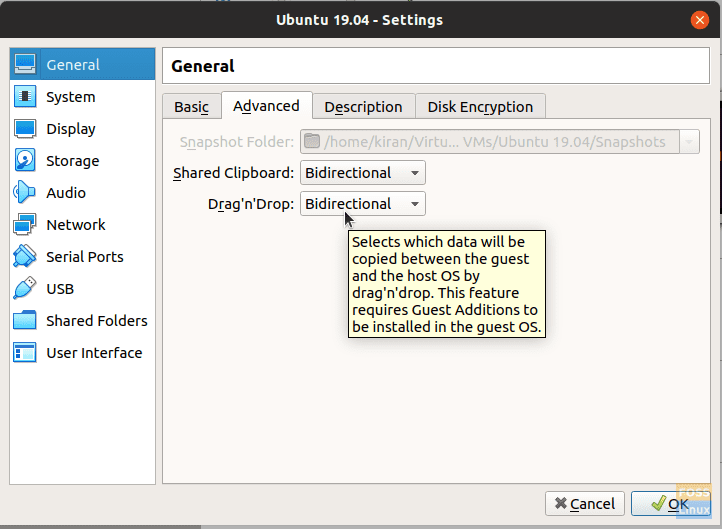
Shared Clipboard
Click, “OK.” You should now be able to share your clipboard between the host and the virtual machine.
2. Add a Shared Folder
Another significant enhancement is to create a folder on your host and share it with the virtual machine for transferring files between them.
Click on “Folder Settings” in the right-click options on the Virtual machine. Then, click on the icon to that says “Adds new shared folder.”
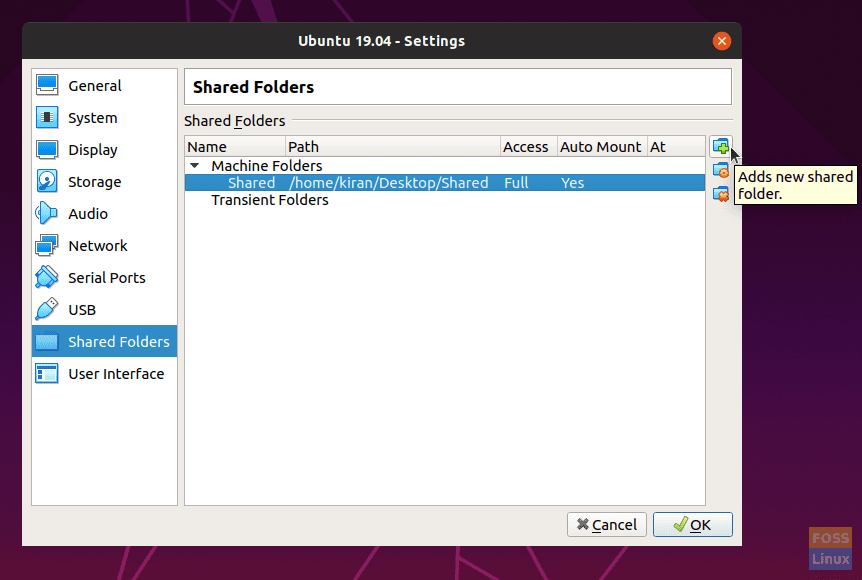
Add Shared Folder
Set a folder path on your host and provide the path in the “Folder Path” field. Check the boxes “Auto-mount” and “Make Permanent” to avoid the hassle of doing the same thing all over again and again. Optionally, you can select the “Read-only” option if you want.
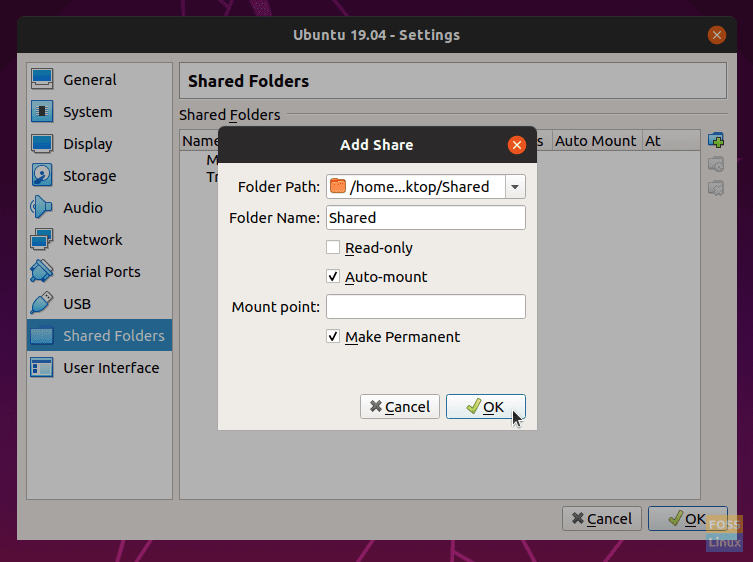
Setup Shared Folder
Click “OK” to save the settings. Launch File Manager, and you should see the shared folder.
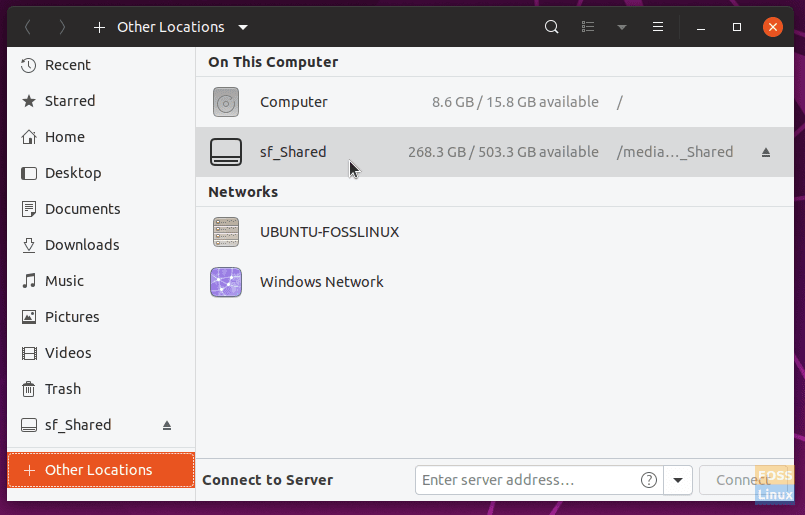
File Manager
Upon opening it, you will see a prompt for the root password of the virtual machine. Enter the password to view the shared content.
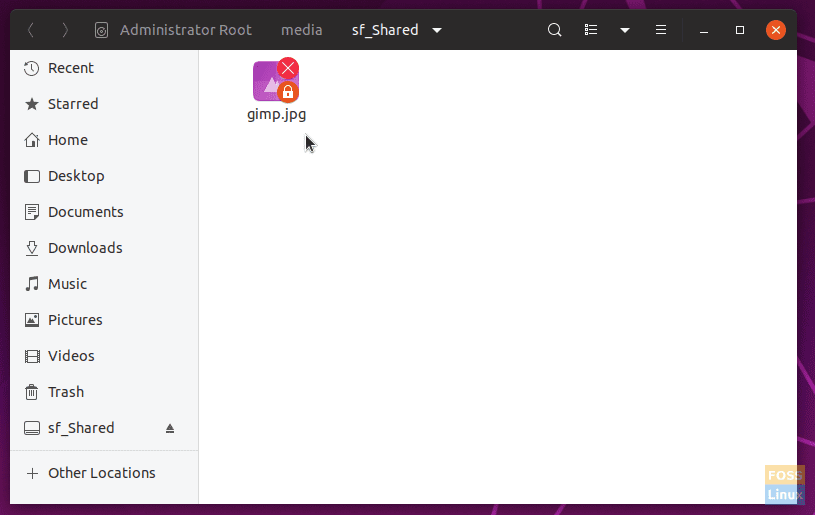
Shared Folder
Conclusion
This concludes our tutorial on installing VirtualBox and guest additions package on your Ubuntu machine. VirtualBox is a powerful tool to test new operating systems, notably different Linux flavors, without fiddling with computer partitions. VirtualBox Guest Additions also improve the experience of achieving a compelling performance by installing needed drivers for the virtual machine. As discussed, it also includes convenient folder sharing and clipboard sharing between the host and your virtual machines.

2 comments
Unfortunately, the version of VirtualBox is not compatable with Ubuntu 20.10. I tried installing the latest which is compatable with 20.04, but it failed to install.
I agree, the Guest Additions fail to install.