
If you’ve ever wanted to dip your toes into the Linux world, Ubuntu is one of the friendliest and most popular distributions out there. Pair that with VirtualBox, a robust virtualization platform, and you’ve got a winning combination to experiment with Linux without altering your existing system.
Personally, I find this method the best for exploring Linux. Why? Because it’s non-intrusive. You can play around, make mistakes, and learn without risking your primary operating system. Plus, there’s something magical about seeing an entire operating system running in a little virtual window!
Let’s get started. I promise to keep things simple, but thorough.
What is VirtualBox?
VirtualBox is a free, open-source virtualization tool developed by Oracle. It lets you create virtual machines (VMs) to run multiple operating systems on your computer simultaneously. Think of it as a computer within your computer.
I love VirtualBox for its simplicity and cross-platform availability. It runs on Windows, macOS, and Linux, making it versatile.
Why install Ubuntu on VirtualBox?
- Safe environment for learning: Break things without consequences.
- Experimentation: Test software, configurations, or server setups.
- Portability: Carry your VM on a USB drive.
Personally, I appreciate how VirtualBox doesn’t take over my system resources—it’s lightweight yet powerful.
System requirements
Before you begin, make sure your host machine meets these requirements:
- Processor: Modern dual-core or better. (I use an Intel i5, which works great.)
- RAM: At least 8 GB for a smooth experience. (Allocate 4 GB for the VM if possible.)
- Storage: At least 20 GB free space for the VM.
- Operating system: Windows, macOS, or Linux as the host OS.
If your system is underpowered, you can still proceed by tweaking settings, but expect a slightly laggy experience.
Step 1: Download VirtualBox
- Visit VirtualBox’s official website: VirtualBox Downloads.
- Select your platform: Choose the appropriate version for your OS (Windows, macOS, or Linux).
- Install it: Follow the straightforward installation wizard.
Pro tip: Download the VirtualBox Extension Pack for extra features like USB 3.0 support and shared folders.
Step 2: Download the Ubuntu ISO
- Head to the Ubuntu website: Ubuntu Downloads.
- Choose your flavor: For beginners, I recommend the latest LTS (Long Term Support) version for stability.
- Download the ISO file: It’s a disk image of the OS.
Fun fact: I always opt for LTS because I like stability over cutting-edge.
Step 3: Create a new virtual machine
- Launch VirtualBox.
- Click ‘New.’
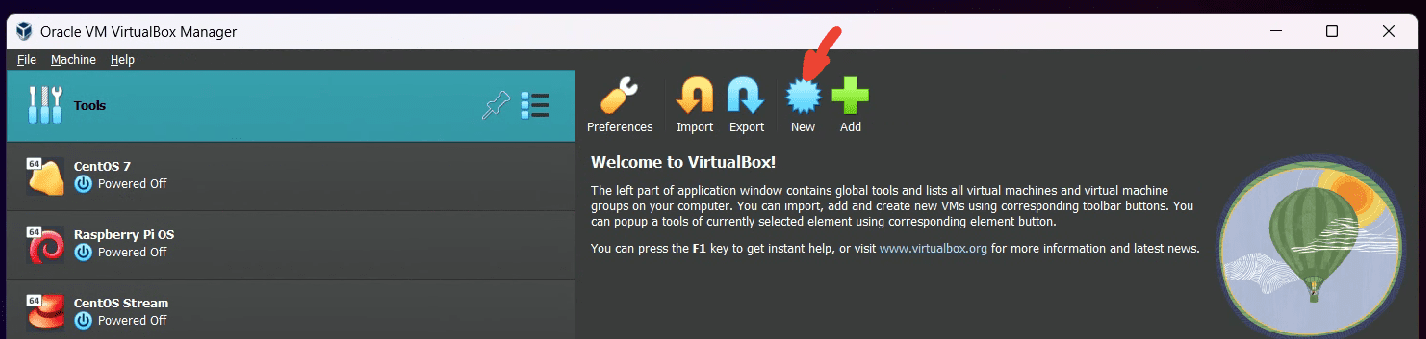
Virtualbox-Create New
- Name your VM: Something like “Ubuntu VM.” VirtualBox usually detects the OS type automatically. I recommend to turn on the option “Skip Unattended Installation”. It feels more engaging and ensures everything is set up exactly the way I want, which matters when I’m running tests or experimenting.
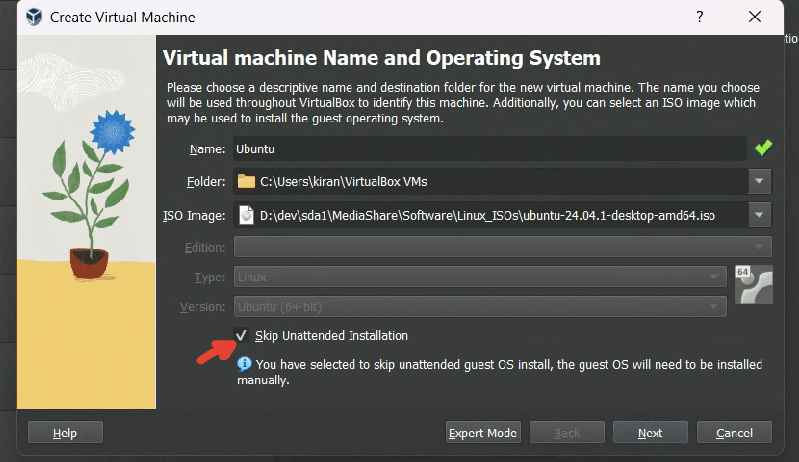
Name the OS and Skip Unattended Installation
- Allocate memory (RAM): I suggest at least 2 GB (2048 MB), though 4 GB is better if you can spare it.
- Create a virtual hard disk:
- Type: VDI (VirtualBox Disk Image).
- Size: 25 GB minimum.
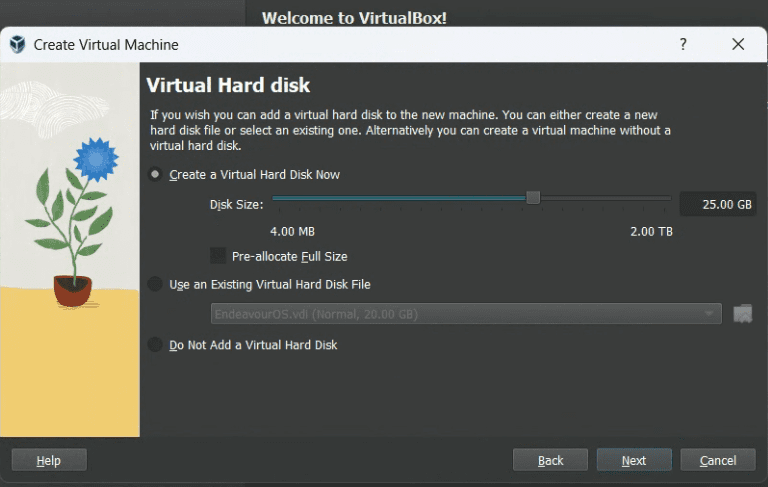
Virtual Hard disk setup
Step 4: Configure your VM
Before starting the VM, tweak a few settings:
- Select your VM and click ‘Settings.’
- System tab:
- Uncheck Floppy in the boot order (who uses floppy drives anymore?).
- Allocate 2 CPUs for better performance.
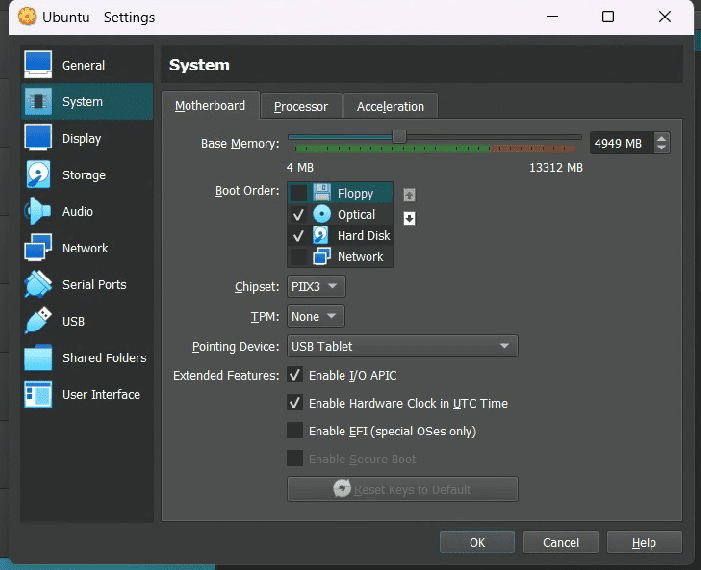
VirtualBox System Settings
- Display tab:
- Increase Video Memory to 128 MB.
- Storage tab:
- Click the empty optical drive, then choose your Ubuntu ISO.
This part is where my inner geek loves tinkering with options to see what delivers the best performance.
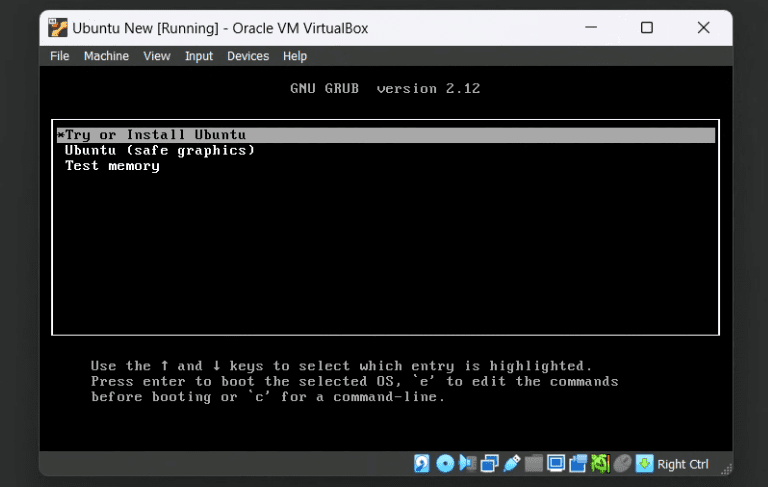
Step 5: Boot your VM and install Ubuntu
- Start the VM: VirtualBox will boot from the Ubuntu ISO.
- Select ‘Try or Install Ubuntu.’
Installing Ubuntu
- Follow the on-screen instructions:
- Choose your language.
- Keyboard layout: I stick with the default (English US).
- Updates: Select “Normal installation” and “Install updates” if you have a good internet connection.
- Partitioning: Go with the default option: Erase disk and install Ubuntu (it’s a VM, so no real disks are harmed).
- Create a user:
- Username: Pick something short (e.g.,
fosslinux). - Password: Make it memorable but secure.
- Username: Pick something short (e.g.,
This is where I usually feel a mix of excitement and nostalgia—watching Ubuntu install reminds me of my early Linux days.
Step 6: Post-installation tweaks
Once Ubuntu boots up, there are a few things to fine-tune:
- Install Guest Additions:
- Insert the Guest Additions CD (Devices > Insert Guest Additions CD Image).
- Follow prompts to install drivers for better resolution and shared clipboard support. If the automatic installation of Guest Additions doesn’t pop up in Ubuntu, you can install it manually with a few quick commands. I will explain it in next section.
- Update your system:
- Enable shared folders: Share files between host and VM.
Steps to manually install Guest Additions
- Update the package manager:
- Install required dependencies:
VirtualBox Guest Additions requires certain packages for compilation. Install them with: - Mount the Guest Additions ISO:
- In VirtualBox, go to Devices > Insert Guest Additions CD Image.
- This mounts the ISO as a virtual CD in your VM.
- Navigate to the mounted CD:
Replace
<version>with the version number shown in the directory name. - Run the installation script:
- Reboot your VM:
After installation completes, reboot the VM to apply changes:
Verifying the installation
Once rebooted, check if Guest Additions features (e.g., dynamic screen resizing, shared clipboard) are working.
Note: If the mounted ISO isn’t detected, ensure VirtualBox Extension Pack is installed on the host machine.
Step 7: Start exploring Ubuntu
Congratulations! You now have a fully functional Ubuntu system running on VirtualBox.

Ubuntu Desktop
Explore the appearance settings, install apps, or even break things (intentionally). Virtual environments are forgiving, and you can always start fresh.
Common troubleshooting tips
- Low performance:
- Allocate more RAM or CPUs.
- Install Guest Additions for smoother graphics.
- No internet:
- Check the network settings in VirtualBox (use NAT).
- Mouse not working:
- Ensure Guest Additions are installed.
Final thoughts
Setting up Ubuntu on VirtualBox is an incredibly rewarding experience, especially for beginners. You learn a lot without compromising your primary OS. I personally enjoy using VMs to test software or learn commands. The beauty of Linux lies in its versatility, and VirtualBox amplifies that.
If you’ve made it this far, I hope you’re already enjoying Ubuntu. Remember, the Linux world is vast, so keep exploring!