
Mozilla Firefox is a free and open-source, internet-browser packaged in the default Ubuntu installation. If your Linux system lacks the Firefox browser for any reason, we’ll help you install the latest Firefox version.
Moreover, we’ll show you how to install the latest Firefox Beta version to stay updated on the developments going on in the dev community. Also, if you haven’t liked your installed Firefox or whatever your reasons, we’ll help you uninstall it smoothly.

FireFox Browser
This article will cover two methods of installing Mozilla Firefox. The first method is to install a stable, stable version. The second method is to install a beta version still under testing and not suitable for production machines. We’ll also cover how to uninstall Mozilla Firefox just in case you need to remove it.
Method 1: Install a Stable Mozilla Firefox Version
If you need to install a stable and the most updated Mozilla Firefox version, then follow the below steps.
Step 1. First, ensure that your Ubuntu system is up-to-date using the following command.
sudo apt-get update
sudo apt-get upgrade
Step 2. To install a stable version from Mozilla Firefox.
sudo apt install firefox
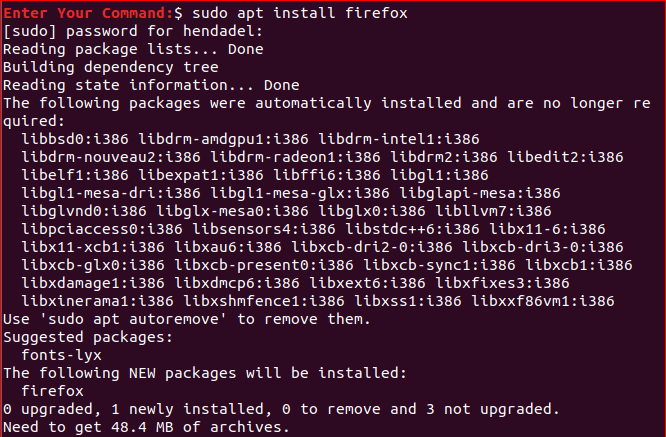
Download and Install Firefox
Step 3. Check Mozilla Firefox version, after it had been installed.
firefox --version

Stable Firefox Version
Method 2: Install a Mozilla Firefox Beta Version
If you need to test the new beta version of Mozilla Firefox, follow the following steps. It’s highly recommended to be careful while using this beta version of Mozilla Firefox, which is still in the testing phase so that it can crash anytime.
Step 1. Add the official Mozilla Firefox beta PPA to your Ubuntu system.
sudo apt-add-repository ppa:mozillateam/firefox-next
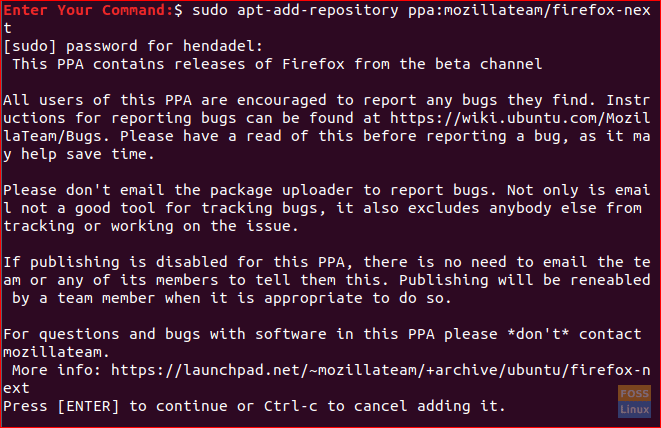
Add Repository for Firefox Beta
Step 2. Update your Ubuntu repository.
sudo apt-get update
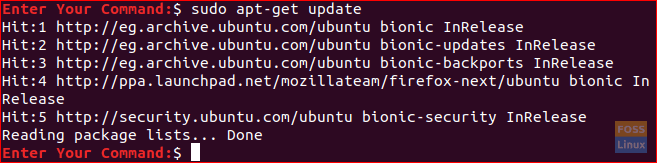
Update System Repository
Step 3. Upgrade your Ubuntu repository.
sudo apt-get upgrade
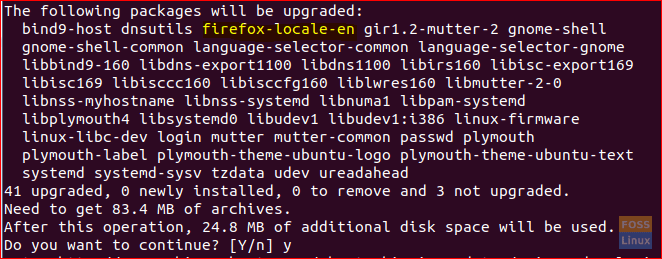
Upgrade your System
As you can see in the previous screenshot, the Mozilla Firefox application will be added to your repository.
Step 4. Now download and install the Mozilla Firefox application.
sudo apt install firefox
Step 5. Next, you can check the current installed Mozilla Firefox version.
firefox --version

Current Firefox Version
As you can see in the previous screenshot, the current version is the beta one.
Uninstall Mozilla Firefox From Your Ubuntu
Let’s consider uninstalling the current Mozilla Firefox application. To do so, follow the next steps to remove Mozilla Firefox from your Ubuntu system.
Step 1. To remove the Mozilla Firefox application along with any other configurations.
sudo apt-get purge firefox

Purge Firefox Completely
After the purge process completes successfully, you will get something like that:
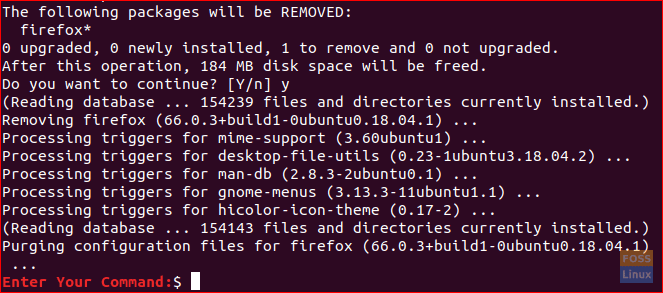
After Purging Firefox
Step 2. To remove the created Mozilla Firefox folder, which is located in “/etc/firefox” that contains the Firefox users profiles.
sudo rm -Rf /etc/firefox/
Altogether Remove Firefox Users Profiles
Step 3. To remove the Mozilla Firefox, downloaded Add-ons, which is located in “/usr/lib/.” The next command should remove two directories.
sudo rm -Rf /usr/lib/firefox*
Remove Firefox Installed Add-ons
Conclusion
That’s all about complete uninstallation as well as installing Mozilla Firefox on your Ubuntu PC. You’ve also learned how to install a developing beta version so you can look at what’s in store for the upcoming Firefox browser.
3 comments
I have followed all instructions to remove firefox, but even then when I type firefox in a terminal window, it still pops up.
I used your instructions.
Everything is short and simple.
Many thanks.
This needs to include the removal of firefox files from a user’s login.