Solus is one of the fastest growing free and open source Linux distributions out there. Unlike several new distributions that are merely a skin to Ubuntu, Solus is built from scratch and so I believe it has a solid foundation to become a promising distro. Their development team is actively working on it on daily basis.

Solus is released as a rolling distribution which means you will have to install the OS once and it will get updated lifetime. There is nothing like End-of-life (EOL) for rolling distributions unlike standard distributions that have a set EOL when updates will be stopped and a new version will have to installed.
Install Solus on your PC
Prerequisites:
- Create a Solus Live USB drive
- Prepare your PC to install Linux. I strongly recommend you to first create the ext4 and linux swap partitions before you start installing Solus. This will make you organized and prevent you from accidentally formatting or overwriting data.
STEP 1: Boot into Solus Live USB drive, and select ‘Start Solus’.
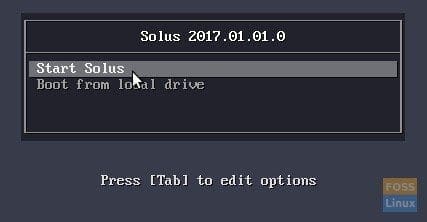
Boot into Solus Live USB Drive
STEP 2: Click on ‘Install OS’ icon on the panel.

Click ‘Install OS’ on the Panel
STEP 3: Click ‘Install Solus to disk’.
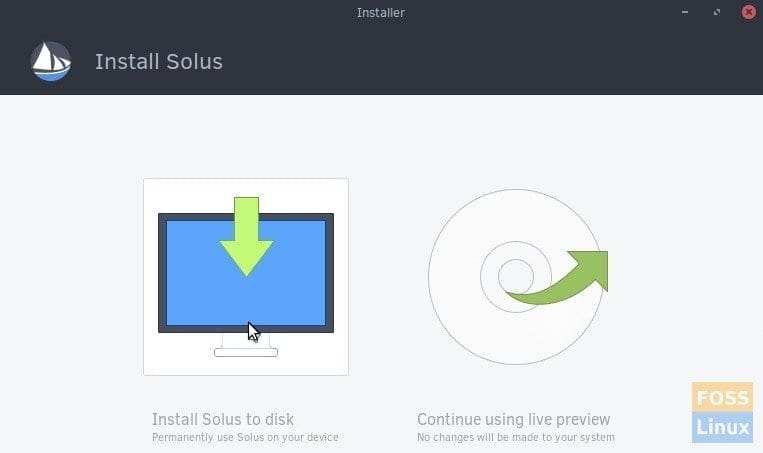
Install Solus
STEP 4: Choose a language and click ‘Next’.
STEP 5: In the next window the installer will ask you your location. Don’t worry, it’s only needed to check the best server to download updates while installation is in progress. You can check the box ‘Find my location automatically’ so that you can save time in manually selecting your location. If you are on VPN or something, you may leave this option unchecked and enter your location manually in next step.
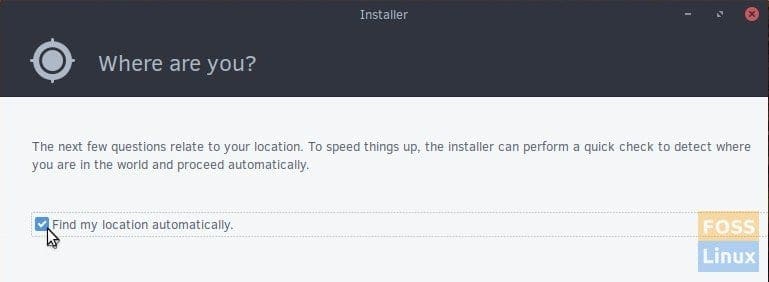
Location Information
STEP 6: In the next step you will have to select the keyboard layout.
STEP 7: Enter your timezone and click ‘Next’.
STEP 8: In the next step, you will have to select where to install Solus. If you have followed our prerequisites section, you should already be having the ext4 partition and linuxswap space set. Select option that says ‘Assign mount points to partitions you have previously created. These must already exist to launching the installer. If you modify them, please restart the installer‘. Click ‘Next’.

Install Solus by manually specifying partitions
STEP 9: Click on the Mount Point column under each root partition and allocate ‘/’ and ‘swap’.
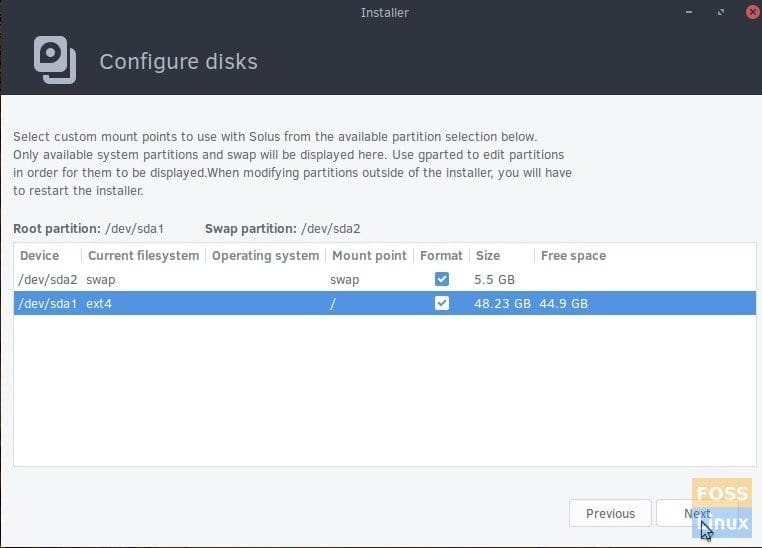
Confirm Mount Point and SWAP
STEP 10: Enter the name of the PC. This is the name used on the network. Bootloader typically goes to the top level of the hard disk and not on any partitions. Click ‘Next’.
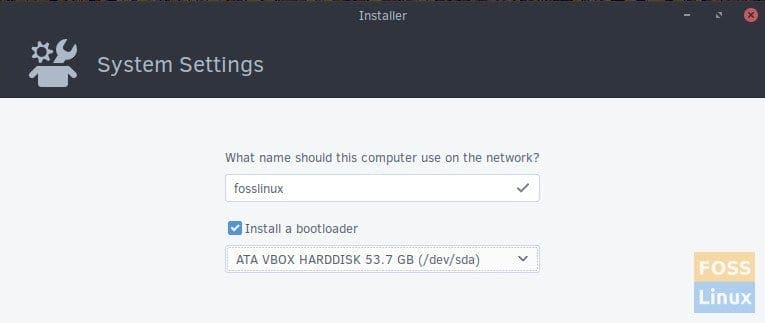
Confirm Bootloader location
STEP 11. Enter the user profile details. The administrative capabilities user password will be same as root password. Click ‘Add now’ and then ‘Next’.
STEP 12: If you wish you can add multiple user profiles by clicking on ‘+’ icon, but you can do it later on after setup is complete. Click ‘Next’.
STEP 13: Finally the installer will show summary of the things you have configured until now. It’s good idea to check them before you hit ‘Install’.
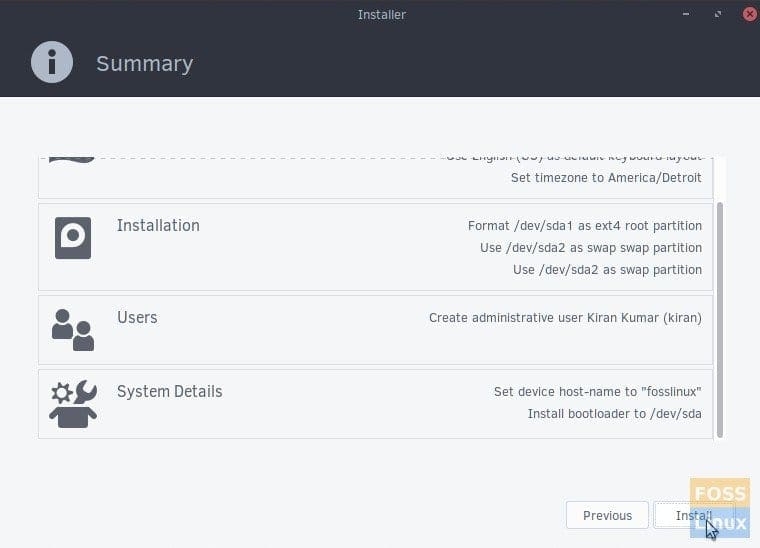
Summary of configured things until now
STEP 14: Grab a coffee and relax for 10 to 20 minutes while Solus is installed. After installation is complete, you should see a prompt to restart the computer. You may now unplug the Solus Live USB drive and then go ahead and click ‘Restart’.
STEP 15: Select ‘Solus’ from boot menu. Welcome to Solus!
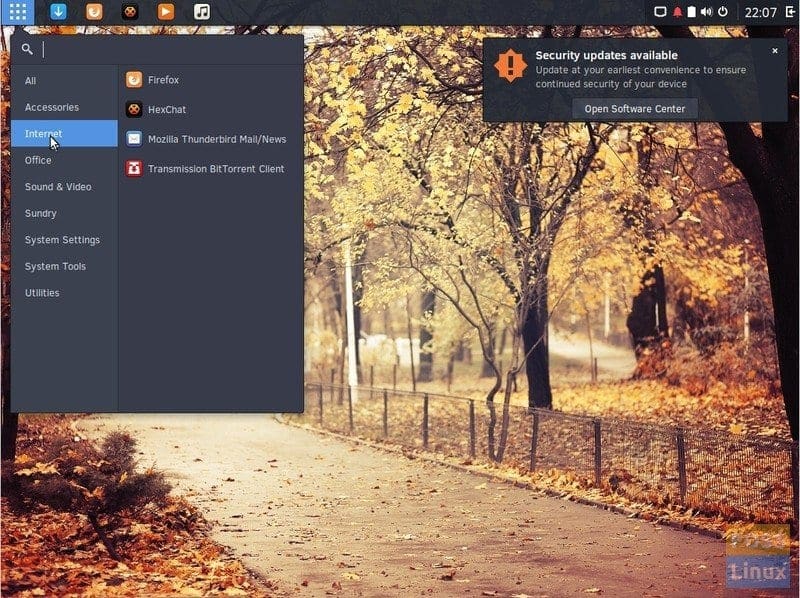
Solus desktop


2 comments
After selecting disk partition, it is showing cannot find valid bootloader (MBR disk)
Thank you for your time developing such article.