Boot-Repair utility is a free & open-source utility that lets you fix and recover the GRUB bootloader. It can reinstate those lost operating systems for you. Earlier, we published a detailed post on the utility and how to install it on Ubuntu, Linux Mint, and elementary OS.
Now, we shall see more options to use Boot Repair. You can run it in two ways:
- The first method is to install Boot Repair on your PC that was already published.
- Secondly, you can make a bootable Boot Repair Live USB drive.
In this article, we shall look into option two on creating a bootable Boot Repair Live USB flash drive. I recommend to create a disk and keep one readily available just in case you have it when you need it the most. You never know when disaster strikes.
There is more to it than just a Boot Repair. The live USB desktop comes loaded with not only the Boot-Repair utility, but also other handy utilities like GParted, OS-Uninstaller, Synaptic Package Manager, Firefox web browser, LX Terminal, and File Manager. It’s a customized version of Lubuntu OS running in your USB flash drive! Since there is the Synaptic Package Manager, you also open to those thousands of other utilities.
Create a Bootable Boot-Repair USB disk drive in Ubuntu, Linux Mint, and elementary OS
STEP 1: Plug in a blank USB flash drive of at least 1 GB capacity to the PC.
STEP 2: Download Boot-Repair ISO image.
Download Boot-Repair ISO image (64-bit)
Download Boot-Repair ISO image (32-bit)
STEP 3: I recommend to use ‘GNOME Disks’ utility to write the bootable image to the USB flash drive. Ubuntu and Linux Mint ships with this utility pre-installed. Elementary OS users first need to enable PPA and then use the following commands in terminal to install the gnome-disks utility.
sudo apt-get install gnome-disk-utility
STEP 4: After installation is complete, right-click on the downloaded boot-repair-disk-64bit.iso file and select ‘Open With’ > ‘Disk Image Writer.’
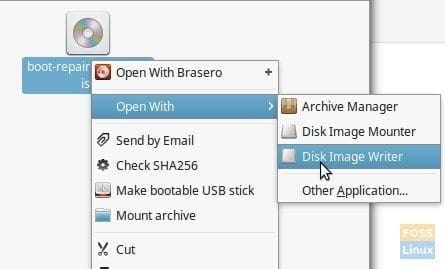
GNOME-Disks Write Image
STEP 5: Make sure to select the USB flash drive in the ‘Destination.’
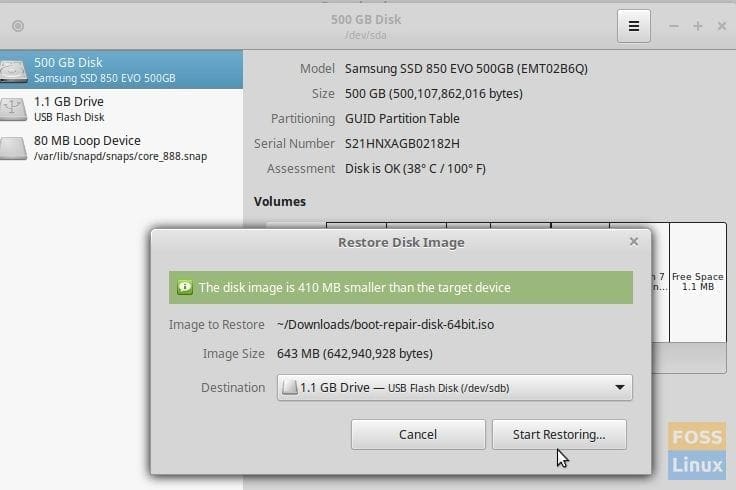
Select the USB drive in the Destination field
STEP 6: Click ‘Start Restoring…’ and wait for the process to finish.
Your Boot Repair Live USB flash drive should be ready!
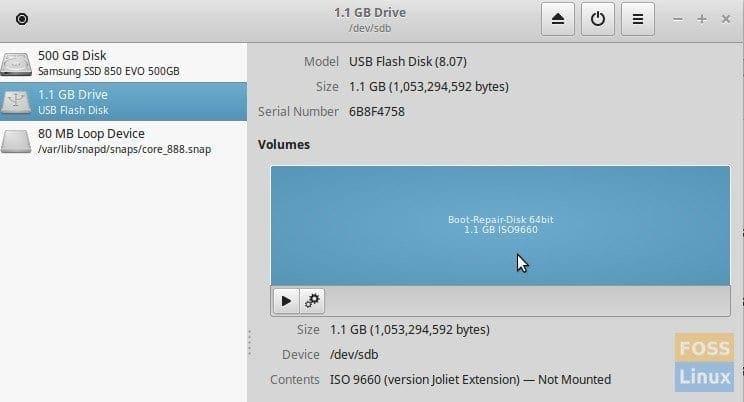
Boot-Repair USB Flash Drive is Ready!
You can plug in this USB flash drive to your computer at startup and boot into it. You will have to enable UEFI mode in BIOS settings. You will have to search in your computer manufacturer website to know how to boot into BIOS and enable the UEFI mode.
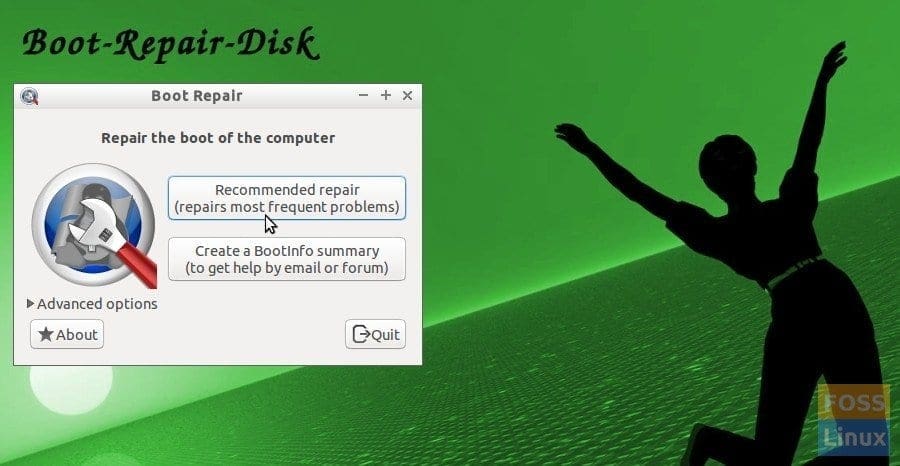
Once you boot into the flash drive, you should be taken to the Boot Repair live desktop, where you can fix your GRUB 2 boot problems. It reinstalls the GRUB bootloader.
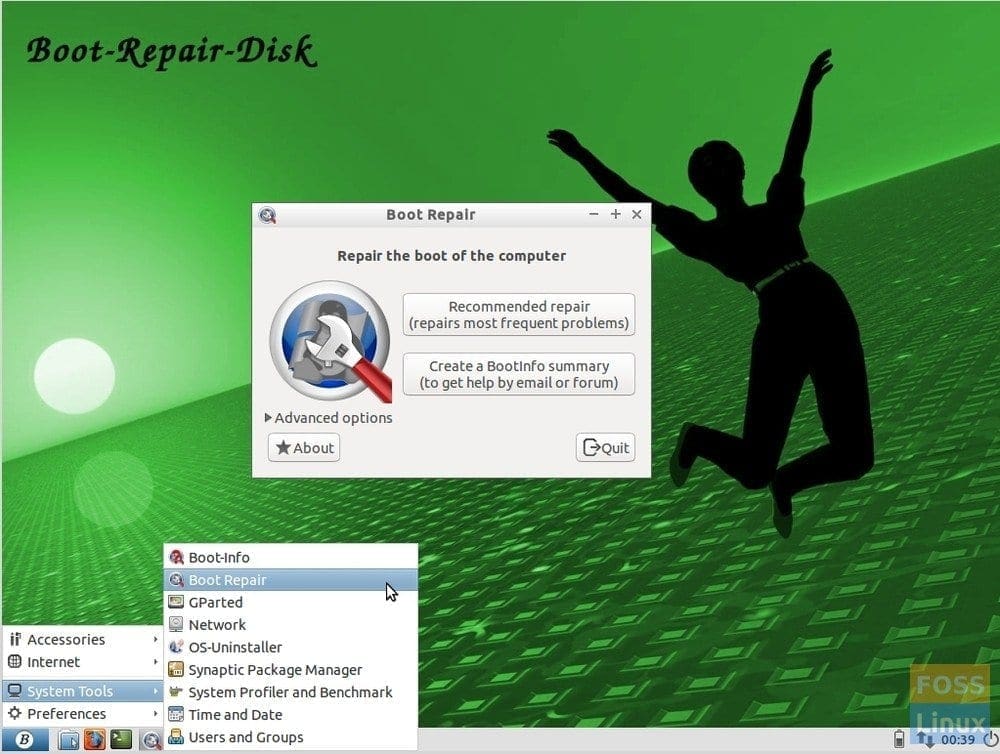
Boot-Repair Live USB Desktop

4 comments
Many thanks
My cinnamon desktop crashed months ago but I am still able to use the computer without it but I cannot open a terminal to type anything. I am a novice but liked the mint distribution better than the win10 that came with the computer but kept crashing. The mint was fine until I did an update. I couldn’t recover from that. I did see where certain display drivers may be the problem but my systen doesn’t use those drivers anyway. I can to this page hoping I could download a bootloader to a USB that would help fix my problem on boot up. Do you know of anything that can do that?
Thanks
Thank you!
If you have Windows (dual boot or another computer), I highly recommend using Rufus to create your bootable USB from any ISO image. It works seamlessly and has never given me any problems. It’s open source and available from Sourceforge.