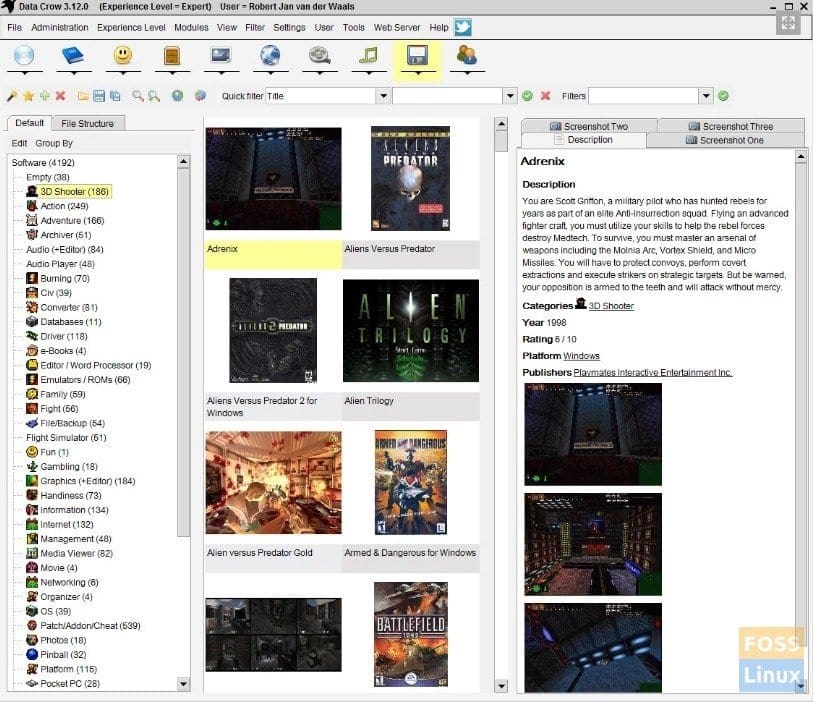
Data Crow is the ultimate media cataloger and media organizer. It lets you manage all your media collections in one place, including books, software, games, movies, and so on.
It connects to an online service to get the information on your cataloged items. Coming to media support, you can import information from AVI, DIVX, XVID, MP3, MP4, OGG, JPG, SVG, PNG, and many other formats. If you borrowed a book from your public library or friend, you could input the info in the Loan Administration section that lets you track when they should return or who has borrowed your items.
If that’s enough, you can even run your server and allow your family and friends to view the information via the web or a full Data Crow client! Data Crow is a 100% free, open-source software (FOSS) that can be installed on your Linux distro.

Data Crow User Interface
Install Data Crow in Ubuntu, Linux Mint, and elementary OS
Data Crow is written in Java. Therefore before installing it, you must have Java SDK installed. Most recent Linux distros come pre-loaded with Java, but to make sure, check Java installation as follows:
Check Java Installation
Elementary OS users first need to enable apt-get before proceeding further.
STEP 1: Launch ‘Terminal’ and run the following command to update the index of repository sources.
sudo apt-get update
STEP 2: Enter this command to check if Java is installed on your computer.
java -version
STEP 3: If it says the Java package is not installed, go ahead and install it using the below commands, else you can start installing Data Crow.
sudo apt-get install default-jre
sudo apt-get install default-jdk
sudo apt-get install openjdk-7-jre
Install Data Crow

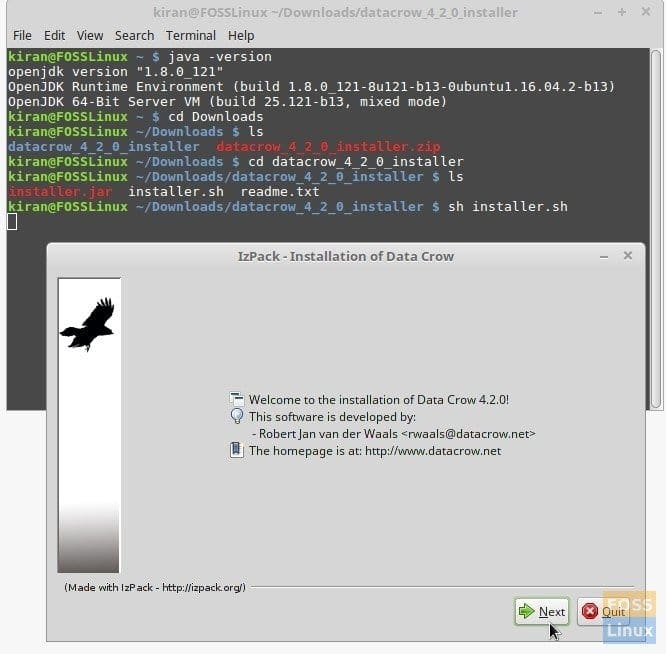
Data Crow Installation in Linux Mint 18.1
STEP 1: Download the Data Crow binary package and extract the content. I assume the downloaded file is in the ‘Downloads’ folder.
STEP 2: Launch ‘Terminal’ and navigate the ‘Downloads’ directory. Use the cd command.
cd Downloads
STEP 3: Use the list command to see the Directory’s contents and then navigate inside it. Make sure to replace the folder name accordingly.
ls

cd datacrow_4_2_0_installer
STEP 4: Finally, use sh command to initiate the installer.sh file.
sh installer.sh
Installation should begin now. Follow the simple on-screen instructions to complete the installation.

