First point release for Linux Kernel 4.10 got released today which means it’s now ready for production environment. According to the shortlog, a total of 21 files were changed in this release, with 259 insertions and 52 deletions.
According to the announcement made by Greg Kroah-Hartman, this is a ‘must upgrade’ for Linux Kernel 4.10 users. In this tutorial I will guide you on how to install this latest kernel, the easiest way using UKUU.
Install Linux Kernel 4.10.1 in Ubuntu 16.04
IMPORTANT: Linux Kernel upgrades are not always smooth. You should understand the risk and if this is your first Linux Kernel upgrade, you may find our couple of articles helpful:
- What is Linux Kernel, and Should you upgrade to the latest Kernel
- How to find out Linux Kernel version running on your PC
This guide shows Linux Kernel 4.10.1 installation on Ubuntu 16.04, but it works on Ubuntu based distributions including Linux Mint, elementary OS, etc.. I recommend using Ubuntu Kernel Upgrade Utility (UKUU). It makes the whole installation process so simple and effortless, which otherwise is a lengthy and painful ordeal.
STEP 1: Launch ‘Terminal’.
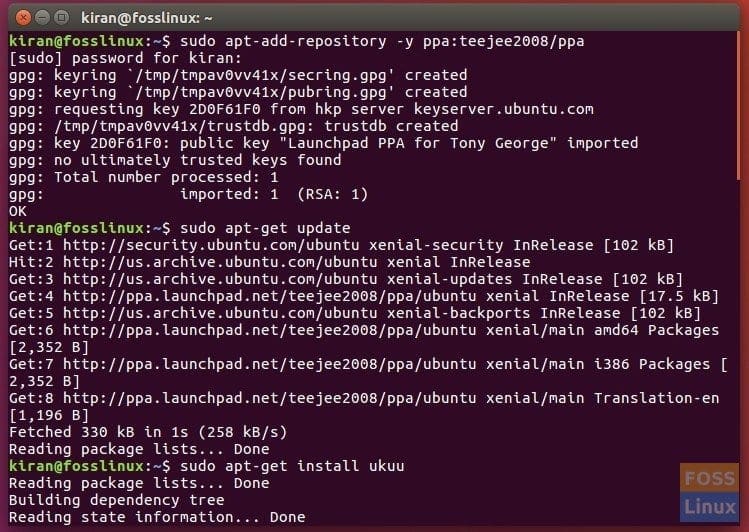
STEP 2: To install UKUU, add its repository source:
sudo apt-add-repository -y ppa:teejee2008/ppa
STEP 3: Let’s update the sources:
sudo apt-get update
STEP 4: Install UKUU
sudo apt-get install ukuu

Installing UKUU via Ubuntu Terminal
Pay attention to the ‘Terminal’ and enter ‘Y’ when prompted.
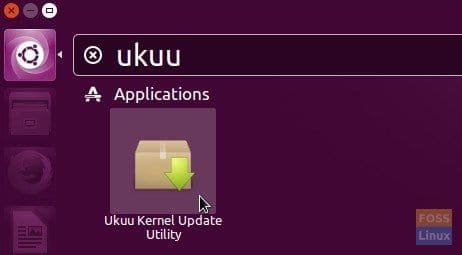
STEP 5: Launch UKUU from Unity Dash or ‘Applications’ in other distros.

Launch UKUU
STEP 6: The utility will now connect to official kernel servers and fetch the latest version of Linux Kernel for you. As of when this article was written, Linux Kernel 4.10.1 is the latest. Select it and then click ‘Install’.

Ubuntu Kernel Upgrade Utility
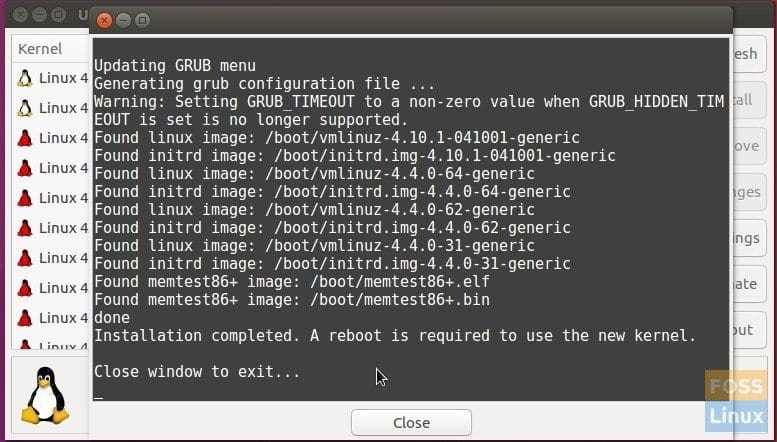
STEP 7: Enter root password and sit back and relax. It’s going to take some 20 minutes or more depending on your internet speed. The utility will download Linux Kernel 4.10.1 and install it right away!

Linux Kernel 4.10.1 Installation
STEP 8: After installation is complete, you need to close the UKUU and restart the PC.
STEP 9: You should see 4.10.1 in the GRUB Bootloader. After logging in, you can launch ‘Terminal’ and use uname command to check the Linux Kernel version.
uname -r

Linux Kernel 4.10.1 Successful Upgrade in Ubuntu 16.04
That’s it! How did your installation go? If for some reason the installation was doing more harm than good, you can still revert to previous kernel. New Kernel installation doesn’t wipe the old kernel. In such case you can have to reboot your PC and the select ‘Advanced Boot Options’ in GRUB. You can now select older kernel from the list displayed on the screen and boot into it. Use UKUU to remove the latest kernel. Good luck!


1 comment
Thanks Kiran It worked for me on the 18.04 LTS straight away