Java is one of the most popular programming languages in the world. It is still one of the best languages for creating powerful cross-platform applications as well as web applications. Even Android apps are created using Java. That being said, Java isn’t only necessary for programmers.
Many popular applications and software require Java to be installed, which is why even non-programmers need to have it in their system. As such, for this read, we have put together an in-depth tutorial on how to install OpenJDK (Open Java Development Kit), so you can run, as well as create, the Java applications. But first, let’s go over a few basic questions like – what is OpenJDK, and what features does it offer?
What is OpenJDK?
The Java Platform is currently owned and managed by Oracle. They have provided three different editions for the platform, namely the Standard Edition (SE), Enterprise Edition (EE), and Micro Edition (ME). OpenJDK is the open-source and free version of the Java Development Kit for Java SE.
It is managed by Oracle and covers pretty much all the necessary components to help you build and run Java-based applications. This includes the Java Class Library, the Java Compiler, the Java Virtual Machine (JVM), and the Java Runtime Environment (JRE).
Other than this, OpenJDK contains the main Source Code for all the other JDK projects in the market. This includes popular JDK options like Amazon Corretto and AdoptOpenJDK.
OpenJDK vs. Oracle Java: What’s the Difference?
With OpenJDK being actively maintained by Oracle, how is it different from the commercial version – Oracle Java? Here are a few areas of difference between the two Java implementations.
Release Schedule & Support
Oracle Java follows a three-year release cycle, whereas OpenJDK follows a much shorter six-month release schedule. It means with Oracle Java, you are getting long term support for its releases. However, with OpenJDK, support for the current version only lasts until the next version is released.
Licensing
Oracle JDK comes under the Oracle Binary Code License Agreement, whereas OpenJDK falls under the GNU General Public License v.2 with a linking exception.
Furthermore, as of January 2019, businesses are required to purchase a commercial license from Oracle to receive updates as well as continual support. However, you are free to use OpenJDK on all your commercial projects without paying a premium and still getting access to all the feature updates.
Development
Oracle Java is fully developed and maintained by Oracle Corporation. However, OpenJDK is jointly developed by Oracle, OpenJDK, and the Java Community – which includes notable tech-giants like Red Hat, IBM, SAP AG, Apple Inc., and many more.
Performance
As of Java 11, OpenJDK has 99% the same code base as Oracle Java, which means a similar level of performance in both instances.
But that being said, we do see Oracle Java having much better results when it comes to responsiveness and JVM performance. This is because Oracle puts more focus on its enterprise customers and thus, gives extra attention to stability.
On the flip side, since OpenJDK frequently comes out with more releases, they have a propensity of encountering new problems more often. You can check the OpenJDK community feedback page, and you will meet more user complaints about instability and performance issues.
Features
Oracle Java records a few extra bells and whistles over OpenJDK’s otherwise extensively long list of features and options. Some of the extra things you get with Oracle Java includes access to the Java Mission Control, as well as an Application Class-Data sharing functionality. You also get better renderers along with more garbage collection options.
Other than this, both OpenJDK and Oracle Java cover the same set of features. Here is a quick look at some of the notable features of OpenJDK 11 to give you an idea:
- Nest-Based Access Control
- Dynamic Class-File Constants
- Improved Aarch64 Intrinsics
- Flight Recorder
- ChaCha20 and Poly1305 Cryptographic Algorithms
If you want a more detailed look at all the OpenJDK 11 features and functionalities, we encourage that you visit their official page to access the complete documentation.
Installing OpenJDK on Ubuntu
Now that you have a basic understanding of what OpenJDK is and all its different features and functionalities, let’s talk about installing it on Ubuntu – more specifically – installing OpenJDK 11 on Ubuntu 20.04. To help you out, we have put together a detailed guide discussing every single step to help you properly install OpenJDK on your Ubuntu PC.
Step 1: Check to see if Java is already installed
OpenJDK often comes bundled in with Ubuntu. Therefore, you should first check whether or not your Ubuntu PC already comes with it pre-installed. But first, we recommend you to update the package index by entering the following command in the terminal:
$ sudo apt update
With all the packages updated, enter this command to check the version of Java installed on your system.
$ java -version
If Java is installed, then the above command will show the JRE (Java Runtime Environment) version number and the JDK (Java Development Kit Environment) version number.
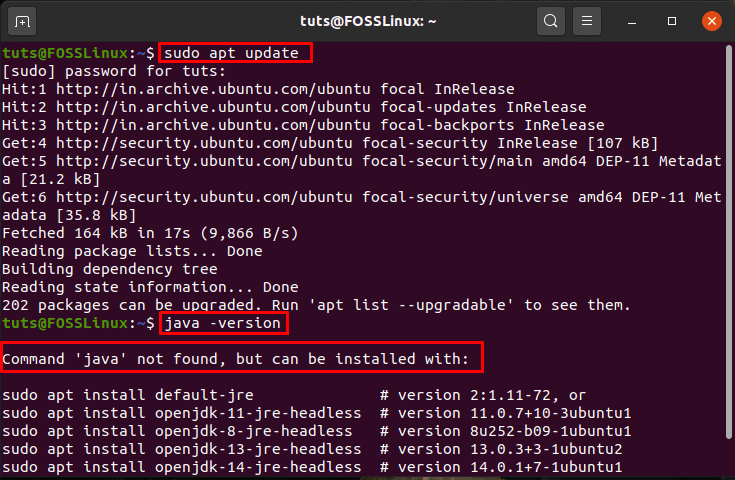
Checking Java Version
However, as you can see from the above image, it is showing a message that – “Command ‘java’ not found.” This means that Java is not installed on our Ubuntu PC, and we need to install it. So let’s get to it!
Step 2: Installing JDK and JRE on Ubuntu
To install Java on Ubuntu, first type in the following command:
$ sudo apt install default-jre
This is going to install the Java Runtime Environment (JRE) from OpenJDK 11.
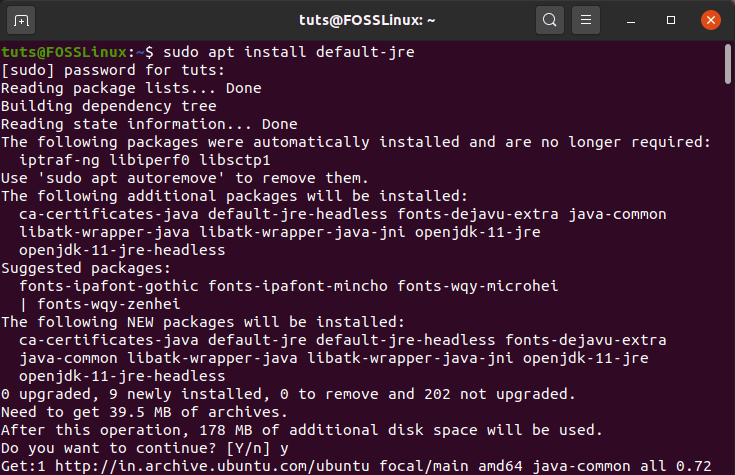
Installing JRE
If you only intended to install Java to run Java-based applications, then just installing the JRE is enough. It comes with the Java Libraries & Java Plugins, as well as the Java Virtual Machine (JVM), and Java Web Start to help you run all the Java applications.
However, if you are a developer and want to create your own Java applications, then you need the JDK (Java Development Kit) as it also comes with the Java Compiler and necessary debugging tools.
Now, to install the JDK from OpenJDK 11, you will need to enter this command into the terminal:
$ sudo apt install default-jdk
This is going to give you a similar output screen:
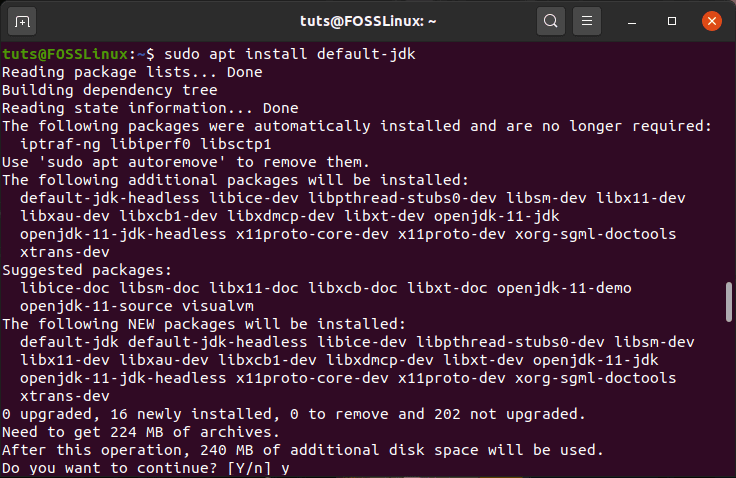
Installing JDK
All you need to do now is to check if Java got installed correctly on your system. To do this, we will again check for the version of Java installed on our system using this command:
$ java -version
At the same time, you should also check the version of the installed Java Compiler using this command:
$ javac -version
You should see an output screen showing you the version numbers like this:
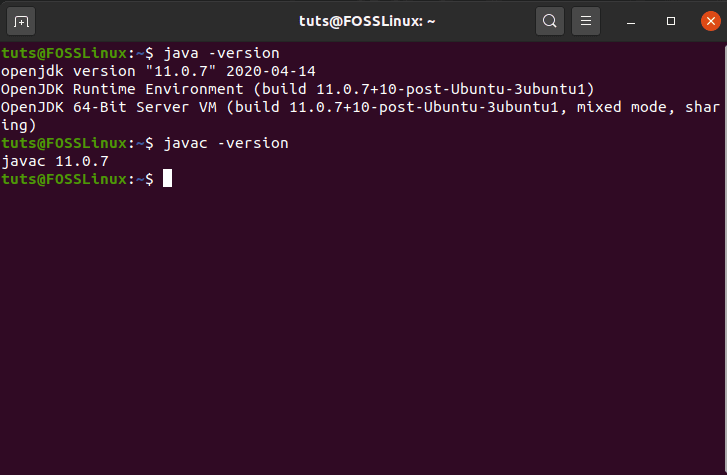
Checking Version of Java and Java Compiler
And that’s it! You have successfully installed both JRE and JDK from OpenJDK on your Ubuntu PC. You can now run, as well as create any Java application you like.
Uninstalling OpenJDK on Ubuntu
We talked about what is OpenJDK, it’s different features and functionality, and how to install it on your Ubuntu PC. Now to wrap things up, here is a quick guide on uninstalling OpenJDK from Ubuntu.
This is quickly done by entering the following command in the terminal:
$ sudo apt-get purge --auto-remove openjdk*
You will see a similar output screen, as shown below:
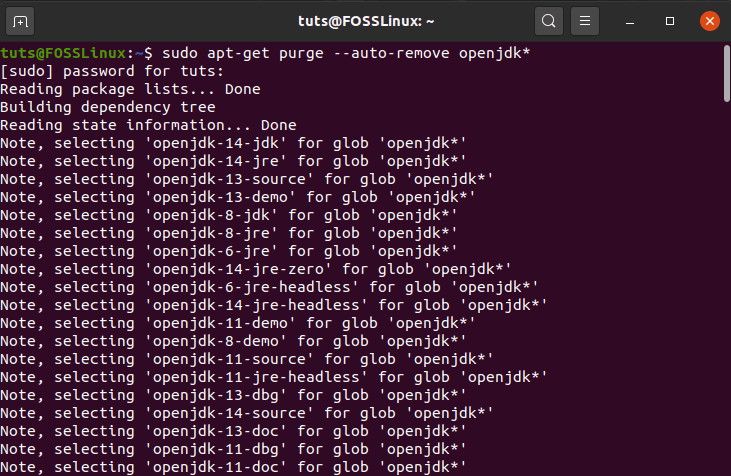
Uninstalling Java
The command will remove OpenJDK from your Ubuntu PC, along with all of its dependencies and configuration files. To check that OpenJDK is wholly removed from your system, you can again use this command in the terminal.
$ java -version
Just like the first time, you should see the line “command ‘java’ not found,” meaning Java is successfully uninstalled from your system.

