The primary and default administrator account in Ubuntu and other Linux distributions is the root account. By default, while you are installing some Linux distributions (such as CentOS and RedHat) on your machine, the installation wizard creates the root account automatically. It also allows you to set the root account password too.
However, in Ubuntu during the installation, the root account will be created in the background but without providing you the option to set the account password. In general, an account in Linux without password or with an empty one is considered to be a disabled account until it is manually enabled.
In this tutorial, we are going to show how to enable, disable, and set a password to the root account in Ubuntu. Needless to say that with the default installation, the root account is locked and disabled.
Before starting, you can check your root account password information using the next commands:
sudo grep root /etc/passwd

Check If Root Account Has Password
As you can see in the above screenshot, the “x” means that the account has an empty password.
sudo grep root /etc/shadow

Check If Root Account Has Password
In this screenshot, the “!” indicates that the password is locked. An account with a locked password means that the account user will not be able to use the password. In case the user types a right or wrong password, the user login attempt will fail.
Now to enable the root account and set a password to it, you can use one of the following three methods depending on your usage:
- Temporary Method.
- Command-Line Method.
- Command-Line and Graphical User Interface Method.
First Method: Temporary Enable/Disable Root Account
In this method, the root account will be enabled for a specific task. To allow the root account in this method, you can use the following command:
sudo -i

Enable The Root Account Temporary
In case you need to disable the root account, all you need is to log out of this session using the “exit” command.
exit

Logout From Root Account
Second Method: Enable/Disable Root Account Via Command Line
In this method, you will be able to enable or disable the root account through the terminal or the command line. But you will not be able to login to the root account through the graphical interface.
To enable the root account use the next command:
sudo -i passwd root

Set Password To Root Account
As you can see in the above screenshot, the previous command will allow the root account and also will let you set the root account password.
Now you can switch to the root account through the terminal as follows:
su - root

Switch to Root Account
To disable the root account in this method, use the following command:
sudo passwd -dl root

Disable Root Account
To make sure that you have disabled the root account, let’s try switching to it and see what happens:

Switching To Root Account After Disabling It
As you can see in the previous screenshot, you will face an authentication failed error after disabling the root account.
Third Method: Enable/Disable Root Account In Both Command Line and Graphical User Interface
In this method, you will be able to switch to the root account from the command line as well as the graphical user interface.
Step 1. To enable the root account use the next command:
sudo -i passwd root

Set Password To Root Account
Step 2. Now if let’s try to login through the graphical user interface and see what will happen:
Enter “root” in the username textbox.
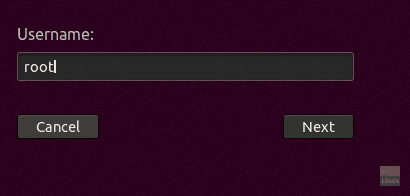
Login With The Root Account
Enter the root account password.
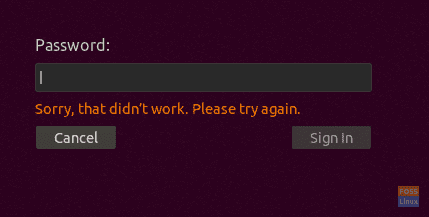
Error While Login To Root Account
As you can see an error will appear during login. The graphical interface has an additional security layer that prevents the root account from login unless you configure some other additional configuration files.
Step 3. To enable the root account login through the graphical user interface, we need to edit the next two files:
/etc/gdm3/custom.conf
/etc/pam.d/gdm-password
But first lets back up those configuration files:
sudo cp /etc/gdm3/custom.conf /etc/gdm3/custom.conf_backup
sudo cp /etc/pam.d/gdm-password /etc/pam.d/gdm-password_backup

Backup Configuration Files
Step 4. Now open the “/etc/gdm3/custom.conf” configuration file using your favorite editor.
sudo vi /etc/gdm3/custom.conf
Open custom configuration File
Under the “Security” section add the next line, like the below screenshot.
AllowRoot=true
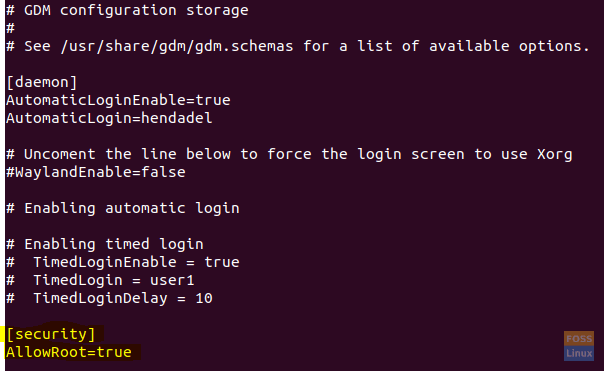
Edit custom configuration File
Save and exit the “custom” configuration file.
Step 5. Open the “/etc/pam.d/gdm-password” configuration file.
Open gdm password configuration File
Search for the below line and add a hash “#” at the beginning of the line, like the below screenshot.
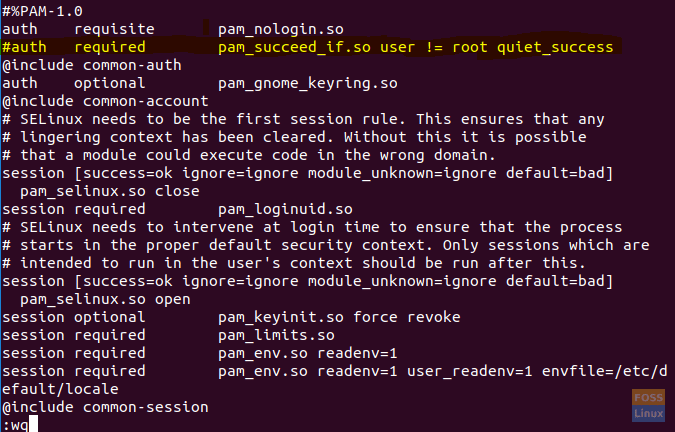
Edit gdm password configuration File
Save and exit the “gdm” configuration file.
Step 6. To apply the previous changes, you need to reboot your system using the next command.
sudo reboot -f
Step 7. After rebooting try to login using the root account.
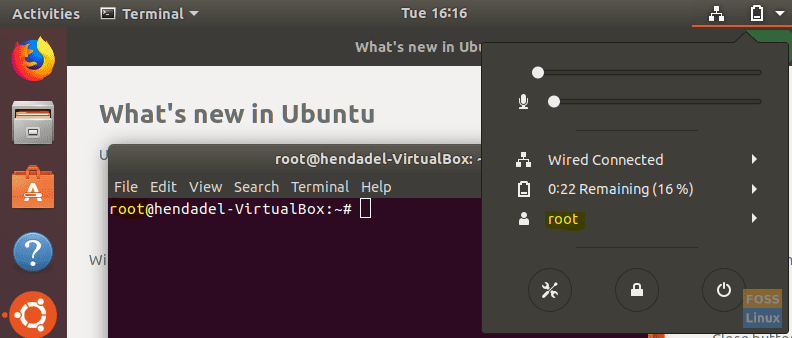
Root Account Enabled
Congratulations you have logged to root account using the graphical user interface.
Step 8. To disable the root account, use the same command as in the command line method.
sudo passwd -dl root

Disable Root Account
Step 9. Undo changes you have done in the two configuration files (or you can restore the original files from the backup one).
Remove the “AllowRoot=true” from the “/etc/gdm3/custom.conf” configuration file, like the below screenshot.
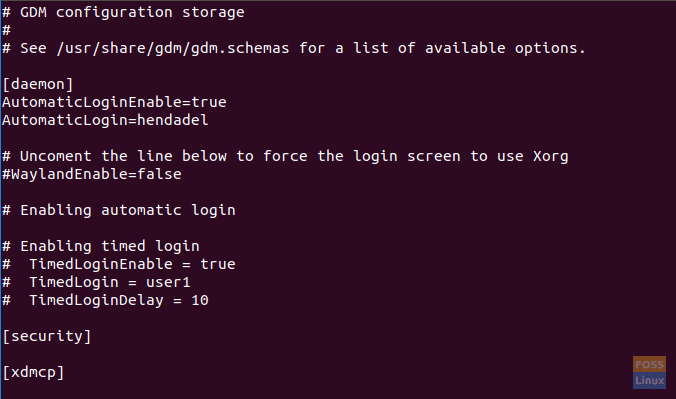
Edit custom configuration File And Remove Added Option
Remove the hash “#” sign from the “/etc/pam.d/gdm-password” the configuration file, like the below screenshot.

Edit gdm password configuration File And Remove Added Option
That’s it for now. In case you face any question, leave a comment, and we will be glad to help you.

