
Ever wanted to determine the characteristics of a media file? The default file properties of a media file given by the Finder app are fundamental, with no detailed data on the file. For a video asset, technical metadata includes info such as audio codec, resolution frame rate, aspect ratio, and a lot of other technical information. With technical metadata, users can make intelligent decisions about what to do next in their workflow. The asset can be transcribed to a standard format, resized, or even performed quality checks to ensure that it is in an acceptable format.
Media info is a popular free and open-source program that extracts technical metadata about media assets for many video and audio files in BSD, macOS, Linux, and Microsoft Windows. It provides a piece of complete technical information as well as tag information for video and audio files. MediaInfo can easily be integrated with other programs and uses the command line interface (CLI) and graphical user interface(GUI). As such, you can get the details of a media file from a Desktop or server system.
Here is a list of information given by MediaInfo:
General:
- Name of the media file, File size, Bit rate, Writing application, format, duration, and much more.
Video:
- Video format, format settings, Codec id, Width, Height, Display aspect ratio, color space, frame rate, format info, and many more.
Audio:
- The just installed audio format, codec id, sample rate, channel, compression rate, and more.
Media info supports the subsequent media formats.
- Audio: AIIF, OGG, WAV, DTS, M4A, AU, RA, MP3, AC3, AAC, and more.
- Video: MPEG-4, AVI, MPEG-1, MKV, WMV, Real, DivX, MPEG-2, and more.
- Subtitles: SAMI, SRT, ASS, SSA.
- Video Codecs: AVC, MSMPEG4, H.264, XviD, ASP, DivX.
Now that we need to inspect the exact properties of our audio and video files setting up MediaInfo is inevitable. Let us see how we can install this application on our Linux machine.
How to install MediaInfo on Linux
This software is packaged in the most famous Linux OS and is available in the default repos. Here are some commands to install this application in other Linux versions.
If you are an Arch Linux user, ensure you have enabled the (community) repo and then proceed to install MediaInfo using pacman as shown below:
sudo pacman -S mediainfo mediainfo-gui
Here is the command for the Debian users:
sudo apt-get install mediainfo mediainfo-gui
For CentOS and RHEl, first, enable the EPEL repository by running this command:
sudo yum install epel-release
Then install MediaInfo by issuing this command:
sudo yum install mediainfo mediainfo-gui
Then do run this command if you are a Fedora user:
sudo dnf install mediainfo mediainfo-gui
For openSUSE, run this command:
sudo zypper install mediainfo mediainfo-gui
For Ubuntu, first, enable the universe repo using this command:
sudo add-apt-repository universe
And then install MediaInfo using this other command:
sudo apt install mediainfo mediainfo-gui
That is that for the Linux installation phase of various Linux distros, let us proceed and see how we can now implement the installation on our Linux machine. In this guide, we will be using the Ubuntu version of the Linux distro. With that said, let us kick off with the installation phase.
How to install MediaInfo in Ubuntu using GUI
First, visit the Mediainfo official website. Clicking that link will redirect you to such a page:
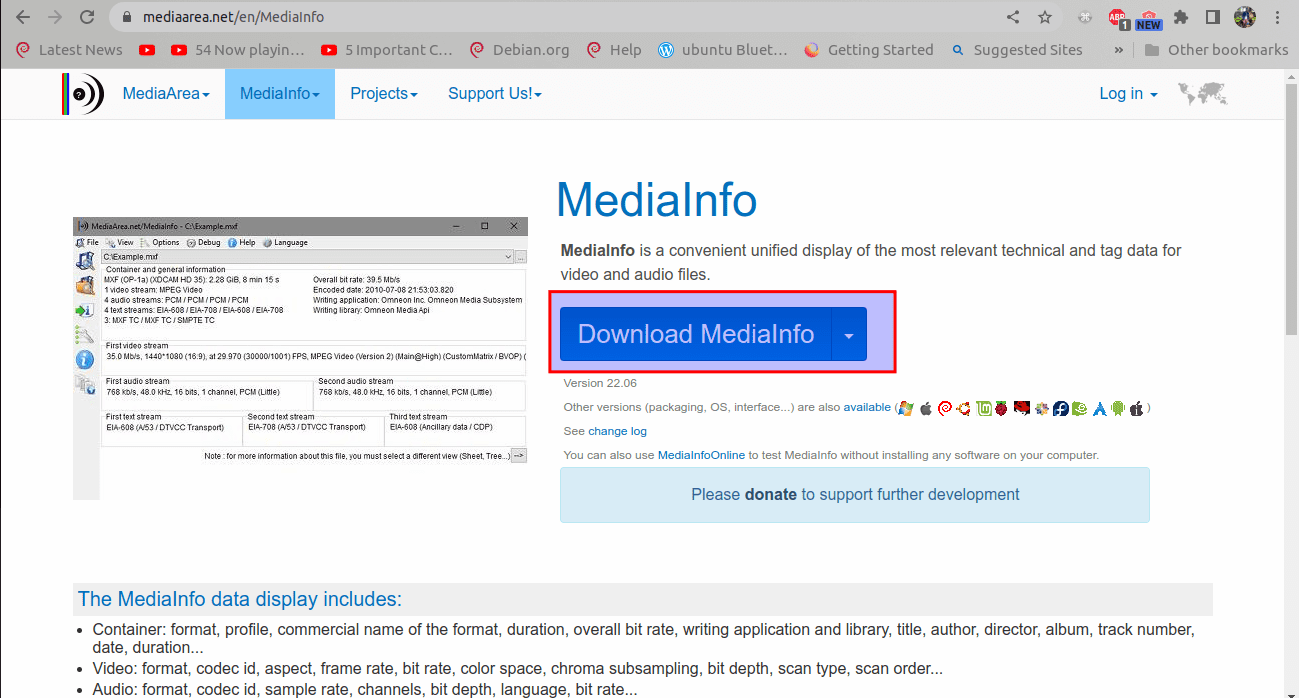
Download page
Here, you will click on Download MediaInfo. You will then scroll down to the operating system you are currently running, like in our case, Ubuntu:
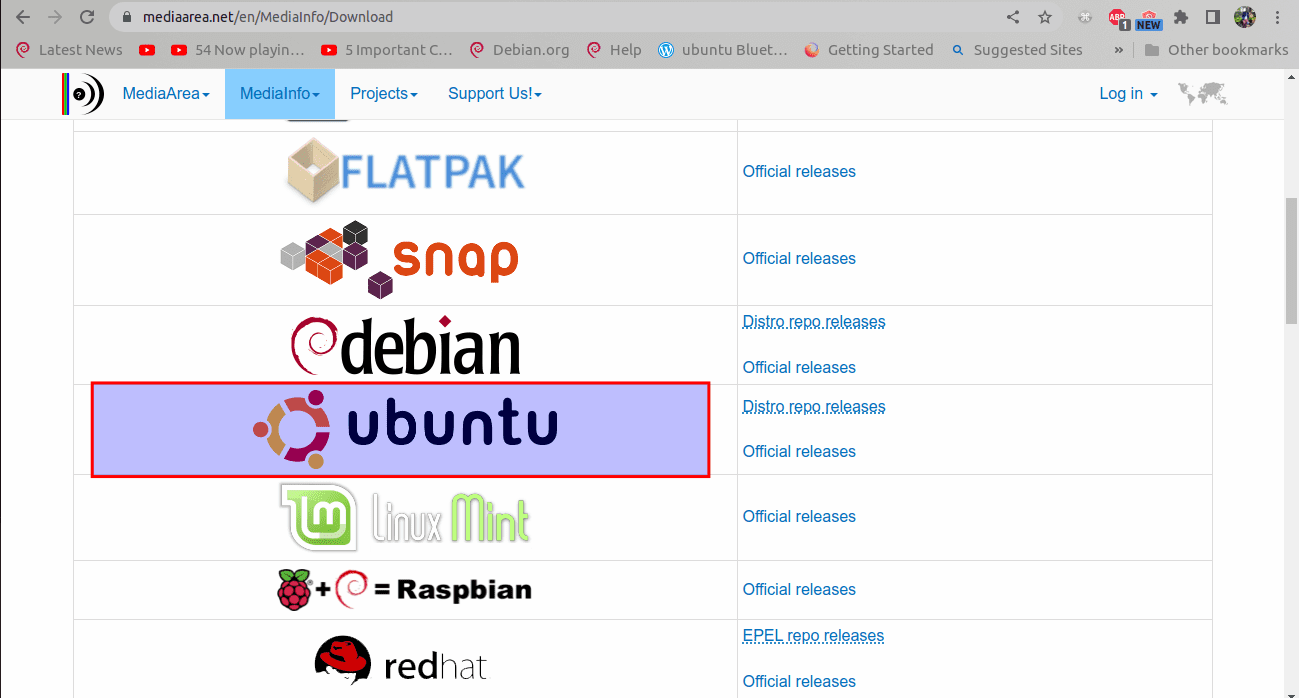
Select your operating system
Click on “Official releases.”
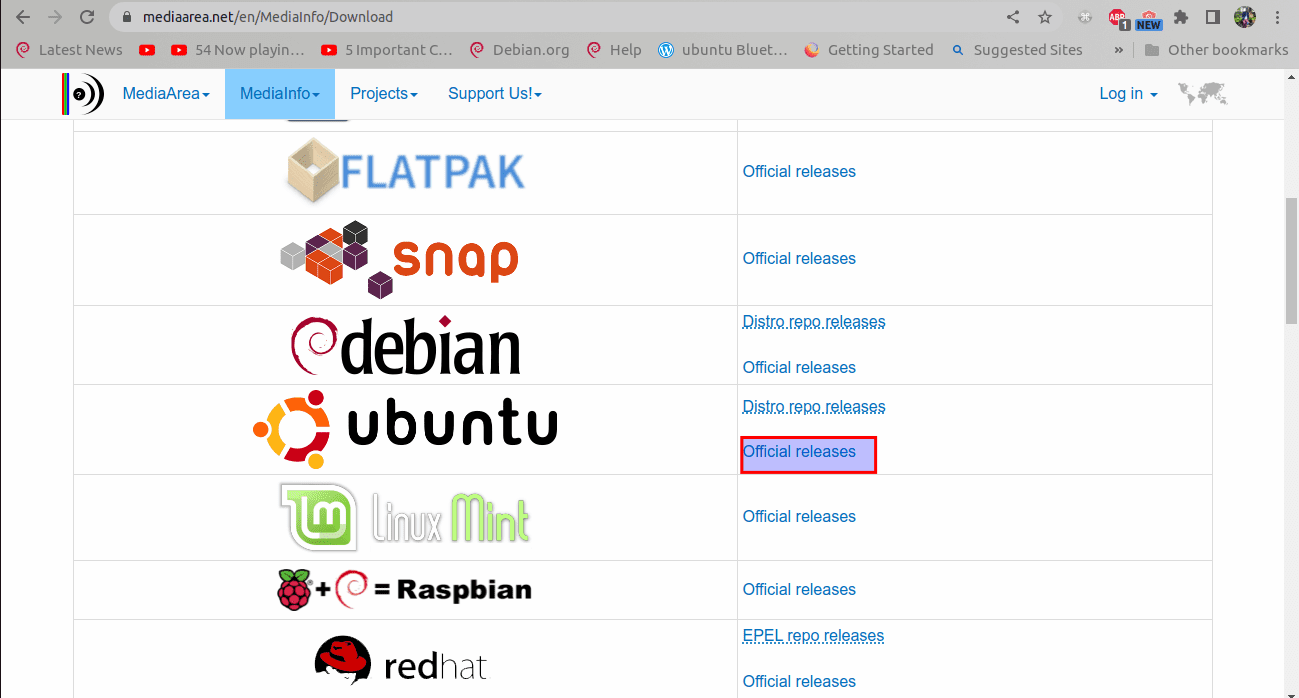
Click on official releases
This will then take you to a category download page of the MediaInfo package, where you have Ubuntu’s version, the Architecture of your machine, the interface, and the version of the MediaInfo you want to download. Again you should realize that the version of MediaInfo has options (the command line and the graphical user interface). Select the graphical for this event.
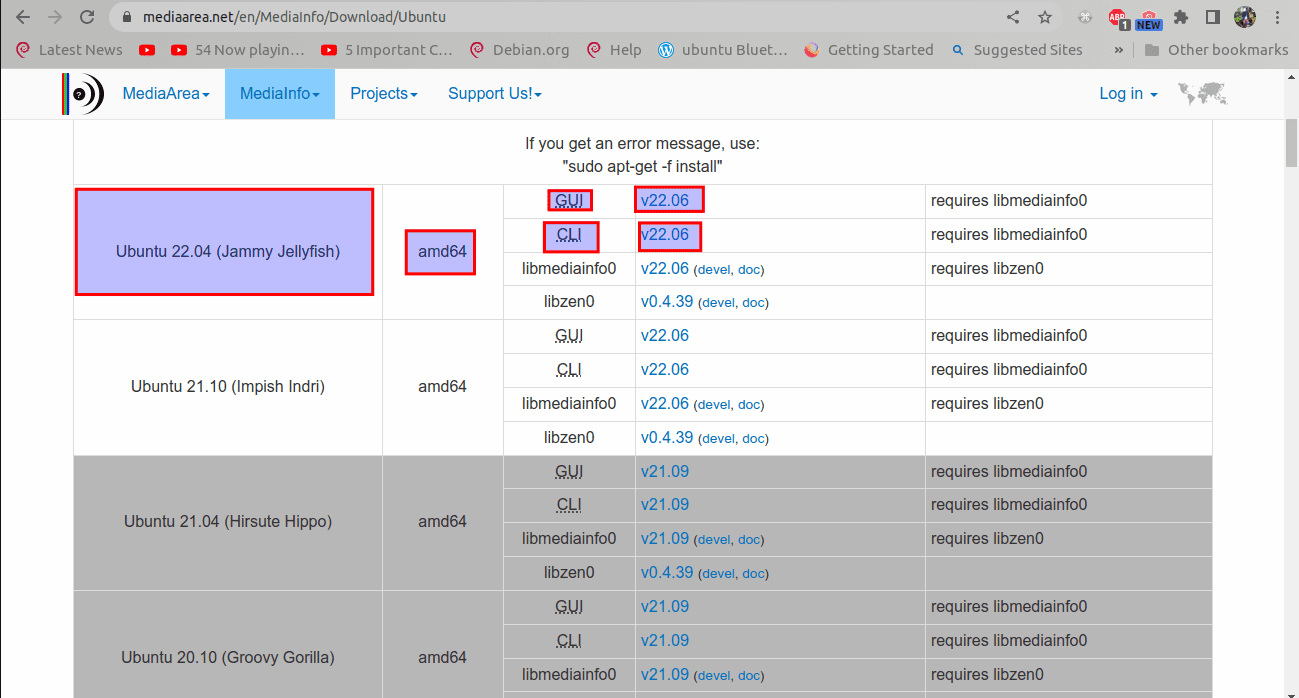
Category download page
Click on the version, like “v22.06” in this case, and the .deb package will download as shown below:

Download package
Now that we have downloaded the Mediainfo .deb file, we need to install it and to do this, navigate to the Downloads folder by clicking on your files directory, then go to downloads as highlighted below:
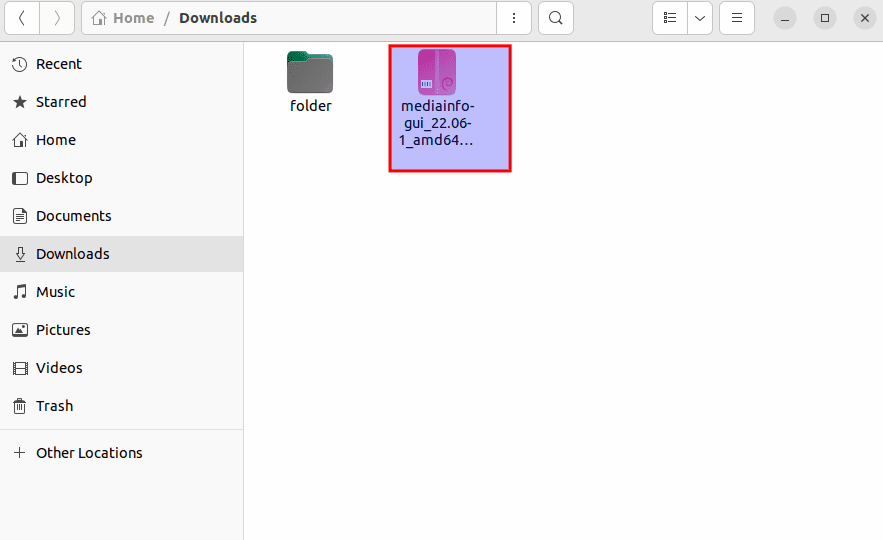
Downloaded package
Here, you should locate the .deb MediaInfo package we have to install.
Note: The Downloads folder is our default download section which may be different from yours in case you changed the default downloads location. As such, you will have to go to where you redirected your downloads to.
To install this deb file, first right-click on the .deb file. After that, select “Open with other Application” on the displayed context menu as shown below:
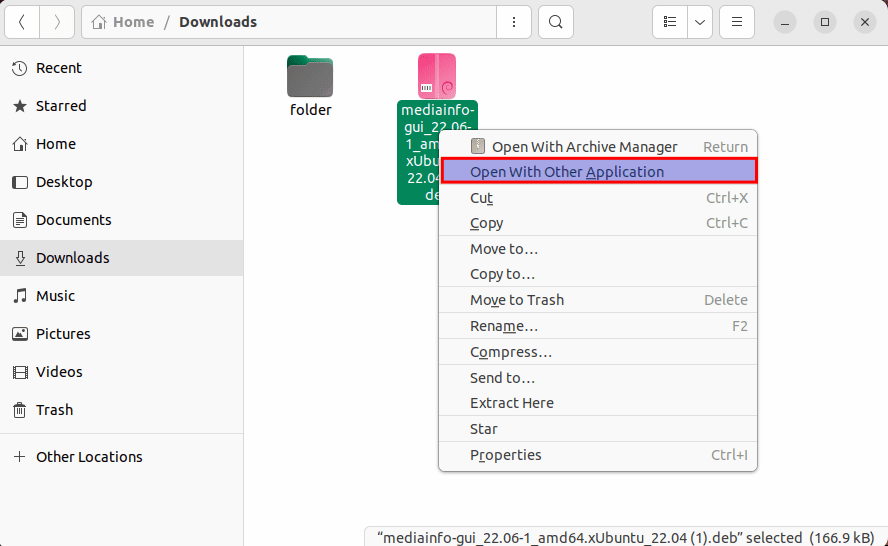
Right-click on the file
This will prompt a select application window; just look for “software install” as highlighted below:
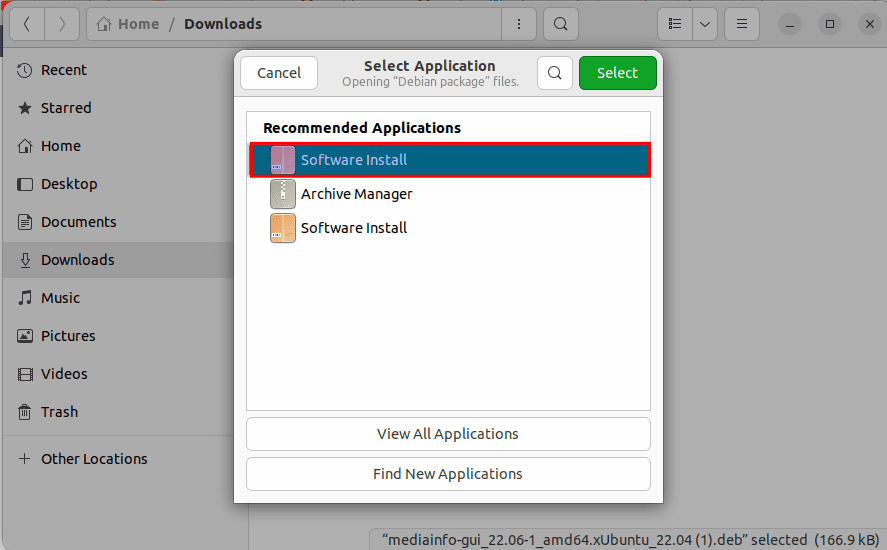
Select install with software
After that, click on the green highlight “select” button:
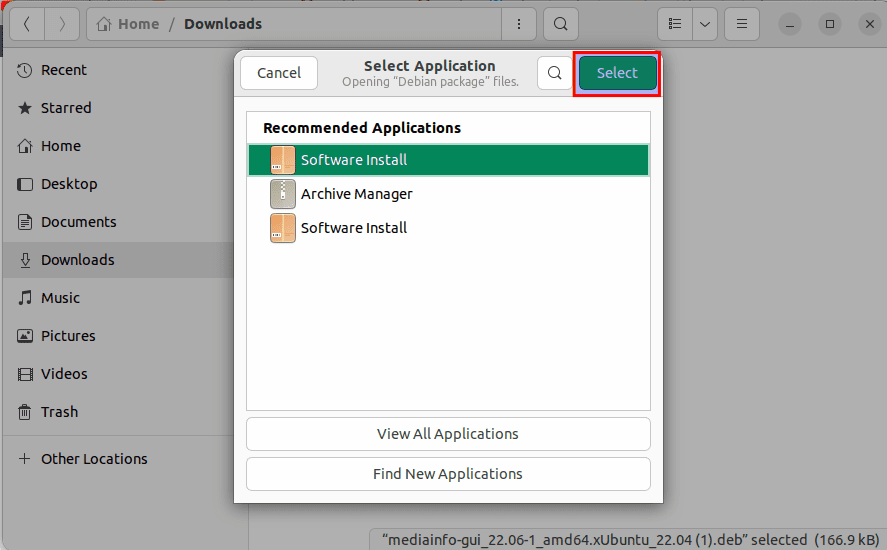
Click Select
This will open the software in Ubuntu as shown here; click on the install button to set up the software on your machine:
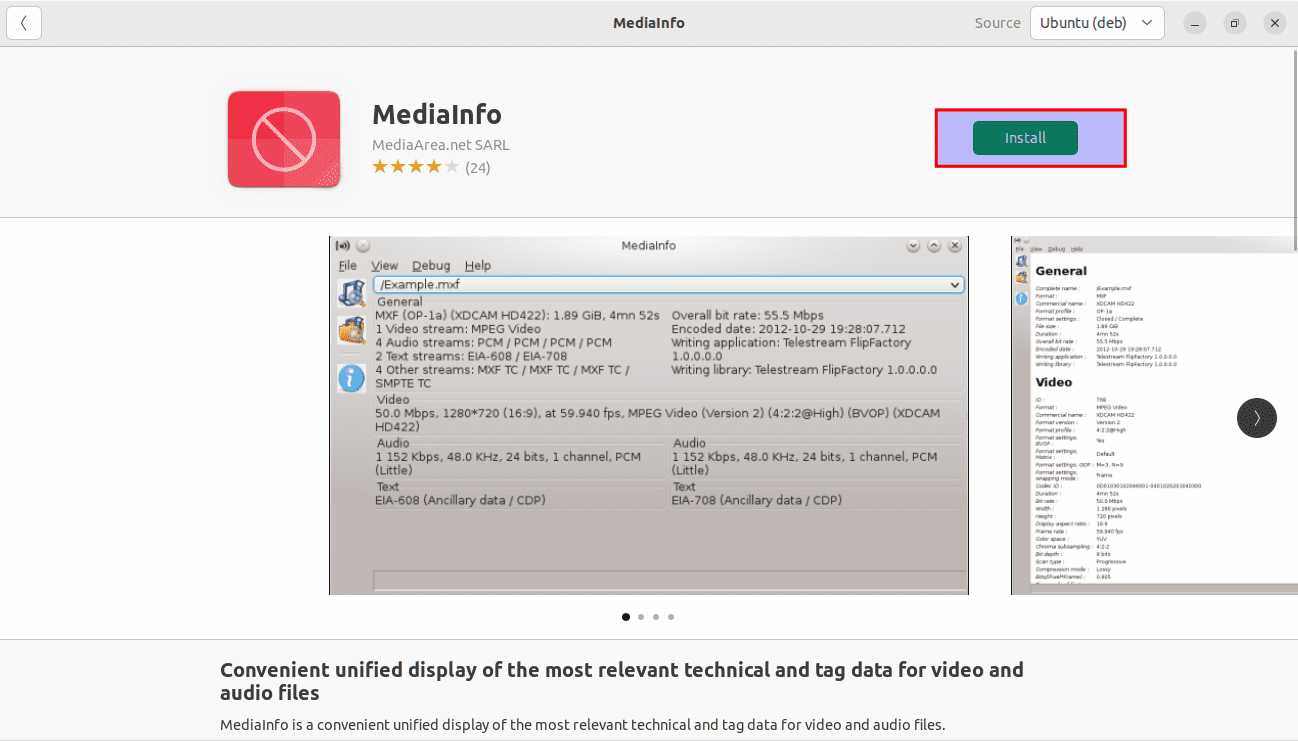
Click on install
An authentication window will appear after clicking the install button. Type in your PCs password and hit the authenticate button:

Authentication window
Be patient as the installer takes over. When you see an “open” button, the installation was successful:
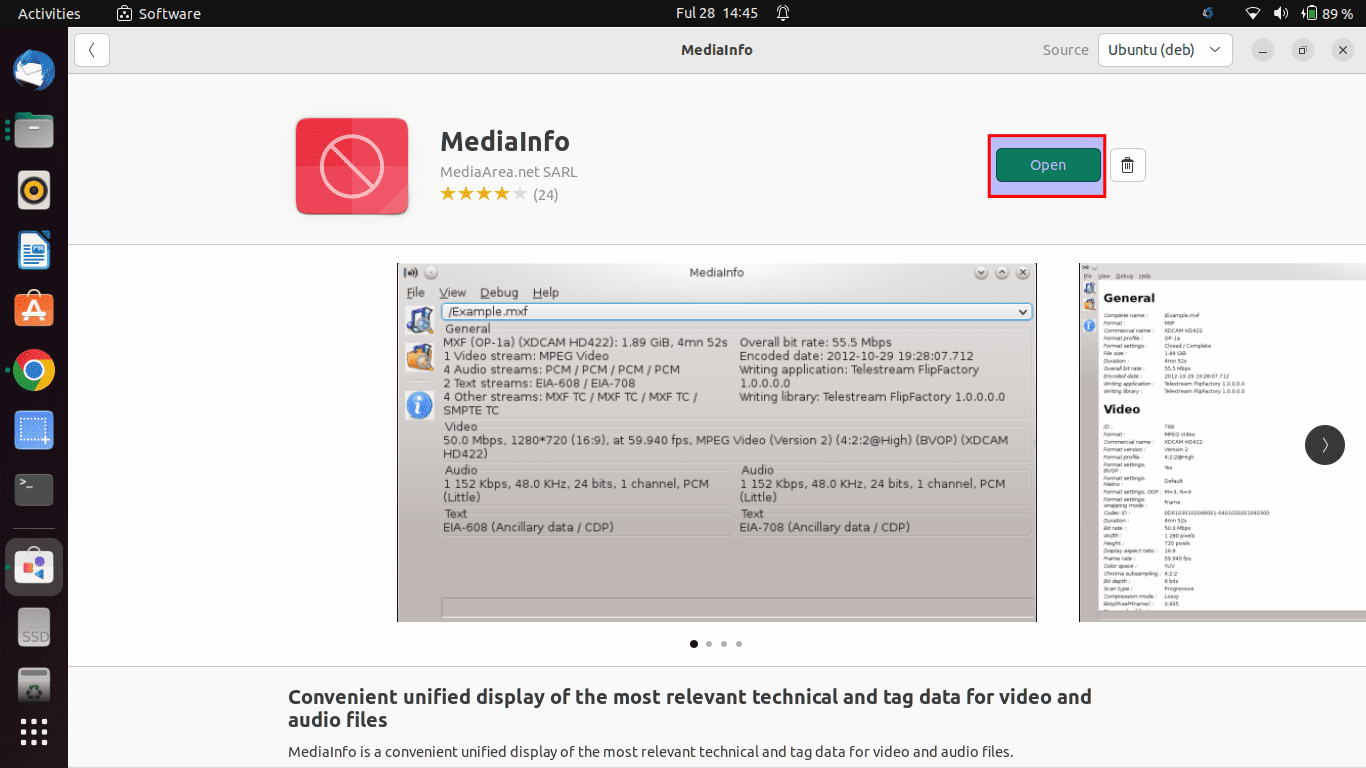
Successful installation
Alternatively, you can do this:
Note that MediaInfo is directly available from default repos; therefore, installation is pretty straightforward using the apt command. To do this, launch your terminal and issue the following command:
sudo apt-get install mediainfo-gui
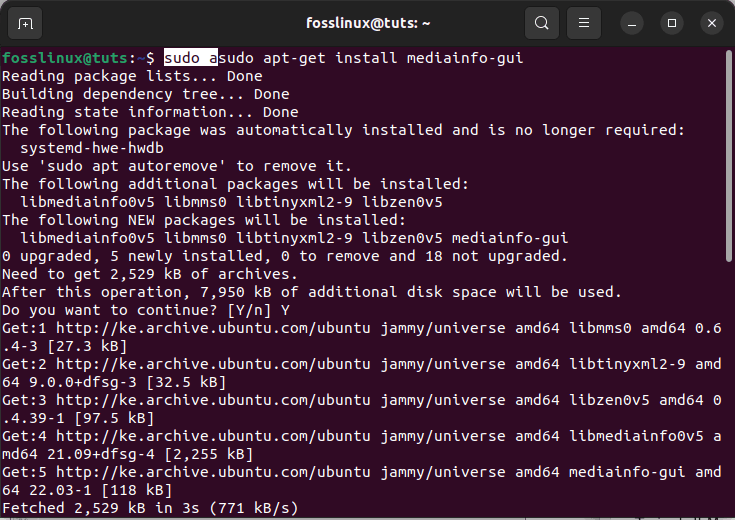
Install MediaInfo GUI
This will install the MediaInfo graphical user interface.
That is that on the Graphical method. Let us see the command line approach.
How to install MediaInfo using the command line
To install MediaInfo using the command line, run the following command:
sudo apt-get install mediainfo
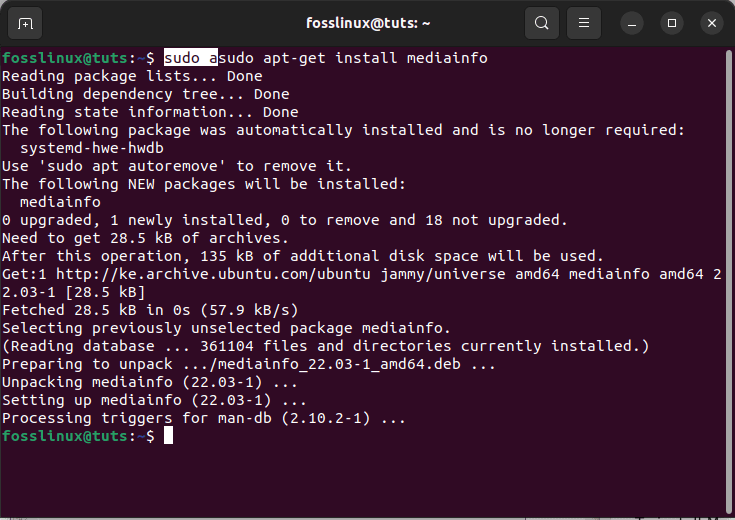
MediaInfo command line installation
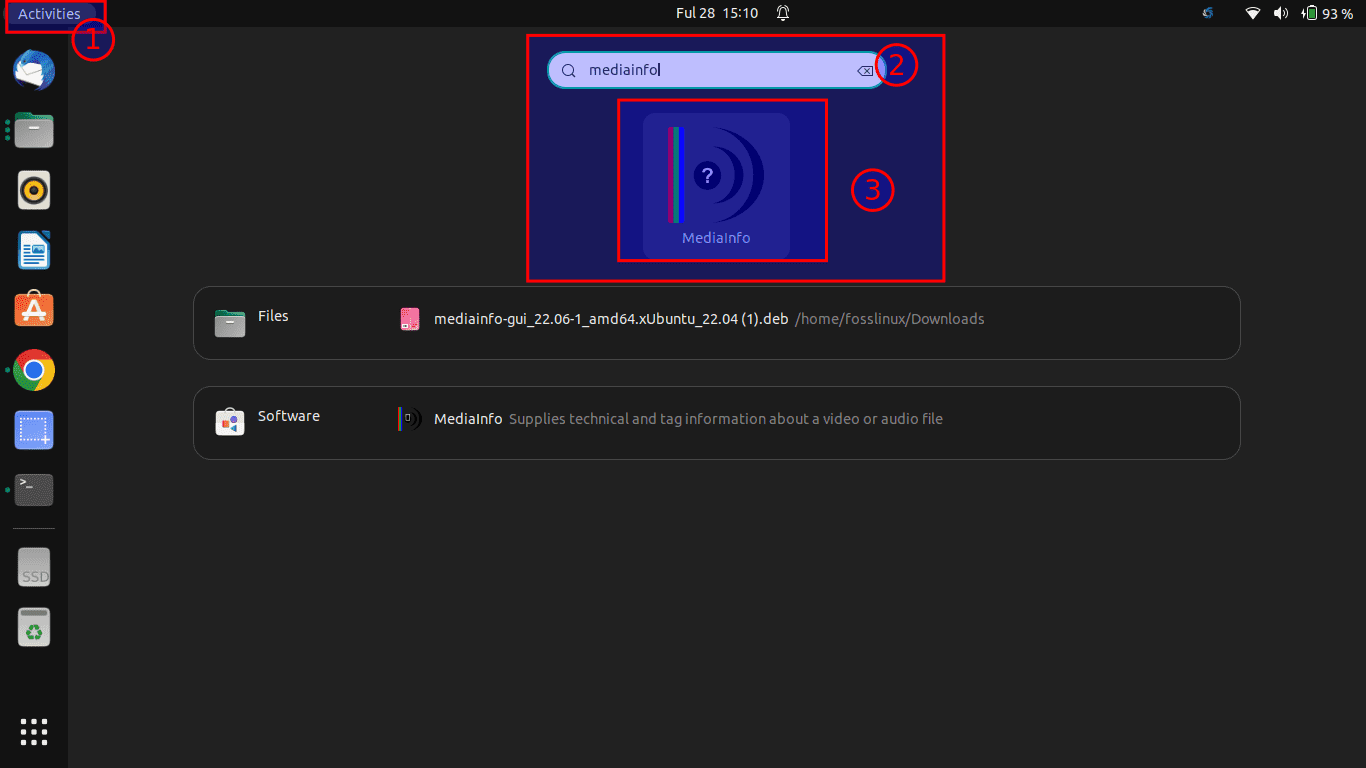
How to Open MediaInfo
Next, open up the just-installed MediaInfo. To do this, click “Activities” on your desktop’s top left corner. After that, use the search bar and look for MediaInfo and click on the icon as shown below:

Open file
And that should open the application for you. Let us look at how we can display media files information on Linux using MediaInfo
How to display media files information on Linux using MediaInfo
Here is the syntax to get this done:
mediainfo <path_to_media_file>
Example 1
How to display video file information using MediaInfo
For example, to find data about a particular file, run the following command:
mediainfo sample_1280x720.mkv
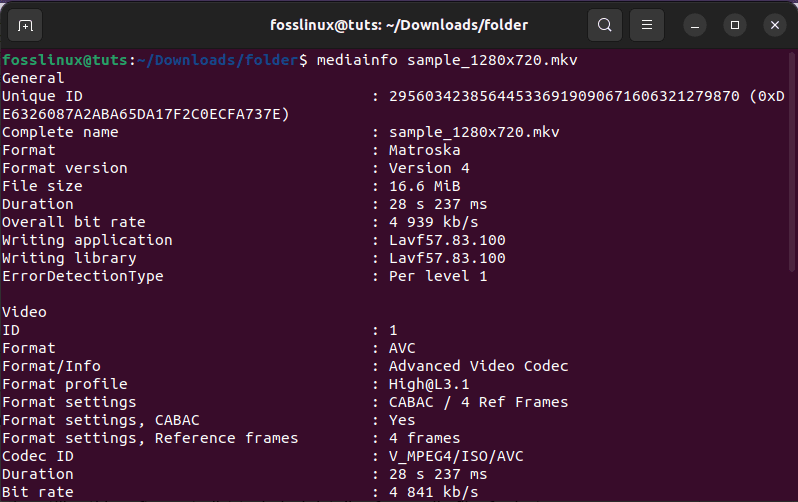
Data on a specific file
For the video file information, let us now see how we can check audio file information using MediaInfo.
Example 2
How to display audio file information using Mediainfo
We can also utilize this software to list technical details of an audio file, for instance, f, as shown below:
mediainfo strong_holds_vol_2_-5822918554525970037.mp3
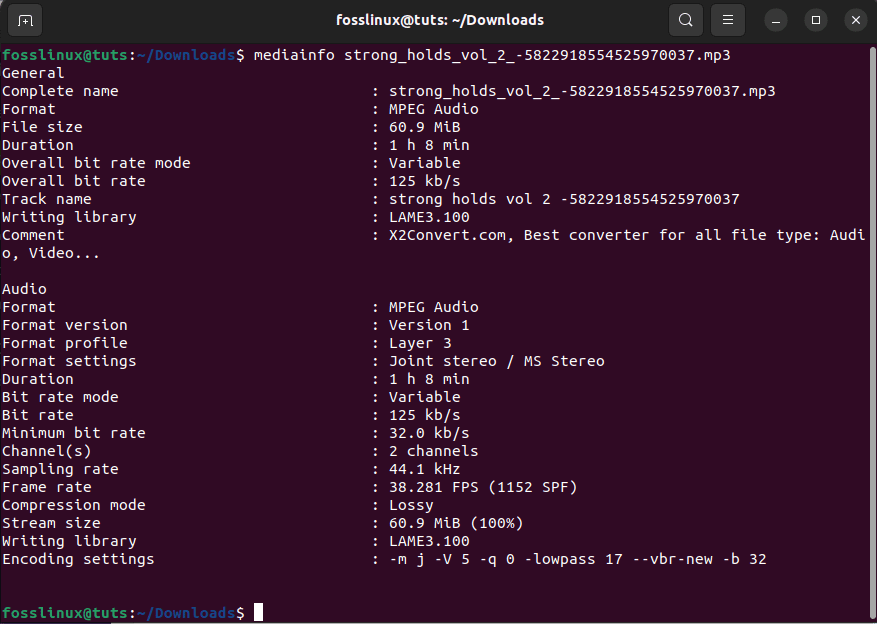
test
To display full information, including all the internal tags, you have to deploy the -f flag on your command, as shown here:
mediainfo -f sample_1280x720.mkv
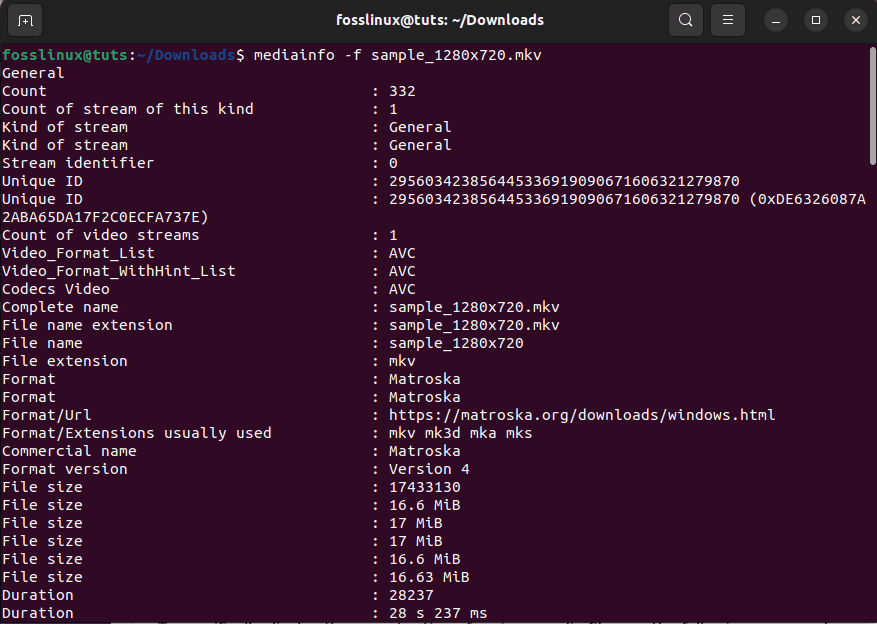
Display full info
Now let’s see how we can display particular media file details.
How to display particular details of a media file
It is possible to list particular info, for instance, audio/video formats, bit rate, frame rate, and much more, about a media file using multiple parameters.
To specifically display the aspect ratio of a given media file, run the following command.
mediainfo sample_1280x720.mkv --Inform="Video;%DisplayAspectRatio%"
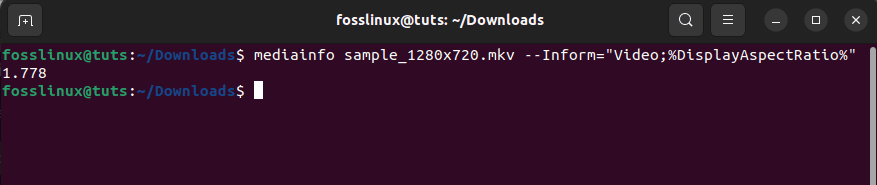
Display aspect ratio
To show the audio format of the media file, run this command:
mediainfo sample_1280x720_surfing_with_audio.mkv --Inform="Audio;%Format%"

Display audio format
To display format settings, run this command:
mediainfo sample_1280x720.mkv --Inform="Video;%Format_Settings%"
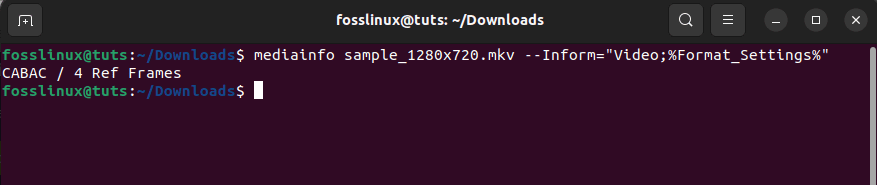
Display format settings
To display the frame rate, run this command:
mediainfo sample_1280x720.mkv --Inform="Video;%FrameRate%"
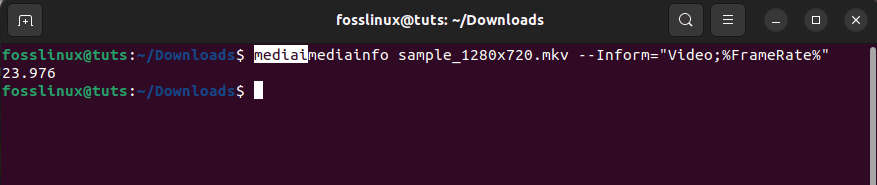
Display framerate
To display the duration (playtime) of the media file in the format HH:MM:SS:FF, execute this command:
mediainfo sample_1280x720.mkv --Inform="Video;%Duration/String4%"
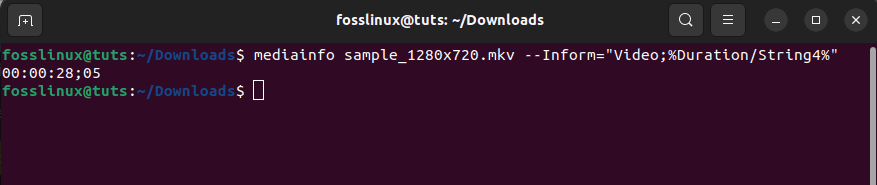
Display playtime
To find the list of all available parameters of a media file, issudurationommand:
mediainfo --info-Parameters sample_1280x720.mkv
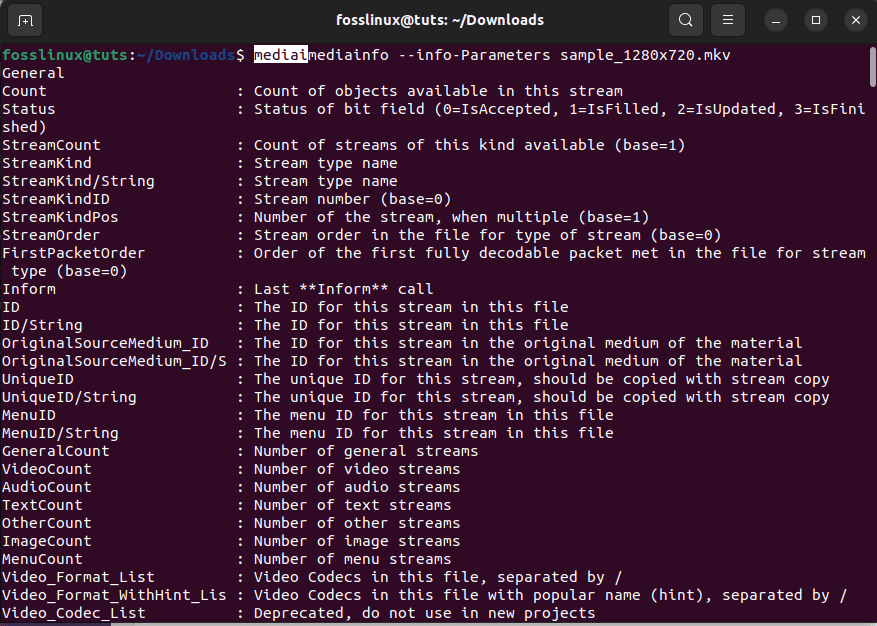
List all parameters
To get MediaInfo help, execute this command on your console:
mediainfo -h
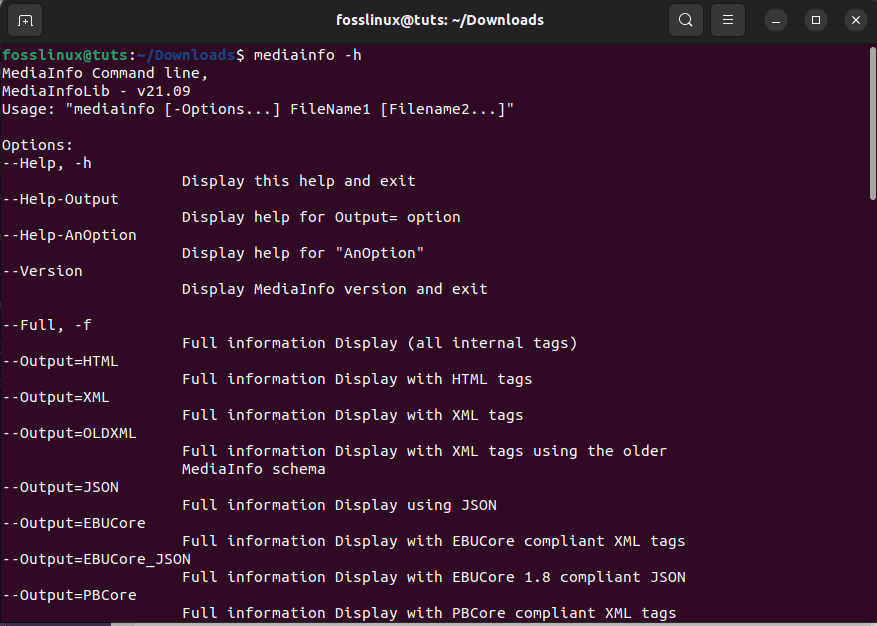
MediaInfo help
Now that sums up the command line phase of displaying information using MediaInfo, let us see its graphical part.
Display media files information using MediaInfo GUI
If you are not that much of a terminal fanatic, you can use the MediaInfo GUI(graphical user interface) to exhibit information about a media file.
To do this, launch the MediaInfo GUI by hitting the “Activities” button on your desktop’s left side, and then use the search filter bar to look for MediaInfo. Click on the displayed icon shown below to open it:
Open MediaInfo
After that, navigate to the File>Open>Open File(s) option from the menu bar and select a media file from your local drive as shown below:
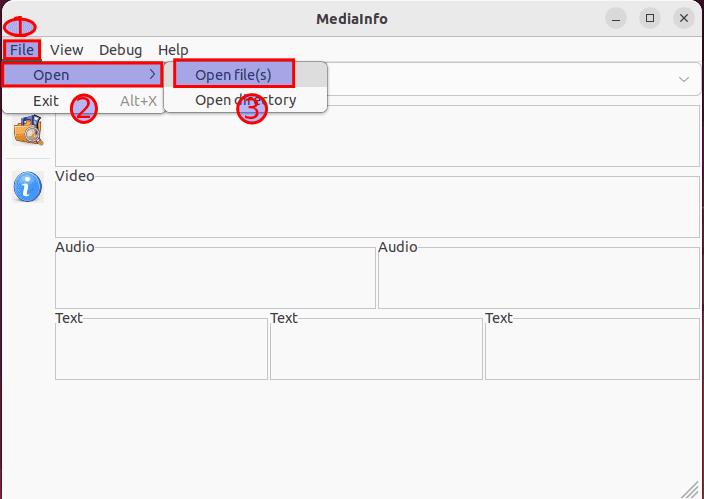
Open file
Then select the location of your media file; in our case, the file is in the “Downloads” folder. After that, click on “open” as highlighted below:
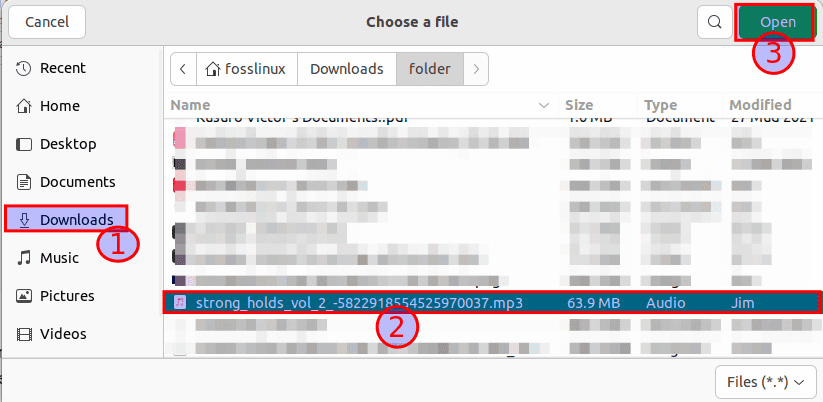
Navigate to the file’s location
And here is the audio file data on the graphical interface of MediaInfo:
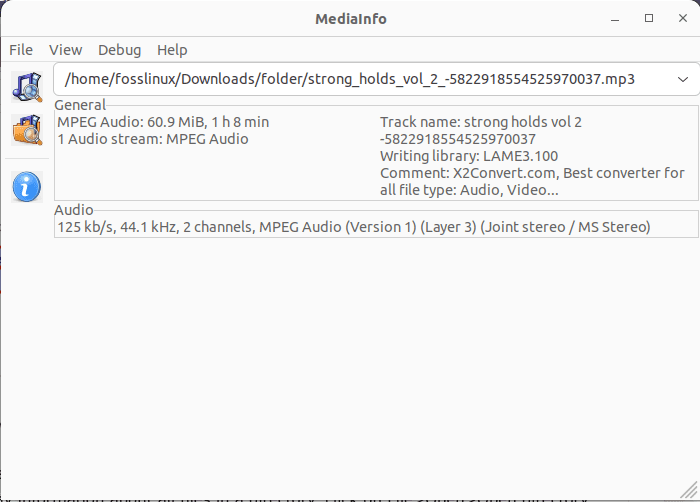
File’s data
It is also possible to display information about multiple files or all files in a directory at a go. To display information about several files in a directory, click on File>Open>Open directory option:
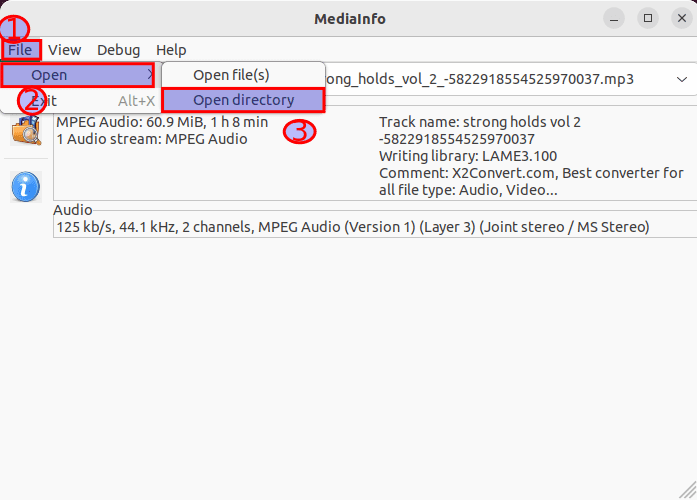
open directory
Select to open a directory as shown below:

Select to open the file
Multiple files selected on the MediaInfo app:
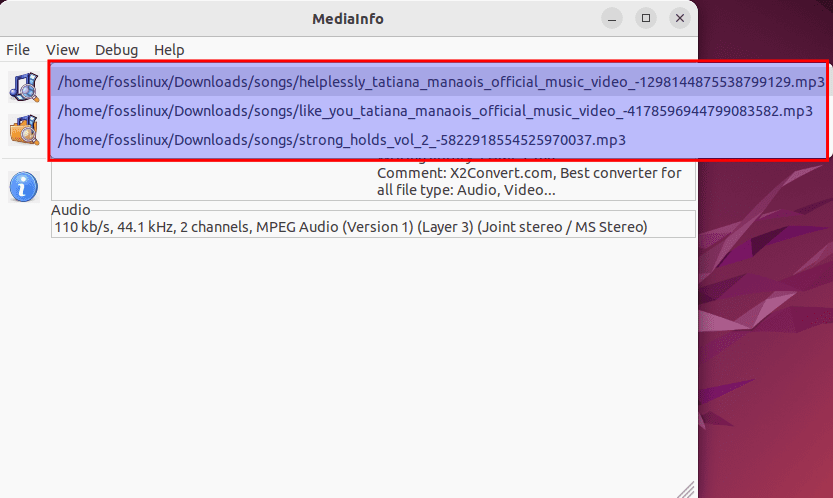
Open multiple files
You can also rotate the default view to another layout, for instance, XML, Text, HTML, etc. To do that, click View from the menu bar and choose your view layout from the menu context:
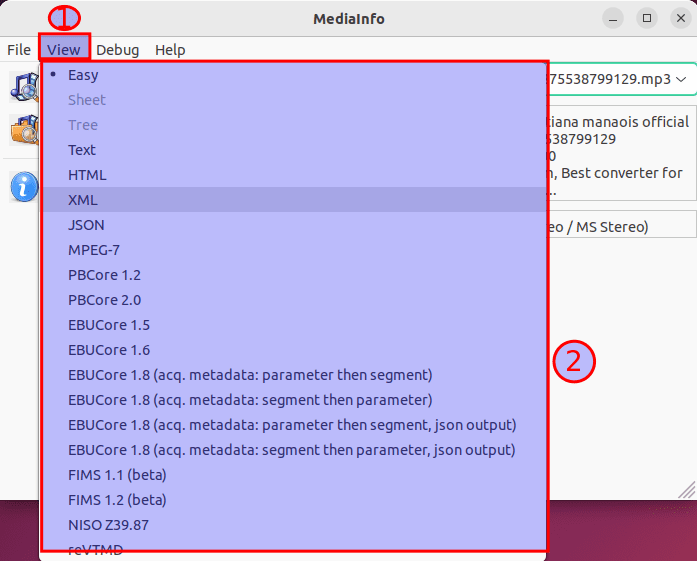
Change default view
This article cannot be complete without covering the uninstallation process of the just-installed app. Here are the steps to do this.
How to uninstall MediaInfo
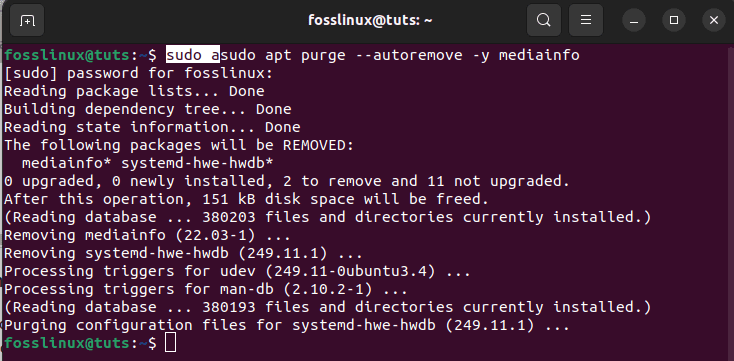
If you make up your mind to completely do away with MediaInfo and the related dependencies, here are the commands to execute:
sudo apt purge --autoremove -y mediainfo
Uninstall MediaInfo
To remove the GPG key and repository, run this command:
sudo rm -rf /etc/apt/trusted.gpg.d/mediaarea.asc
sudo rm -rf /etc/apt/sources.list.d/mediaarea.list

Remove GPG key
That should do it!
Final Thoughts
And there you have it, guys! This article has covered nearly all the installation steps, how to use and not live out the uninstallation steps of this application. We also gave you the specific commands to issue for installing MediaInfo in diverse Linux Operating systems; we hope this article was informative enough. Otherwise, thanks for reading through.