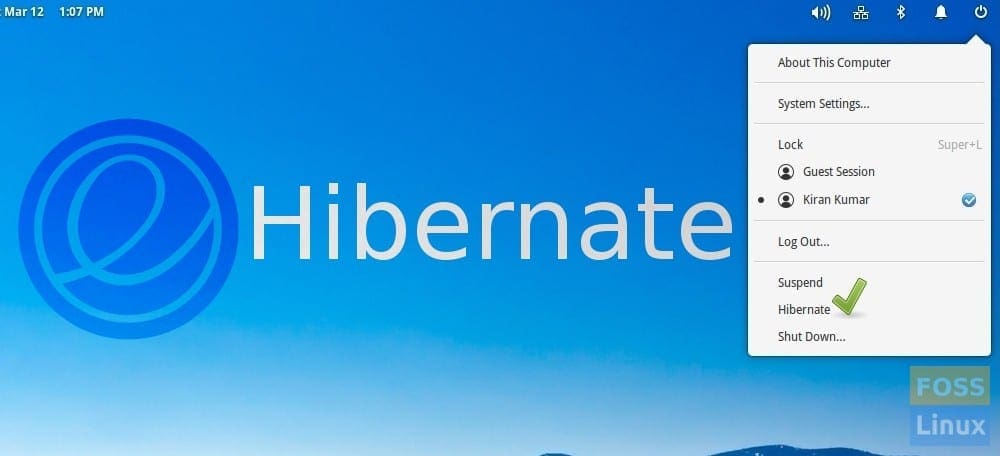
Linux, specifically the elementary Operating System, has taken away the user’s ability to set their computer in “Hibernate” mode for a while now. There are several reasons behind the developers doing away with the hibernate button. Some of which include people’s ignorance of the feature. Nowadays, most people often prefer the hibernate button to the suspend button, thus pushing the developers to obsolete the button functionality.
However, despite the hibernate button on the elementary OS is less popular and less reliable than the suspend, it is still valid. One of the best features of the hibernate button is that it powers off the machine instead of setting it to low-power mode, which is a massive help to your laptop’s battery.
Some people always wonder why the feature was taken away; however, we have good news! As it turns out, anyone can re-enable and re-add the hibernate mode on their elementary OS with a few tweaks.
Difference between Suspend and Hibernate
Many Linux users often assume that “Suspend” and “Hibernate” are the same when they aren’t. The primary differences between Hibernate and Suspend are how they handle power management on your PC when it goes to sleep.
Generally, your computer does not sleep when you click the suspend button on your Gnome desktop environment. Instead, it goes into a low-power mode, and all the stuff you have been doing is saved to the Random Access Memory (RAM). When your elementary OS is in this state, it will drain your laptop’s battery or use power minimally.
On the other end, hibernation doesn’t use power at all. This, therefore, means that when your elementary OS is set to hibernate, the entire state of the computer is saved to the hard drive and put in a state which uses no power.
Despite having differences, both suspend and hibernate have their use cases. For instance, if you are on your PC and need it at a moment’s notice, we suggest going with suspend as it is a good choice because it can resume quickly. Alternatively, if you need to conserve your laptop’s battery life, you can go with Hibernate.
How to re-enable Hibernate on elementary
To use the Hibernate feature inside the elementary OS, you must install some packages. This package includes a collection of scripts and the hibernate function button.
First things first, we will get our hands on the Power Management Utilities (Pm-utils), a small collection of scripts that handles suspend and the resume on behalf of Hardware Abstraction Layer (HAL). So, to begin with, open your PC terminal window.
Immediately the command line window is open, use the Apt package manager and load up the Pm-utils package.
sudo apt install pm-utils
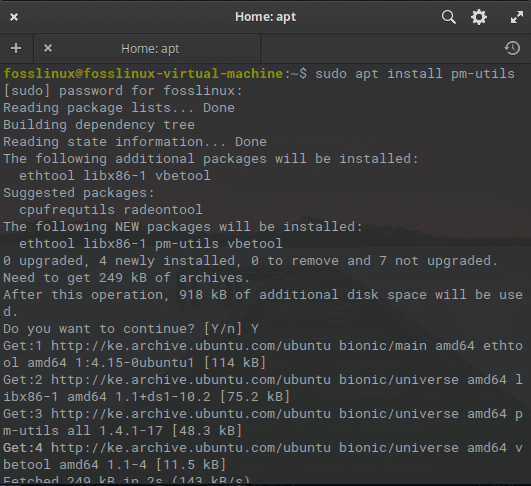
install utils
After setting up the Pm-utils package on your elementary PC, the hibernate function is useable. However, in case you want to run a test on it to confirm if the hibernate function works, go to the terminal and run the following command:
sudo pm-hibernate
Alternatively, you can use the following command:
systemctl hibernate
To suspend the system, you can make use of the following command:
systemctl suspend
For a hybrid hibernate in which the system follows the hibernation process. Still, instead, it will remain in the suspend mode, which spontaneously means a faster system resume while possessing the hibernation benefits. To achieve this, use the following command:
pm-suspend-hybrid
Note: Always ensure that your SWAP partition is more significant than the system to ensure the hibernate function works perfectly using:
grep swap /etc/fstab
Installing Hibernate and other dependencies
To install the hibernate button, copy and paste the following command:
sudo apt install hibernate

install hibernate
After that, run the following command to install some dependencies:
sudoedit /etc/default/grub
After that, the nano editor will open up. Go to the line written GRUB_CMDLINE_LINUX_DEFAULT=” quiet splash” and add UUID of swap. Ensure the line looks like this:
GRUB_CMDLINE_LINUX_DEFAULT=”quiet splash resume=UUID of swap”
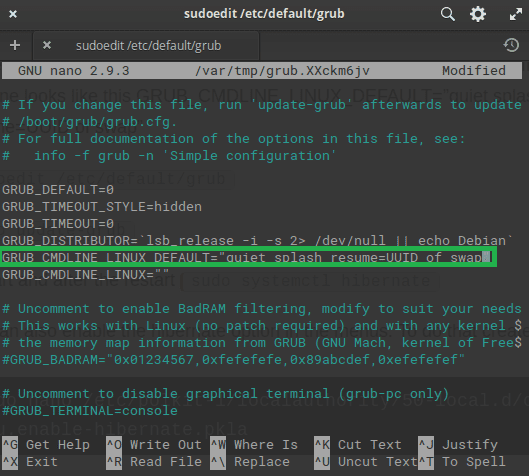
edit file
Once you are through with editing the file, you will be required to update the grub using the following command:
sudo update-grub

update the grub
Finally, restart the system and run the following command to hibernate the system.
sudo systemctl hibernate
Note: A point to note is that the hibernate command will not work without the sudo or root account access. You will encounter errors if you run without it because it won’t work.
Presuming the pm-hibernate command runs successfully, then hibernation is working through the terminal, and you will be able to use it that way. If you are happy with setting your elementary OS into hibernate mode via the terminal, then you can end your tutorial here. Otherwise, please move to the next section, where we will look at how to re-add the option on the power menu.
Re-adding the Hibernate button in elementary OS
To this point, hibernation is now enabled on your elementary PC. Nevertheless, the only way to use it is by invoking a command of the Pm-Utils in your terminal.
For average Linux users, this is not that user-friendly. However, if you plan to use this feature regularly, we suggest adding the hibernate button.
We will re-add the hibernate button by modifying a specific file. To do this, you will be required to gain a root shell and then open it up in the nano editor.
So copy and paste the following command in the terminal
sudo –s

superuser command
At this point, your shell terminal has been granted superuser access abilities. So, open up the “com.ubuntu.desktop.pkla” file in the nano editor.
nano -w /var/lib/polkit-1/localauthority/10-vendor.d/com.ubuntu.desktop.pkla
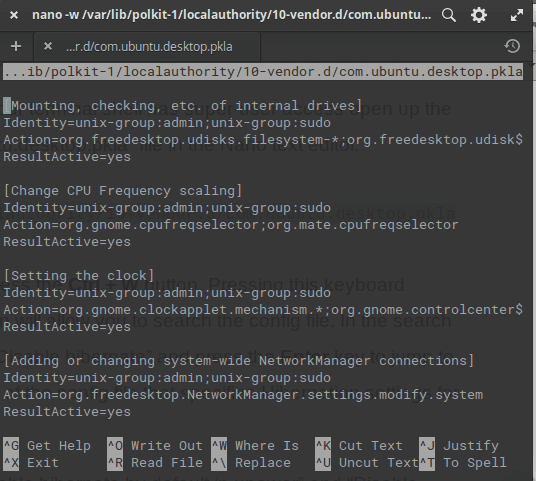
run nano editor file
When in the nano editor, press the Ctrl + W button. Upon pressing the combination, you will be permitted to search the config file. In the search box, type “Disable hibernate” and press the “Enter” button to skip to the part of the config file that specifies hibernation settings for elementary OS.
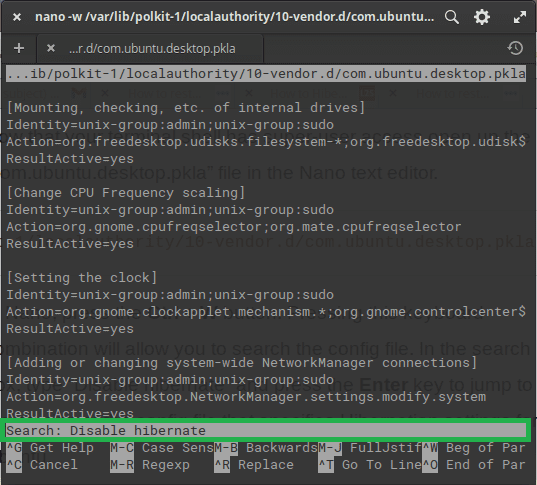
type disable hibernate
Uber the “Disable hibernate by default in upower” and “Disable hibernate by default in logind,” look for the line below.
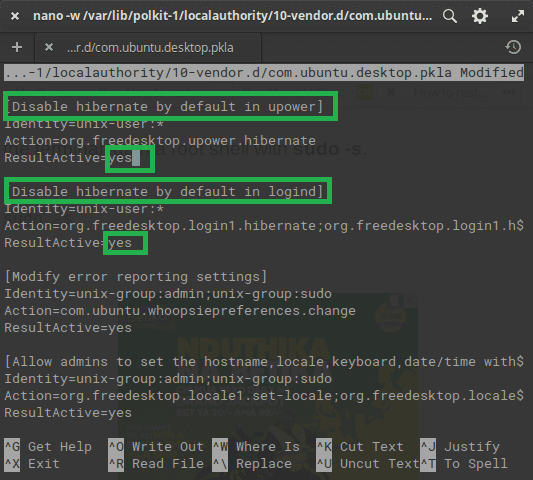
switch to yes
ResultActive=no

And change it to:

ResultActive=yes
When you are done with the changes on the config file, press the Ctrl + O combination on the keyboard to save the file.
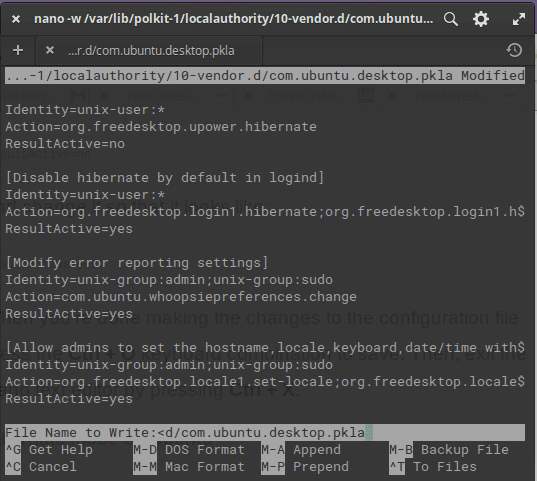
press ctrl + o
After that, exit the Nano editor by pressing Ctrl + X.
The final window of the hibernate button:
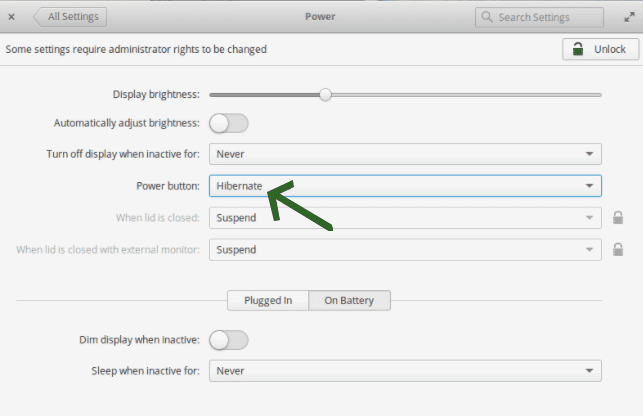
final window
Note: If you use elementary’s Gnome Shell desktop environment, you will need to install the “hibernate status extension” button. Otherwise, you would not be able to click the “Hibernate” button in Gnome.
Conclusion
The article has covered steps to re-enable the hibernation process via the command line for those who find the terminal an easy option. After that, we further looked at the user-friendly (GUI) method of installing the hibernate button on our elementary os, which you should be well versed with as of now.
To this end, we hope the article has covered the crucial steps needed in re-enabling and re-adding the hibernate button in your elementary. Suppose you are done with installing the elementary hibernate button. In that case, you can also check out our article on 15 things to do after installing elementary, which will give you some neat tricks for making your OS attractive for use. Thanks for reading!

