TeamViewer is an application that permits users to access and operate distant computers or other devices, facilitating remote maintenance. Its initial release was in 2005, and since then, it has seen gradual but steady enhancements to its original set of features. Despite being copyrighted software, TeamViewer may be used without a license key and cost for personal use.
TeamViewer is an all-in-one remote access, remote control, and remote support solution compatible with Linux, Windows, macOS, Android, and iOS, among other desktop and mobile operating systems. Using TeamViewer, you can log in from anywhere globally and control a computer or mobile device as if you were sitting in front of it.
How to boost your remote team’s efficiency with TeamViewer
When you work remotely, you won’t be able to rely on coworkers to help you out if you run into trouble. To counteract the inability to attend a meeting in person is another possible interpretation of the importance of TeamViewer and how you can effectively work remotely.
The good news is that you can do all of these things and more with the help of TeamViewer. Using these features, you may have your remote staff finish each work as quickly as feasible.
After becoming familiar with TeamViewer, you may want to check out some of its remarkable features.
TeamViewer’s Remarkable features
Below are some remarkable features you would like to consider about TeamViewer.
Audio sessions
Remote access sessions or team meetings held through Blizz may be recorded using TeamViewer. This hardware complements the program and may be used in tandem with it. Get the most out of this function by replaying recordings as much as you like. Identifying these bottlenecks can let you join your team’s sessions faster, saving time in the long run.
A variety of interfaces
Regarding remote connections, TeamViewer works equally well on laptops, tablets, and mobile phones. The program gives you access to distant computers running any of these operating systems: Windows, Mac OS X, Chrome OS, iOS, and Android. As a result, this function allows crew members to use any computer regardless of the device they are now using, thereby avoiding hardware constraints.
In-depth Summaries
Use the TeamViewer reports function to monitor your team’s every action. In this method, you can ensure your team has a high degree of accuracy and learn which relationship indicators are most crucial to them. Moreover, you will know who on your team was accountable for a particular work, how long it took them, and when they finally completed it.
Administrative control panel
Using this TeamViewer administration console, you can control who has access to what and see and manage connection logs, user IDs and passwords, chat, and other features. You’ll always be in the driver’s seat of your TeamViewer account and have complete transparency into the inner workings of your business or remote team, including the specific responsibilities of each employee.
Quick entry buttons
Your remote team can easily access TeamViewer’s primary features, thanks to the program’s user interface and QuickSteps menu. In particular, this panel’s features include connecting to remote computers and maintaining many active connections simultaneously. You may use each of these to improve the efficiency of your team’s day-to-day operations.
Controlling trouble reports
Using service camp, TeamViewer makes it simple to manage customer support tickets. This allows you to delegate tasks to individual team members and monitor the efficacy of internal processes.
Regulating the Pace of a Connection
There is an opportunity to customize the bandwidth of this remote program. The connection window’s settings menu allows for a modification here. Therefore, your staff won’t have to worry about their connection timing out during extended remote meetings with you. You might suggest that they put more value on having a fast connection than on having a high-quality image.
How to install TeamViewer on Solus
Installing TeamViewer on solus is pretty straightforward. To get the process underway, we shall follow the steps provided herein:
Step 1: Launch the terminal using the ‘menu’ option as illustrated in the image below:
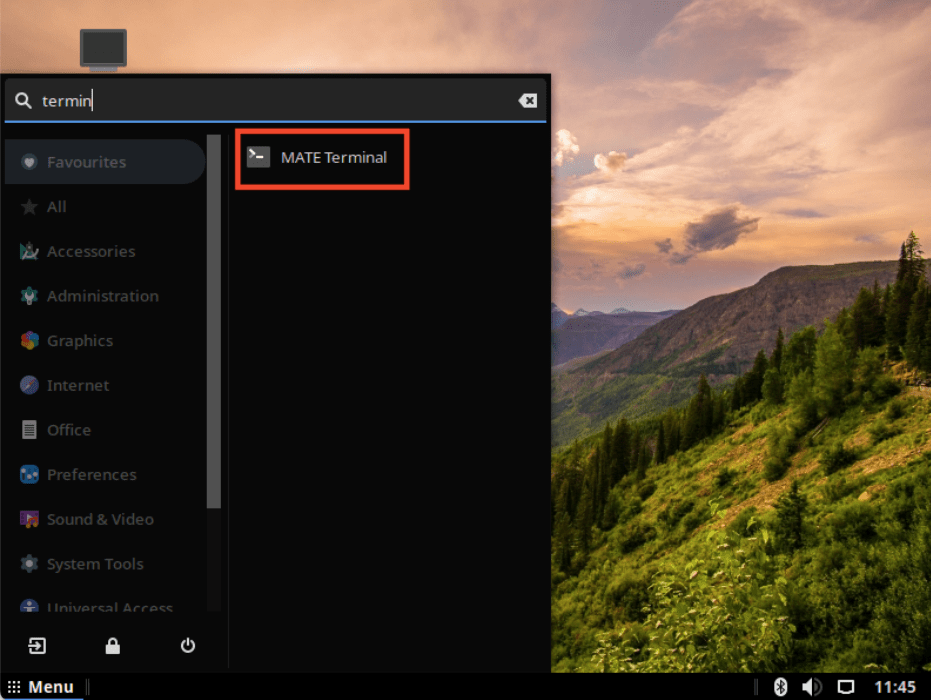
Launch terminal
Step 2: Download the TeamViewer installer app from its official Solus GitHub page by executing the command line below:
sudo eopkg bi --ignore-safety https://raw.githubusercontent.com/solus-project/3rd-party/master/network/util/teamviewer/pspec.xml
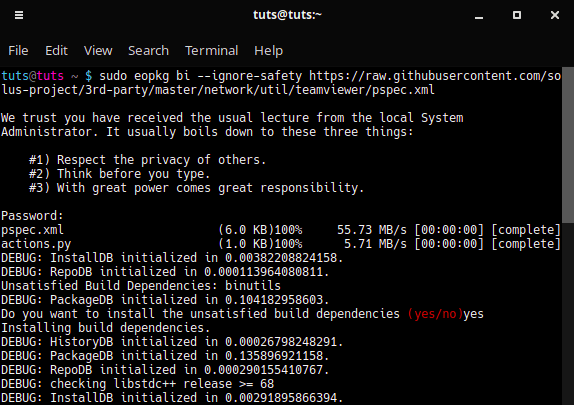
Download teamviewer installer
Be patient as this command executes, as it might take some time. Once the process finishes, proceed to the next step.
Step 3: Execute the following line of code to install the recently downloaded TeamViewer installer file:
sudo eopkg it teamviewer*.eopkg
Note: Ensure you change the ‘teamviewer*’ name with the actual version name of your downloaded installer.
To check the name of the downloaded installer, run the ls command as shown in the snapshot below:
ls
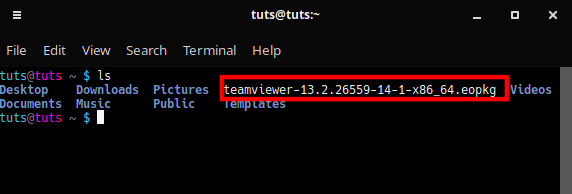
Run ls command
Now copy the actual name and replace it as shown in the code below. After pasting the command, press ‘Enter’ to execute it.
sudo eopkg it teamviewer-13.2.26559-14-1-x86_64.eopkg
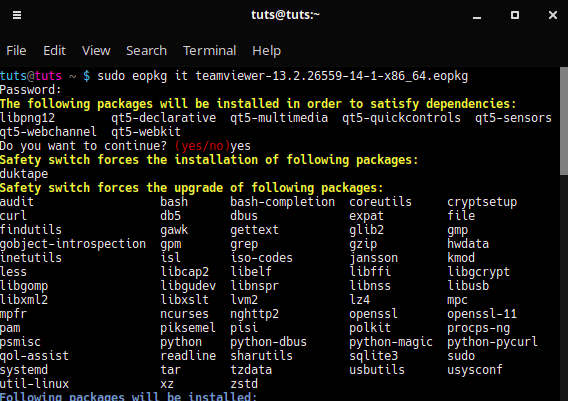
Install the downloaded TeamViewer installer
Step 4: Once the terminal completes the installation process, you need to initiate the TeamViewer service by executing the following line of code:
sudo systemctl start teamviewerd.service

start teamviewer service
You can now check if TeamViewer has been successfully installed via the menu option, as illustrated in the image below. I hope you enjoy using TeamViewer.
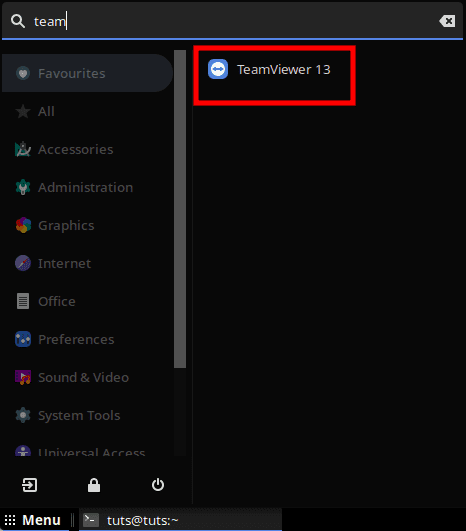
Teamviewer
How to uninstall TeamViewer
After installing TeamViewer, it might get to a point where you will need to uninstall it for one reason or another. If, by chance, you get to this point, don’t worry. You only need your terminal and one line of code to get things done. Launch your terminal as previously stated and execute the following line of code:
sudo rm teamviewer*.eopkg
Note: Ensure you change the ‘teamviewer*’ name with the actual version name of your downloaded installer, as shown in the example below:
That’s it. Enjoy using TeamViewer.
Conclusion
With TeamViewer, you and other users can collaborate on a single window or the entire desktop. You can send and receive files, images, text, folders, and screenshots. Alternatively, you can upload and download files directly from cloud storage services like Google Drive, OneDrive, and Box. With TeamViewer, you can use the whiteboard to annotate and highlight content on the remote screen.
TeamViewer allows you to connect to all your computers and contacts instantly with just one click, requires no setup, allows you to access an unlimited number of remote machines, transfers files quickly and easily, and includes Wake-on-LAN and other valuable features at no additional cost.

9 comments
Didn’t work for me unfortunately,
System error. Program terminated.
(-30973, ‘BDB0087 DB_RUNRECOVERY: Fatal error, run database recovery — BDB0061 PANIC: Invalid argument’)
Error in sys.exitfunc:
No handlers could be found for logger “pisi”
System error. Program terminated.
(-30973, ‘BDB0087 DB_RUNRECOVERY: Fatal error, run database recovery — BDB0060 PANIC: fatal region error detected; run recovery’)
Did you resolve your issue? I just got the same issue.
Try rebuilding the package. Launch Terminal and use this command:
sudo eopkg rebuild-db
Try rebuilding the package. Launch Terminal and use this command:
sudo eopkg rebuild-db
Installing Teamviewer12 in Manjaro 17.0.6 (my main OS) did not work, because of some dependencies. I installed teamviewer12 in Solus 3 according the tips on Fosslinux and it worked right-away. Thanks Kiran.
Thanks for your feedback!
How can i update teamviewer 13 to 14 on Solus ?
use third party in software center, version 15.3.26.82 avialible there
Hello,
This procedure is not up to date with the latest version.