If you have been looking for a screenshot utility in Linux that’s near equivalent to Snagit for Windows, then you should take a look at Shutter. It is a free and opensource utility for Linux that lets you take a screenshot of a specific area, window, your whole screen, or even of a website.
After wrapping up a screenshot, you can apply different effects to it, draw on it to highlight points, and then upload it to an image hosting site.
In today’s tutorial, we shall show you a step-by-step guide on how to install Shutter on Manjaro. We shall also show you how to extend the Shutter’s functionality by enabling its Editor.
Installing Shutter in Manjaro
Shutter app is not available in the official Manjaro repository; hence you have to enable AUR to download and install Shutter. You can install it in all editions of Manjaro, including GNOME, KDE, and XFCE. Our distro of choice is Manjaro GNOME for today’s tutorial.
Step 1) Launch the Add/Remove Software.
Step 2) On the top right corner, click on the tri-dots and then “Preferences.”
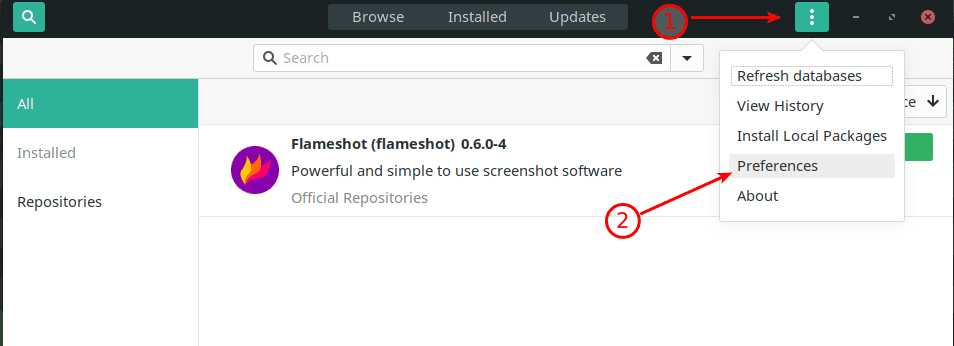
Add Remove Software Manjaro GNOME
Step 3) Enable AUR support and also enable “Check for updates.” When done, close the “Preferences” menu.
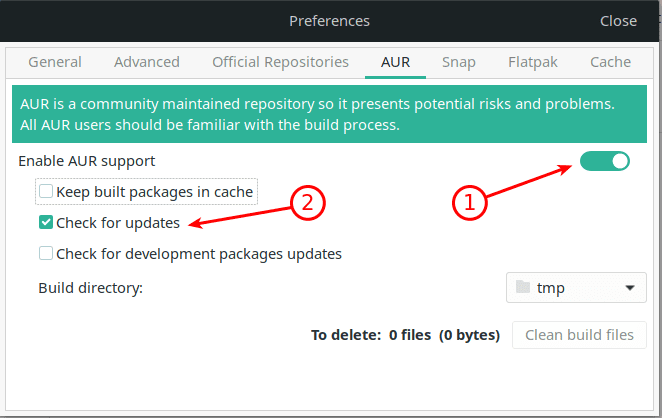
Enable AUR
Step 4) Search for “Shutter,” click on “Build” on the “Shutter” item from the search results. Click “Apply.”
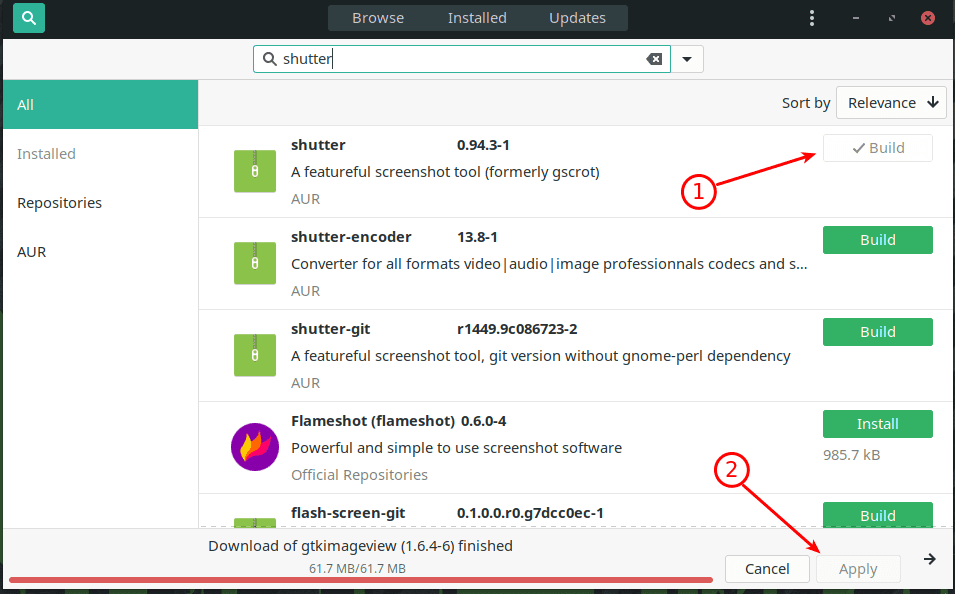
Install Shutter
Step 5) Click “Apply” to the next few prompts and wait for the installation to complete. Shutter needs a ton of dependencies to work, so it is going to take some time, even on a faster internet connection. Pay attention to the progress and enter the Administrator password when needed.
Step 6) After the Shutter installation is complete, you should the “Build” button now shows “Remove.” Don’t click on it!
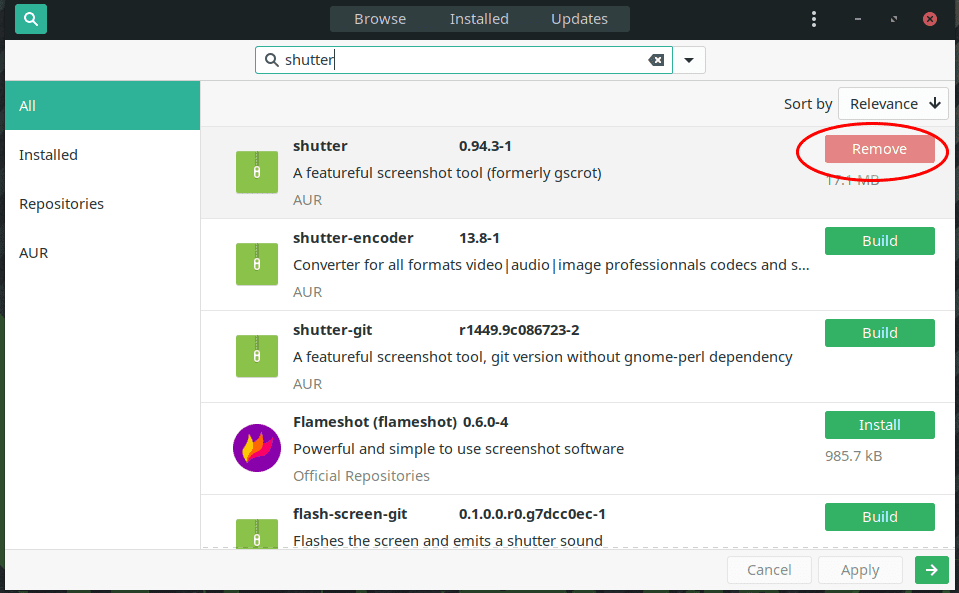
Shutter Installation completed
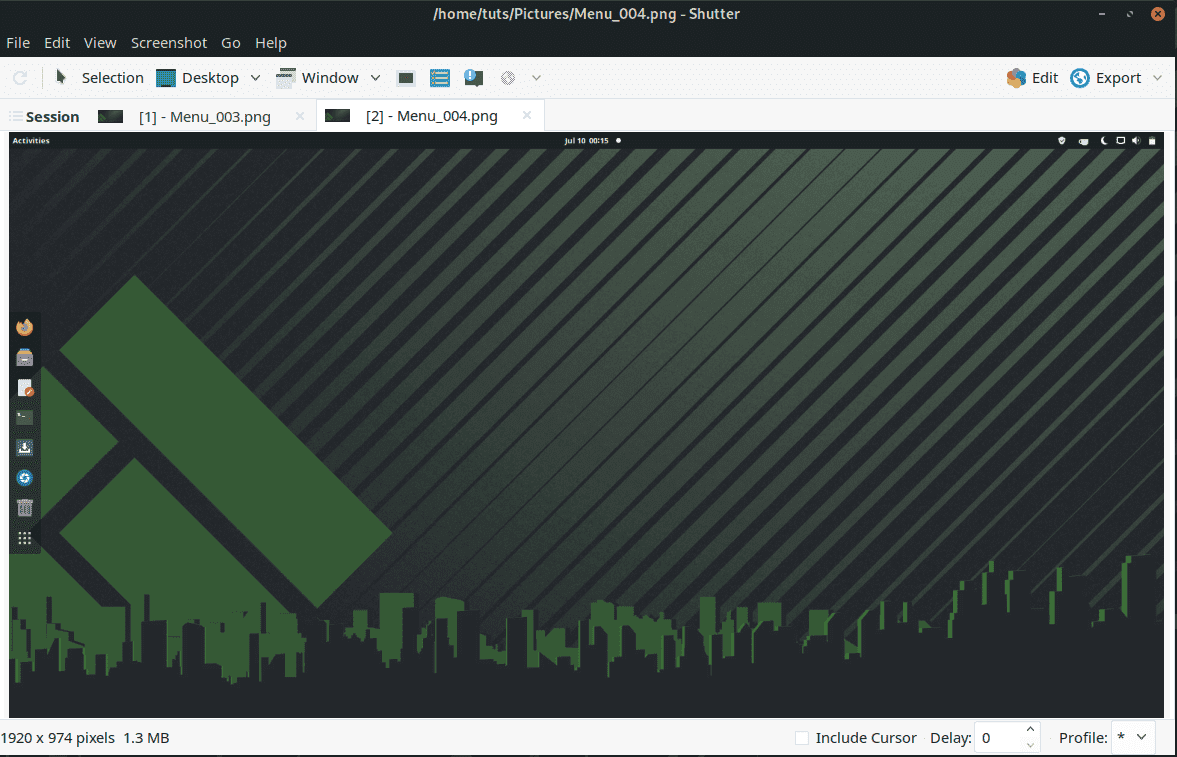
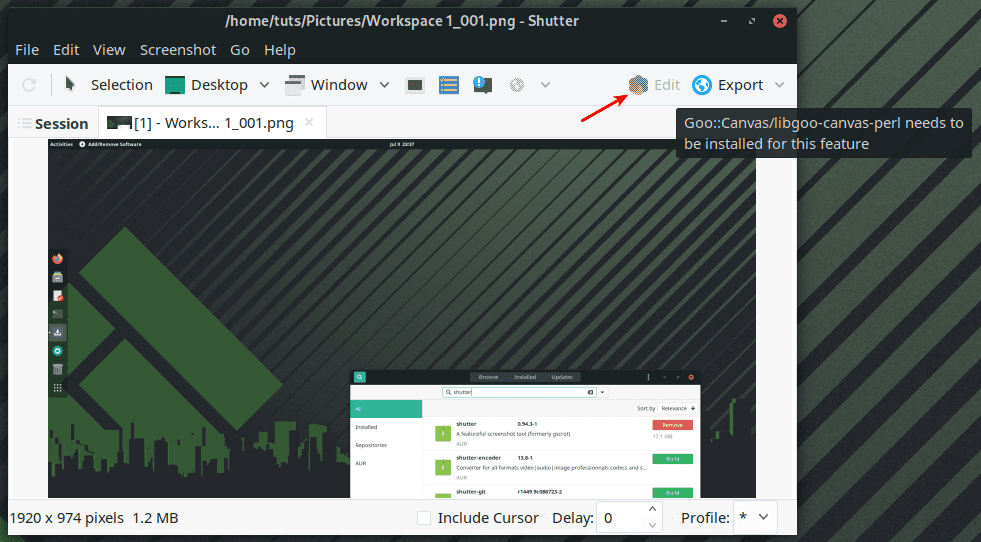
Step 7) Go ahead and launch the Shutter from the Applications menu and take a sample screenshot. Although Shutter can take screenshots now, you won’t be able to use the Shutter Editor, which means you will miss the other needed features such as adding annotation, blur text, adding arrow, etc. You can notice that the “Edit” feature is grayed out. That’s because Shutter still needs some more libraries to work. Let’s download them in the next step.
Step 8) Back in the “Add/Remove Software,” look for “perl-goo-canvas” and install it.
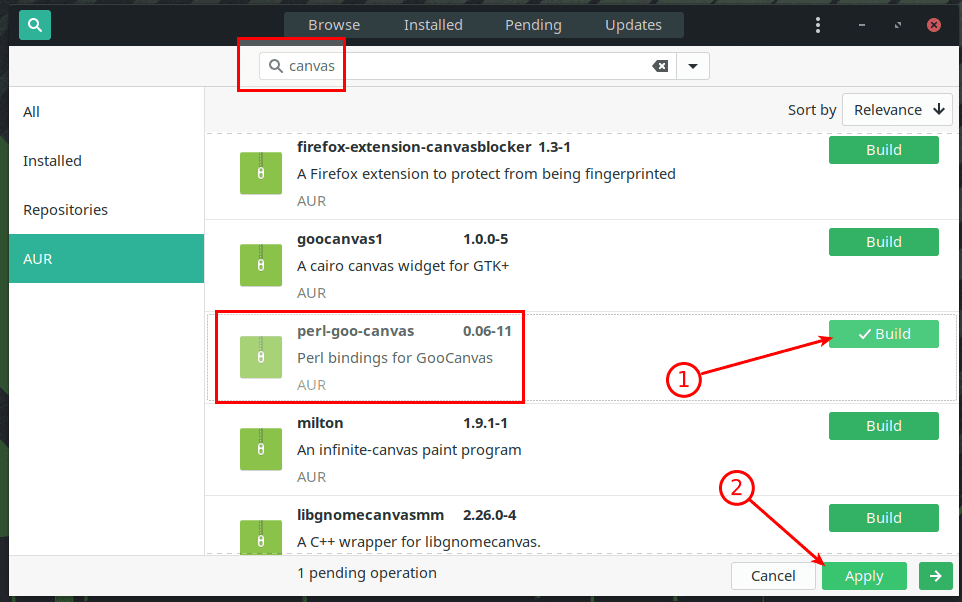
Install additional libraries
Step 9) You must click “Apply” when needed and enter the administrator password to complete the installation of the additional libraries.
Step 10) When done, close everything, and restart your computer.
Step 11) Try taking a screenshot using Shutter; you should see the “Edit” available now. Happy annotating!
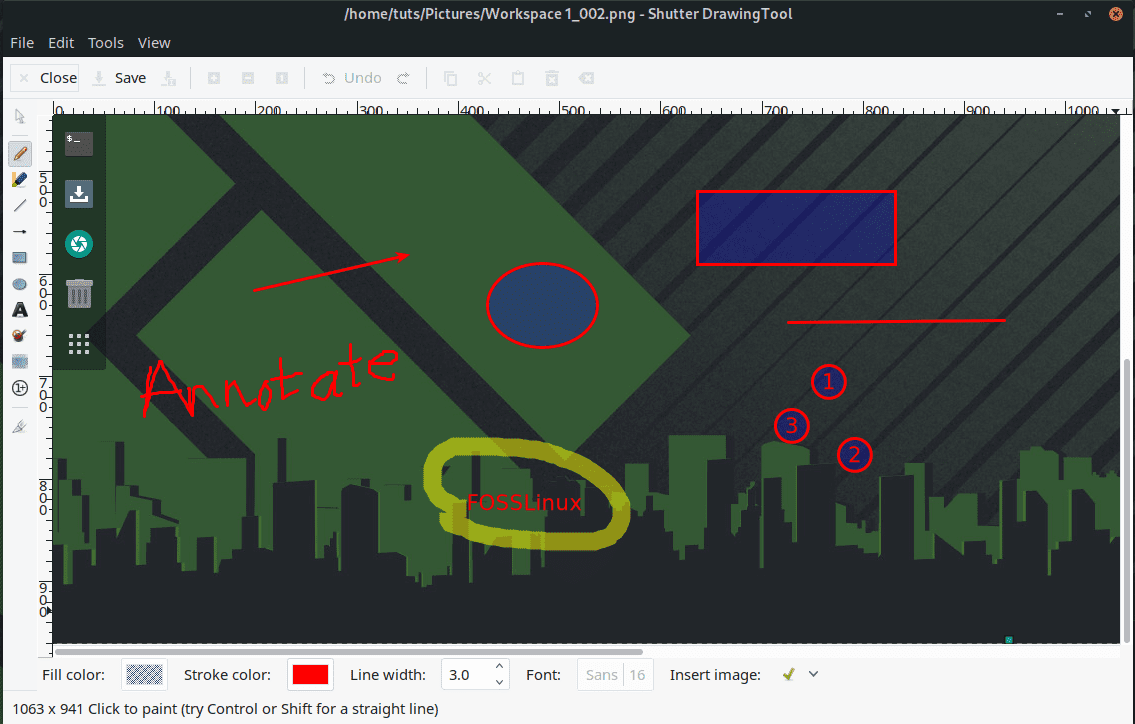
Shutter Editor
That’s all about installing Shutter Screenshot Utility on your Manjaro PC and enabling the much-needed Shutter Editor functionality. You now have a powerful Screenshot capture tool.

5 comments
thanks!!! it works for me 😀
Hello, can you please help me.
I want to install shutter in manjaro kde.
Thanks.
Unfortunately, it did not work. !!!
I followed the steps, but not working in Antergos, edit option still not enabled!
Pretty Coool !. If you enabled the Snap, it will minimises the perl-goo-canvas installation.