The Terminal in Ubuntu, or in any GNU/Linux distribution for that matter, is the essential tool of all. It is the tool that is used to control, manipulate, and administrate over the whole system or even a group of systems.
Even though it looks like just a prompt with a host-name and user-name, its look has been improved over Linux’s years and is aesthetically pleasing in most graphical distributions now. Here, we’re going to explain how users can customize the look of their Terminal in the most commonly used distribution, Ubuntu. The final part of this article can be used in any other distribution as well.
Terminal Customization
Using the ‘Preferences‘ option:
Ubuntu’s Terminal has an existing ‘Preferences‘ option that can be used to customize the Terminal to some extent. It can be accessed by simply right-clicking on an empty area in the Terminal, and choosing ‘Preferences.’
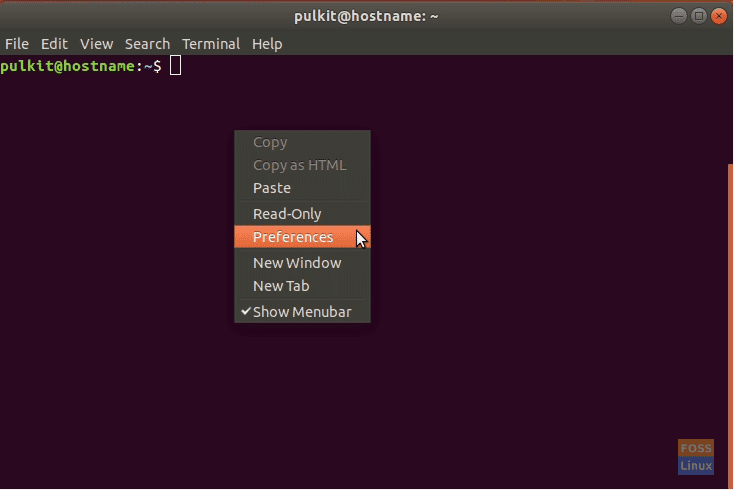
Accessing preferences
There are various options listed under multiple tabs. They have been listed and explained concisely below:
1. Text
Let’s explore the basic possibilities of changing the text style in the Terminal and some other options.
- Terminal dimensions (in terms of rows and columns)
- Font and font size
- Spacing between cells
- Cursor shape and blinking mode
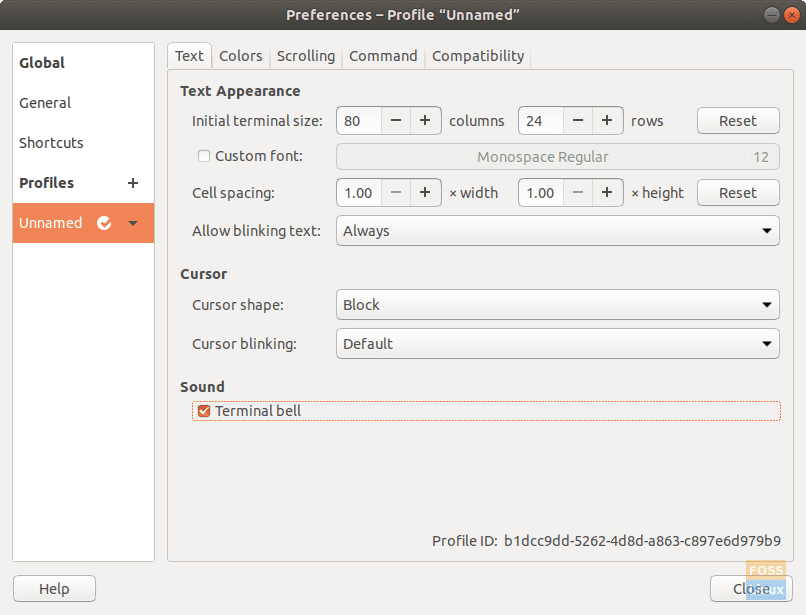
Text options
2. Colors
Changes available are:
- Available color themes
- Default background and foreground (text) color
- Bold text, cursor, and highlighted text color
- Transparency slider
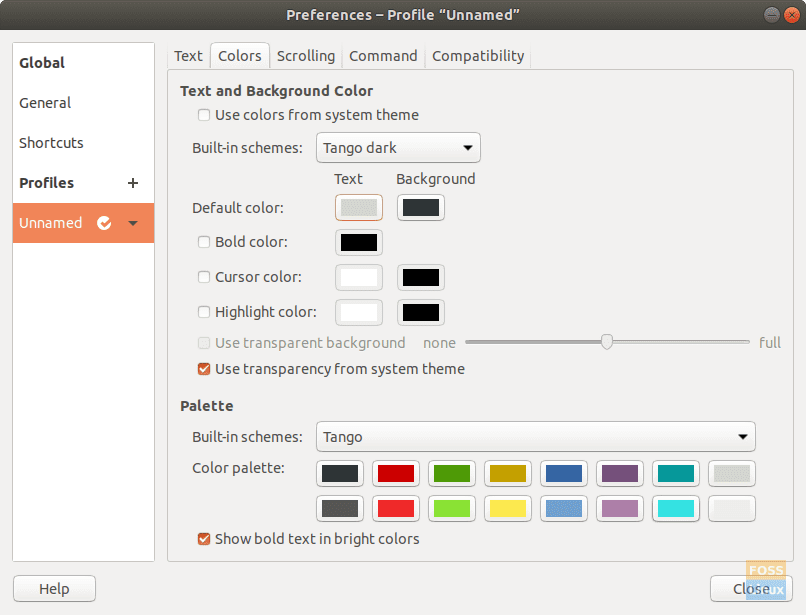
Color options
3. Scrolling
Options here are to:
- Enable/disable scrollbar
- Scrolling on output (the cursor comes back down to the bottom if there is new output)
- Scrolling on keystrokes (the cursor comes back down to the bottom if any key is pressed)
- Scrolling limit
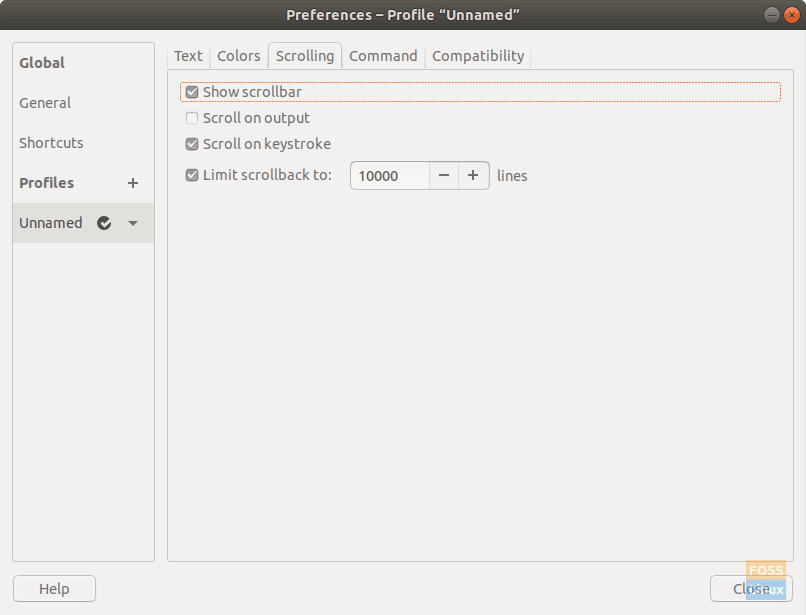
Scrolling options
Those were all options that are provided by default for changes in the Terminal.
Customization using .bashrc file
Editing the parts and layout
Every Linux distribution has a Bash profile customization file in the home directory. It can be used (very extensively) to change the prompt’s appearance and function. The prompt is the part that comes up after a user logs into a user account. The default Ubuntu prompt looks like this:
Ubuntu default PS1
The first part is the username, followed by the ‘@’ sign, and the host-name (the name of the system/server). Then there is the location of the working directory and finally a ‘$’ sign, indicating that its a non-root user. The root user has a ‘#’ sign, instead.
In conclusion, the default prompt looks like:
user@system-name:working_directory$
This prompt is represented by the name ‘PS1‘. The Bash profile file can be used to customize the PS1 prompt in multiple ways.
The default prompt is expressed as:
\u@\h:\w\$
It can be explained as:
- \u: The username of the user
- @: The ‘@’ symbol
- \h: The host-name of the system
- ‘:’: The ‘:’ symbol
- \w: The path of the working directory
- \$: The ‘$’ symbol
Thus creating the default prompt layout. Now, some of the other options are the following:
- \d: Date in the format ‘Weekday Month Date’ (like ‘Tue October 1’).
- \t: Time in HH:MM: SS format.
- \n: A newline (goes to the next line)
A more extensive list is available here. Now that we have learned a bit, we can try these out. However, for safety, save your current format using this command:
DEFAULT=$PS1
It saves the current format of PS1 to the variable ‘DEFAULT.’ Now, if we want to try just having the user name in the prompt, how would that be? According to the codes, just ‘\u.’ Therefore, we have to enter the following command:
PS1="\u$ "
The ‘$’ is necessary to act as a border. The expected result shows up:
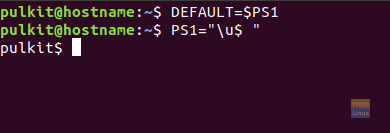
Only username
We can even add Bash commands to show up in the prompt. That can be done the following way:
PS1="[`uname -sr`] \u$ "

Username and a command
The command that we used, “uname -sr,” prints the Linux Kernel version. Similar to this, you can use pretty much any other command. You can also add simple text like this:
PS1="(This is just sample text) \u$ "

With sample text
NOTE: Brackets come off merely as brackets.

Brackets
You can now revert to the original layout using:
PS1=$DEFAULT
Adding colors
Now we can move on to the difficult things, that is the actual .bashrc file. If we see the PS1 variable set there, it looks something like this:
\[\033[01;32m\]\u@\h\[\033[00m\]:\[\033[01;34m\]\w\[\033[00m\]\$
Not to worry, this is pretty simple too. You can see at first glance, that there is a pattern here. Opening using ‘\[‘ and closing using ‘\]‘. Other than that, there is always a ‘033′ before the other bunch of numbers and signs. What do these mean?
The ‘\[‘ and ‘\]’ indicate that the characters included within are non-printing characters, and denote some formatting of the text. It applies till another formatting bracket like itself, or to the whole part after this is written (if no other formatting is applied).
The ‘033’ denotes that the formatting is of color and look of the text.
The part that expresses color
The parts that express colors are the numbers ending with ‘m‘ So, ‘xxm‘ denotes a color. Some of these standard colors are:
- 30: Black
- 31: Red
- 32: Green
- 34: Blue
- 37: White
- 35: Purple
- 33: Yellow
More elaborated lists can be found easily.
Okay, cracked most of it, just the leftover part is the numbers before semicolons that some of the colors have. These denote some specific text formatting, like the text being bold, underlined, etc. Some codes are as given:
- 0: Normal text
- 1: Bold text
- 4: Underlined text
- 2: Dim text
- 8: Hidden text
Phew! Finally, let’s try having just a username, in color red, and formatted bold. The command would look something like:
PS1="\[\033[1;31m\]\u$ "

Color changes
Breaking it down one last time:
- \[ : Opens formatting bracket
- 033: Tells that this is going to format the text color and formatting.
- [1; 31m: Tells that the text should be bold, and of the color red.
- \]: Closes formatting bracket
- \u: Fetches user name
NOTE: Remember; the square bracket opened after ‘033‘ is not supposed to be closed.
Now for the final part, manipulate everything you have learned to create the perfect PS1 format for yourself, and add it permanently the following way:
nano ~/.bashrc
Go to the end of the file, and enter your desired PS1 format.
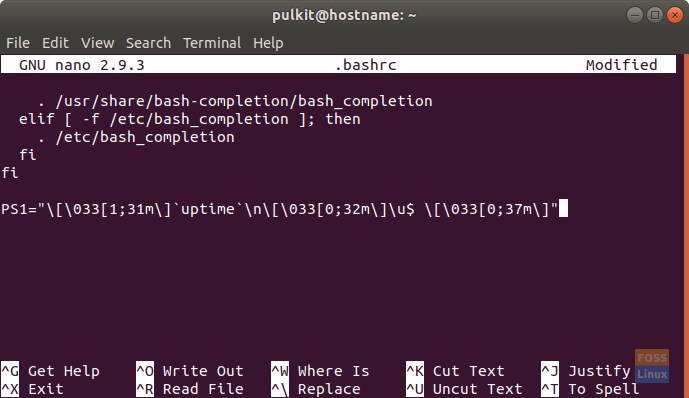
Editing .bashrc
Press CTRL + X, hit ‘Y’ and press ‘Enter’ to save the file.
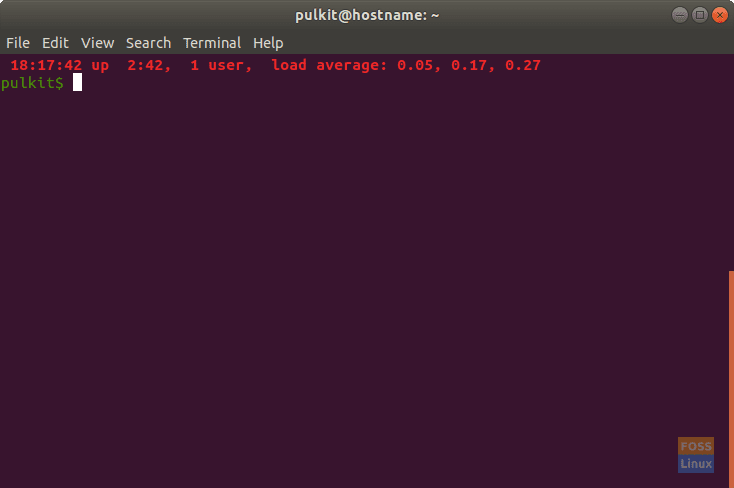
New formatted PS1
Conclusion
So that’s (almost) everything you need to know about customizing your Terminal. The latter part of the article can go much deeper, but we have kept it to a limit so that users don’t get confused. I hope you enjoyed the article.

1 comment
I have been using Linux-based distros for about a year and have done many customizations, but I never knew that the terminal can be customized too! I have learnt many things from this article, thanks a lot.