
Jenkins Pipeline is a suite of Jenkin features. It is one of the several ways of defining some Jenkins steps or combination of jobs using code and automate the process of deploying software.
If you haven’t set up Jenkins yet, head over to our Jenkins installation guide for instructions. The pipeline uses a Domain Specific Language(DSL) with two different syntaxes:
- Declarative Pipeline
- Scripted Pipeline
In this tutorial, we are going to configure the declarative pipeline with sonar and GitLab integration.
Configuring Jenkins Pipeline with SonarQube and GitLab integration
1. Prerequisites
Installing Pipeline plugin
If you had selected the option install suggested plugins when you configured Jenkins, it should have automatically installed all the needed plugins. If not, don’t worry, you can install the plugins now.
Launch Jenkins and go to Manage Jenkins -> Manage Plugins -> Available
If you can’t find the Pipeline plugin in the Available section, check the installed tab.

Pipeline Plugin
Installing Sonar Scanner
Login to Jenkins server first. Here, I am going to download the sonar scanner to the “/opt” folder.
cd /opt
Download using wget.
wget https://binaries.sonarsource.com/Distribution/sonar-scanner-cli/sonar-scanner-cli-4.2.0.1873-linux.zip
if wget command is not available, you can install it using the following commands:
For Ubuntu / Debian:
apt-get install wget -y
For Centos / Redhat:
yum install wget -y
Back to Sonar, it’s time to unzip downloaded Sonar file.
unzip sonar-scanner-cli-4.2.0.1873-linux.zip
Install unzip if you get command not found an error.
For Ubuntu / Debian:
apt-get install unzip -y
for Centos / Redhat:
yum install unzip -y
Rename sonar package.
mv sonar-scanner-4.2.0.1873-linux sonar-scanner

Rename Sonar Scanner
Go to the sonar directory.
cd sonar-scanner
Get the path.
pwd
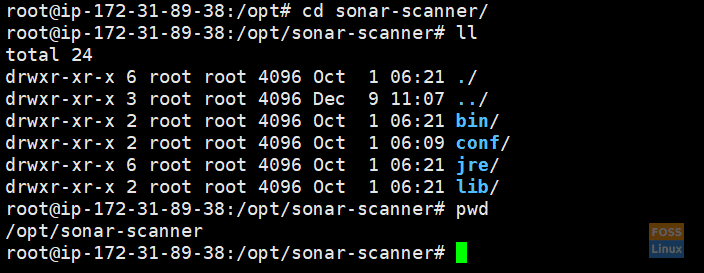
Sonar Scanner Path
Copy sonar scanner path:
/opt/sonar-scanner
Installing Sonar plugin
From Jenkin’s head to Manage Jenkins -> Manage Plugins -> Available
Search for Sonar and select SonarQube Scanner and click Install without Restart.
Then Jenkins should install the relevant plugin.
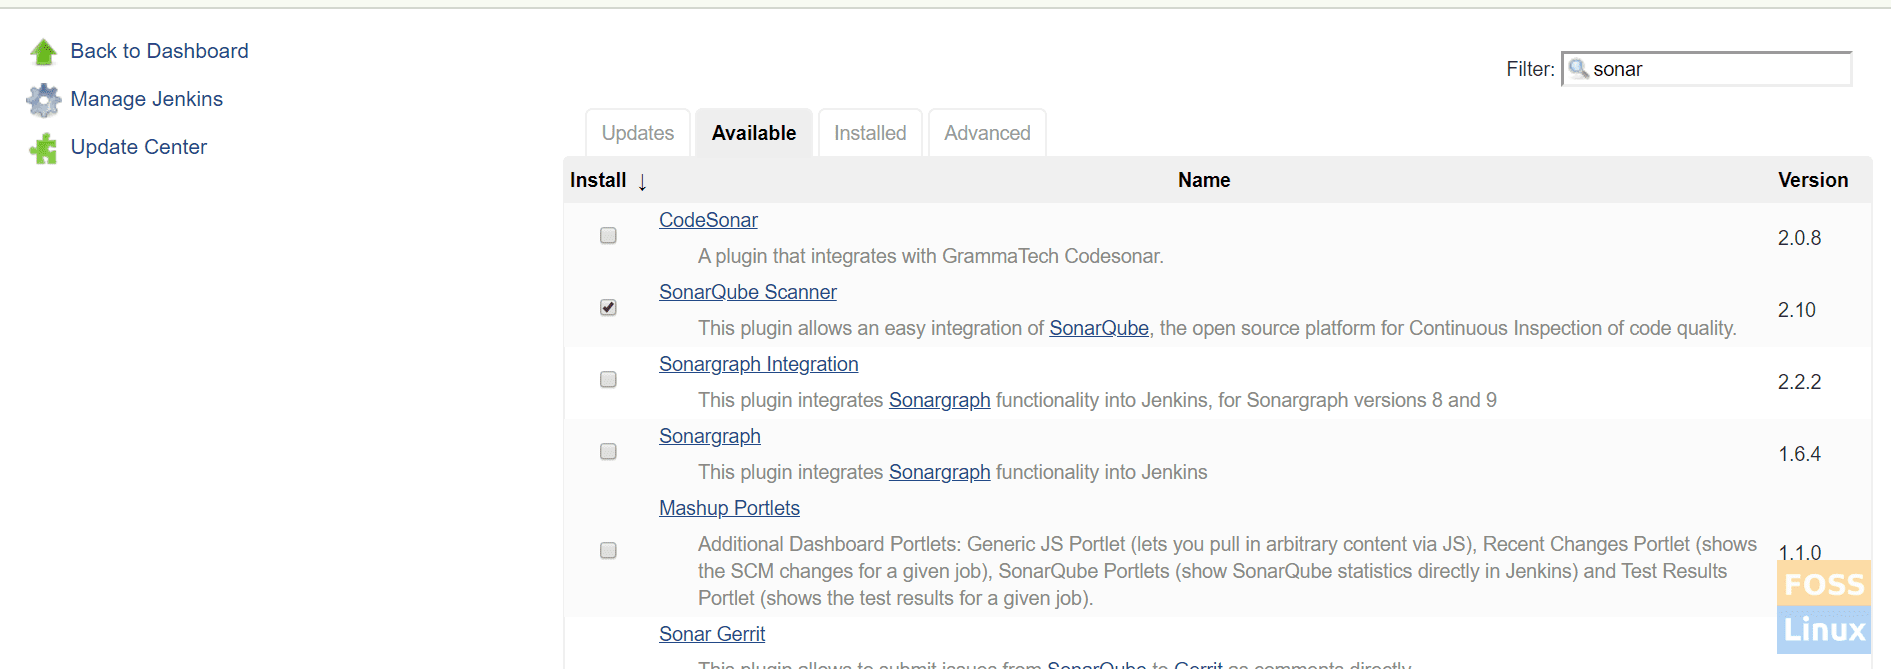
SonarQube Scanner Plugin

SonarQube plugin install
Select Restart Jenkins when the installation is complete. Jenkins should restart.
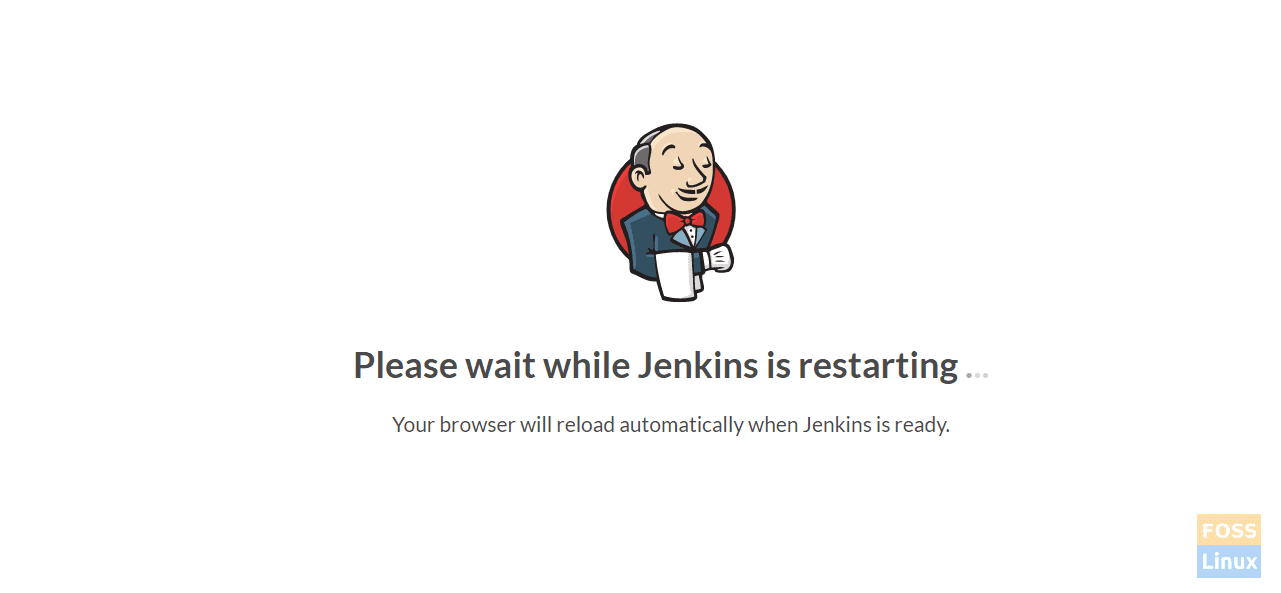
Restarting
Configuring Sonar plugins
Go to Manage Jenkins -> Global Tool Configuration.
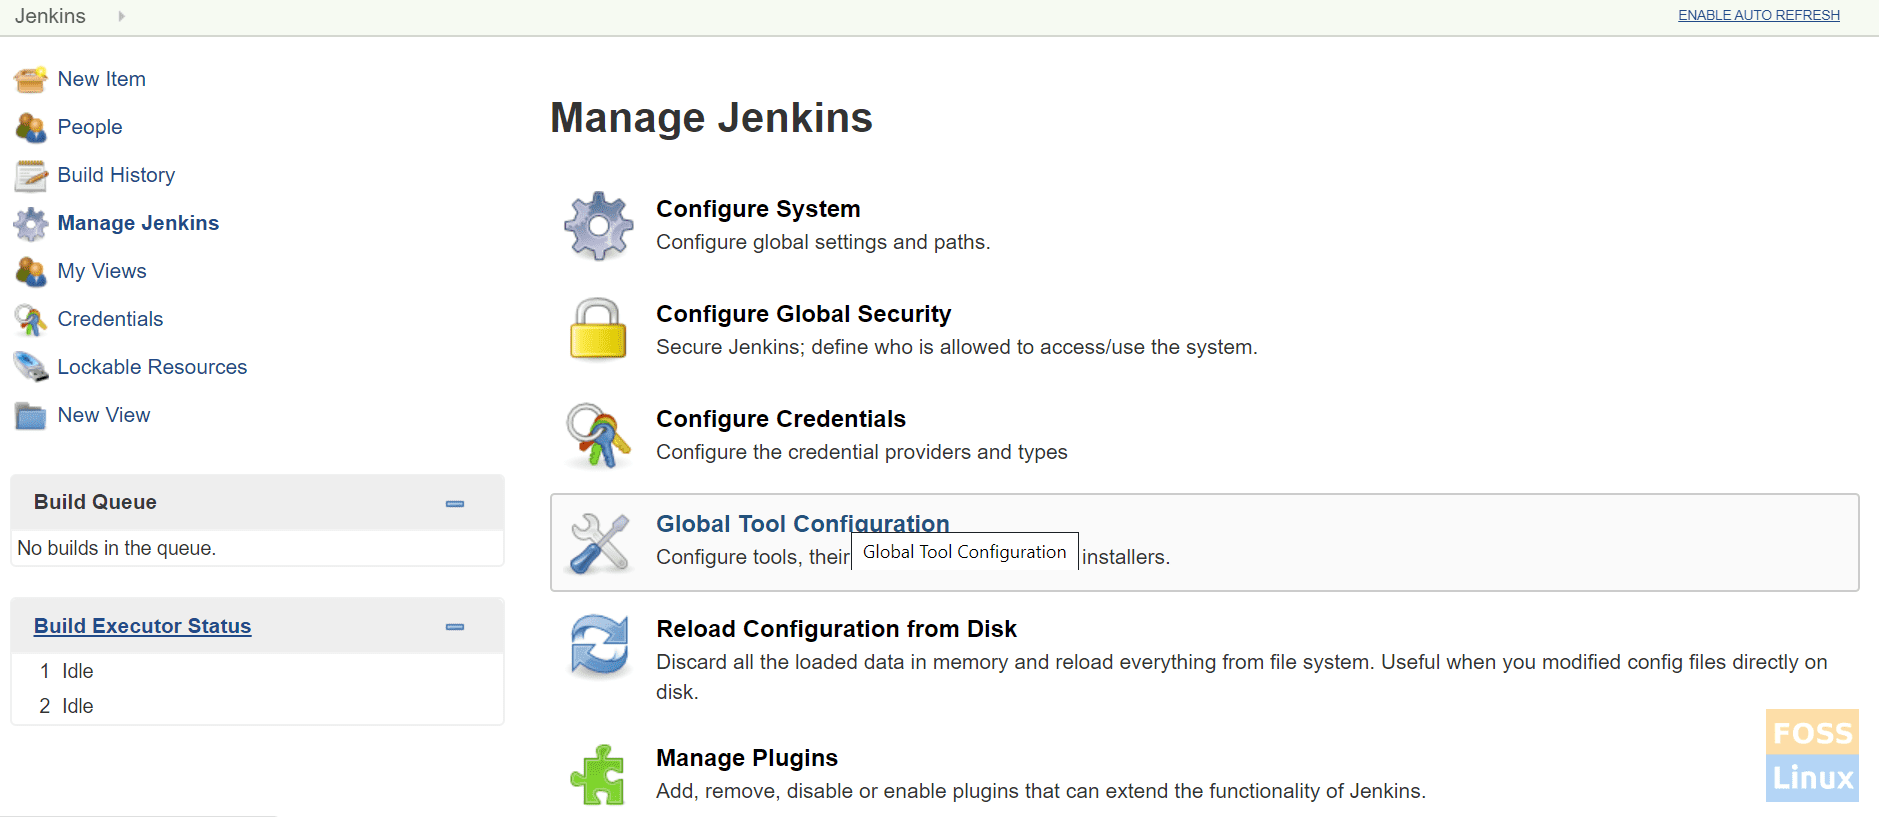
Global Tool Configurations
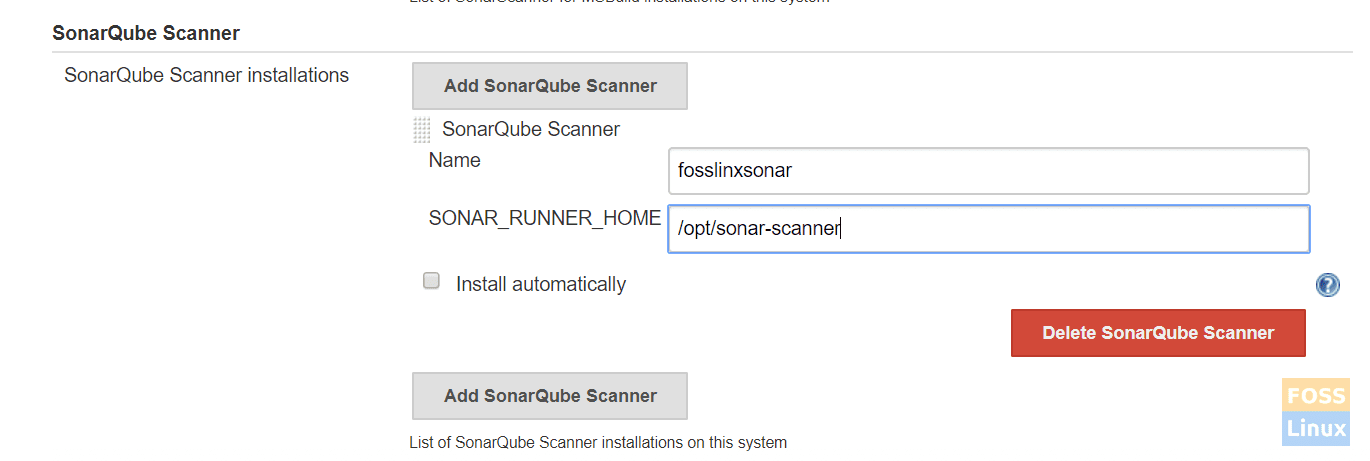
Find SonarQube Scanner and click on Add SonarQube Scanner.
Unselect install automatically.
Give any name and paste copied sonar scanner path to SONAR_RUNNER_HOME.
SonarQube Scanner Settings
Then save configurations.
Configuring Sonarqube server settings
Get SonarQube token from the SonarQube server.
Login to the SonarQube server. Follow our SonarQube server installation guide for install Sonarqube Server.
Go to Administration -> Security -> users.
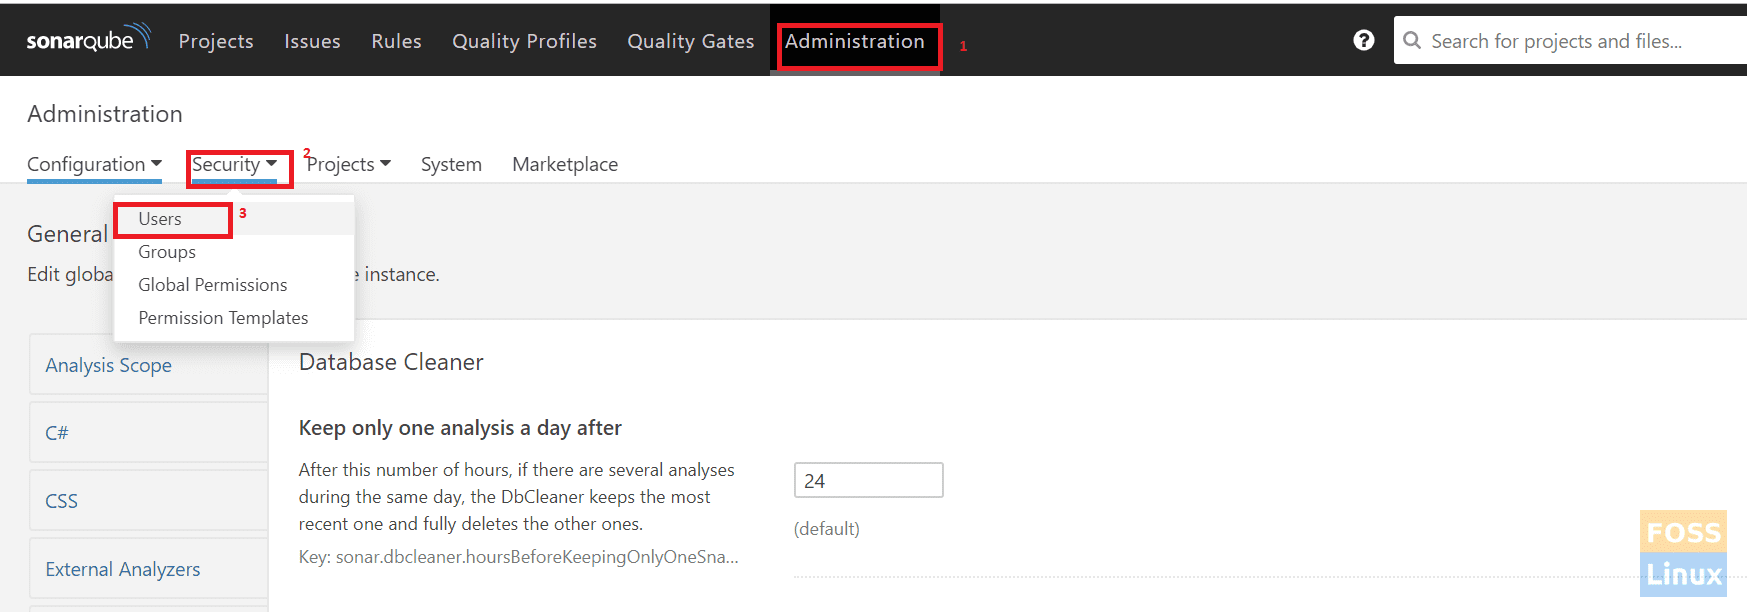
Click on Tokens.
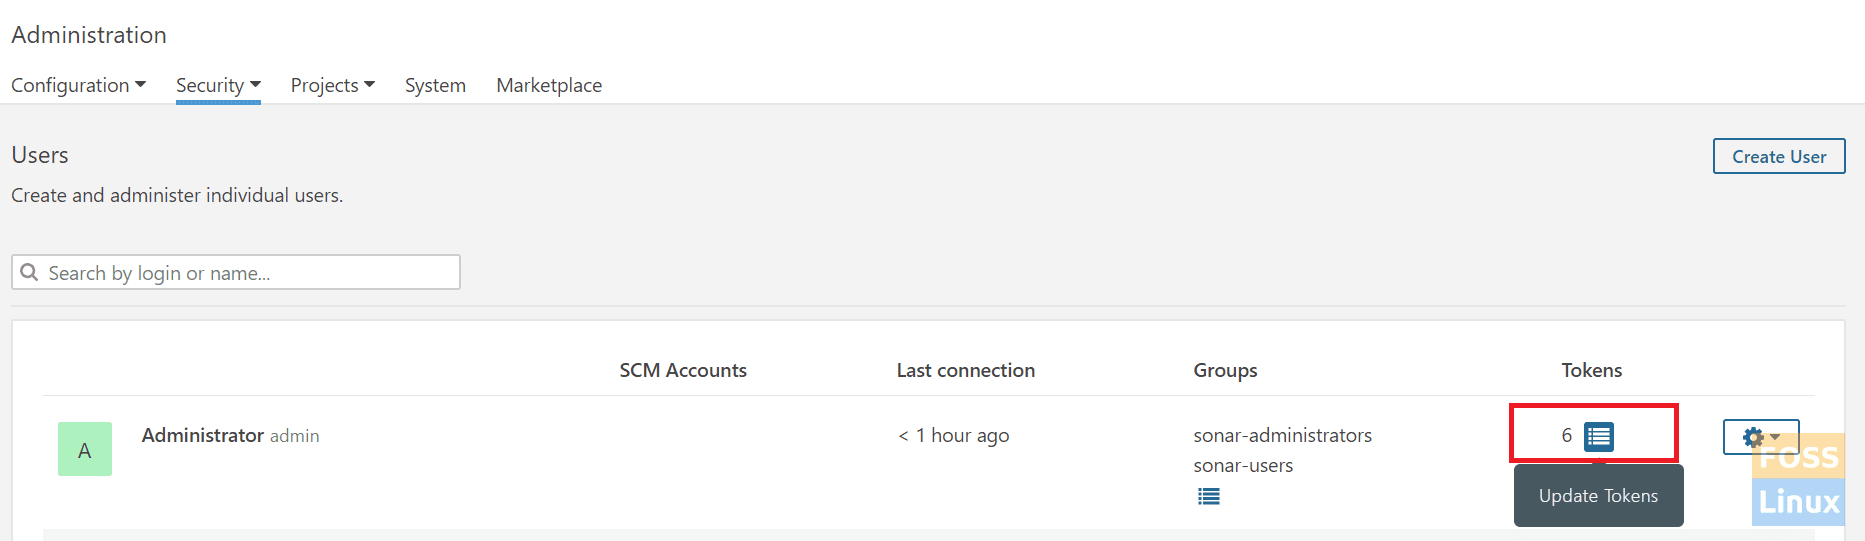
Tokens
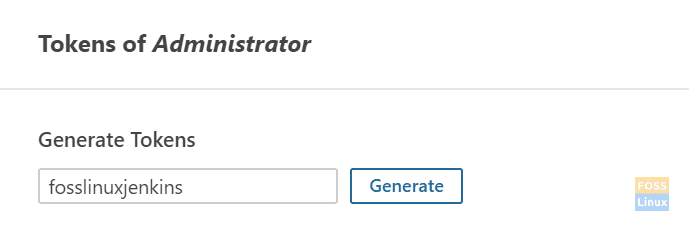
Give any name and click on Generate Token.
Create Token
Copy generated Token.
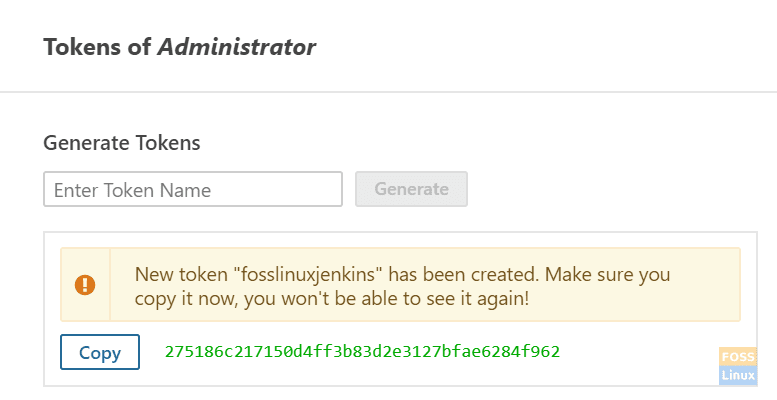
Generated Token
Now go to Jenkins Server.
Click Credentials -> System -> Global Credentials -> Add Credentials.
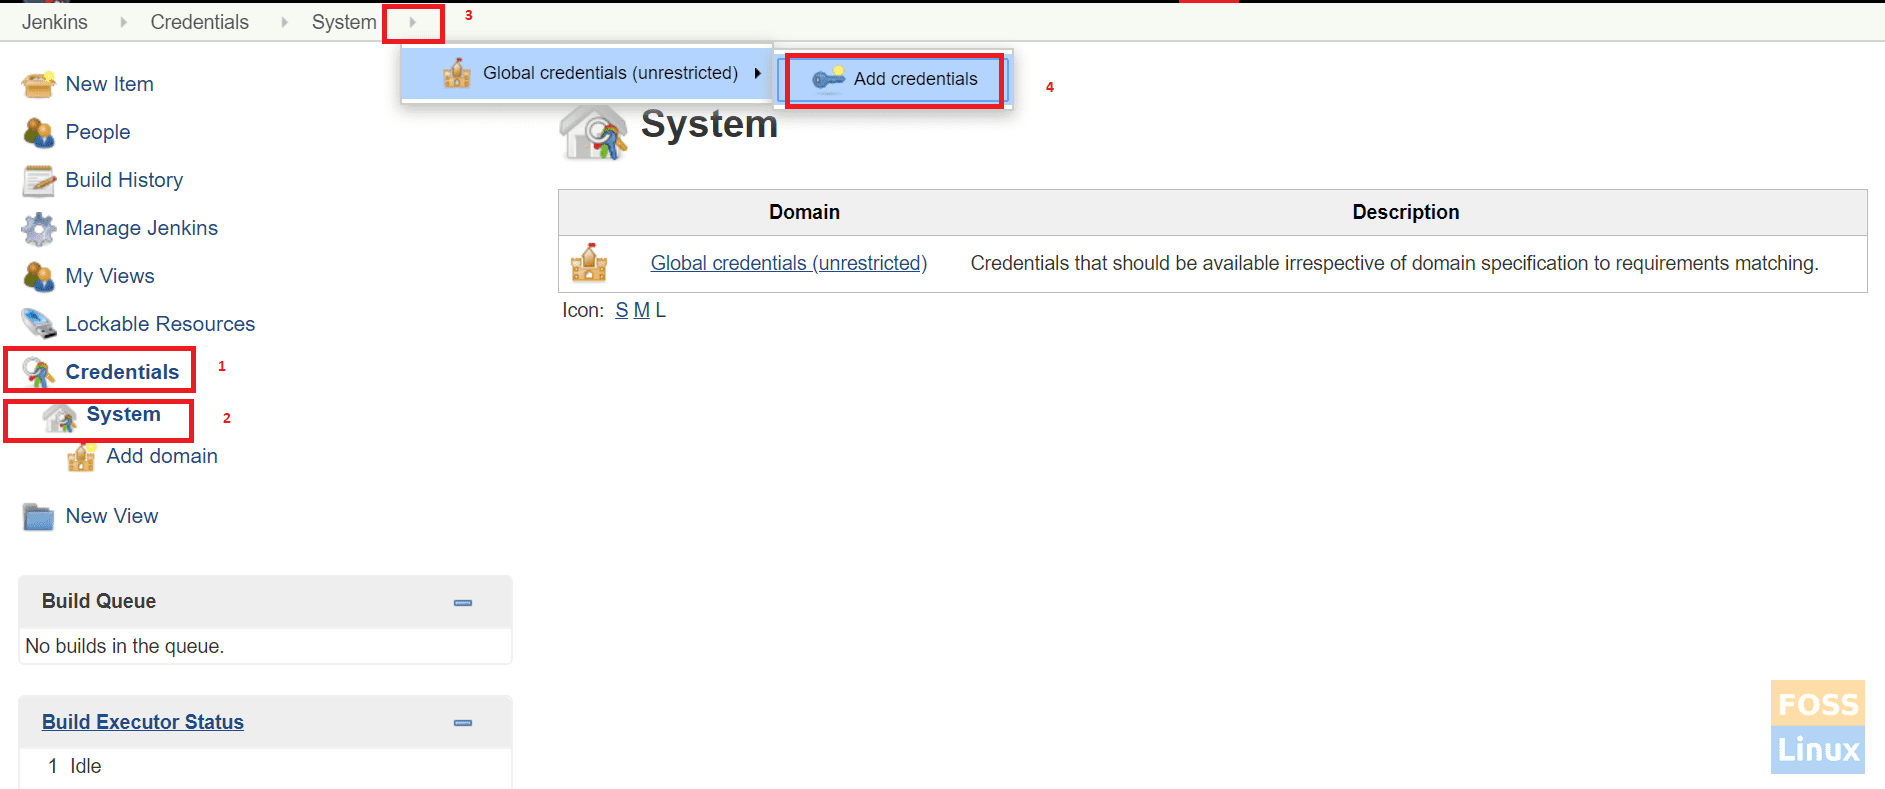
Add Global Credentials
Select Secret text. Paste copied SonarQube Token to Secret and give any name to ID and description.
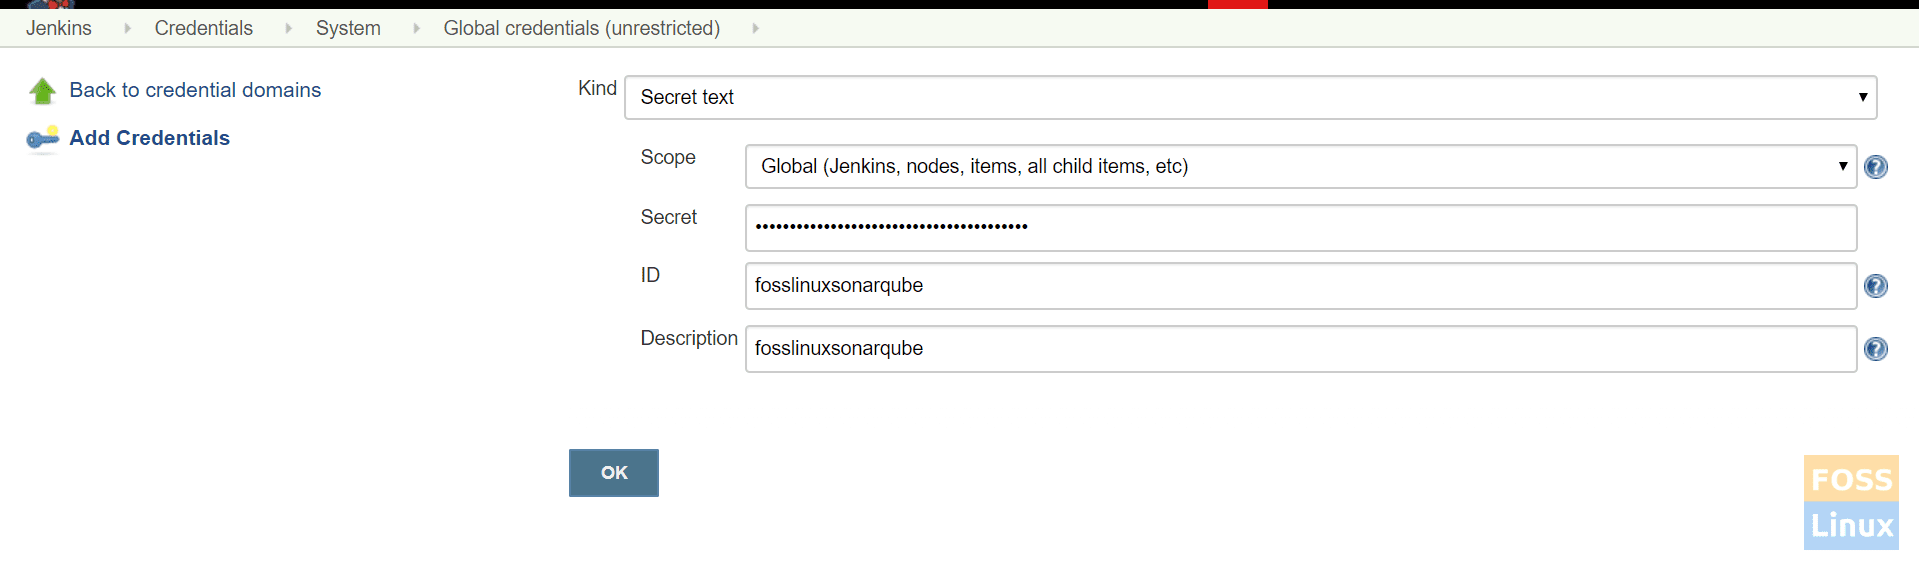
SonarQube Credentials
Adding SonarQube server to Jenkins
Go to Manage Jenkins -> Configure System.
Find SonarQube servers and click on Add SonarQube.
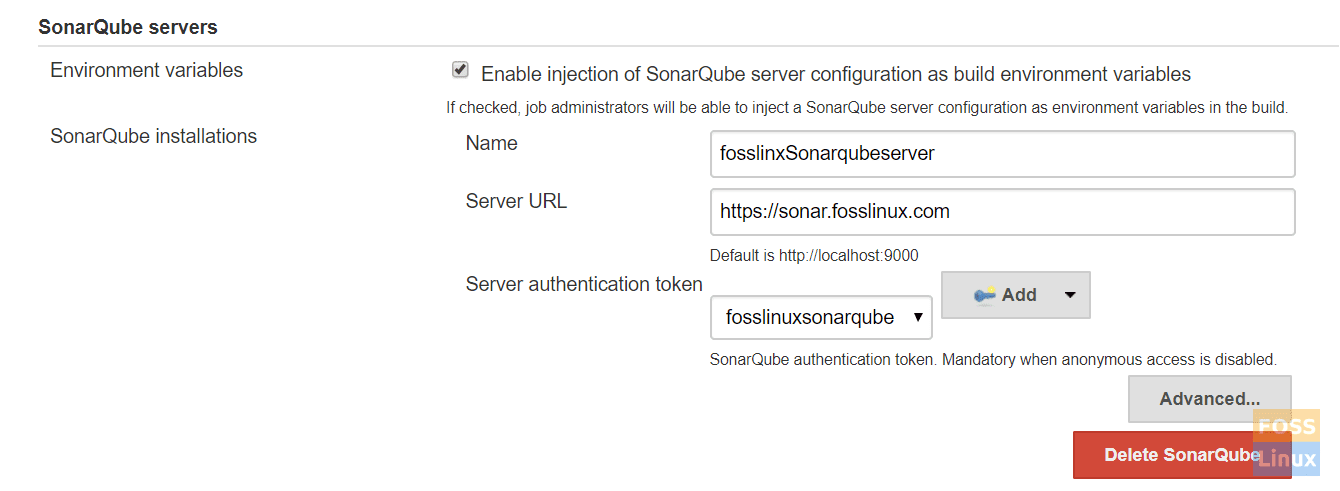
SonarQube Server Details
Select Enable on injection of SonarQube server, give any name, and add sonarQube server Url.
Select authentication token from the dropdown menu. The token we added previously should list here.
Adding the sonar-project.properties file to the repository root
Here is our file:
# Required metadata
sonar.projectKey=fosslinux-nodejs
sonar.projectName=fosslinux-nodejs

# Comma-separated paths to directories with sources (required)
sonar.sources=./

# Language
sonar.language=js
sonar.profile=node
# Encoding of sources files
sonar.sourceEncoding=UTF-8
Finally, click on save.
Integrating GitLab server with Jenkins
Follow our Gitlab guide for Installing and Configuring GitLab.
Go to Credentials -> System -> Global Credentials -> Add Credentials.
Select a username with a password. Add GitLab login credentials and click on OK.
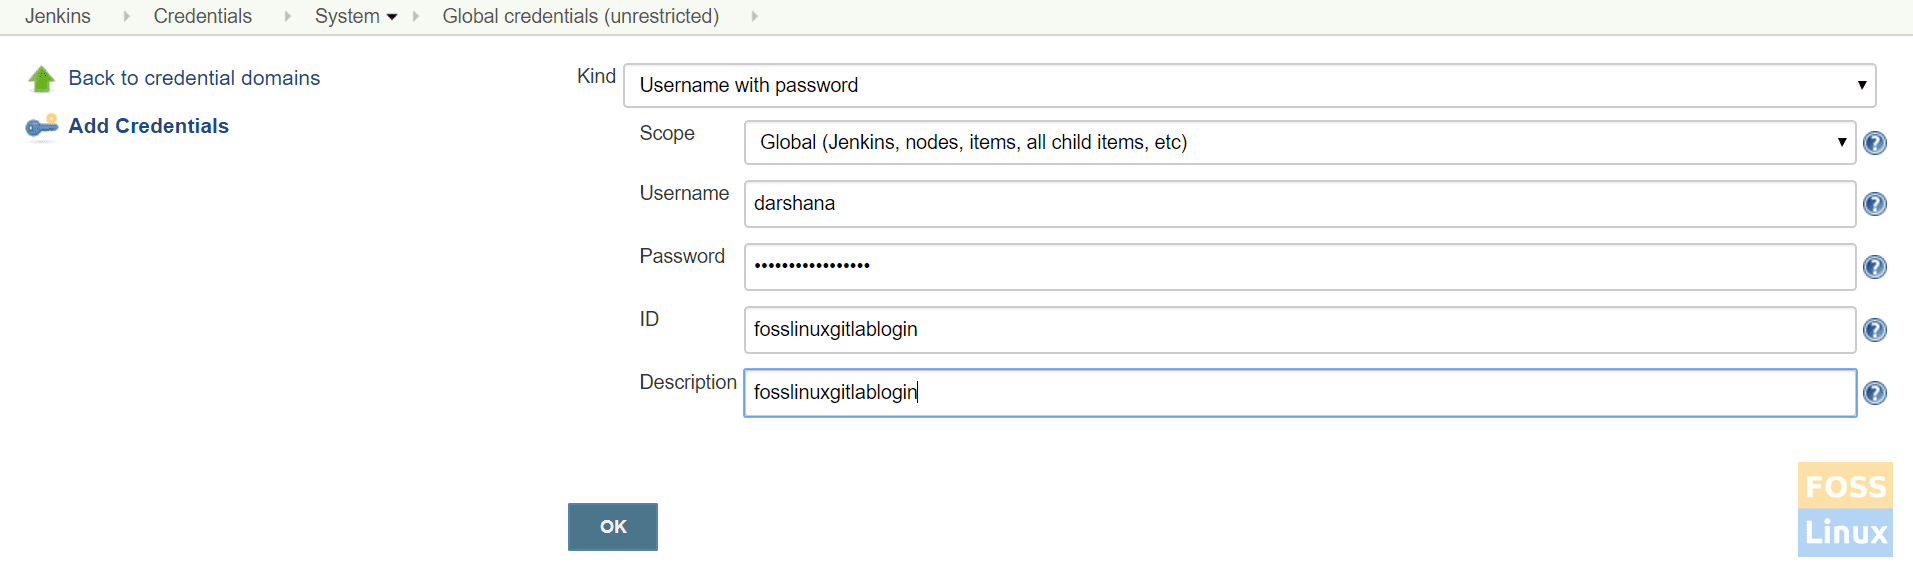
Gitlab Credentials
Login to Jenkins server and install git.
For Ubuntu/Debian:
apt-get install git -y
For CentOS/Redhat:
yum install git -y
Here we are going to work with the NodeJS app, so shall install it first.
Installing NodeJS plugin
Go to Manage Jenkins -> plugin manager -> available.
Search for NodeJS.
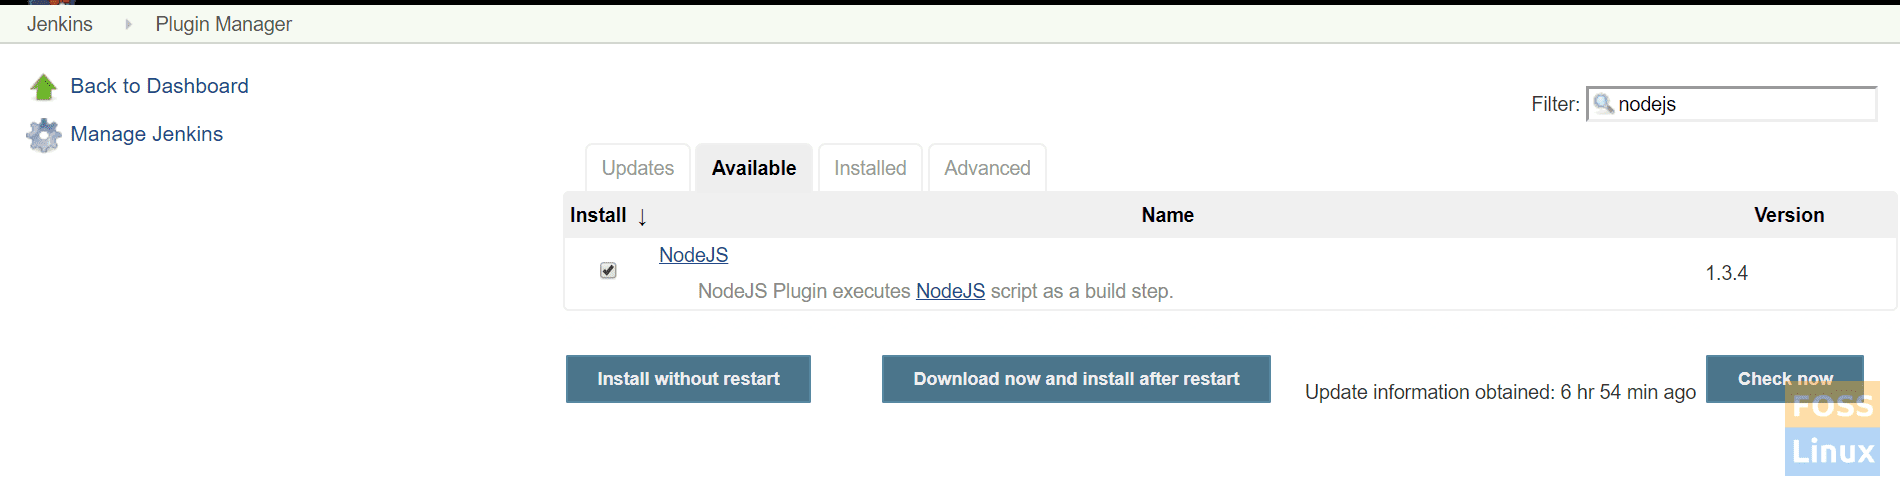
NodeJS Plugin
Then select the plugin and install without a restart.
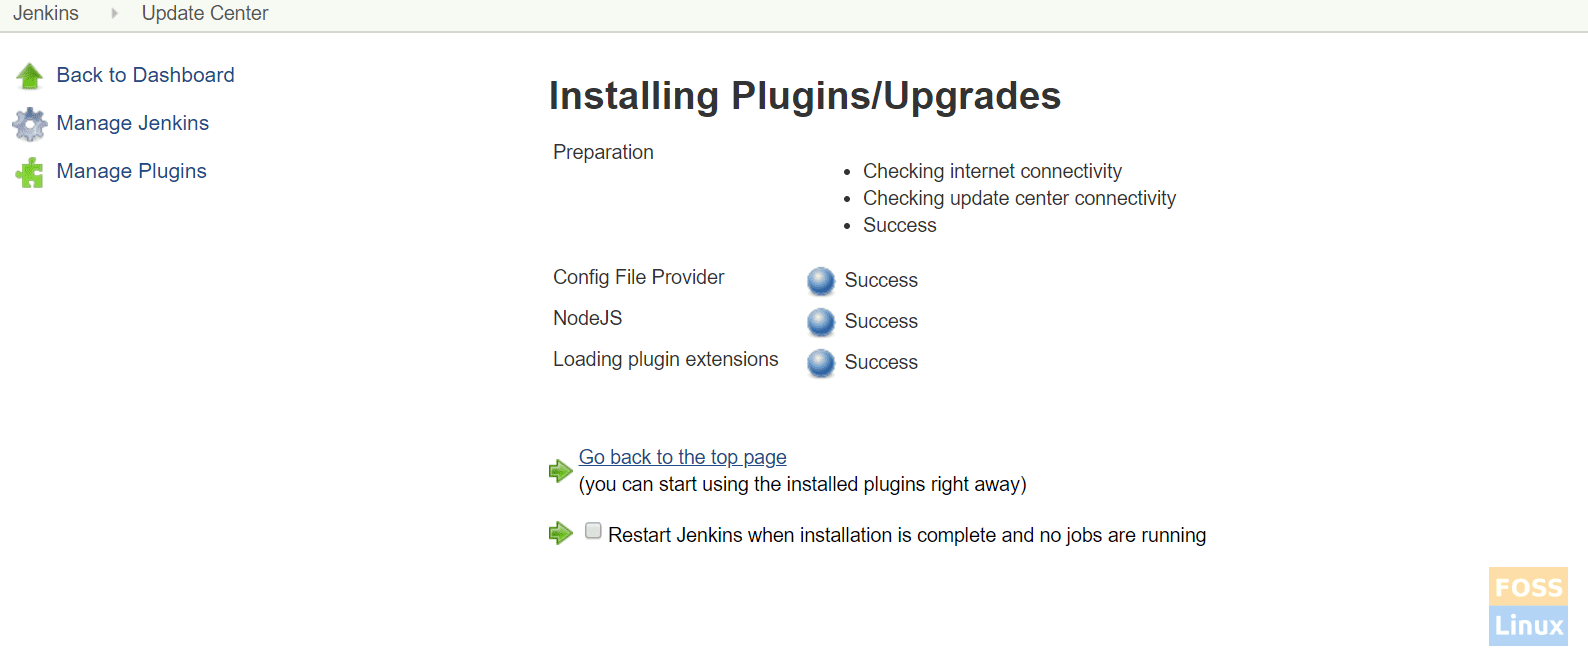
Installation Of Plugin
Click on Restart Jenkins when the installation is complete, and no jobs are running, and Jenkins should restart automatically.
Configuring NodeJS plugin
Click on Manage Jenkins > Global Tool Configuration -> NodeJS
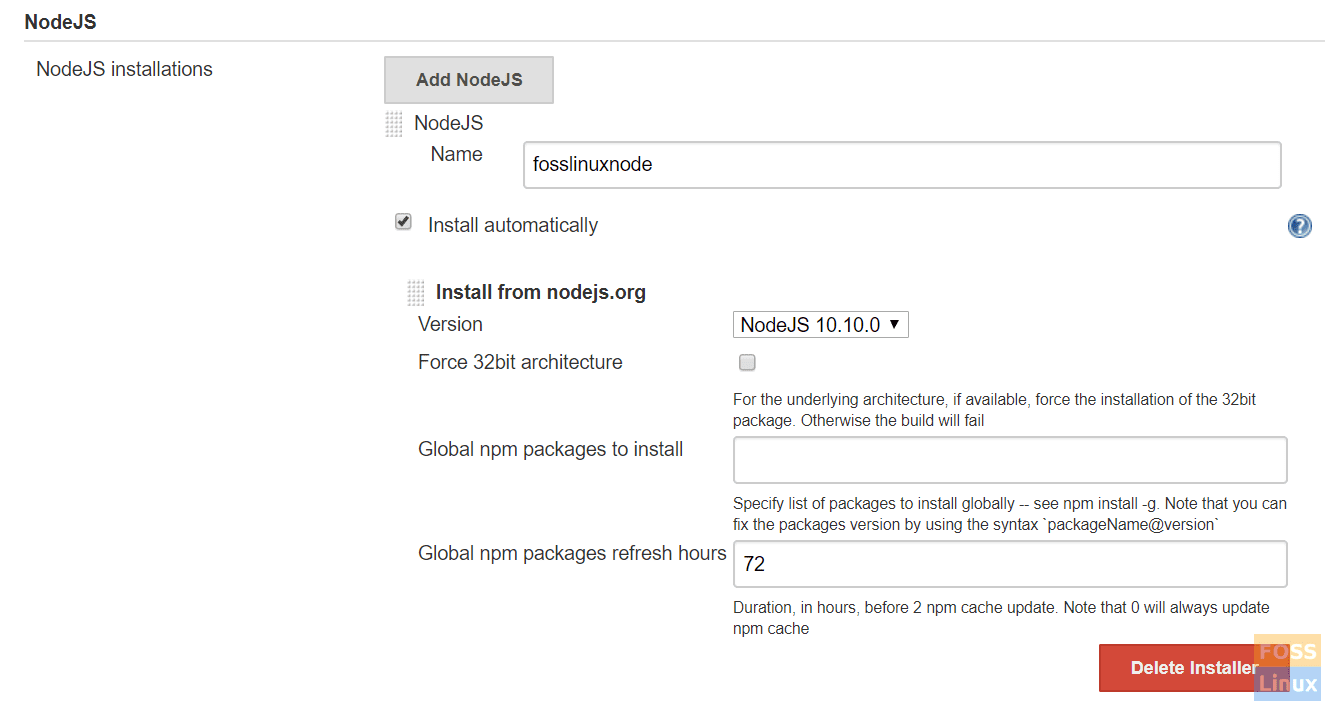
NodeJS Settings
Give any name. Here we have selected install automatically and NodeJS 10.
Save the configurations.
Creating a declarative pipeline
Go to Jenkins dashboard, click on New Item. Then enter an item name and select the ‘Pipeline’ project. Click OK.
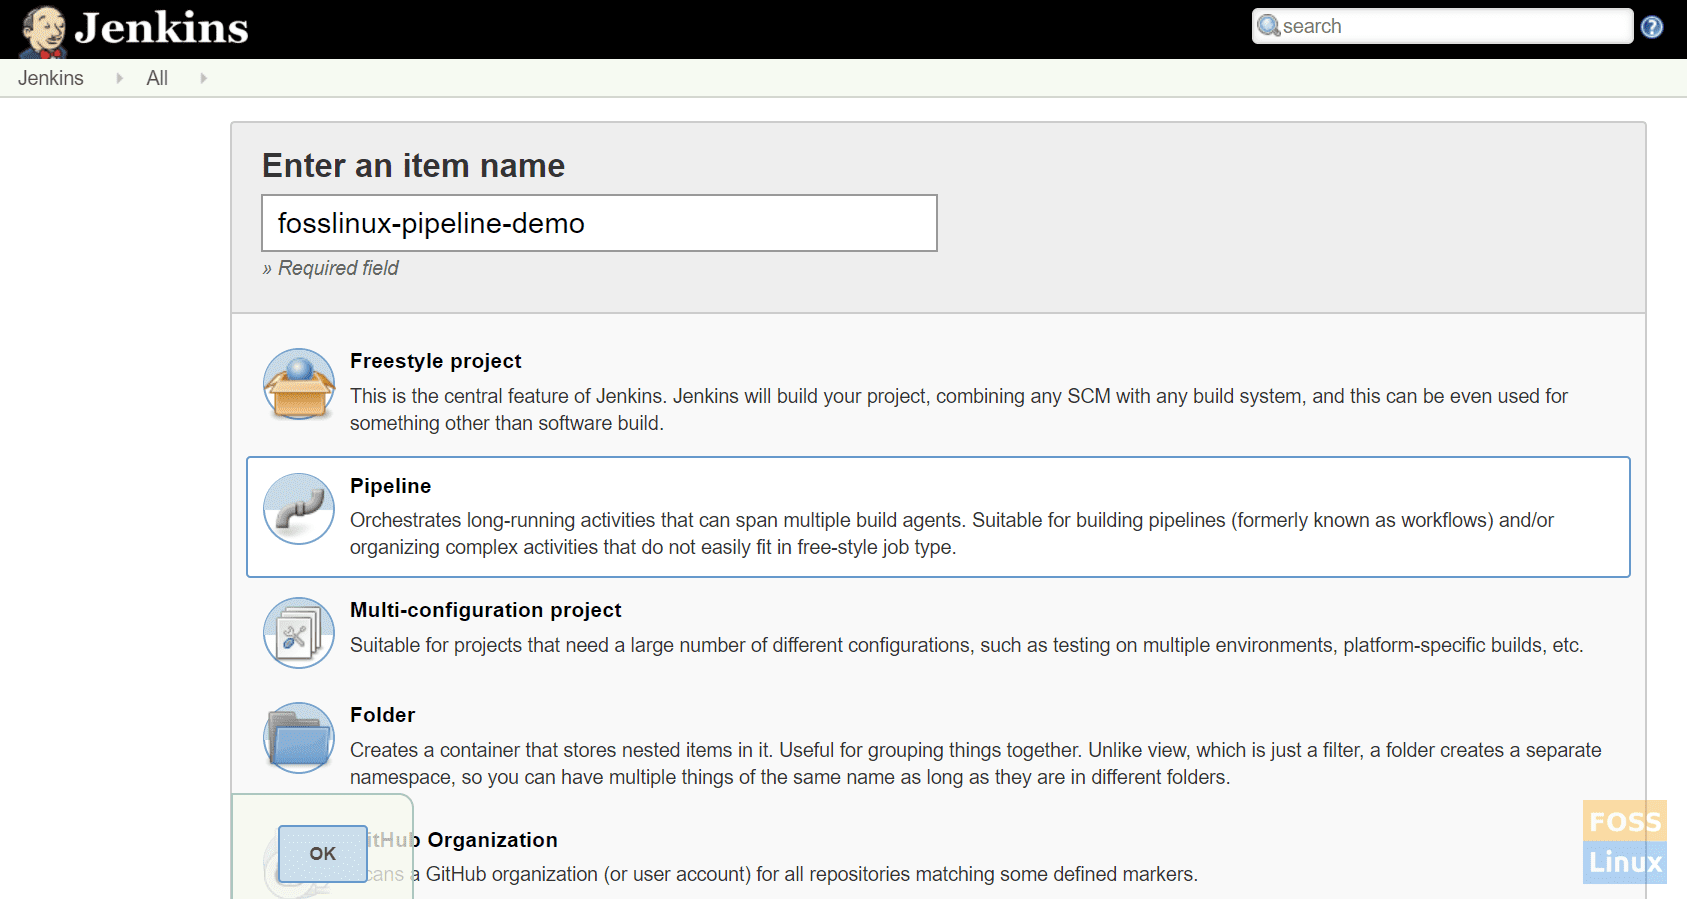
Create a Pipeline
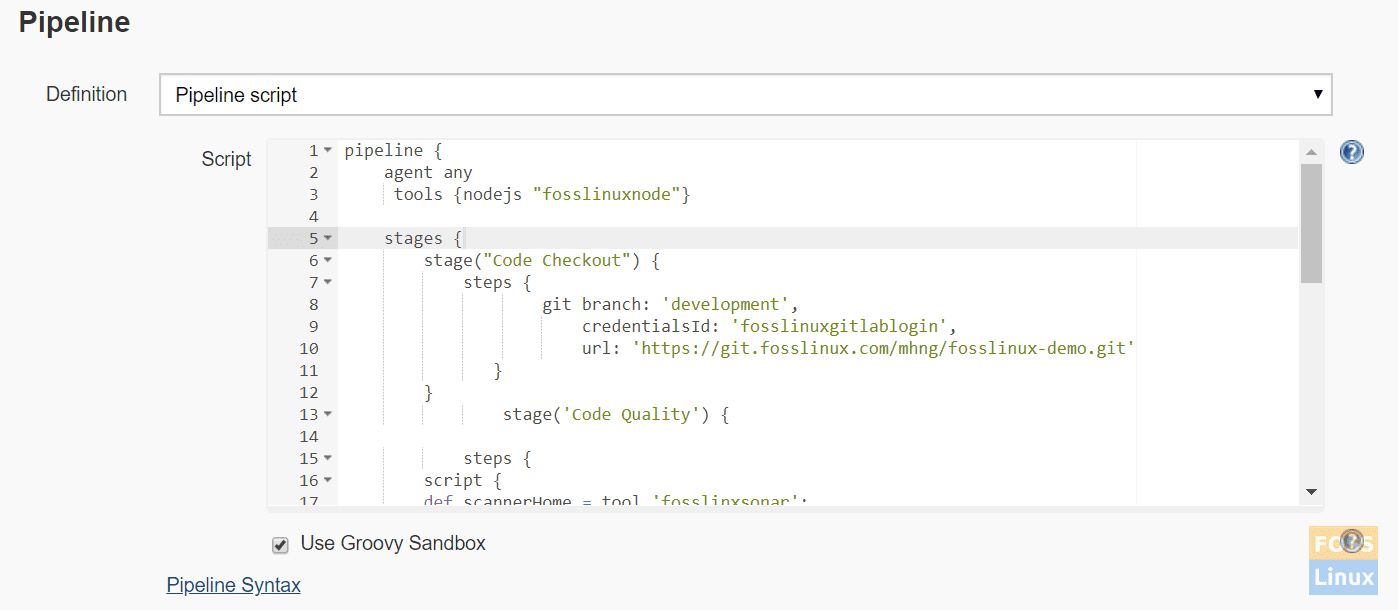
Select Pipeline Script

Select Pipeline Script
Here is the simple pipeline script for git clone, SonarQube quality check, and NodeJS.
pipeline {
         agent any
         tools {nodejs "fosslinuxnode"}

    stages {
        stage("Code Checkout") {
            steps {
                git branch: 'development',
                credentialsId: 'fosslinuxgitlablogin',
                url: 'https://git.fosslinux.com/demo/fosslinux-demo.git'
                  }
              }
         stage('Code Quality') {
                   steps {
                       script {
                          def scannerHome = tool 'fosslinxsonar';
                          withSonarQubeEnv("fosslinxSonarqubeserver") {
                          sh "${tool("fosslinxsonar")}/bin/sonar-scanner"
                                       }
                               }
                           }
                        }

         stage("Install Dependencies") {
                                  steps {
                                        sh "npm install"

                                       }
                                }

         stage("unit Test") {
                            steps {
                                sh "npm test"

                              }
                        }
             }
     }
Add the above pipeline script and save it.
Pipeline Script
Pipeline Concepts
a) Pipeline: This is a user-defined block that contains all the processes, such as build, deploy, etc.
b) Agent: The agent section specifies where the entire Pipeline, or a specific stage, will execute in the Jenkins environment depending on where the agent section is placed.
c) Any: This option runs the pipeline/stage on any available agent.
d) Stage: A stage block contains a series of steps in a pipeline. That is, the clone, build, deploy, etc. process a stage.
e) Steps: A series of steps can be added into a stage block. Simply this is a single task that executes a specific process. Now click on build.
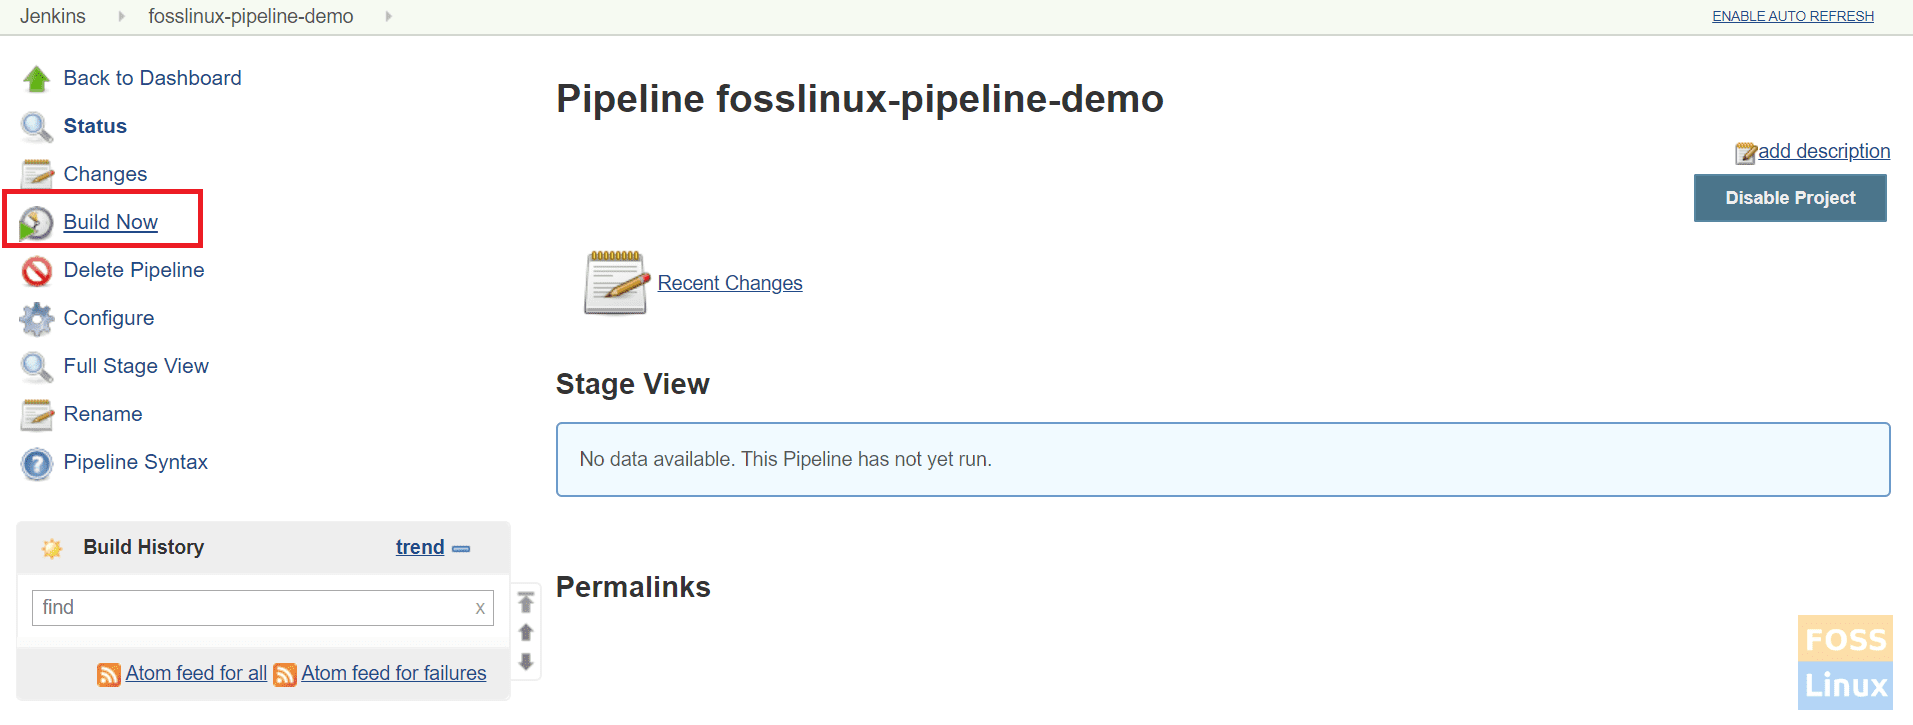
Build the Job
The pipeline should start to run.
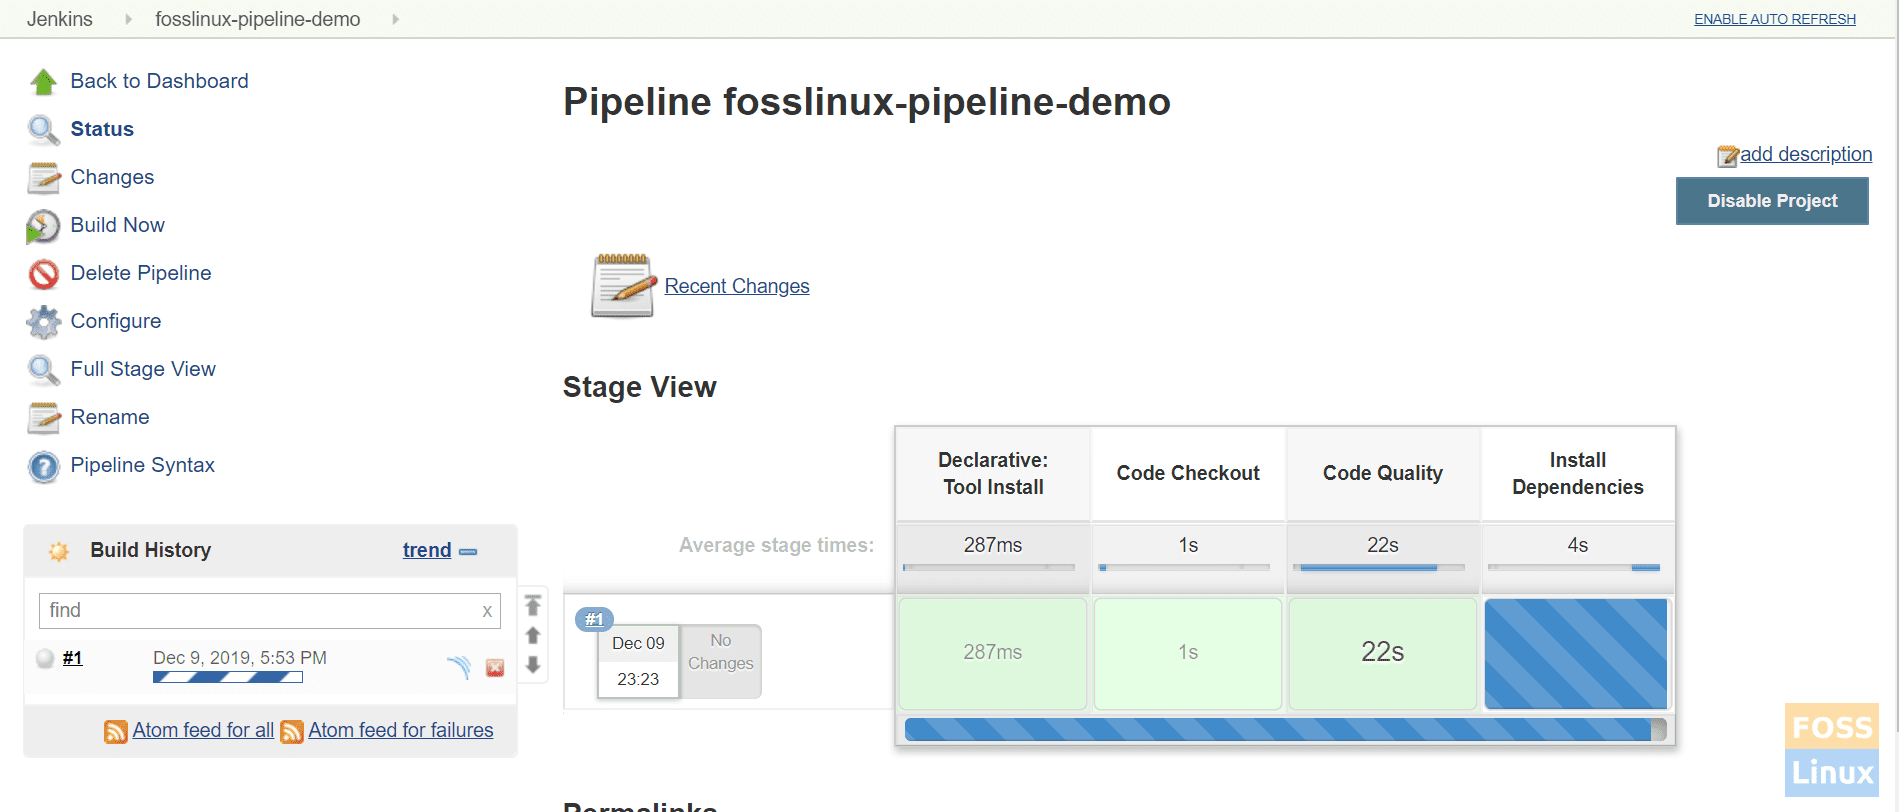
Pipeline Running
Here is a completed pipeline:
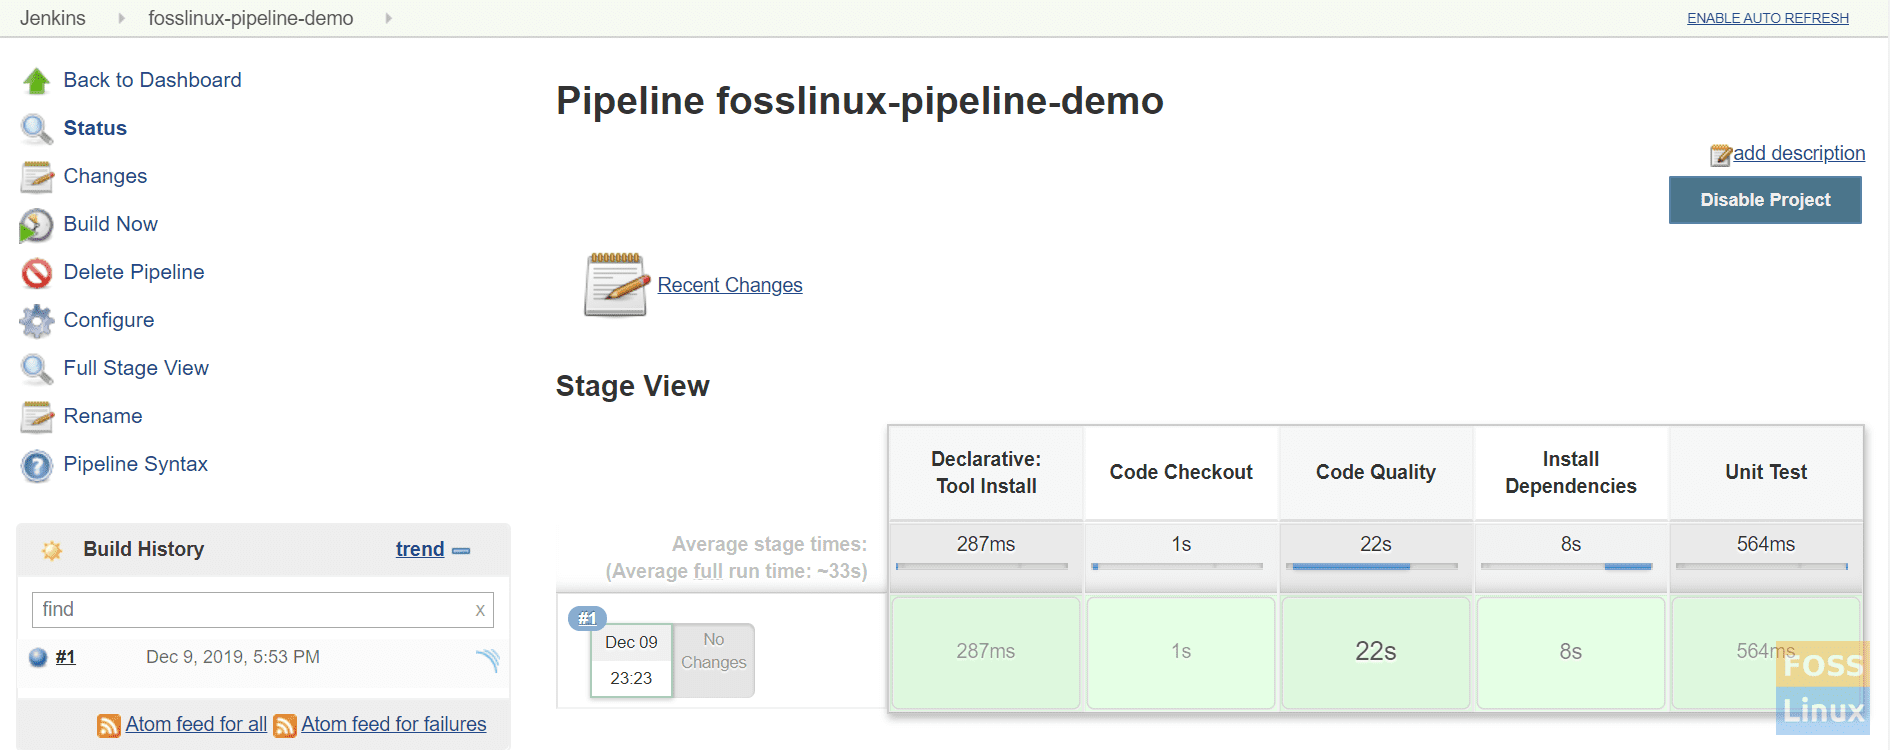
Completed Pipeline
That’s all about installing and configuring Jenkins Pipeline.
7 comments
Hi I found this tutorial very helpful, but I’ve one doubt that where to add the “sonar-project.properties” file, u mentioned it in root repository that means in sonar-scanner installed repository or in the jenkins path i.e. “/var/lib/jenkins/workspace/$JOB_NAME/”, can you please make me this clear as I’m getting error while executing the pipeline.
please add “sonar-project.properties” file in jenkins workspace folder.
with below values
sonar.projectName= xyz
#sonar.sourceEncoding=UTF-8
sonar.sources=.
# Required metadata
sonar.projectKey=fosslinux-nodejs
sonar.projectName=fosslinux-nodejs
# Language
sonar.language=js
sonar.profile=node
Hi, thanks for your helpful video, I am stuck here to start the elasticsearch service. I am getting this error “systemctl restart wazuh-manager.service
Job for wazuh-manager.service failed because the control process exited with error code. See “systemctl status wazuh-manager.service” and “journalctl -xe” for details.
”
Please help me.
I had that same issue and i solved it by going into /opt/sonarqube/bin/Linux_64_86/ and ran ./sonar.sh to stop the service running.
Then i then went and configured systemd and it worked.
Hi, thanks for your helpful Articale.
Thank you for this article. It saved me a lot of hours configuring jenkins and sonar on container
When i try to run my Jenkins job. following error is displayed.
+ /var/lib/jenkins/tools/jenkins.plugins.nodejs.tools.NodeJSInstallation/sonardemo/bin/sonar-scanner
/var/lib/jenkins/workspace/demosonar@tmp/durable-f32cf5e2/script.sh: 1: /var/lib/jenkins/tools/jenkins.plugins.nodejs.tools.NodeJSInstallation/sonardemo/bin/sonar-scanner: not found
[Pipeline] }
WARN: Unable to locate ‘report-task.txt’ in the workspace. Did the SonarScanner succeed?
can some one ;et me know what was the error.