We have all had that moment when we copied a text, but we first needed another one, and in the process, lost the first one. If you’re lucky, you can get it back quickly with a bit of work.
But what if you can not, and that information was crucial? The solution is a clipboard manager. The one that we are going to talk about today is CopyQ for Linux.
CopyQ clipboard manager features
CopyQ is a top-rated clipboard manager, especially in the case of Ubuntu and its derivatives. It has a significant number of features and is very helpful. Some of the simple things are: it stays in the tray so that users can access it easily anytime, and it preserves the clipboard on reboot.
CopyQ can also be used to copy images (up-to 320×240 by the default), and HTML formatted text. You can even search for specific text items in the clipboard interface. Just start typing, and any entries containing the words will show up.
Other important features include:
Easy access to Clipboard
The clipboard can be easily accessed using the top bar. Everything that you copy remains there and can be used as the active copied text just with a click. These entries are preserved over a reboot unless configured otherwise or deleted by the user. The other options, such as the clipboard manager, the preferences window, etc. are also accessible through the tray icon.
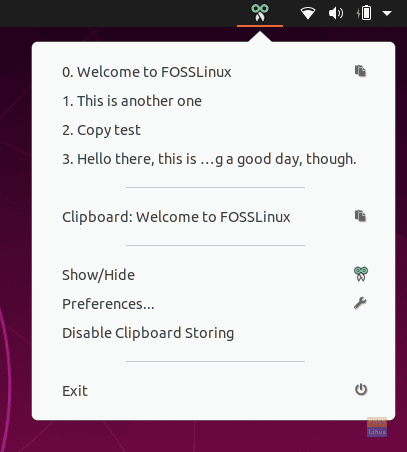
Tray icon.
Clipboard Manager
The actual clipboard manager comes up when you click the ‘Show/Hide‘ option in the quick-access toolbar. It has a high number of options. Some of these are:
- Creating a new entry
- Pinning entries to a position, and adding flags to entries
- Make an entry the active clipboard content
- Delete and edit entries
- Make and configure notes related to a specific entry.
These are the options that are available in the toolbox on the side.
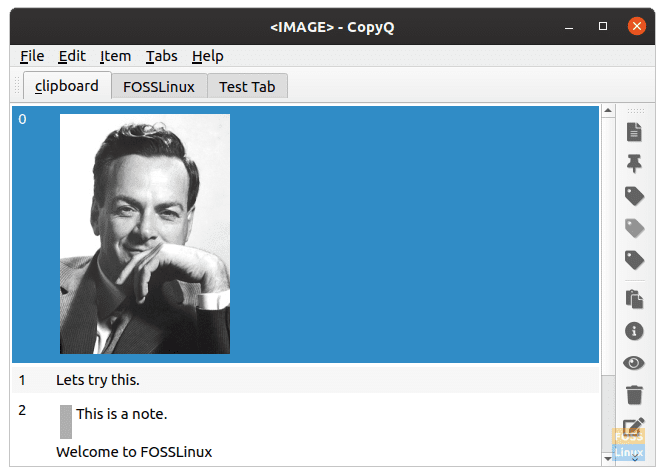
Clipboard overview.
Copy an entry when required
To copy one of the entries in the clipboard manager, first of all, place the cursor in the program in which you need the text added and open the clipboard manager. Then double-click the desired entry, and the content of that entry will appear in the program.
Clipboard content
There is an option that appears when the tray icon is expanded, named ‘Clipboard,’ which, when clicked, shows the information about the current active clipboard item. For example, if the content is copied from a website, the link of the site is shown, the content itself is shown in several character sets.
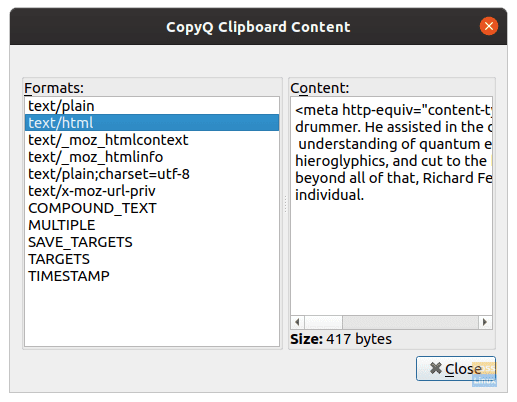
Clipboard content.
Tab Management
Other than those options, there are even options for tab management. You can make and manage various tabs of clipboard data, according to your requirements. This generally would not be required, but in case you always need to enter some data on a website, or a program, you can easily store a bulk of that information here, in a more organized way. Of course, you can also rename the tabs, which should be helpful in management.

Tab management.
Using the ‘Tabs’ option in the toolbar, users can easily create, delete, rename, and switch tabs.
Built-in editor
CopyQ’s clipboard has a build-in text editor, which can be used for fundamental things, like making text bold, italics, underlining, changing the font, or the font color.
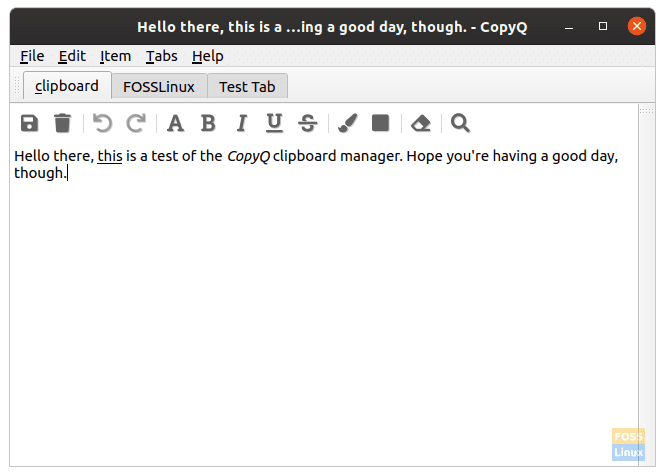
Built-in editor.
Notes
Notes can be made and attached to the entries in the clipboard. This note appears with a bar on the left and isn’t a part of the content that gets transferred to the clipboard. This is helpful in case of vague entries to the clipboard, like alpha-numerical strings, or ciphers.
Preferences options
Apart from these things, CopyQ has got a considerable amount of options in the preferences menu. Some of the important things are listed below:
General Options
Some of the essential options are whether or not to store the clipboard content over a reboot. This is under the option ‘Store Clipboard.’ There also is an option to autostart CopyQ on boot-up.
Other options are:
- Choose default language
- Toggle warping of long text
- Toggle closing or not when the window is unfocused
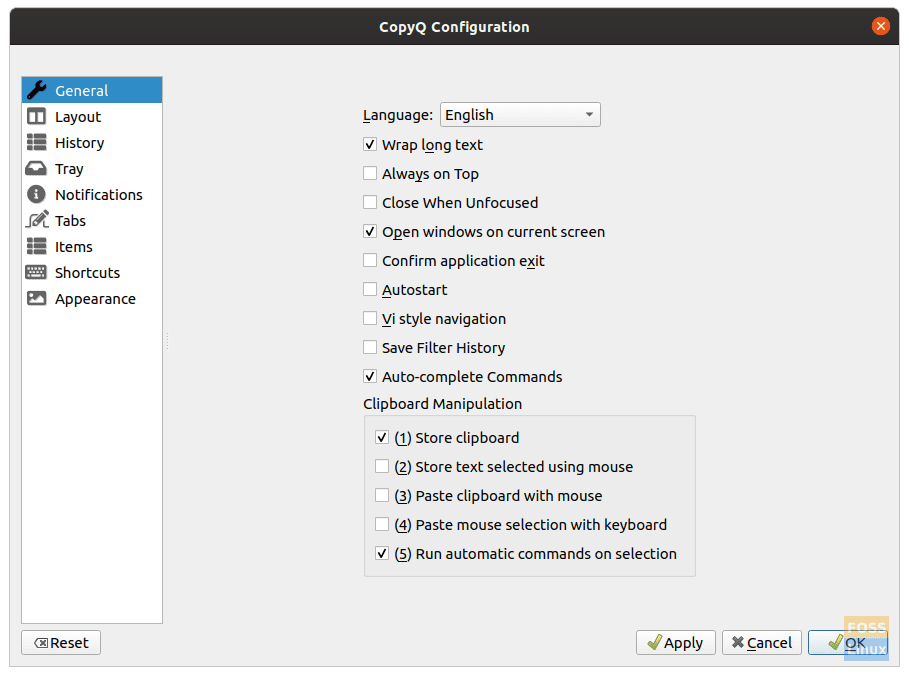
General options.
Layout options
Layout options include toggling for:
- Hiding/showing tabs
- Hiding/showing toolbars
- Hiding/showing toolbar labels
- Hiding the main window
- Enable/disable tab tree
- Show/hide item count
Other than that, focused transparency and unfocused transparency can be configured.
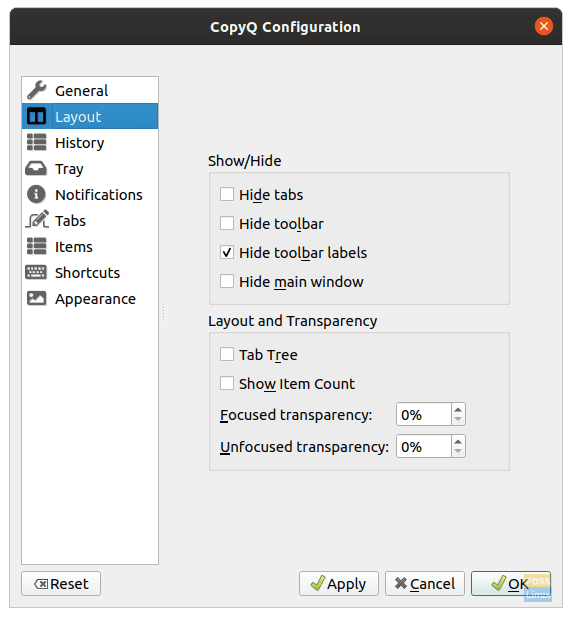
Layout options.
History
History configurations can be used to specify which tabs to use for actively recording the clipboard. The maximum number of items CopyQ can hold can also be changed (default is 200), and there are options for action after an entry is double-clicked (activated), which are:
- Moving item to the top
- Closing main window
- Focusing the last window
- Pasting to the active application’s window
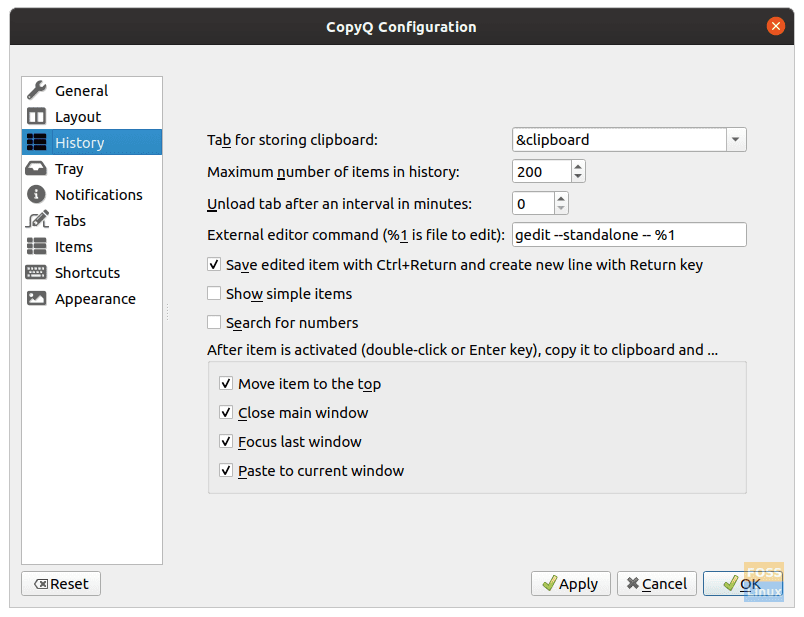
History.
Items
The ‘Items’ preferences hold quite several things. What follows is a concise list of the options:
- Images: Can be used to set the maximum width-height (in px) for the copied image. The default program for image editing can be specified here.
- FakeVim: Checking this box enables users to use the Vim-like editor as the editor for CopyQ. So Vim users, do not fret, CopyQ has got you covered. Even a configuration file can be mentioned for the editor.
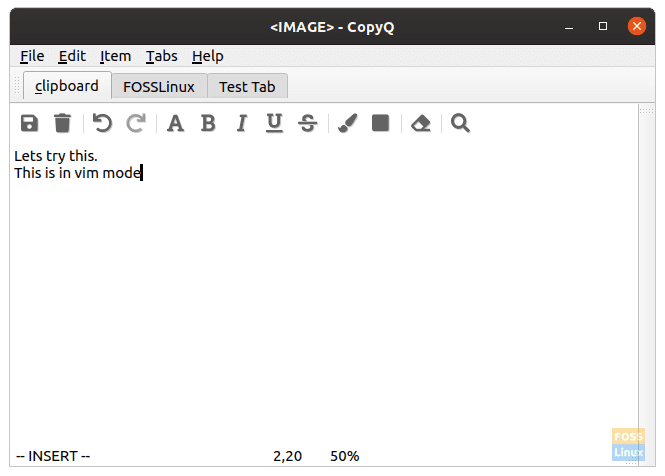
Vim mode.
- Tags: Tags can be configured, like the name, color, icon, etc., in case you would want to create tabs other than the default ones that are available already.
- Text: A checkbox is provided to copy and display HTML and Rich text. The number of lines to show, and maximum height in pixels an also be configured.
Shortcuts
The configurations for keyboard shortcuts are also provided, for pretty much everything that you would want to do. Some notable options are:
- Launch clipboard
- Show the tray menu
- Add item
- Take screenshot
- Paste current date/time
(We recommend to take care that you do not coincide any of these shortcuts with any of the default shortcuts of your system).
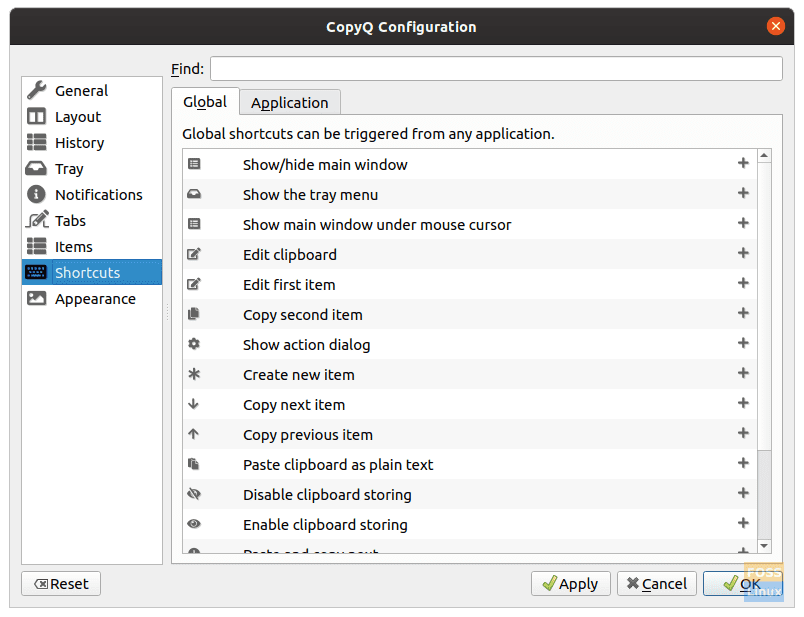
Keyboard shortcuts.
Appearance
Appearance configurations give many tweaks for CopyQ. The background and foreground colors and font can be changed for standard text, selected text, searched text string, notes area, numbers, etc.
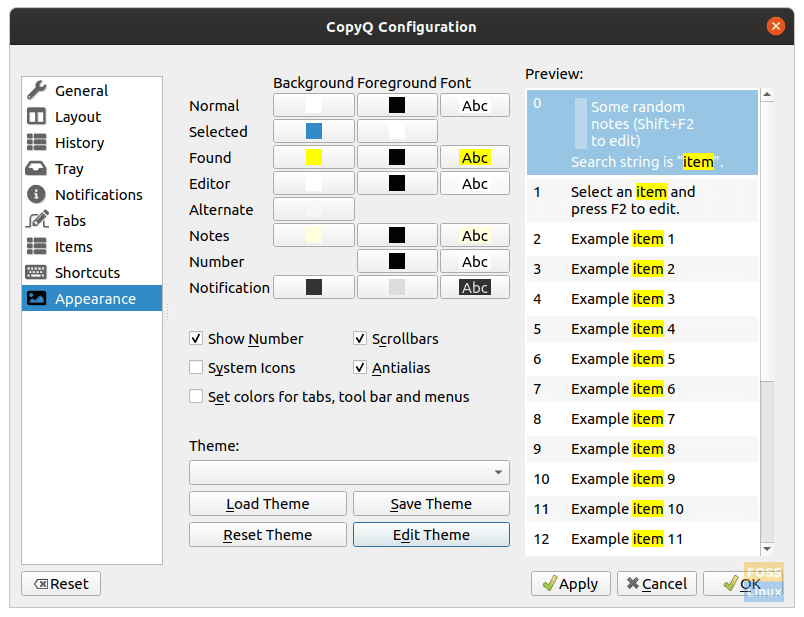
Appearance configurations.
Other than that, the serial numbering can be toggled, and scrollbars can be toggled as well. The theme can even be edited through a simple text configuration file that uses CSS. Otherwise, if you have one already, it can be applied.
A small window on the side shows the preview of the configured areas.
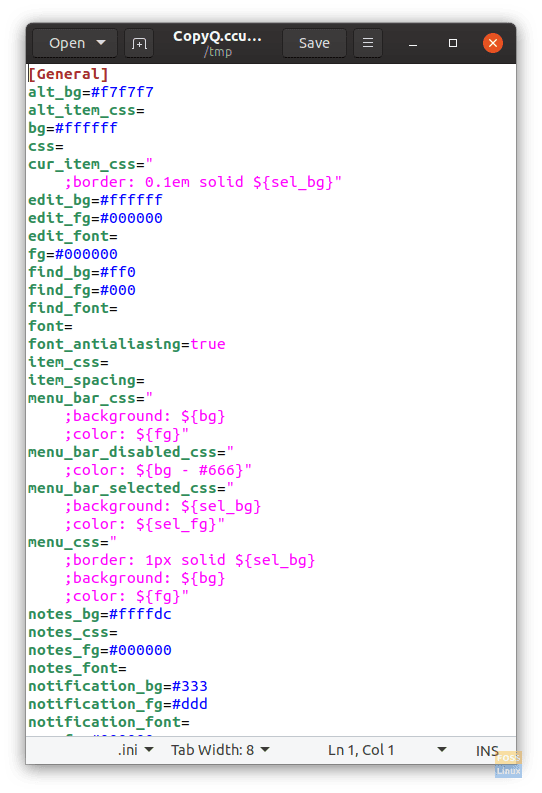
Appearance config file.
Install
For installation on Ubuntu or Debian (or any derivatives), enter the following command:
sudo apt-get install copyq
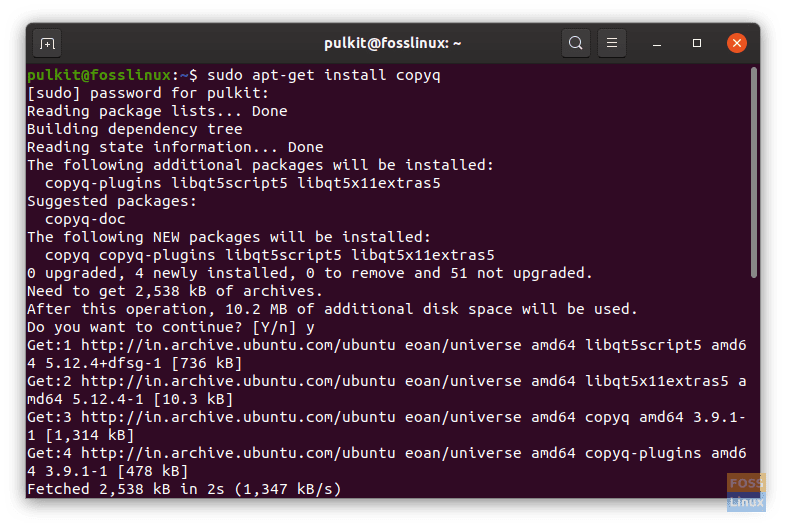
CopyQ installation.
On Fedora, use the following command:
sudo dnf install copyq
Packages for OpenSUSE or the source code can be found here.
Conclusion
CopyQ is an extensive clipboard manager that has some powerful features for every Linux user out there. We have covered the most important options, but to find more, try to take it for a spin and see if it fits your needs. More information or documentation can be found here.

