Node.js is an opensource cross-platform Javascript platform used for general-purpose programming to develop scalable network applications. It’s built on Chrome’s V8 JavaScript engine and allows the execution of javascript code on the server-side.
Sometime back earlier, javascript was just executed on the client-side (frontend) and hence the name (client-side scripting). Nowadays, with Node.js, Javascript can also be supported and performed on the server-side(backend). That means, we can develop applications fully supported by javascript on both frontend and backend.
Installing Node.js and NPM on Ubuntu
This tutorial should give you a step by step procedure on how to install Node in your Ubuntu system together with NPM (Node Package Manager). We will also show you how to manage and install Node.js using NVM (Node Version Manager). However, the latter is just an alternative method of managing your Node versions, while NPM is used to manage your javascript packages. NVM will come in handy if you wish to run multiple Node versions in your system.
Prerequisites
In this guide, we assume that you are running an Ubuntu distribution on your PC and using a non-root account but with elevated privileges. You can attain sudo (elevated) privileges by executing the command below on your working directory.
sudo su

sudo privileges
It’s also important to note that Node.js comes available in the Ubuntu official repositories. You can install it easily by executing the commands;
sudo apt install nodejs
sudo apt install npm
However, to have the latest Node version running in your system, we will need to add the Node official repository, as described below.
Adding the Node PPA
Step 1) Execute the curl command to enable the Node Source repository in your system. If you don’t have curl installed, run the command below to install it.
sudo apt-get install curl

Install Curl command
Step 2) Once the installation is complete, we can now proceed with adding the PPA.
To install Node using the apt package manager, you have to repository options to choose from.
The first repository is one with the latest Node packages and is not LTS release. The second repository is the most stable and have an LTS (Long Term Support).
If you opt for the first node installation with the latest packages, run the command below.
curl -sL https://deb.nodesource.com/setup_10.x | sudo bash -
If you want to install the stable LTS version, add the repository below.
curl -sL https://deb.nodesource.com/setup_8.x | sudo bash -

Add the repository of Node.js latest version (not LTS)
Once done that, we can now proceed with installing Node in your system. Note that if you have both repositories in your system, automatically, the latest Node version, which is not LTS, will be installed.
Install Node.js and NPM
Once we have the repository in our system, we can now start installing Node.js. Run the command in the Terminal.
sudo apt-get install nodejs

Install NodeJs
Once the installation is complete, we should now have both Node and npm running in our system. We can check this by running the –version or -v command.
node --version
npm -v

NodeJs and NPM version
From the above image, we see that we are running Node version v10.20.1 and npm version 6.14.4.
Install and Manage Node.js using NVM
Other than the apt repository, you can also use NVM as an alternative method. Commonly known as Node Version Manager, NVM gives you a more manageable platform to install and use any Node.js version you wish to use. It’s similar to the Ruby Version Manager(RVM), assuming you have worked with Ruby programming language.
The following steps will guide you in installing Node.js using NVM.
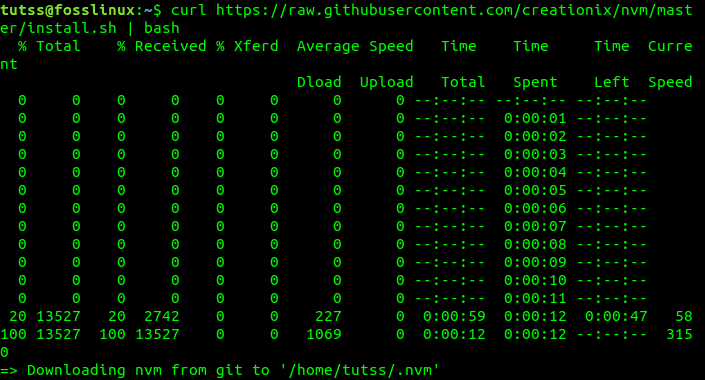
Step 1). Install NVM in your Ubuntu system. We will install using the available bash script with the curl command.
curl https://raw.githubusercontent.com/creationix/nvm/master/install.sh | bash

Curl Bash script to install NVM
Step 2). Now we need to reload the system to set the required environment variable to use NVM. Since we are on a Debian-based system, run the command below.
source ~/.profile
Step 3). Once Node.js Version Manager installs, we now need to find the available Node.js versions to install. Do so by executing the command below.
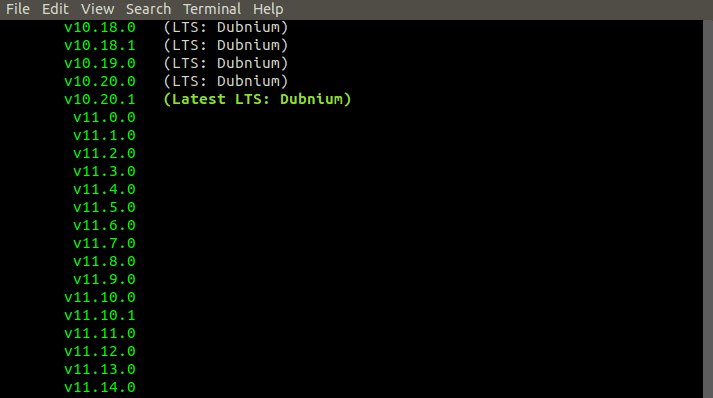
nvm ls-remote
You will see a long list of available versions. The image below is just but a small part of the list.

NodeJS versions available in NVM
Step 4). Now select the Node version you need to use and install it using the NVM command. For this particular article, we will install Node version v10.20.1 as it is the latest LTS release.
nvm install v10.20.1
We will also install Node version v14.1.0, which is the latest release as of the time of writing this post.
nvm install v14.1.0

Install Node version using NVM
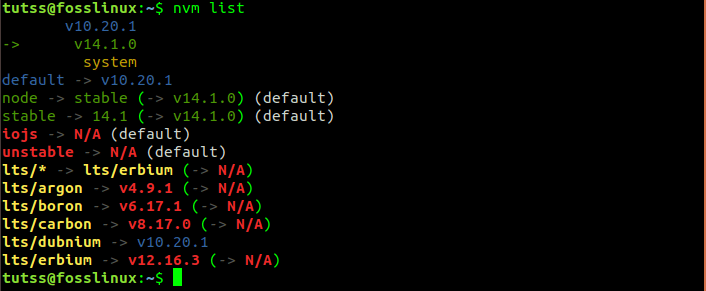
Step 5). If you have installed multiple versions of Node.js, then you need to select a default version that you will use. To list all the installed versions, run the command below.
nvm list

NVM list
Now select, the version that you want to use and execute the command below.
nvm use <Your_Version>
e.g
nvm use 14.1.0

Use NVM v14.1.0
Step 6). You can also verify the Node version running in your system by executing the –version command.
node --version

Check node version
From the image above, we can see that the system is using Node v14.1.0
Step 7). If you have multiple Node versions installed in your system, you can choose a particular release to run your application by including it in the nvm command. See the example below.
nvm v14.1.0 app.js
Step 8). If you have multiple Node versions and you wish to remove any of them, run the command below.
nvm uninstall v12.16.2

Uninstall Node version v10.20.1
Conclusion
That’s the two ways of installing Node and NPM in your Ubuntu system. The first method we used the apt repository, which installed both Node and npm. The second method only installs Node. It’s just an alternative method if you are planning on running multiple versions of Node in your system.

