Ubuntu ships with Firefox as the default web browser. If you were trying to install Google Chrome from the official Ubuntu software center, then it will not work as Chrome is not an open-source application. You may find the Chromium browser which is stripped open-source version of the Chrome browser.
In this beginner’s guide let’s show you various ways of installing the Google Chrome browser on your Ubuntu PC. We shall discuss the command-line as well as the GUI way of doing it.
Installing Google Chrome on Ubuntu
Method 1: Installing Google Chrome on Ubuntu using command-line via the Terminal App
Before starting in the installation process, you have to make sure that your system is updated using the following two commands.
sudo apt update
sudo apt upgrade
Step 1. We shall use the wget command to download Chrome from Google servers. Make sure that the wget is already installed using the following command:
wget --version
If the wget is not installed, you can install it:
sudo apt install wget
Step 2. Download the stable version of the Google Chrome browser deb file with the below command.
wget https://dl.google.com/linux/direct/google-chrome-stable_current_amd64.deb
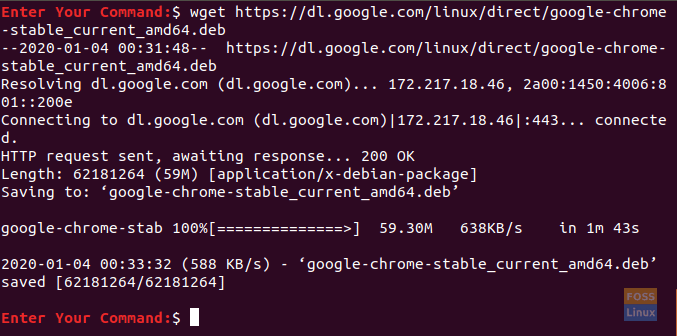
Download Google Chrome Stable Release on Ubuntu
Step 3. Use the dpkg command to install the downloaded Google Chrome deb file.
sudo dpkg -i google-chrome-stable_current_amd64.deb
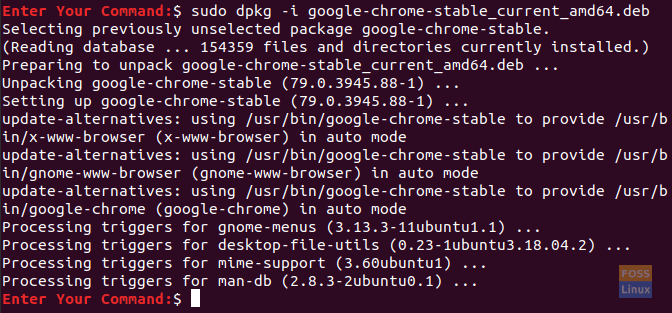
Install Google Chrome Using the DPKG
Step 4. After the Google Chrome installation is complete, you can open it from your terminal as follows:
google-chrome

Open Google Chrome From Terminal
Step 5. For the first time you launch the Google Chrome browser, you should get a prompt. Choose your favorites and click the Ok button.

Google Chrome For the First Time
Step 6. Welcome to your Google Chrome browser, you can now login with your Google account.
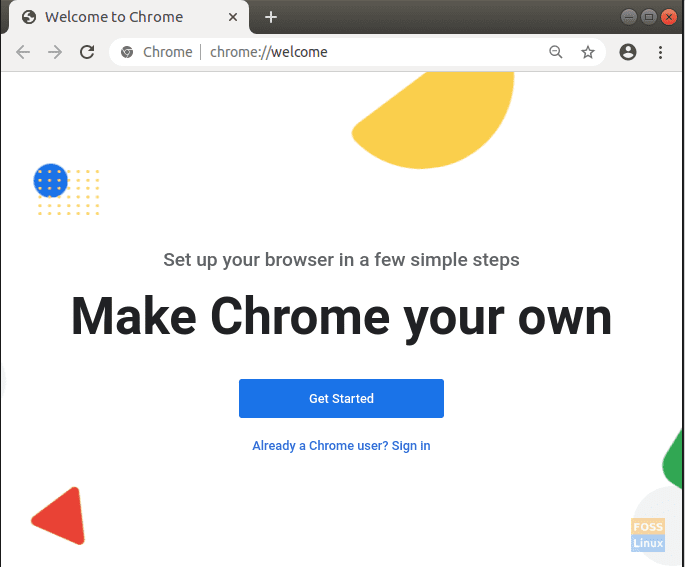
Welcome to Google Chrome
Method 2: Installing Google Chrome on Ubuntu Using the Graphical User Interface (GUI)
During this method, we will download and install the Google Chrome browser graphically.
Step 1. From your default web browser which is Firefox on a brand-new Ubuntu installation, launch the Google Chrome website and press the Download Chrome button.

Open Google Chrome Website
Step 2. Choose your download option then press the Accept and Install button.

Download Google Chrome Stable Release on Ubuntu GUI Method
Step 3. Save the Google Chrome download file.
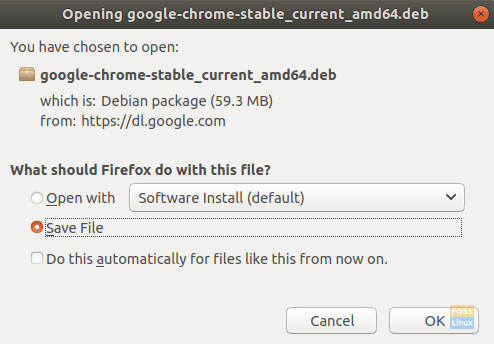
Save Google Chrome Download File
Step 4. After your download is complete, open the downloads directory.
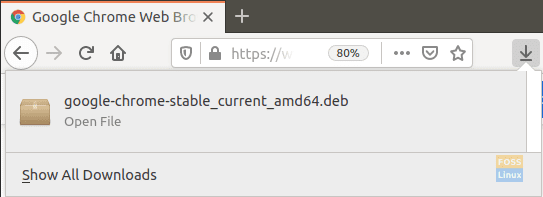
Press Show All Downloads
Step 6. Now double click on the downloaded Google Chrome file.

Double Click On the Google Chrome Downloaded File
Step 7. The Ubuntu software center will open, you can click the Install button to start installing the Google Chrome browser.
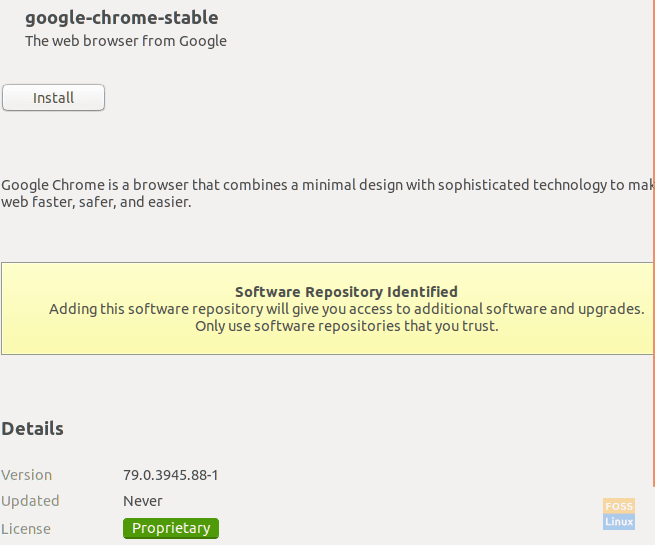
Install Google Chrome from Ubuntu Software Center
Step 8. As you can see, Google Chrome has installed successfully.
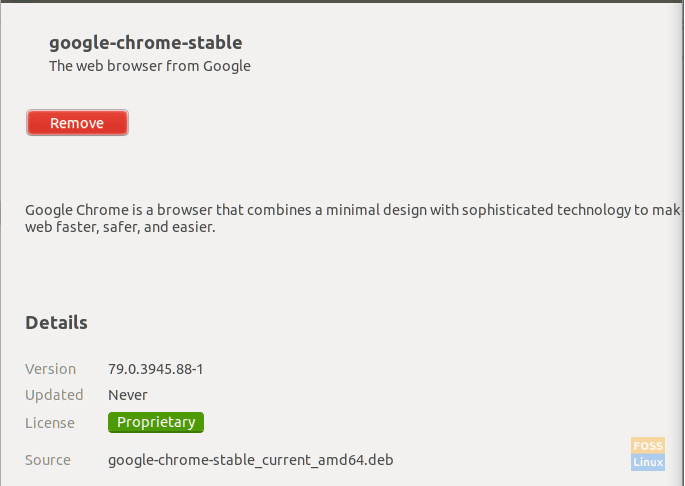
Google Chrome Installed Successfully
Step 9. From the top left of your desktop, click on the Activities tab.

Open The Activities Tab
Step 10. Search for the Google Chrome browser and launch it.
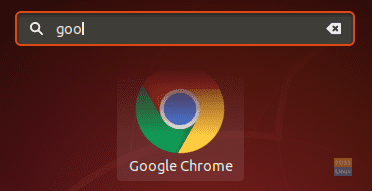
Open Google Chrome
Step 11. To add Google Chrome to your favorites bar, right-click on the Google Chrome icon, then select the Add to Favorites option.
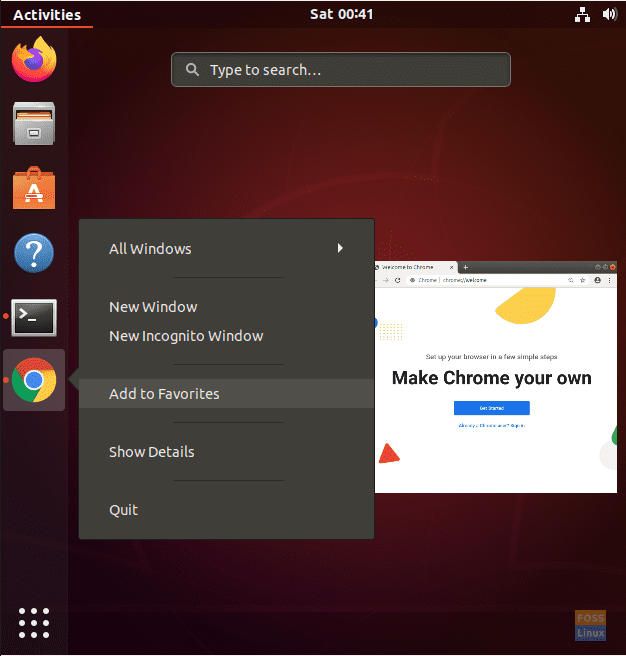
Add Google Chrome To Your Favorites
That’s all about installing the Official Google Chrome browser on Ubuntu. I hope you have enjoyed the tutorial.

