In our day to day activities, we need to search for specific files in our Linux systems. These can be documents, texts, and even multimedia data including video and audio files.
Linux comes with a powerful command-line tool (Terminal), that enables users to search for data and text using various command-line arguments. One advantage of using the Terminal is it supports the use of regular expressions and scripting.
Having said that, not everyone is well-versed with the many Linux commands; this brings forth the demand for having an interactive and reliable Graphical User Interface. One of such powerful tools is the Searchmonkey application.
What is Searchmonkey?
SearchMonkey is a GUI desktop search tool for Linux, Windows, Macintosh, and FreeBSD. It enables users to search for files and content using regular expressions. It runs through your files recursively before outputting the results.
Not only does it display files containing what you are looking for, but it also gives you data with close matches highlighted.
Installing Searchmonkey on Linux
Searchmonkey is available in three different languages; French, English, and Russian. To download Searchmonkey, navigate to their official download page. It is available in Java, Gnome/GTK and KDE editions.
Searchmonkey JAVA Edition
It is the newest edition of Searchmonkey. The Java edition comes with both Windows and Linux installers. We will focus on the Linux setups.
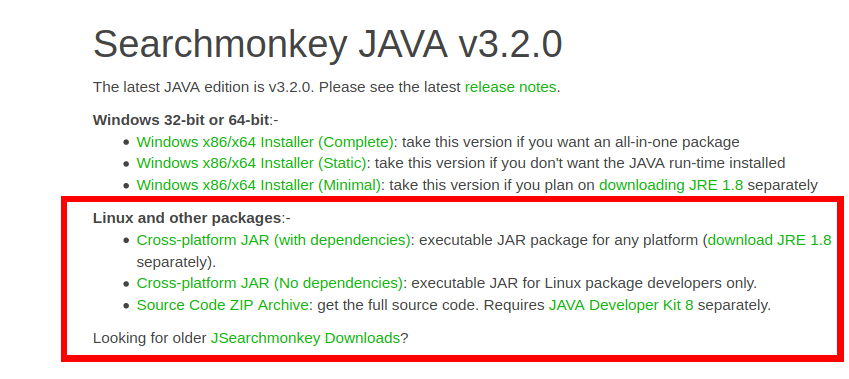
Java Edition Download
Cross-platform JAR (with dependencies)
This installer contains the full package of Searchmonkey and its cross-platform. To run it, you are required to install Java Runtime Environment (JRE) 1.8 or any latest version.
To get started with the installation, you have to execute it via Terminal.
java -jar searchmonkey.jar
Cross-platform JAR (No dependencies)
This installer contains the full package of Searchmonkey but doesn’t include any dependencies. It is recommended for developers. To run it, you are required to install Java Runtime Environment (JRE) 1.8 or any latest version.
You will have to download all dependencies manually using the package manager. The full list of required dependencies can be found when compiling the source code. To get started, you have to execute it from the Terminal.
java -jar searchmonkey.jar
Source Code ZIP Archive
For Java developers, you can get the full source code here in a zipped format. You will be required to install JDE 8 separately.
Searchmonkey Gnome/GTK
This edition is meant for GNOME/GTK users who want a lightweight application that packs well with their operating system. It is only available for various Linux distributions like Ubuntu and CentOS.
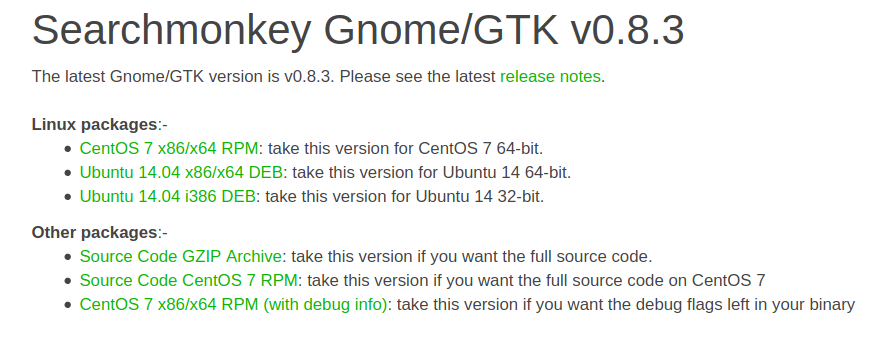
Gnome_GTK Edition Download
For CentOS users, download the RPM package. Ubuntu users should go for the DEB package.
Your computer should meet the required Hardware specifications for each installer. For example, if you have a 64bit laptop, then you should go for the 64bit package.
You can also access the source code by downloading the source code zip archive.
Searchmonkey KDE/Qt
It is recommended for users who like application with beautiful graphics and still offering the best services. This version is recommended for users who are not sure which packages they should download.
Currently, it’s only available for Windows users in both 64bit and 32bit versions.

KDE Edition Download
With recent developments, Searchmonkey is now available in the package repository for various Linux distribution. For Ubuntu users, you can install searchmonkey via the Terminal using the APT command.
sudo apt-get searchmonkey
Getting started with Searchmonkey
After installing Searchmonkey, you should see it in the list of installed applications. Click on it to launch the app.
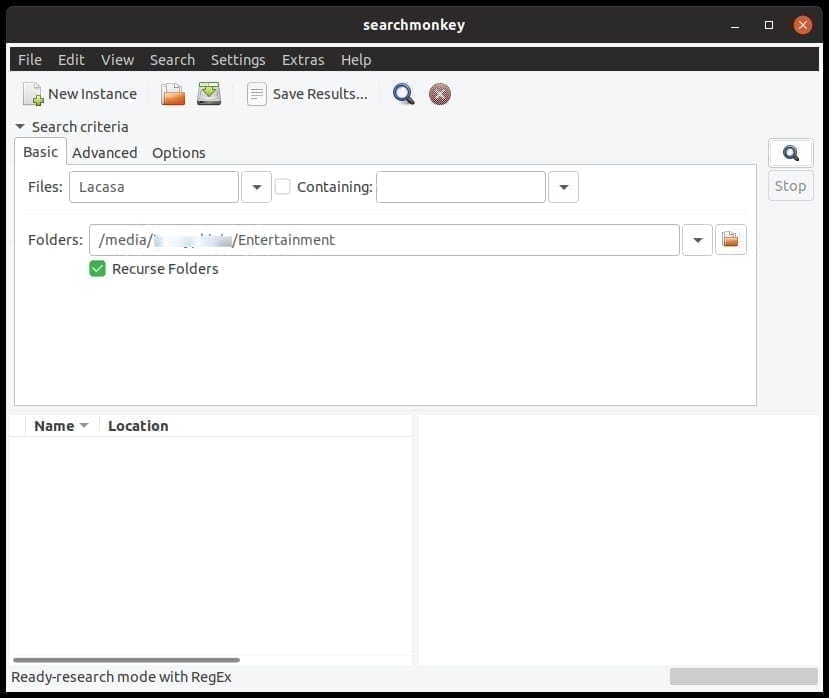
The application comes loaded with different menus, buttons, and options, which are useful when searching through your files. Searchmonkey is a GUI application which replaces the grep and find commands used for searching files in the Terminal.
Let’s look at how you can perform a basic file search using Searchmonkey.
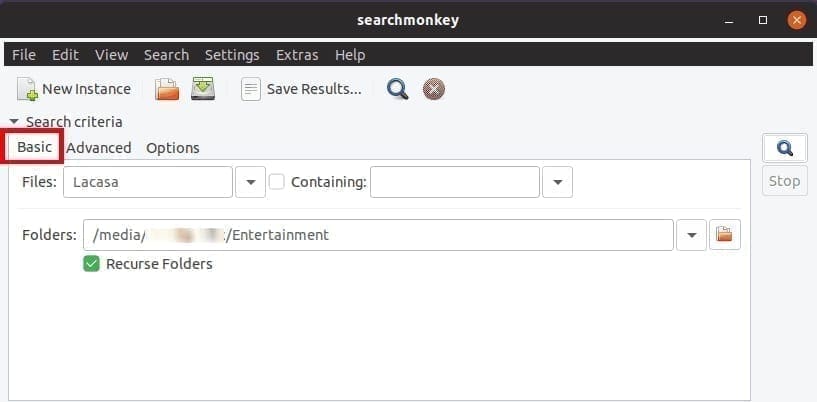
Step 1) Launch Searchmonkey and click on the Basic tab. By default, it is always the selected tab.
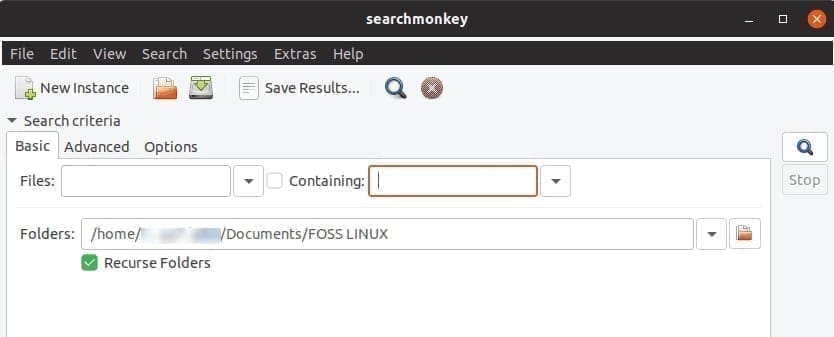
Step 2) You need to put the keyword you want to search in the Containing field, and you can also set the files you wish to search in the files field. Note that you should not use spaces in either of these fields.
Step 3) Select the target location or folder where you wish to perform the search. It is done by clicking on the icon at the far right of the Folders field.
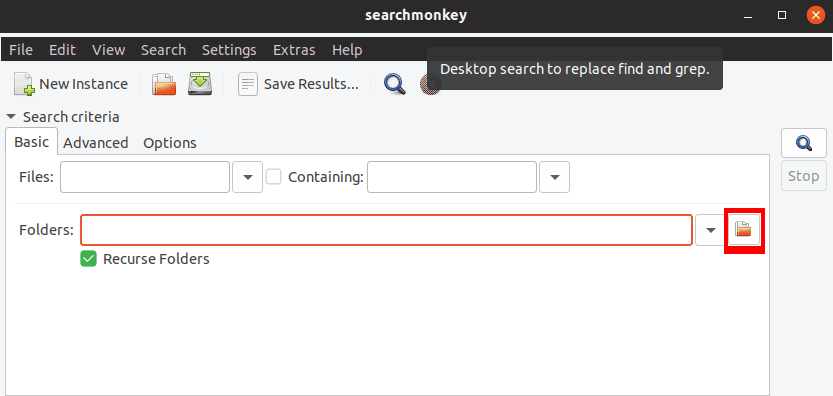
Select Target Location
Step 4) Click on the search icon at the far right to start the searching process.
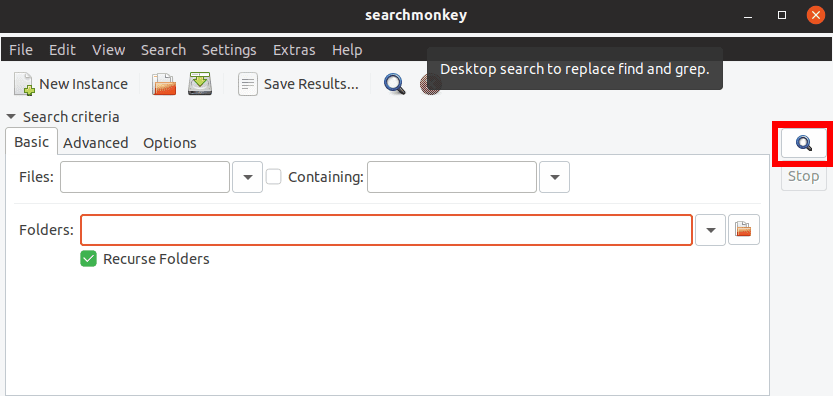
Search Button
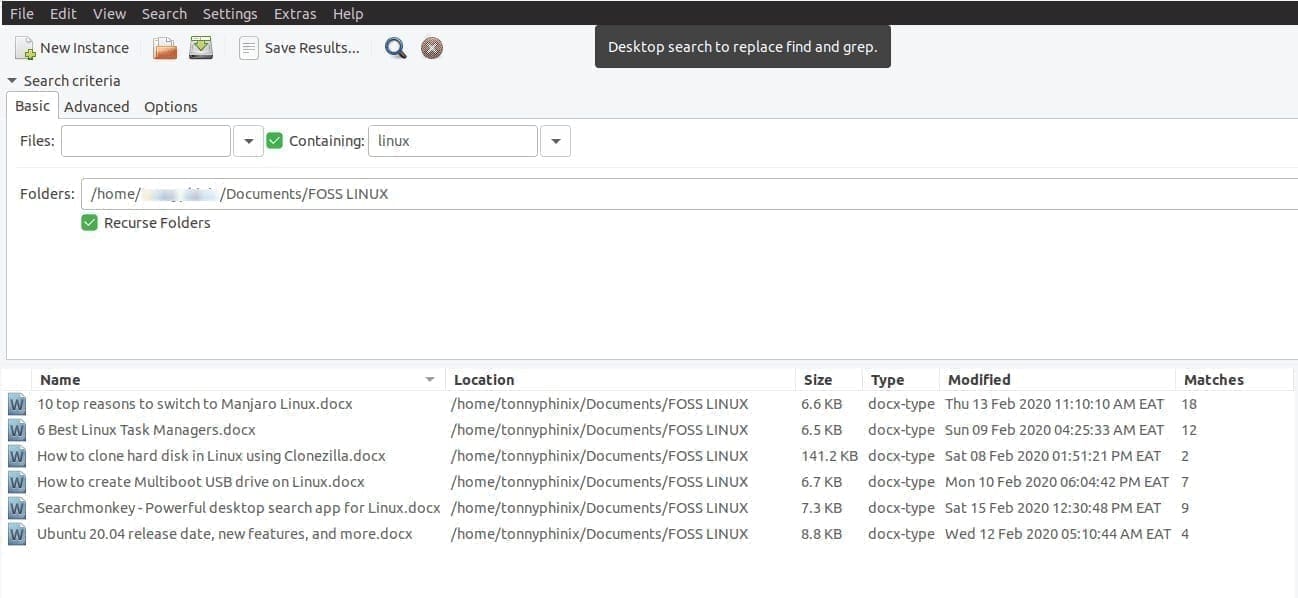
As the search takes place, results will be displayed below shows the name of the files containing the search keyword, the location, the size of the data, and the time when it was last modified. Click the stop button below the search button to stop the search.
For example, we searched the word Linux in the FOSSLinux folder containing various posts. Below is a screenshot of the results.
Conclusion
That was a complete guide on how to get Searchmonkey running on your Linux machine and getting started with it. With the latest release, the developers have improved the app and added excellent features.
They made some improvements to the menu bar and added a view menu that you can use to change the look and feel of the Searchmonkey window. They also made some improvements to the search summary and test of regular expressions.
Searchmonkey is a reliable tool for any Linux user out there. Do not strain yourself to look for a particular file, when you have this FOSS tool available for you!


