
At times when something is wrong with your Ubuntu installation like for example broken packages, file system errors, etc., you got plenty of options to recover your PC. Earlier, I published a article on how to reinstall Ubuntu, keeping your data unaffected. But that guide is the last resort to recovery. If you are able to boot into GRUB bootloader, then you should try the Ubuntu Advanced Recovery first. Here is how.
Using Bootloader Recovery Tools in Ubuntu
Ubuntu comes built-in with some powerful recovery tools, which often resolves the issues in typical cases. To boot into Ubuntu Recovery tools, you must first boot into GRUB. Depending on your system configuration, your GRUB bootloader may be different. If you only have Ubuntu installed in your computer, then you may not be seeing GRUB at all. Ubuntu hides it as it is redundant unnecessary step when there is no other OS to boot into. In such case, you should press and hold <shift> key just as the PC boots.
Automatically Fix Broken Packages
Step 1) In the GRUB bootloader, use up/down arrow keys and select “Advanced Options for Ubuntu”.
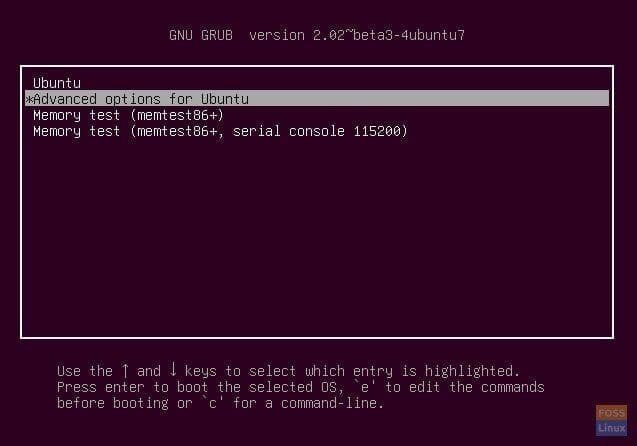
GRUB Bootloader
Step 2) Select “Ubuntu, with Linux xxxxx-generic (recovery mode)”, and press <enter>. The version number xxxxx may be different in your case. That’s just Linux Kernel version.
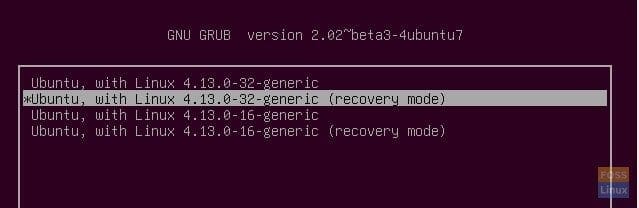
GRUB Advanced Options
Step 3) Use arrow keys to navigate, and select “dpkg”. Press <enter>.
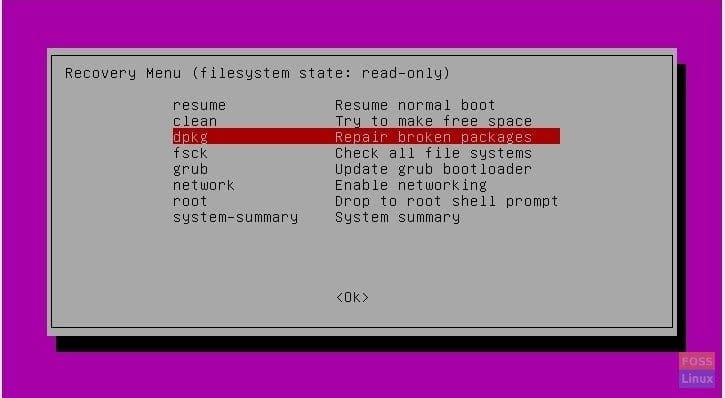
dpkg – Broken Packages Recovery
Step 4) Ubuntu will prompt you that in order to continue, the file system should be loaded in Read-write mode. Select “Yes” (default selected), and press <enter>key.
Step 5) Ubuntu will show you how many packages are to be upgraded/fixed. Your PC need to be connected to downloaded packages. When ready, enter ‘y’.

Broken Packages Fix and Upgrade Report
Broken packages should be fixed.
Check All File Systems for Errors
Next thing to do is check if there are file system errors in any of the partitions in your PC.
Step 1) In the Recovery Menu, select “fsck – Check all file systems” and press <enter>.
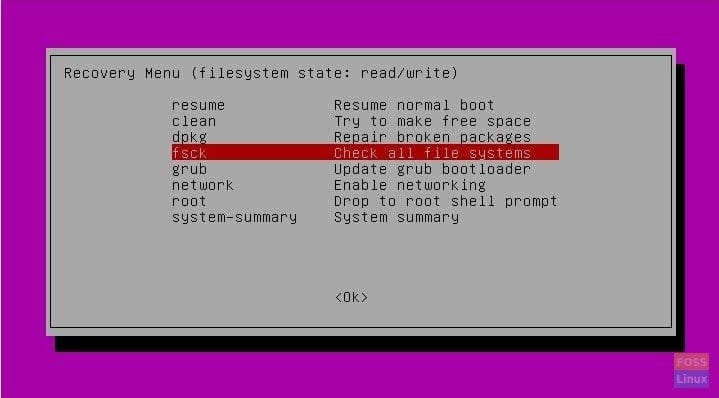
Check File System Errors
Step 2) If you remember, the file system got changed to ‘Read/Write’ mode in previous section of this article when you were using ‘dpkg’. Hence you may see a prompt that File system need to be in ‘Read-only’ mode for scan to happen.

File System Read-Write Mode Error
Therefore, you should go back to main Recovery menu again and come back so that you see ‘read-only’ filesystem state.
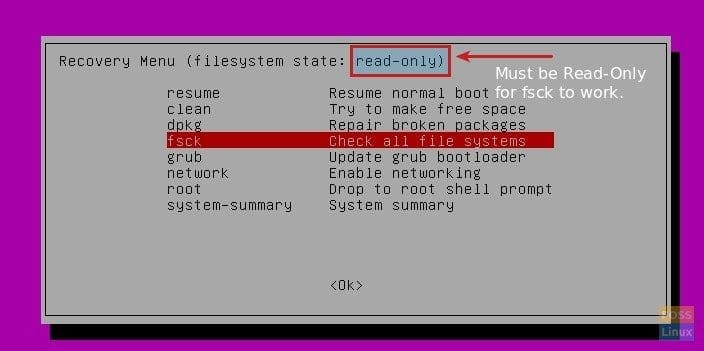
fsck read-only file system mode
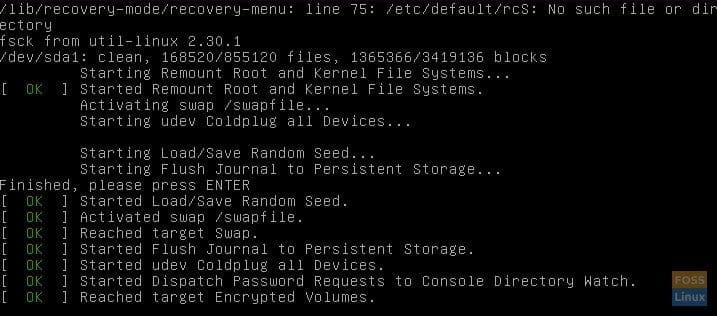
File System Check
Ubuntu will give the scan report on if swap, root, and kernel systems are OK or not, and also fix the errors if found.
That’s all what Ubuntu’s Recovery tool can do to fix your PC. If you still see issues, then resetting Ubuntu is what I suggest you to do.
1 comment
That was a great help, Kiran. Thanks!