Hard disk space is something which is never enough. Every now and then there comes a time when you may want to free up hard disk space. Although you can be little liberal when you have several terabytes of conventional hard disk, same is not the case when you have a solid state hard disk. Higher capacity SSDs are still expensive. That’s one of the reasons why even a high range laptop still ships with 256 to 500GB SSD.
Like any other OS, if not maintained properly, Ubuntu too consumes a considerable amount of hard disk over a period of time. Hard disk space can get easily filled up with cached package files, old kernels, and not used apps. Let’s take a look at various ways on how to clean up your Ubuntu installation, and regain the lost hard disk space.
Free Up Hard disk space in Ubuntu
1. Delete Cached Package Files
Every time you install some apps or even system updates, the package manager downloads and then caches them before installing them, just in case they need to be installed again. If the installation was successful, Ubuntu doesn’t go and delete the left cache – it’s just leftover garbage. It’s recommended that you clean up these packages to gain hard disk space, improve the performance of your PC, and speed up boot times.
Want proof? Check out the used space in /var/cache/apt/archives folder. Simply run the following command from the Terminal to clean up those files.
sudo apt-get -s clean
This command will clean up following directories. It is completely safe to do so:
- /var/cache/apt/archives/partial/*,
- /var/lib/apt/lists/partial/*
- /var/cache/apt/pkgcache.bin
- /var/cache/apt/srcpkgcache.bin
2. Delete Old Linux Kernels
Another huge junk of files that will be left over in your Ubuntu PC is the bunch of old Linux kernels. Ubuntu and almost all other Linux distros retain the old kernels after updating to new kernels so that you can boot with the older kernel in case of a problematic kernel update. I would recommend to keep at least a couple of old kernels just to be safe and delete all others.
In order to do that, you first need to know the installed Linux kernel versions on your computer. Use this command:
sudo dpkg --list 'linux-image*'
Then use ‘remove’ command to delete the older versions. Replace xxxxx with the Linux version you want to delete.
sudo apt-get remove linux-image-xxxxx
Alternatively, a simpler way to clean old kernels is to use ‘autoremove’ command. Once your PC is stable with the current Linux Kernel, you can get rid of all older ones using the following command in the Terminal.
sudo apt-get autoremove --purge
3. Use Stacer – GUI based System Optimizer
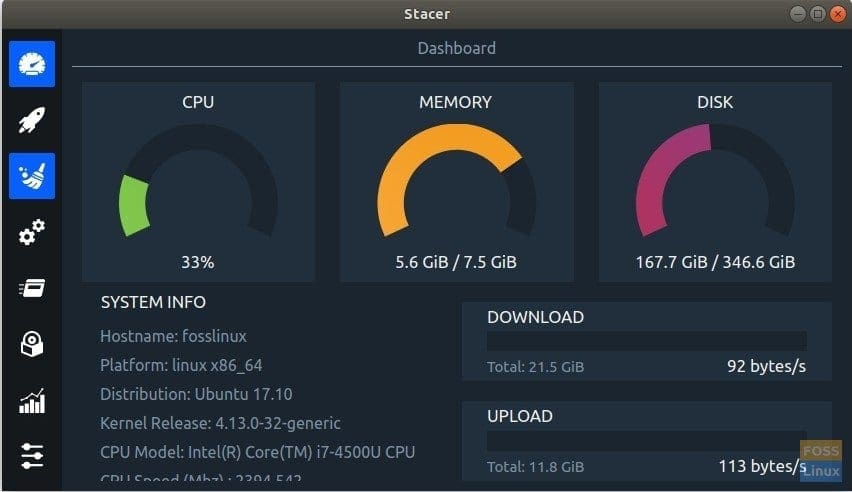
For those who feel Terminal usage is not their cup of coffee, I highly recommend beautiful application ‘Stacer’.

Stacer Dashboard
Stacer is a feature-rich free system optimizer for Linux. It has several system tools. One among them is the ability to clean up obsolete files. Refer our detailed article on Stacer and how to use install and use it.
4. BleachBit – GUI based System Cleaner
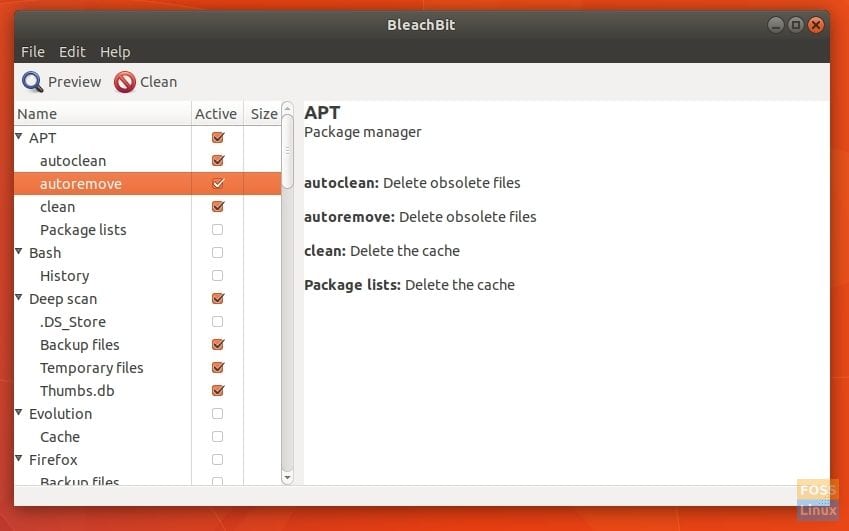
BleachBit is yet another GUI based system cleaner for Ubuntu. It offers similar functionality to the items #1 and #2 in this article. It is a free utility available in the Ubuntu Software. Alternatively, you can use below commands to install it.
sudo apt update
sudo apt install bleachbit

BleachBit – Free up Hard disk space
BleachBit includes a good list of cleaners such as removal of APT packages, thumbs.db, cache, browser cache & cookies, log files, backup files, etc..
5. System Update!
Unlike Windows OS which loves accumulating all the old junk files, Linux on other hand is self-cleaning when you keep it updated from time to time. Typically, version upgrades bring a lot of new features as well as remove the old junk too, thus helping you clean up your Ubuntu system. Now, that’s one more reason to keep your system up to date!


5 comments
Thank you for your post! Freed up about 5 GB in no time. Best wishes from Italy
thankyou so much mama
EDIT: apt-get was still running. It is actually 9 GB, all old kernels from #2 (while #1 gave ca. 400 MB spare space). This allows me to keep my old 32 GB system SSD. Thx again!
sudo apt-get install exfat-fuse exfat-utils
worked for me – thanks
Very useful.