In today’s session of Terminal Tuts, let’s take a look at how to record a screenshot video using command line from Terminal. Let me introduce to byzanz command line utility.
Byzanz can record your desktop session to an animated GIF image, flv, ogg, and ogv file formats. It supports entire screen capture, a single window, or a specified region. For those preferring the GUI, screenshot recording is possible via command line or via the panel applet.
Installing Byzanz in Ubuntu
This guide is tested on Ubuntu 17.10. It should work good in Linux Mint and elementary OS too.
Step 1) Launch Terminal.
Step 2) Use the following command in the terminal and hit enter.
sudo apt-get install byzanz
Step 3) That’s it. Byzanz should now be installed in your computer.
Finding resolution of your computer’s display by command line
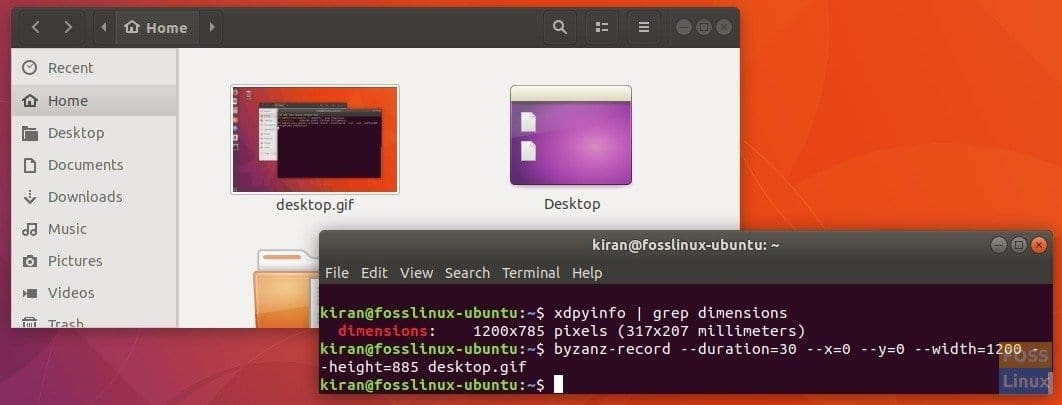
You need to first know the native desktop resolution to start recording the entire screen. To find it out, launch ‘Terminal’ and use this command:
xdpyinfo | grep dimensions
You should see output similar to this one:
kiran@fosslinux-ubuntu:~$ xdpyinfo | grep dimensions
dimensions: 1200x785 pixels (317x207 millimeters)
Using Byzanz
Use this command to record the entire desktop into a GIF.
byzanz-record --duration=30 --x=0 --y=0 --width=1200 --height=885 desktop.gif

Screenshot Video Capture
Where duration is in seconds and height and weight is specified to capture the entire desktop. Use some values in place of 0 to capture the screenshot with preferable height and width in pixels. This is like exactly same as screen capture by region.
Use ogg, ogv file formats to record video with audio. FLV (Flash Video) is a great format for lossless video capture.
Use the ‘help’ command to know the complete list of commands that you can use with Byzanz.
byzanz-record --help
You should see the complete list of commands as follows:
kiran@fosslinux-ubuntu:~$ byzanz-record --help
 Usage:
 byzanz-record [OPTION…] record your current desktop session

Help Options:
 -?, --help Show help options
 --help-all Show all help options
 --help-gtk Show GTK+ Options

Application Options:
 -d, --duration=SECS Duration of animation (default: 10 seconds)
 -e, --exec=COMMAND Command to execute and time
 --delay=SECS Delay before start (default: 1 second)
 -c, --cursor Record mouse cursor
 -a, --audio Record audio
 -x, --x=PIXEL X coordinate of rectangle to record
 -y, --y=PIXEL Y coordinate of rectangle to record
 -w, --width=PIXEL Width of recording rectangle
 -h, --height=PIXEL Height of recording rectangle
 -v, --verbose Be verbose
 --display=DISPLAY X display to use
That’s it!

