Compared to other popular Linux distros like Linux Mint, Manjaro, or elementary OS, MX Linux is a relatively new distro that has caught on in recent times, thanks to its medium-sized footprint and easy-to-configure options, and high stability.
If you have recently migrated to MX Linux from Windows or other Linux distros and are looking for a way to download and install Google Chrome on your system, then this guide is for you.
MX Linux, based on Debian stable, includes some core components of antiX, another Debian-based Linux distro. It was initially started as a collaboration of the antiX and the MEPIS communities. The latest release of MX Linux, MX 19.1, which released in February 2020, is based on Debian 10.3 Buster.
Installing Google Chrome on MX Linux
Firefox is the default browser that comes bundled with MX Linux. If you are like us, Google Chrome would be your one and only one choice of browser, and you are ready to do whatever it takes to get your favorite browser on your newly installed Linux distro.
Don’t worry; you don’t have to struggle hard to get Google Chrome on MX Linux. Here is a beginner’s guide on how to install Google Chrome from MX Linux Package Installer as well as the Command-Line.
Method 1: Using the MX Linux Package Installer
- Click on the MX Linux logo in the bottom left corner of your desktop and select ‘MX Linux Package Installer’ from the Start Menu or the Xfce Menu. MX Linux uses the Xfce, a popular desktop environment that is lightning fast.
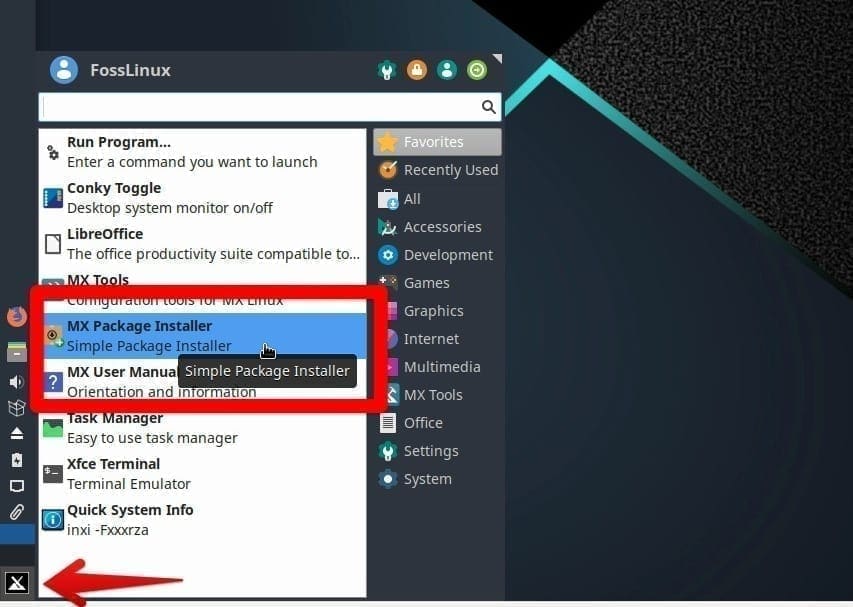
MX Linux Desktop Menu
2. Root access is required to install any packages in MX Linux. So go ahead and enter your root password.
3. Next, you should see the MX Package Installer console. When the MX Package Installer window opens up, you should be on the ‘Popular Applications’ tab. Expand the Browser menu and select ‘Google Chrome’ as shown in the screenshot. Click the ‘Install’ button. Click ‘OK’ on the ‘Processing, finished successfully’ dialog and close the installer.
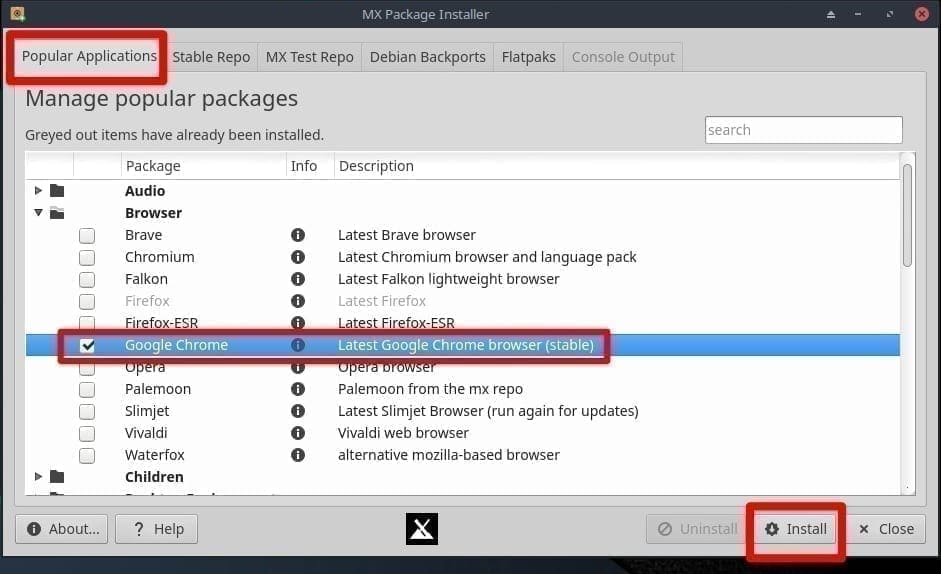
MX Linux Package-Installer
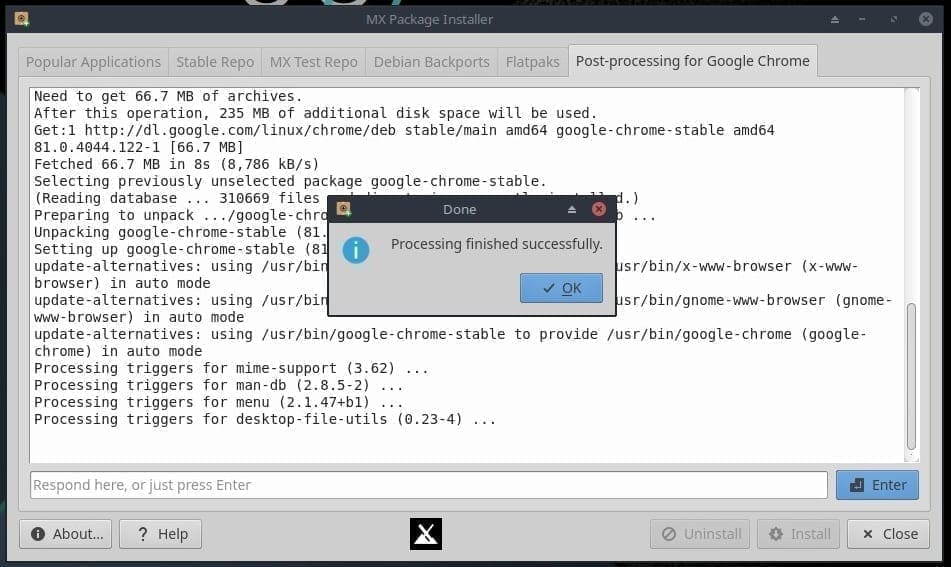
MX Linux Google Chrome Installation
That was super easy, wasn’t it?
Method 2: Using command-lines from the Terminal
For those of you who prefer the Shell to the GUI, here are some quick steps on how to install Chrome using the Command-Line.
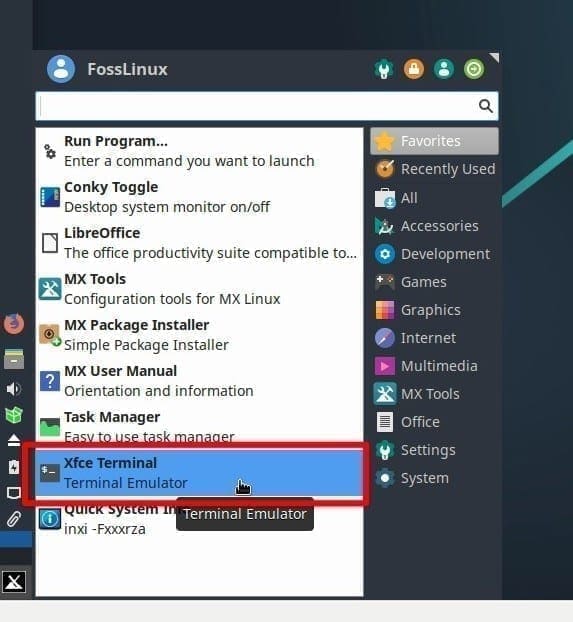
- Open the Xfce terminal from the Start Menu of MX Linux.
2. Update the repositories and upgrade MX Linux so that your OS is up to date with all the latest stability updates and fixes.
sudo apt update
sudo apt upgrade
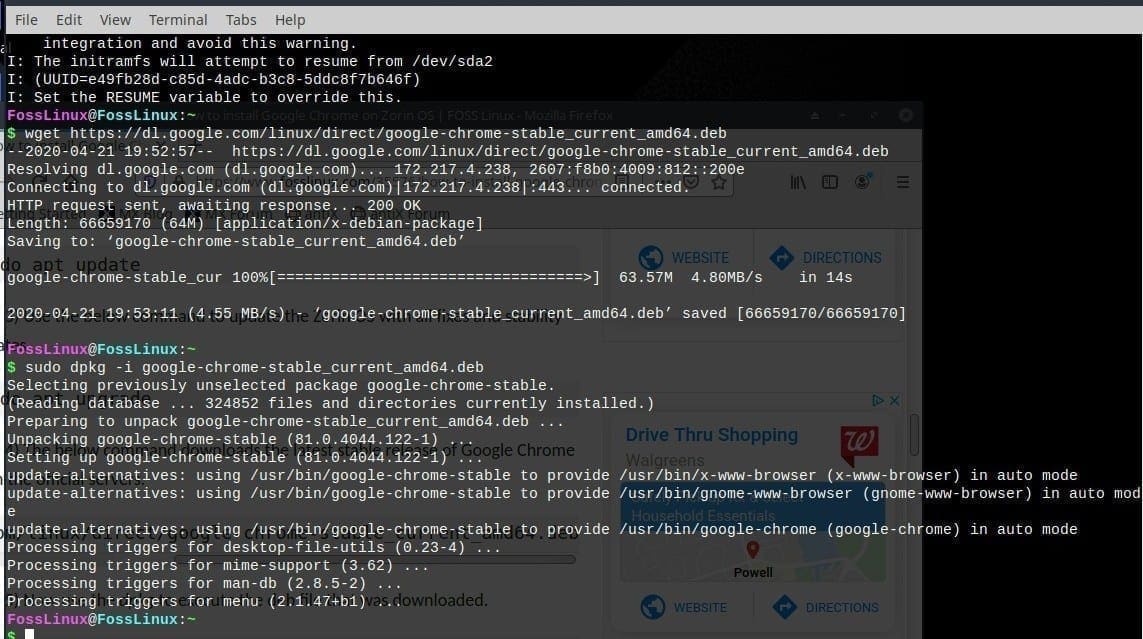
3. Download the latest release of Google Chrome for Linux. This is a Debian file, and it works on MX Linux because MX Linux is derived from Debian.
wget https://dl.google.com/linux/direct/google-chrome-stable_current_amd64.deb
4. Run the downloaded Debian file using the following command.
sudo dpkg -i google-chrome-stable_current_amd64.deb
Add Google Chrome to Desktop, Panel, or Favorites
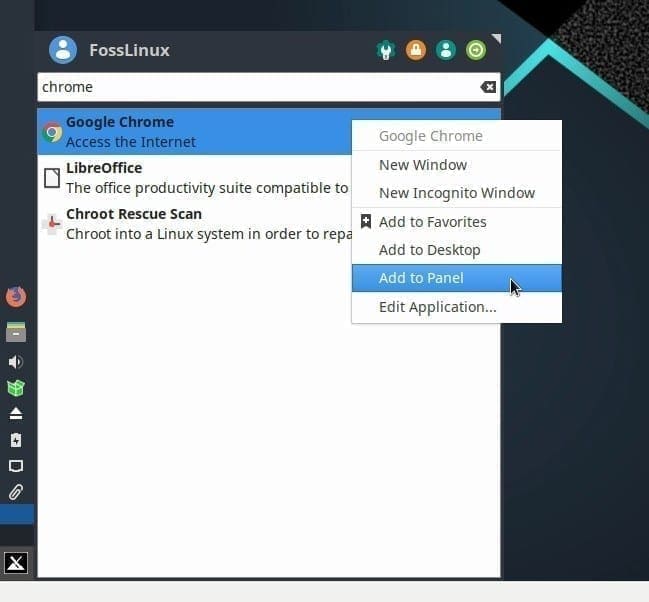
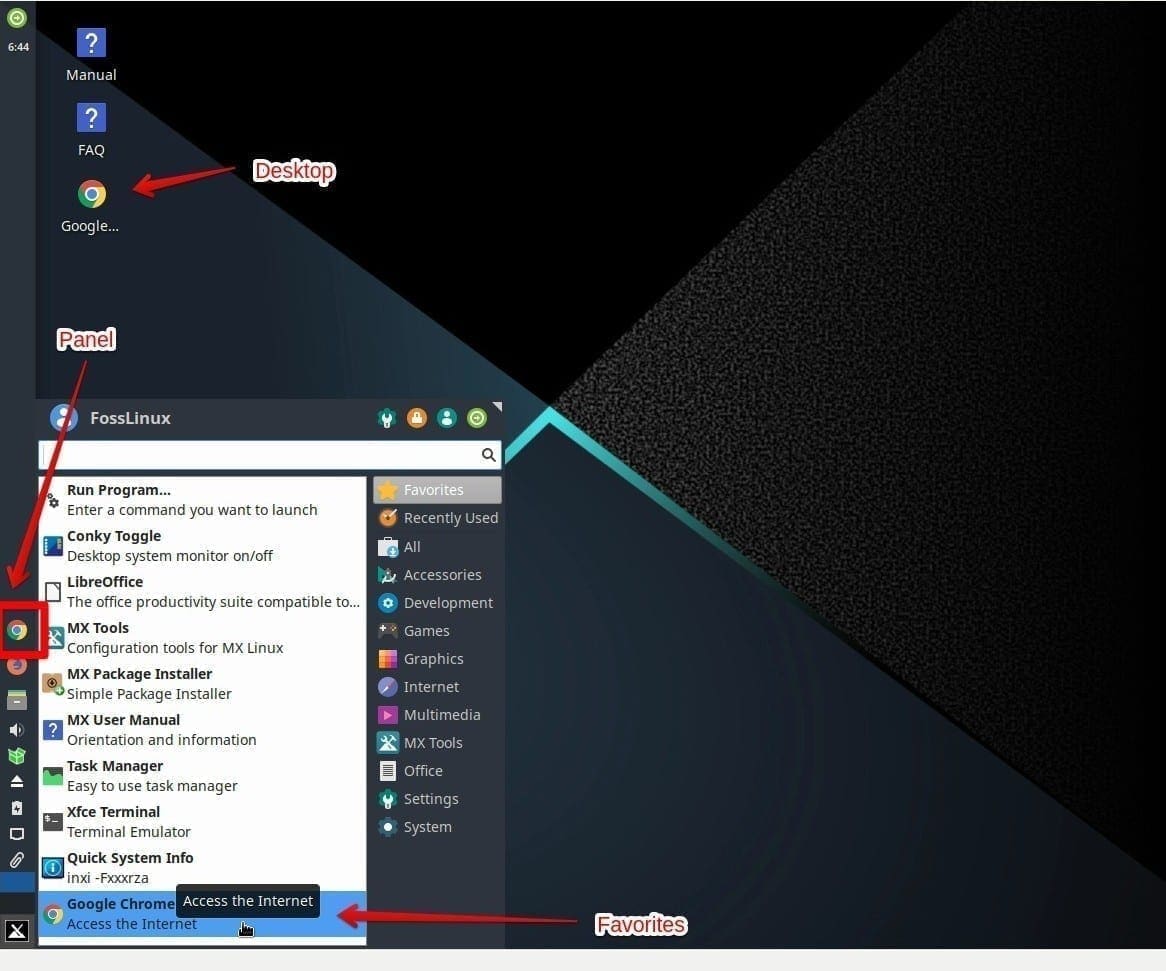
After you are done installing Google Chrome, open the Start Menu and search for Chrome. The Xfce desktop environment has many user-friendly features, such as adding your favorite apps as shortcuts to the Desktop, Favorites in the Start Menu, or the Panel.
Just right-click on Chrome in the start menu and choose one of the following: Add to Desktop, Add to Panel, or Add to Favorites.
The Xfce Panel is a highly productive taskbar of the Xfce desktop environment. Any apps that you add to the Panel can be opened with a single click, and you can organize your work life with all related apps in one place.
Conclusion
So, you now have Google Chrome browser on your freshly updated MX Linux and also have a shortcut to increase your productivity. Enjoy the Linux desktop experience and swing by our site to keep up on the latest buzz from the Linux universe.

5 comments
I thougt you FOSS Linux and Chrome a non foss software. You lie about who you are, you are not foss user you just use computer and software.
relax dude.
thank you for providing such useful information. I have an old computer on which i am using 32 bit MX Linux can you please guide me if the second method will work on my 32bit MX linux or i need to download 32bit version of chrome? if so then plz give me cmds for that as well.
Thank you
Thanks you, it’s useful
32 bit is not supported – so it wont show