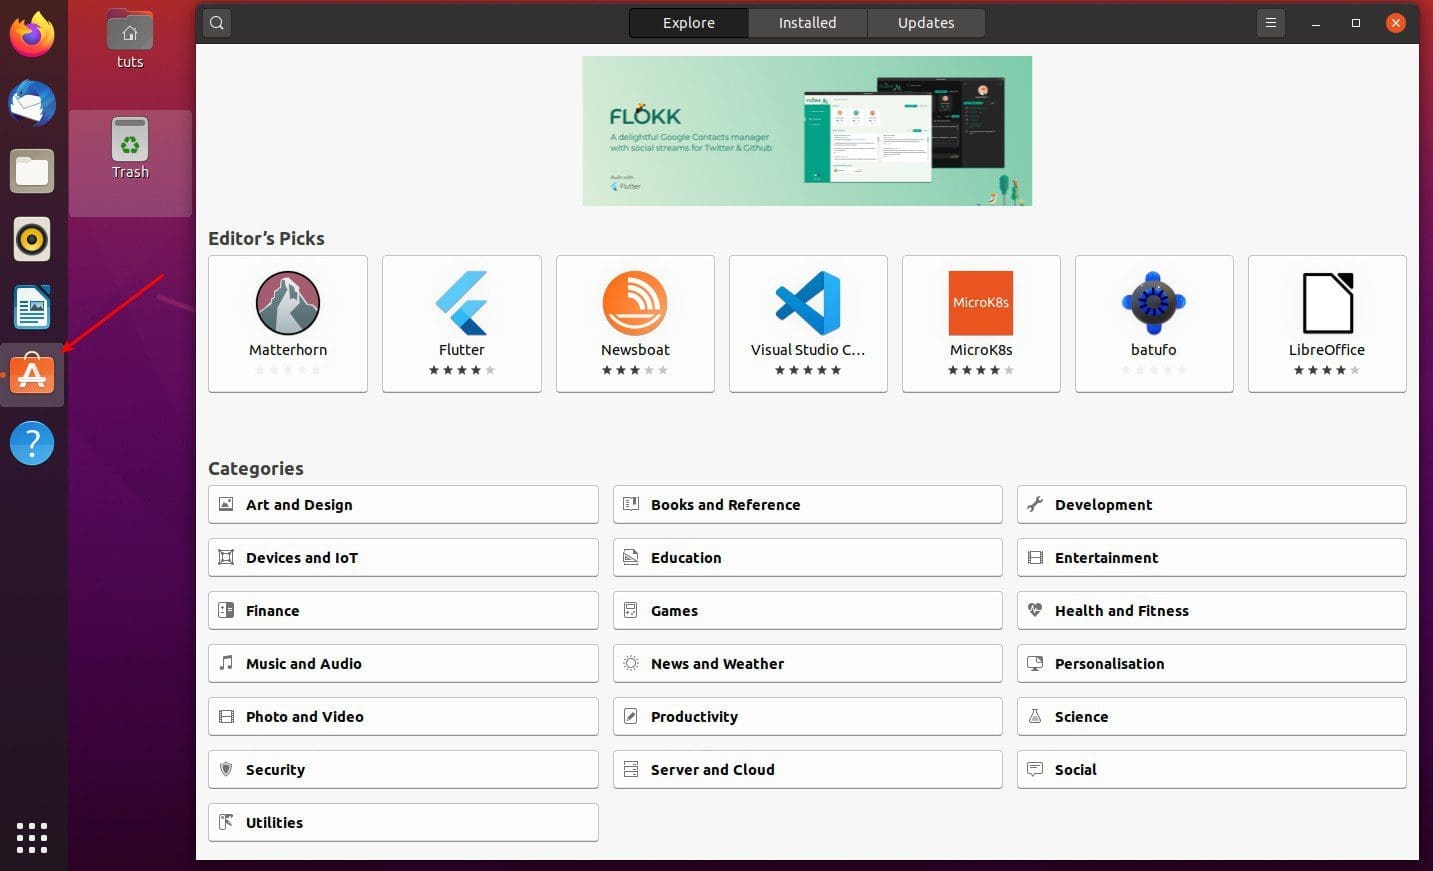
Since its release, the Ubuntu Software Center has proved to be a reliable utility for users who want to install applications graphically without the hassle of executing multiple Terminal commands. It’s an easy to use tool that provides users even with search functionality enabling them to look up for any application they need and install it with a single click. Additionally, most of these applications available are entirely free for use.
Let’s get into details and learn how to effectively use the Ubuntu Software Center for installing and managing the applications.
Using the Ubuntu Software Center
Even with all these fantastic features, we can still tweak the Software Center to make it even more efficient. Below are five great tips you can apply while using Ubuntu Software Center.
1. Set the fastest downloading server
By default, the Software Center uses the primary server for your country and region to download packages and updates for your system. That is done to increase download speeds. However, we can improve the download speed even more by using a local server like that of a university that often hosts many repositories.
Follow the steps below to see how you can change your download server.
i) Launch the “Software & Updates” application from the applications menu.
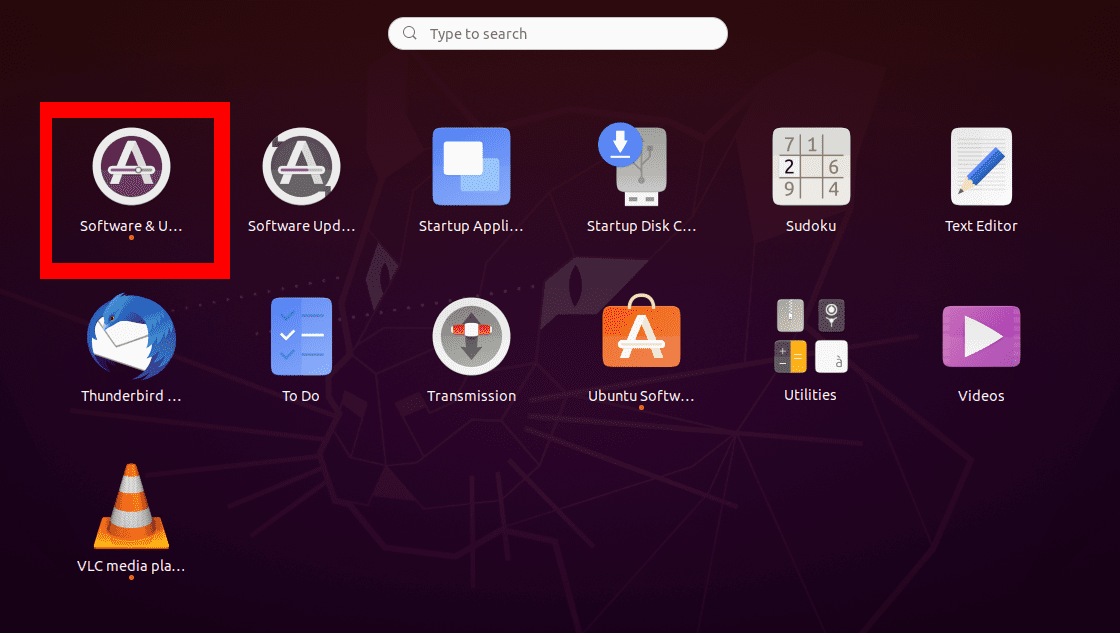
Ubuntu Application Menu
ii) Navigate to the Ubuntu Software menu. It should probably be the first from the left. From the image below, you can see my default server is set to the United States.
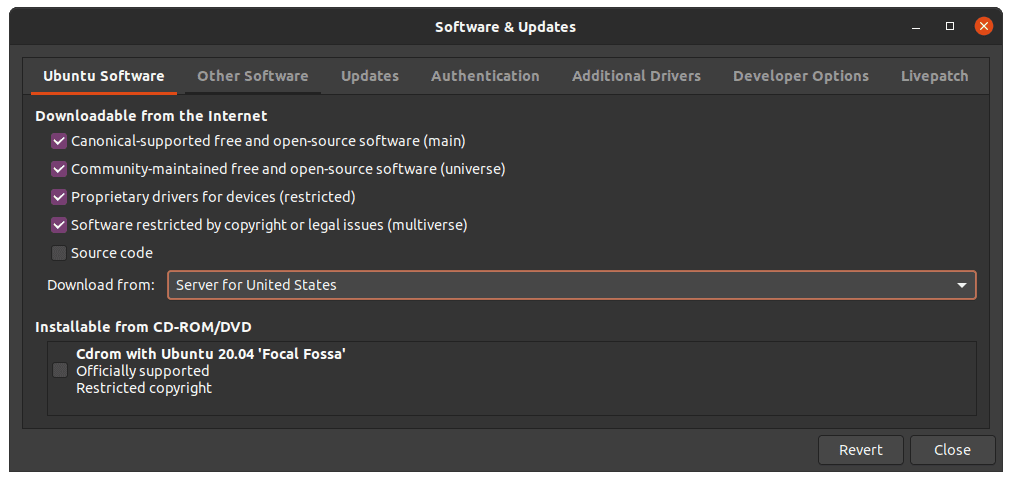
Default download server
iii) Click on the drop-down list, and you should see the “Other” option. Click on it. You will be surprised by the number of servers that will be listed. Select the server closest to you.
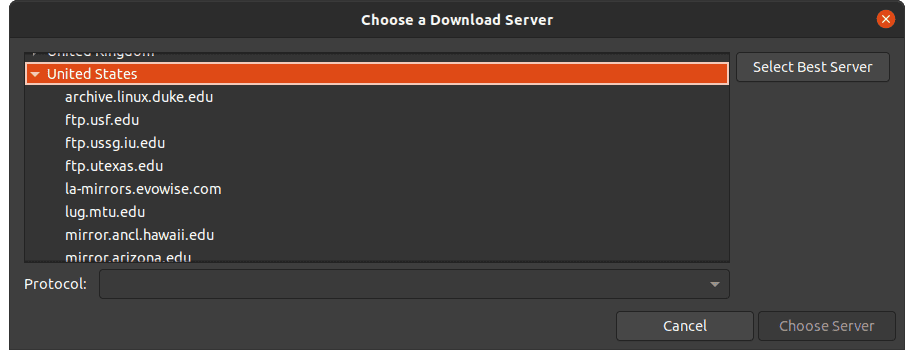
Download Server Setting
iv) If you have no idea which to select, click on the “select best server” option on the top right of the winLaunch Software & Updatesdow.
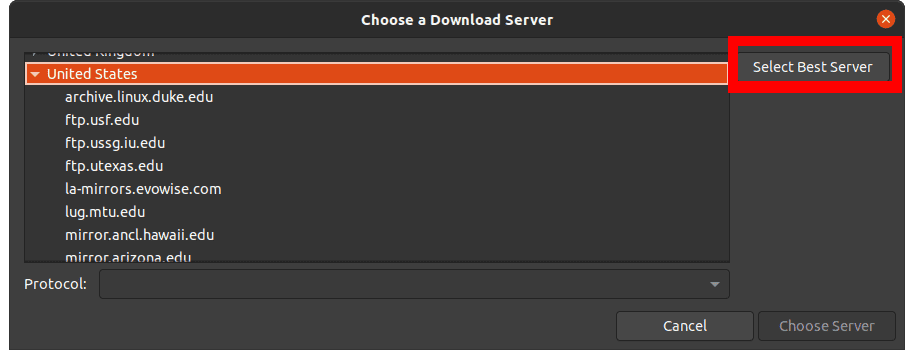
Best Server Setting
This option will test all the servers available and closest to you for the fastest server. That will give your software and updates download speeds an amazing boost. It is even more useful when Ubuntu servers are slow, especially when a new edition of Ubuntu is released.
2. Clickable Installation links
This feature is mainly implemented by blogs and websites, providing tutorials on how to carry out various tasks on Ubuntu. They provide users with a single-click link that will take them directly to the Ubuntu Software Center to download the particular package.
Unfortunately, not all bloggers use this method. Some still use the command-line instructions using the “apt” package manager. For example, “sudo apt-get install.” However, there is a solution to this for you as a reader.
With the Apt-Linker chrome extension, any “sudo apt-get install” command will automatically convert to a clickable link. Installing this extension is as simple as clicking any installation link.
3. Installing DEB packages
With the introduction of the Software Center in Ubuntu systems, software installation was made even more straightforward. Users don’t have to execute multiple commands on the Terminal to install commonly used software like Skype or VLC media player.
With the search feature, users can look up for any application they need to install. For example, to install Android Studio IDE, I can search for it on the Software center.
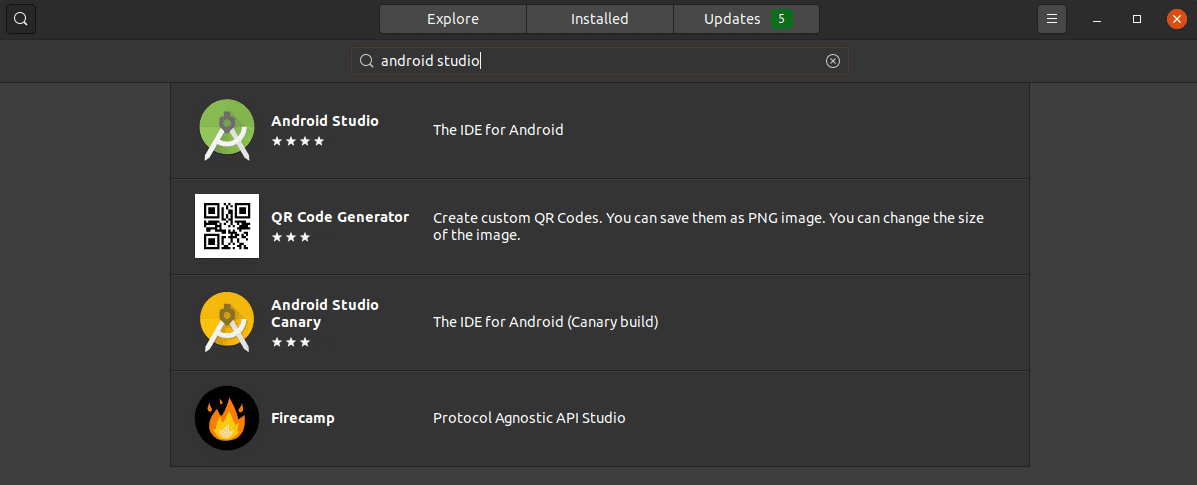
Ubuntu Software Center
The Ubuntu Software Center can also be used to install “DEB” packages. Instead of using the command-line, which will need you to execute several commands, you can use the Software Center. To do so, Right-click on the “deb” package and select the option “Open with Software Install.”
4. Installing Software Updates
Updating and upgrading the Ubuntu system is pretty straightforward. All you have to do is run the commands “sudo apt update” and “sudo apt upgrade.” Even though this method is very efficient, you might need to upgrade only particular applications in the system. That is where the Ubuntu Software Center comes in handy.
Launch the Software Center. You should see three tabs at the top – “Explore,” “Installed,” and “Updates.” Click on the “Updates” tab. If you have any applications that need to be updated, they will be listed here. You can decide to update all of them or update a specific application.

Ubuntu Software Center Updates
5. Managing Native packages, Snap packages, and Flatpak applications
You can use the Ubuntu Software Center to remove and update native applications and apps installed using snap and flatpak. To do so, launch the Software center and lookup for the specific application. You should see a “Remove” next to it. Click on it to uninstall.
Alternatively, you can click on the “Update” tab to see which applications require updates. This method is very efficient for new users who are just getting into Linux and find the whole Terminal thing overwhelming.

Software Center Installed Applications
6. Use Snap Store Account
Ubuntu has two leading Software apps where users can download applications. The Ubuntu Software and Snap Store. The default software app is the Ubuntu Software, but it is the Snap store under the hood. All apps available in the Snap store are snap packages while the Ubuntu Software can contain both Snaps and apt packages.
These available snaps on Ubuntu Software are regarded as free, and you can download them without the need for a snap store account. However, to download and install private snaps, you will need a snap store account. Follow the steps below to create a snap store account if you don’t have one.
i) Launch Ubuntu Software application.
ii) Click on the “hamburger menu drawer” icon at the top-right.
Hamburger Menu Icon
iii) Click on the “Sign in” button.
iv) If you already have a snap store account, select the option “I have a Snap Store or Ubuntu One account.” If not, choose “I want to register” to get started with creating a new account.
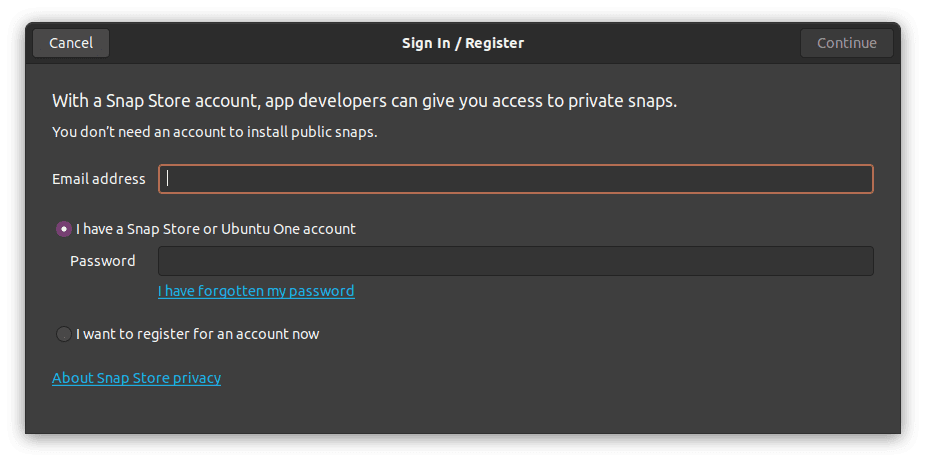
Snap Store account
7. Uninstalling Software
Not only did the Ubuntu Software simplify the overall process of installing software, but also uninstalling applications. If you are getting into Linux systems, the Ubuntu Software can be a reliable utility before you get a good understanding of the Terminal package management commands. You can use it to remove Native apps, snap packages, and Flatpak applications.

Uninstall Applications
8. Additional Drivers
Just like any other operating system, Ubuntu uses drivers to manage most of the hardware components. However, unlike Windows operating systems where users need to search for drivers and install them manually, Ubuntu identifies and installs the required drivers for your order automatically.
However, there is a catch. Most of these hardware components have both open-source drivers and proprietary drivers. By default, Ubuntu will install the open-source ones. In some cases, that might cause some problems since the open-source driver might not work as well as that provided by the hardware manufacturer. I faced these issues, mostly with wireless adapters and graphic cards.
To install additional drivers, follow the steps below;
i) Launch the “Software & Updates” app.

Ubuntu Software & Updates
ii) Click on the “Additional Drivers” tab. You will see a list of devices together with their additional drivers, which you can install. You can decide to install the driver by selecting it and clicking on “Apply Changes.”
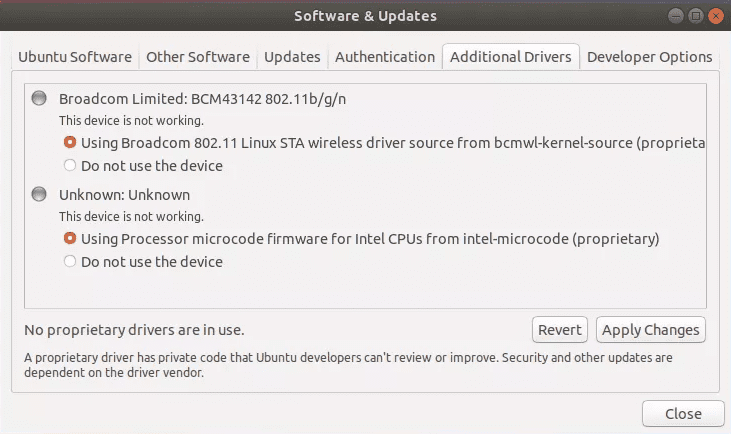
Ubuntu Additional drivers
If you ever want to go back to using open-source drivers, click on the “Do not use” option. Note, your PC will need to restart after switching the drivers.
9. What is Live Patch, and should I use it?
Canonical publicly launched the Canonical live patch service, enabling you to apply kernel security updates without rebooting the system. It directly patches the running kernel. It, however, doesn’t affect the regular kernel updates. You will have to install those the proper way and reboot to apply changes.
If you are running a server or having some dedicated computer, it would be best to set this up. As soon as a security update is rolled out, you want to have it running on your system as quickly as possible. Follow the steps below to setup Ubuntu Livepatch.
i) launch the “Software & Updates” application.
ii). Click on the Livepatch tab. To enable Ubuntu Livepatch, you need to sign in with your Ubuntu one account. If you don’t have it, you can create one here.
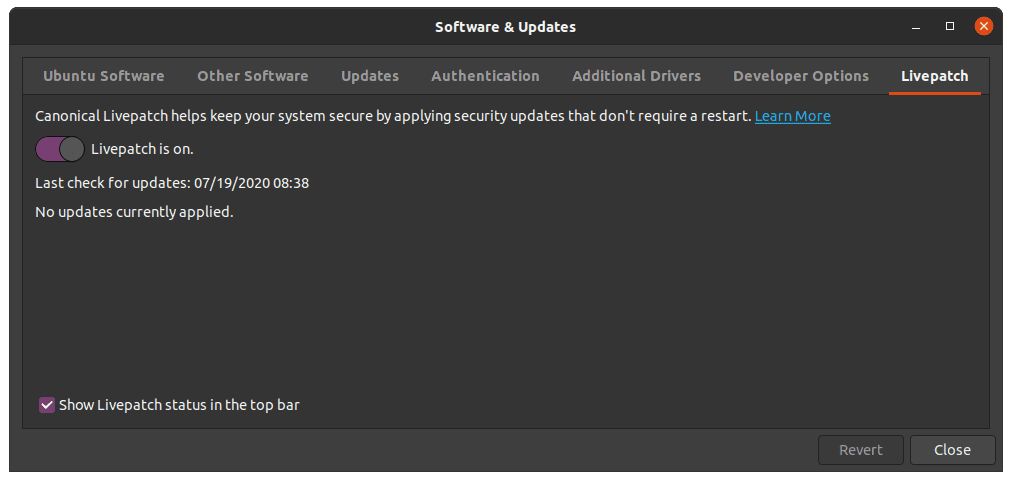
Ubuntu Livepatch
10. Setting Frequency of Updates
If you wish to have your system updated more frequently, you can change the update settings on the Update and Software application. Launch the “Software & Updates” app and navigate to the “Updates” tab.
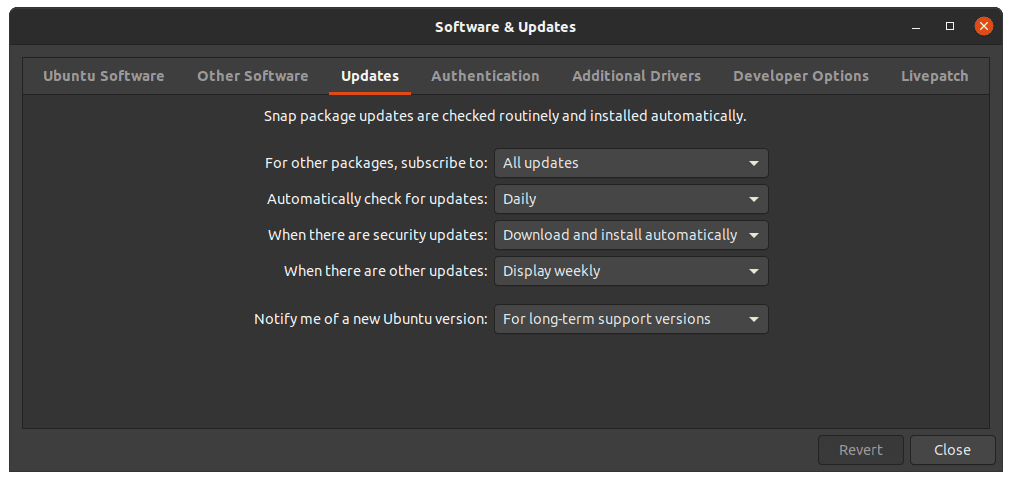
Ubuntu Updates
Here, you will be presented with several options for how you want to receive your updates. For example, in my system, I want it to check for updates daily and automatically download and install security updates.
Conclusion
The Ubuntu Software Center is a handy application and is getting even better with time. We have more and more packages and features being introduced. Currently, there is a rating and review feature that shows customer feedback about the application and Livepatch being the latest. If you found this article useful, feel free to share the link with friends.

