On booting your Linux Operating System, the basic functionality’s services are loaded immediately to the Linux Kernel and continue to run until the login screen appears. On logging-in, other services, including the desktop programs, are loaded. These are called ‘startup applications’ or ‘startup programs.’ We are not referring to services like the network manager; we talk of programs like Skype, torrent clients, browsers, and other such programs.
Even though these startup programs have proven to be quite essential, having too many of them can lag your PC’s startup process. Controlling these startup programs and disabling anything unnecessary for automatic loading will make your Linux system faster and more responsive.
In this post, we will see how we can manage startup programs by covering the following key areas:
- Adding a program to a startup. You can customize your startup list by adding your favorite programs.
- Checking the impact of startup programs on your booting process.
- Removing a program from the startup. You can remove any unnecessary program from the startup list to make your system faster. The program will be removed from the startup list but remain installed in the system.
- Delaying a program in the startup. Ubuntu allows you to delay a program that you don’t want to remove from the startup list for a specified time to boost your boot process.
- Displaying the hidden startup programs. Not all startup programs can be seen as the others are hidden.
Our distribution of choice for this post will be Ubuntu 20.04 LTS. However, this will be the same for any other Linux distro running the GNOME desktop. You might require a different configuration tool for the other desktop environments like KDE Plasma, Cinnamon, MATE, Unity, Xfce, LXQt, Deepin, Enlightenment, and Pantheon.
Startup Applications Manager in the GNOME desktop
Navigate to the Ubuntu applications menu and open the Startup Applications app.

Startup Application
Alternatively, you can also open the ‘Run a command’ dialogue box using the ALT + F2 combination and run the command below:
gnome-session-properties

Run command
In case you don’t have the ‘Startup Applications’ program installed, install it by executing the command below in the Terminal:
sudo apt install gnome-startup-programs
Since we have ‘Startup Applications’ already installed in our system, we will proceed to the Startup Applications Preferences window.
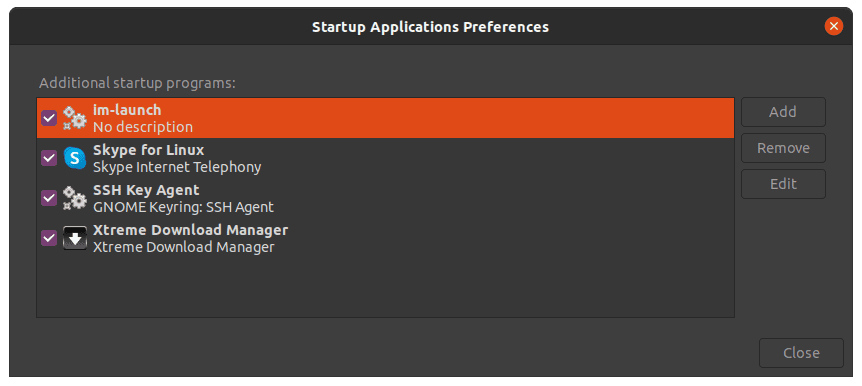
Startup apps preference window
Adding a Program to Startup
To add any application to the Startup Application, we will need to know the command or path that executes the particular app. This tutorial will show you two methods you can use to find the command that runs any application.
- Use the ‘alacarte’ menu
- Use ‘which’ command
(i) Use the ‘which’ command to find the path to an application
The ‘which’ command can be quite useful if you know the name used to execute an application on the Terminal. For example, to execute apps like Vlc, Telegram, or Shotwell, you would call the name vlc, telegram-desktop, and Shotwell, respectively. To know the path to each of these applications, use the syntax below:
which [app-name]
e.g
$ which vlc
$ which telegram-desktop
$ which shotwell
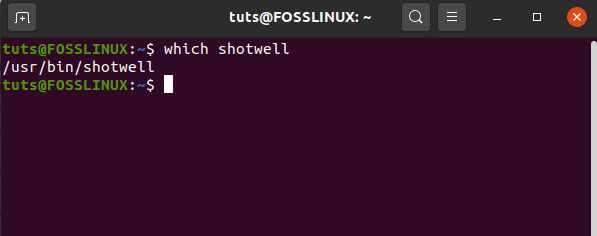
Shotwell command
From the image above, you can see the path to the Shotwell binary listed below. Mark this path as we will use it to add Shotwell to startup applications.
In the Startup programs Preferences window, click the ‘Add button’ and insert the full path to your program in the Command field, which is usr/bin/shotwell for our case. In the ‘name‘ field, enter the name of your application. In the ‘comment‘ section, add any comment or leave it as blank.
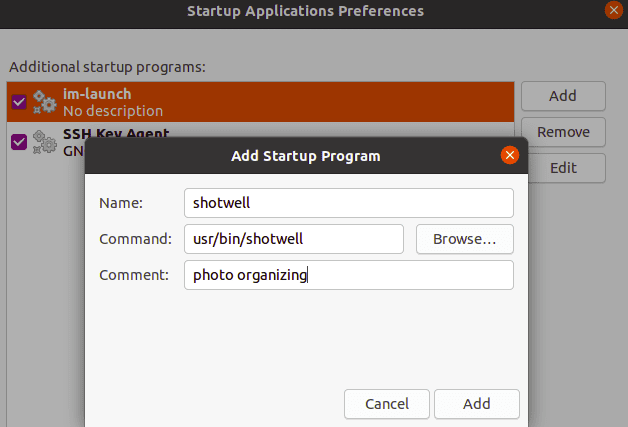
Add Shotwell to startup apps
Confirm that the checkbox is on then finish up by clicking the Add button to apply the changes. Your custom program will then be added to the startup list and launched whenever you boot into your system.

Startup apps
(ii) Use the ‘alacarte’ menu to find the command to run any application
The ‘alacarte‘ menu is a reliable utility that you can use to find the command to run any GNOME desktop environment applications. If you don’t have it installed in your system, execute the command below on the Terminal:
sudo apt install alacarte
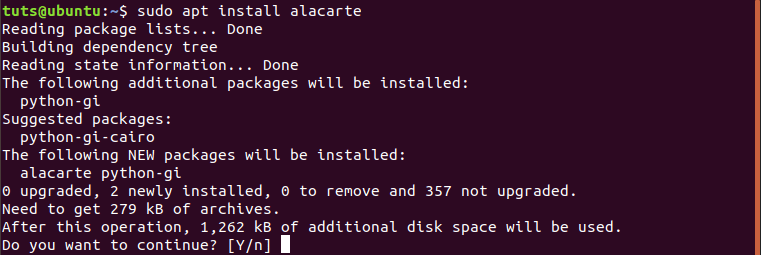
Install alacarte
Once the installation completes, navigate to the system menu and launch the ‘Main Menu‘ application.

Main menu
This menu contains all the installed programs in your system.
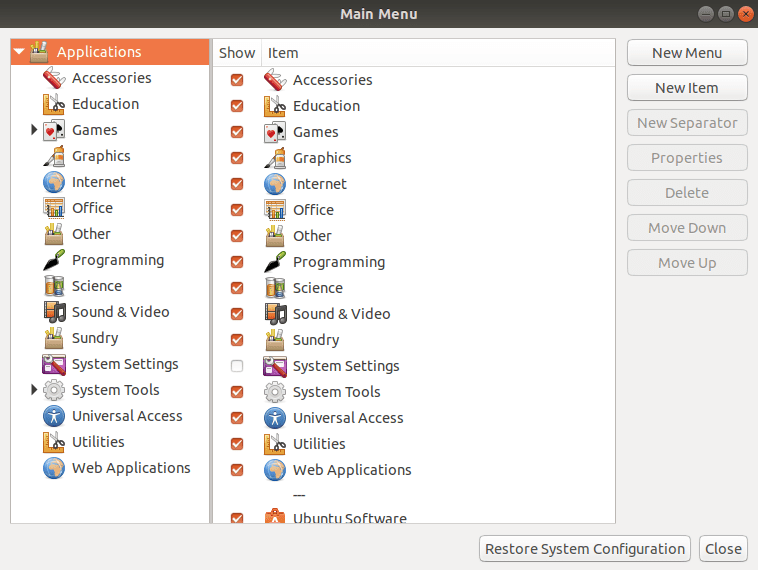
Main menu
Now to know the command used to launch any application, select the app, and click on the properties tab. In our case, we want to add Firefox to our startup programs. Click on Internet -> Firefox -> Properties.
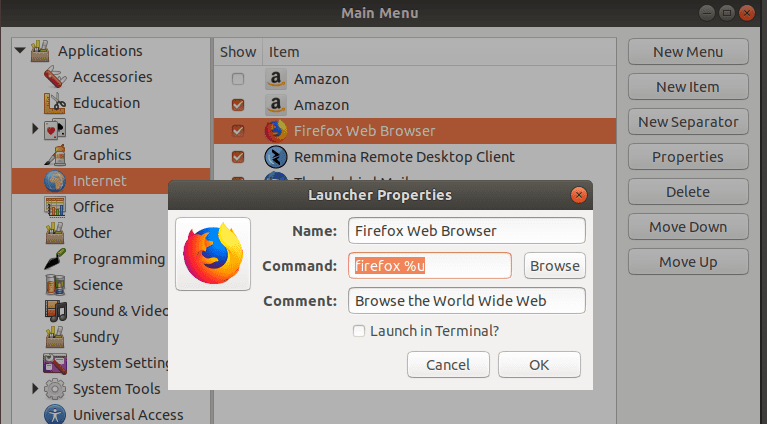
Firefox command
Select the text in the ‘command‘ field. That is the command used to launch Firefox.
Now launch Startup application programs and click the Add button. In the Name field, enter ‘Firefox,’ in the Command field, enter ‘firefox %u’ as shown in the alacarte menu, and enter any comment you wish. The image below illustrates this whole process.
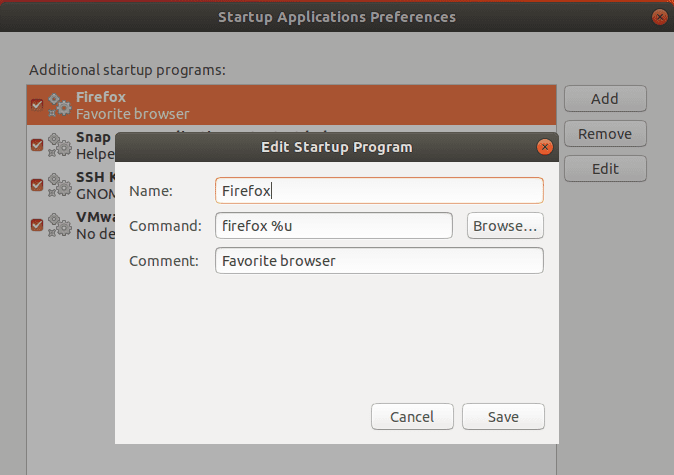
Adding Firefox to startup
That’s it! You can now use the same procedure to add any app you wish to Startup programs.
Removing a program from the startup
Removing an application from startup programs is easy. Follow the steps below:
Step 1. Launch the Startups program Preference Window from the Show Application button.

Startup Application
Step 2. On the provided list of programs, select the program you want to remove.
Step 3. Click on the remove button located on the top-right side of the window.
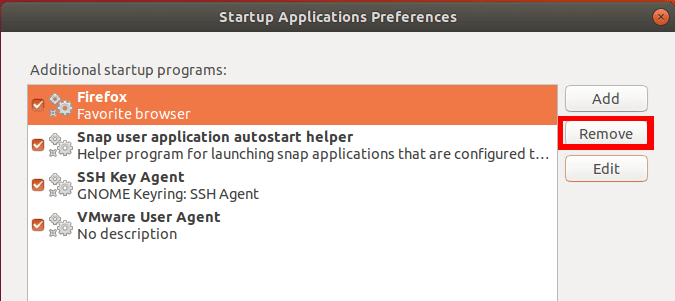
Remove program
The selected program is immediately removed from the list. Finish up by clicking on the close button. The next time you boot into your system, the removed program will not be automatically loaded.
Delaying a program in the startup
To delay the execution of any startup program, we will use the sleep command.
Step 1. Launch the Startup application program from the system menu.
Step 2. Click on the program you wish to delay from the provided list of programs.
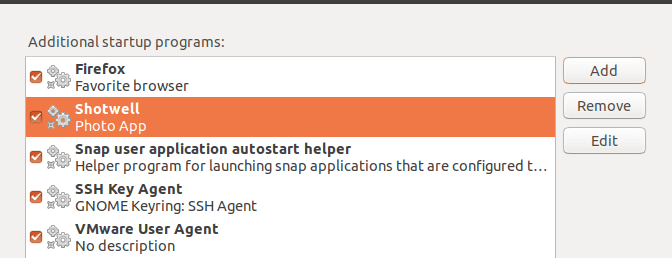
Delay program
Step 3. Click on the edit button to open the Edit Startup Program window.
In the Command field, enter the command sleep, followed by the seconds your program should delay at the beginning. For example, in our case, we will delay the Shotwell program by 10 seconds, as shown below:
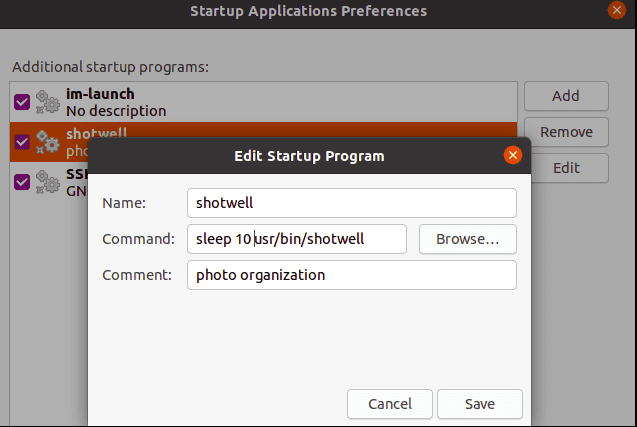
Delay Program
Finish up by clicking on the Save button and Exit to update the changes. Your customized program will remain in the startup list but takes the specified time to load whenever you boot into your system automatically.
Checking the Impact of Startup Services and Programs on your Booting Process
Modern Linux distributions depend on systemd, which comes with tools that analyze the startup process. To check how long your system takes to complete the boot process, execute the systemd command below on the Terminal.
$ systemd-analyze
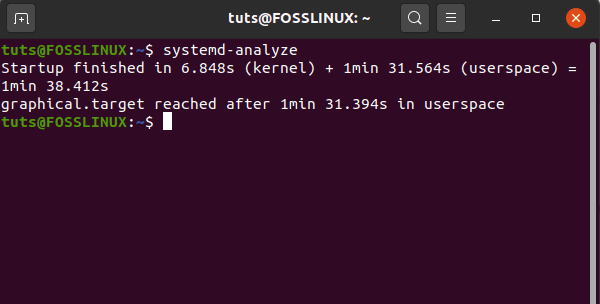
Analyze the booting process
From the report given by the systemd analysis, you will be able to know whether the entire boot process was affected by any additional startup program.
For a slow startup process, that means some services slow down the booting sequence. To check on these services, execute the command below on the Terminal.
$ systemd-analyze blame
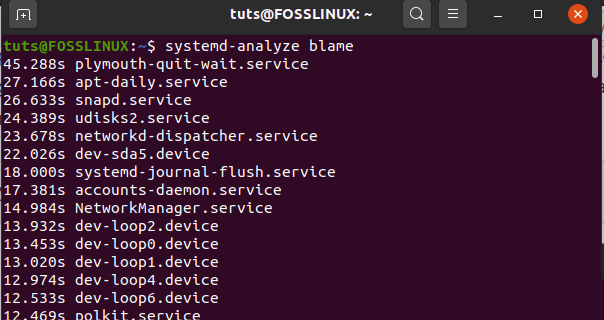
Analyze startup programs
The list will display both the programs and services. The command can disable services:
system 1 disable X—Now
Note: X represents the name of the service.
With that information, you can decide which program to remove from the startup list to speed up your booting sequence.
Displaying the hidden startup programs
We have looked at how we can manage startup programs in the Startup application window. However, there are other services, daemons, and programs not listed here (hidden). To see these hidden programs on the Startup application window, execute the command below.
sudo sed -i 's/NoDisplay=true/NoDisplay=false/g' /etc/xdg/autostart/*.desktop
You will be prompted to enter your password.
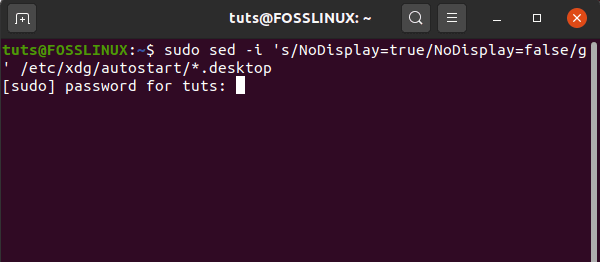
Showing the hidden startup programs
Now, re-open the Startup program Window to view the list of programs. All the hidden startup programs and services will be displayed.
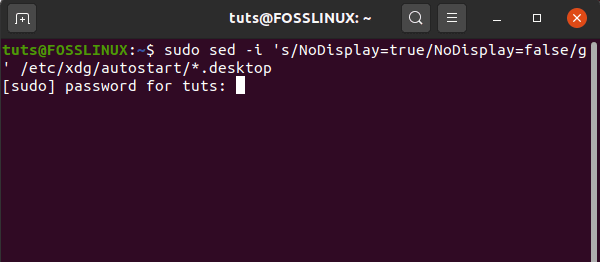
Show hidden startup programs
Conclusion
I hope this post has given you the various methods you can use to manage your startup applications. Is there any additional you wish to share with our readers? Feel free to leave a comment below.

