Olive video editor is a free and open-source non-linear video editor available for Linux, Mac, and Windows. It aims to be a powerful and reliable alternative to popular video editing suits such as Apple Final Cut Pro, Sony Vegas Pro, and Adobe Premiere Pro. Olive is available on various Linux distributions through many channels, including Snap, Flatpak, and PPA. Additionally, regular updates are done on Olive Video Editor to provide high-end professional video editing.
This post will give you a step-by-step guide to installing Olive Video Editor on Ubuntu, Manjaro, and Fedora.
Features
- Olive supports the moving of elements in the visual space directly in the viewer panel. That allows you to move or scale many elements throughout your scene; hence fast results are obtained. You will need to change some value of x or y to move or scale elements in your composition in the other video editors. The scale values of individual axes will have to be adjusted separately.
- Olive enables quick previews that can be tested even on low-end machines. Editing clips become faster and easier.
- This video editor also facilitates multi-cam editing because of the fast adjustment of elements.
- Ability to facilitate network sharing.
- Olive facilitates dual monitor support.
- Provision of backup and archiving elements.
- Olive comes loaded with many built-in templates that can easily adjust the program functionality and layout.
- The interface modern, clean, and easy to use, providing a smooth experience.
- Availability of powerful color correcting tools
Install Olive Video Editor on Ubuntu
There are four ways of installing Olive in Ubuntu-based distributions:
- PPA
- Snap
- Flatpak
- AppImage
1. Install Olive through SNAP on Ubuntu
Snap is already installed in Ubuntu 16.04 LTS or later. In case you are using a lower version, you will need to install snap using the commands below:
sudo apt update
sudo apt install snapd
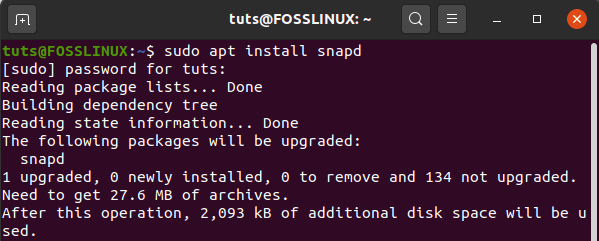
install snapd
Olive is available on the Snap Store as a snap. Use the command below in the terminal to initiate the installation process:
sudo snap install --edge olive-editor
Provide your password to confirm the addition of the installation package.

Install Olive via Snap
2. Install Olive through flatpak on Ubuntu
Install and setup flatpak on your Ubuntu system by running the command below in your terminal:
sudo apt install flatpak
Accept the installation by pressing y during the process.

Install Flatpak
Click on the link below to download Olive-Editor flatpak package.
Once you have downloaded the package, launch the Terminal and navigate the Downloads folder containing your Olive flatpak file. Now, use the flatpak install the command below to install Olive-Editor.
sudo flatpak install [package-name]
e.g
sudo flatpak install org.olivevideoeditor.Olive.flatpakref
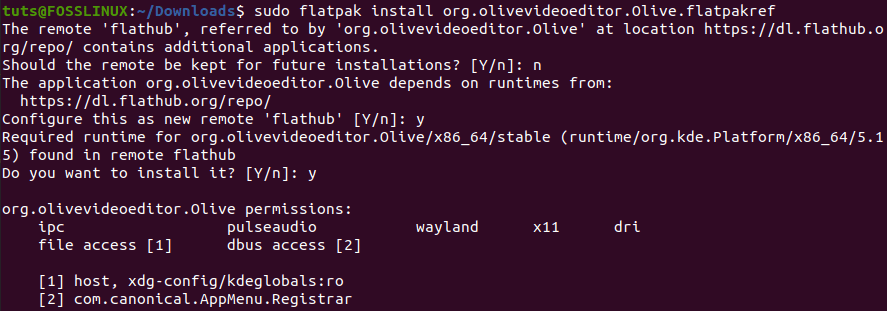
Install Olive with flatpak
3. Use Olive-Editor AppImage
If you don’t want to install Olive-Editor on your Ubuntu system, you can opt for the Olive AppImage file. Download the Olive AppImage package from the link below.
Now, to run Olive-Editor, you first need to make the package executable with the command below:
chmod +x [package-name]
e.g
chmod +x Olive-34cb7c96-Linux-x86_64.AppImage
Then start Olive-Editor with the command below:
sudo ./[package-name]
e.g
sudo ./Olive-34cb7c96-Linux-x86_64.AppImage

Run AppImage File
4. Install Olive via PPA on Ubuntu
Tip: Installing Olive Video Editor via PPA as of writing this post has an issue. When you try adding the PPA, you get an error like: “The team named ‘~olive-editor’ has no PPA named ‘ubuntu/olive-editor’ – The team named ‘~olive-editor’ has no PPA named ‘ubuntu/olive-editor.’ After doing some research I came across the following post on the official Olive Github issues page: “That PPA was not made by Matthew (olive-team), which is why you’re getting that error. It was made by some person who we have never had contact with and who is not affiliated with the project in any way …” However, I will show you the installation steps, hoping that they will soon fix that issue.
To install Olive Video Editor via PPA on Ubuntu, execute the commands below:
sudo add-apt-repository ppa:olive-editor/olive-editor
sudo apt-get update
sudo apt-get install olive-editor
Install Olive Video Editor on Fedora
As of writing this post, there is no RPM package available for Olive Vide Editor. As a workaround, we will install Olive using Snap, Flatpak, and AppImage.
1. Install Olive via Snap on Fedora
To get started, we first need to install the Snap package manager on Fedora. Run the commands below:
sudo dnf update
sudo dnf install snapd

Install snapd
Once the process completes successfully, execute the command below to install Olive Video Editor.
sudo snap install --edge olive-editor
Install Olive via snap
Once done, you should be able to launch Olive Video Editor from the applications menu.
2. Install Olive via Flatpak on Fedora
Unlike other distributions, Flatpak is pre-installed on Fedora. Therefore, all we need is to add the flatpak repo with the command below.
flatpak remote-add --if-not-exists flathub https://flathub.org/repo/flathub.flatpakrepo

Add flatpak repo
Once done, click on the link below to download Olive-Editor flatpak package.
Once you have downloaded the package, launch the Terminal and navigate the Downloads folder containing your Olive flatpak file. Now, use the flatpak install command below to install Olive-Editor.
sudo flatpak install [package-name]
e.g
sudo flatpak install org.olivevideoeditor.Olive.flatpakref
3. Use Olive AppImage on Fedora
If you don’t want to install Olive-Editor on your Fedora system, you can opt for the Olive AppImage file. Download the Olive AppImage package from the link below.
Now, to run Olive-Editor, you first need to make the package executable with the command below:
chmod +x [package-name]
e.g
chmod +x Olive-34cb7c96-Linux-x86_64.AppImage
Then start Olive-Editor with the command below:
sudo ./[package-name]
e.g
sudo ./Olive-34cb7c96-Linux-x86_64.AppImage

Install Olive Video Editor -Flatpak
If the process completes successfully, you can launch the Olive Video Editor from the applications menu.
Install Olive Video Editor on Manjaro Linux
To get started with Olive installation on Manjaro, we first need to install the “Base-devel” and “Git” packages. Execute the command below on the Terminal.
sudo pacman -S base-devel git

Install Base Devel
Next, we need to download the Trizen AUR helper Github repository. Run the command below.
git clone https://aur.archlinux.org/trizen.git

Clone Trizen
Once done, proceed to install Trizen with the makepkg command. Execute the commands below.
cd trizen
makepkg -sri
When the process completes, proceed to install Olive with the command below:
trizen -S olive-git
install olive
If the installation completes successfully, proceed to launch Olive Video Editor from the applications menu.
How to use Olive Video Editor
To get started, launch Olive Video Editor from the applications menu. The Olive Video Editor is still in the alpha version, meaning that it is still under development.
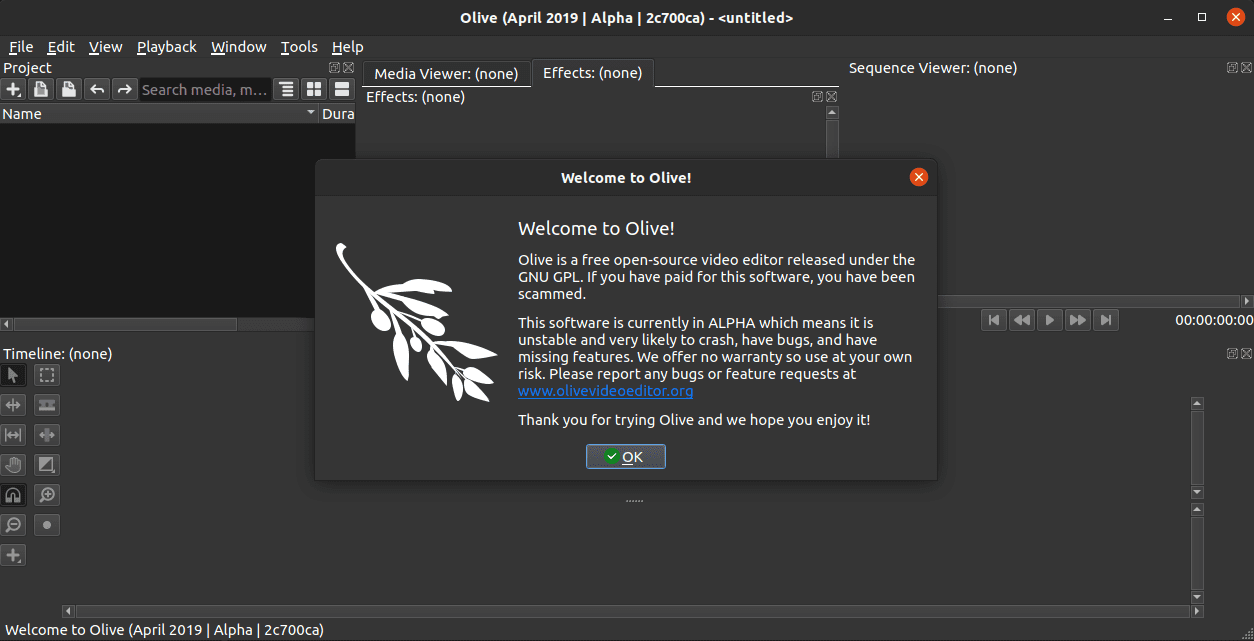
Olive Editor
The File/Import menu brings in various media components. Thumbnails size can be controlled with a slider. To keep the project section organized, use the File/ New/ Folder option to create separate folders for photos, audio, and videos. Files are then dragged into the correct folders, for example dragging video files to video.
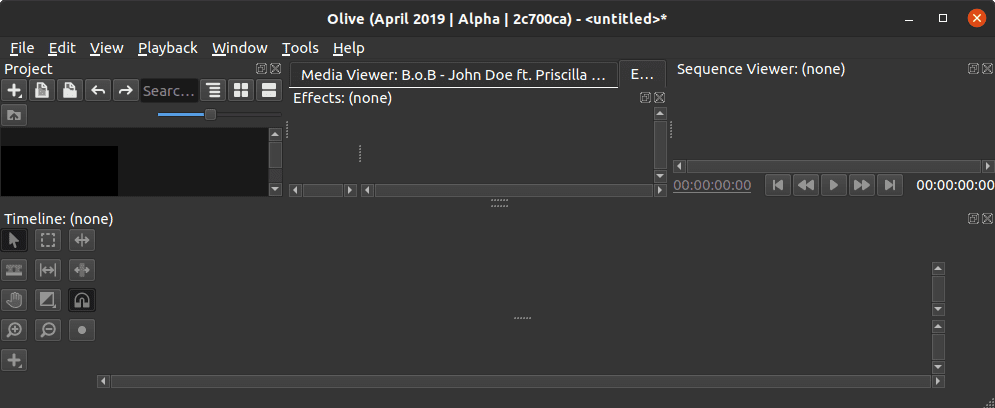
Olive Video Editor
To start a movie onto a timeline, drag the video clip with you. The number of frames is indicated at the top. You can edit the clips on the timeline using the buttons on the left. You can add transitions by right-clicking on the clip and use the command Add default transition.
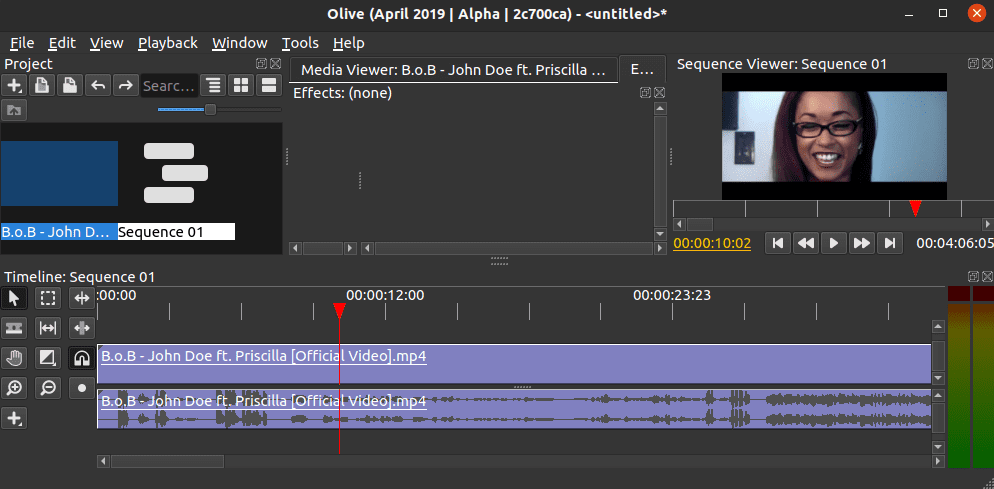
Olive Video Editor Preview
Conclusion
Olive Video Editor being cross-platform, can work on multiple operating systems, including Linux, Windows, and macOS. I used it, and I can say it’s a great alternative to popular commercial Video editors like Adobe Premiere Pro, Apple Final Cut Pro, and much more. After a quick check on their official website, Olive Video Editor users can expect more development done on the software package to make it more reliable.


1 comment
Current tutorial is no longer relevant for Olive installing via snap and PPA on Ubuntu. There is no such app in snap repo and PPA ‘olive-editor/olive-editor’ is not found as well.