The history command in Linux is no complex jargon. It is exactly what you think it is, and there is no hidden meaning behind it. The same way you look at your browser history after a long day on the internet is how you perceive the history command. It is all about tracking your previous movements and actions, but in this case, it’s on a Linux terminal or command line.
Therefore, we can comfortably define the history command under the Linux domain as a way of previewing previously executed commands. In this case, we can look at the terminal as a browser where you execute various commands on a continuous time frame. These executed commands are interpreted individually as events. Each event is then assigned an event number. Therefore, we have commands with ids as event numbers stored in a history file after their terminal execution.
The event ids’ significance is evident when you might later need to recall a specific command you executed. Also, you might want to modify a previously executed command. Therefore, we can conclude the history command’s introductory understanding to display all the previously executed commands or just a specific command on the terminal. Also, we should not forget the viable option of modifying the listed command.
Letting History repeat Itself
We can begin this historical article in a fun way and by quoting George Santayana. This famous individual associates the inability to remember the past with the curse of repeating it. However, when we step into the Linux universe, this quote only qualifies as a myth. It is because the Linux philosophy is realistically the opposite of the stated George Santayana’s quote. When on the Linux terminal, if you can’t remember a past action, there is no need to worry about it because the odds are against it ever unraveling.
Unless, of course, you become a master of the Linux history command, then you can time travel to the past and correct your previous terminal sins if that is your wish. The use of the Linux history command is in no way an associate of laziness. It saves time through efficiency. As you advance your way into mastering the Linux operating system, you will find yourself working with lengthier and complicated commands. Even if you compare your IQ to that of Albert Einstein, you won’t have the time to remember all the commands you execute and soon start making dreadful errors. Working on the Linux terminal will expose an individual to two types of errors:
-
- Error one: This error is the most common, and all it does is prevent you from going forward with the command you want to execute.
-
- Error two: This error is a trickster. It will execute the command you initiated but produce unexpected results.
You can think of the history command as the ninja warrior that eradicates these two types of errors to boost your productivity. A word of thought before we begin the tutorial, there is more to the Linux history command than just using your keyboard’s Up arrow key. Our approach will make you look more professional.
Enter Linux’s History Command
Initiating the history command is as easy as typing the word history on your Linux terminal. So fire up your terminal and pass this simple spelling quiz.
history

history command
If you hit enter, you will get a list of all the commands you executed on the terminal with their assigned ids or event numbers. The numbering system the Linux terminal interface uses depicts the oldest command at the top of the list and the newly typed command at the bottom of the list. As you can see, the history command I just typed was assigned the id number 24.
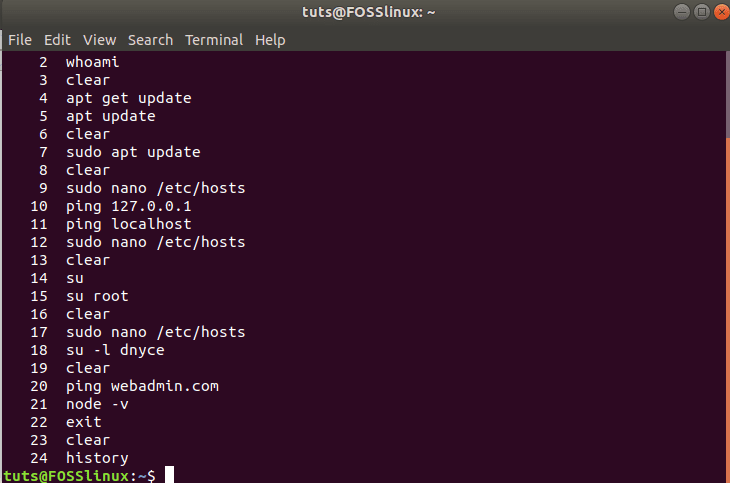
history command list
Consider the scenario of a very active Linux terminal. If we were to type the history command on this terminal, the output would be, let’s say, a list of 500 commands saved on the history file. So the history command is useful in filtering a specified grouped segment of commands. Let’s say we want to view the last 10 commands executed on the terminal. We will filter our way through the terminal by typing the following.
history 10

last ten commands on the history file
As you can see, the command ‘history 10’ filtered the last ten commands used on this terminal and listed them on our terminal with inclusion to the ‘history 10’ command.
That is one way to achieve this objective. Another nerdy way to do it is by piping out history command with another command called tail command. Type the following command, as relayed in the screenshot below.
history | tail -n 10

using the tail command to display the last ten commands on the history file
The command also lists the last 10 executed commands on the Linux terminal, including the one we just executed.
Actually Repeating History
It’s time for the fun part of using the history command. How about we start by actually letting history repeat itself. Since you are familiar with the history commands and their associated event ids, let’s get back to the terminal. To repeat a specifically listed command, take note of its event id and mock the following command, as depicted on the screenshot. Do not use spaces when typing the command.
!17

using event id to execute a previous command
In my case, I wanted to view the Linux /etc/host file and was prompted for an authentication password. As soon as my credentials were approved, the command executed itself.
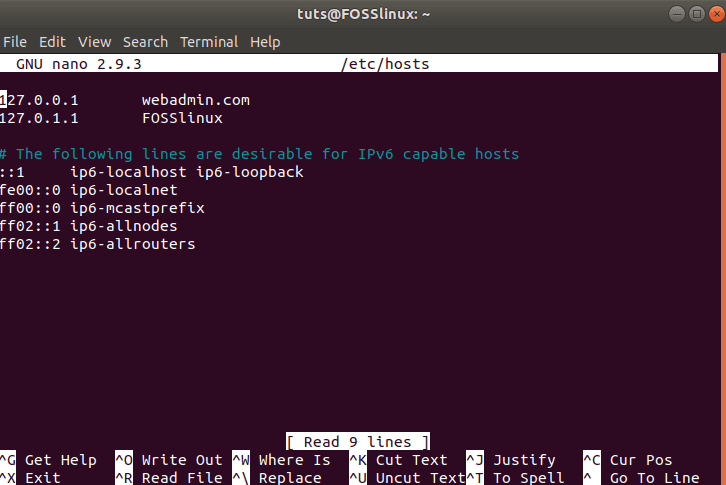
executed command on the history file
There is also a case where you want to repeat the previous command you executed. Achieving this objective is as easy as typing two exclamation points on your terminal. Do not use spaces.
!!
re-executing previous command
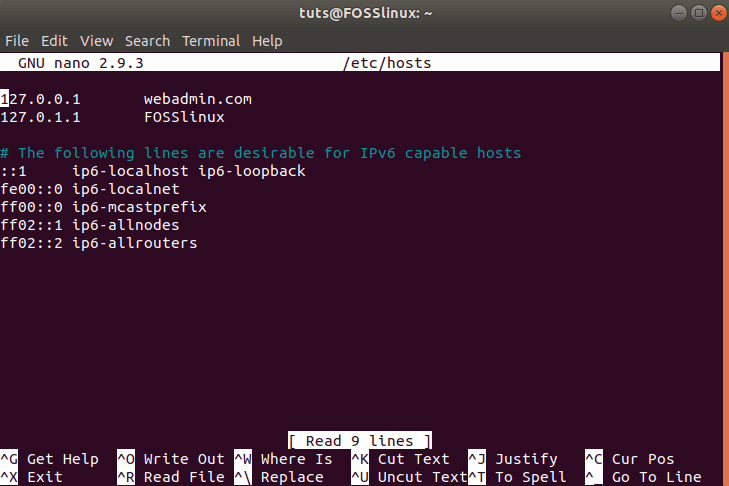
re-executed history command
As you can see, the command took us back to the Linux /etc/host file I had previously opened. It took the double exclamation command to reuse my previous command, which was executed by itself. Maybe you might have been used to the keyboard Up arrow key, which required you to perform two actions, scroll up once and then hit the enter button. However, the double exclamation command looks more swift and professional as you only need to perform a single action.
Since the command I used requires Sudo privileges, I can prefix my double exclamation marks with a Sudo command to yield the same expected result.
sudo !!
dealing with Sudo history command
A single exclamation number combined with an event id will execute the displayed command tied to that id. A double exclamation mark gets you to execute your most recently used command with the option of prefixing the command with Sudo if it requires a sudoer user to execute.
You might also want to take your nerdiness to the next level and want a way to repeat your 3rd or 6th previous command. In this case, you will need to take note of the event id associated with the command. You will then combine the event id with a hyphen and a single exclamation mark as follows.
!-21
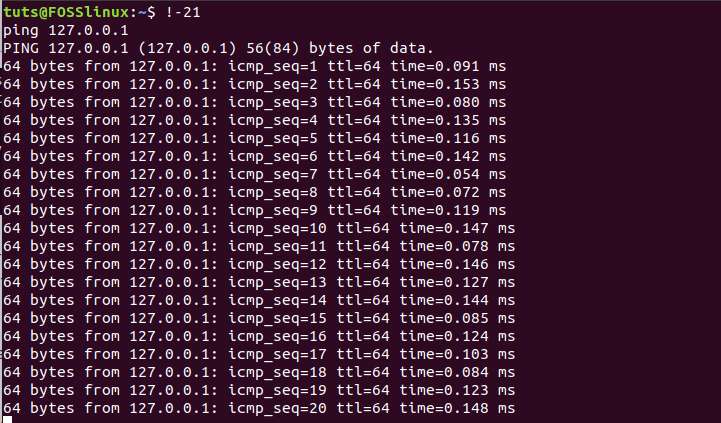
executing any previous command on the history file
On my end, I wanted to query about my 21st previous command, and it turned out to be a ping request for my localhost IP address. Using this command sequence is useful when you want to counter-check a previously executed command and determine if the parameters you used to execute it are still valid or not biased.
Command Strings
Let’s say you executed some command on your terminal, but you have not fully memorized the command. You are, however, sure of the effectiveness of the command and how it helped you. Knowing a portion of the string that constitutes this command is very useful. In my case, I am very sure of once running a command to update my system. Let’s say I am yet to memorize this system update command fully, but I know a portion of the command contains the string ‘apt’ as the initial wording to the command. To use this command again, I will type in the following command on my terminal. However, since most system update commands required a sudoer user’s authorization, I will prefix the command string I want to use with Sudo.
sudo !apt
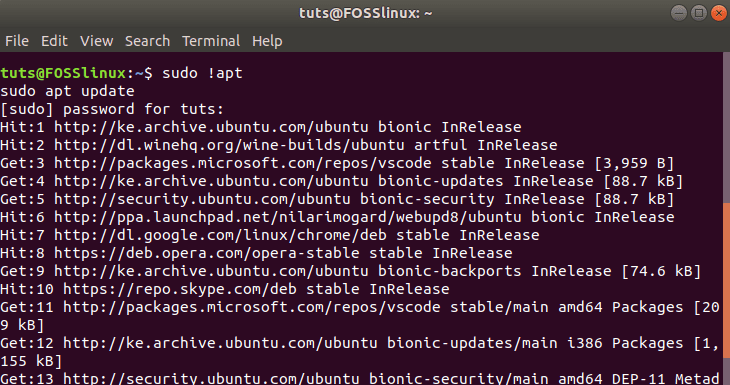
history command with strings
As you can see, I successfully updated my Linux system from the command line without using the full ‘sudo apt update’ command. This hack from the Linux history command manual is useful when dealing with longer commands that might be tedious to type or might lead to a nagging typo. You might be editing a file whose relative path produces a lengthy command or just copying files. Either way, you need a stress free approach to recycling your repetitive commands.
Since we touched on the sudoer users’ authorization aspect, we might end up hitting a wall if we are not careful. Most commands from sudoer privileged users will require the prefix Sudo to execute. Therefore typing a string command like ‘!sudo’ for the commands that begin with Sudo might not be enough as it might lead to the execution of an unwanted command sequence. However, we can provide a safety net through the use of the parameter :p which is a print modifier. Therefore, combining our string command with it should yield outputs like the following.
!sudo:p

history command with the print modifier
The command printed the available Sudo commands I just used. To reuse this command, I will use the keyboard’s Up arrow key and press enter to execute it. If the list showed more than one Sudo command, I would still use the Up arrow key to navigate to the specific Sudo command that I wanted to reuse.
These are not all the options that we have on dealing with strings. There is also a case where you only know of a particular string defined in the command you want to use. It is a case where you are not sure of the first strings that define the command you previously used. Here, you will use both the exclamation mark and the question mark to find your command.
!?ping

executing a specific command from the history file through strings
I used the ‘!?ping’ command sequence, which instantly executed my previous ping request. You can use this sequence to execute previous commands on your terminal that are unique to others.
Interactive Search
Let’s assume you have several previous commands that you executed, and they have similar or matching string sequences. Out of all these matching cues, you might only want to execute a specific command sequence in that fold. An interactive search lets you get to this one command that you want to execute. To initiate the interactive search, combine the keys Ctrl+r. Your Linux terminal display should look similar to the one below.

history command and interactive search
Just type the search clue for the command you need to execute. In my case, I typed ‘apt,’ and as you can see, it appeared between the apostrophe and the backtick. You can type in as more string clues about the queried command, and the interactive search will continually update the related results. Pressing enter will immediately execute the found command.
sudo apt update

using interactive search
Moreover, you might want to edit the found command before executing it. To do so, use the left and right keyboard arrows. The found command will now display itself on the terminal, where you can make the needed changes.
sudo apt update && cd FOSSLinux
editing an interactive search
Deleting History Commands
So far, you can now retrieve, query, update, and execute commands from the history file. However, you might be looking for a way to empty the history list of some or all of its command. Maybe you are that type of user that does not want anyone to track how they used their Linux system. The -d parameter helps you get rid of some unwanted commands on the history file. In my case, my history file contains a misspelled command with an event id number 44.
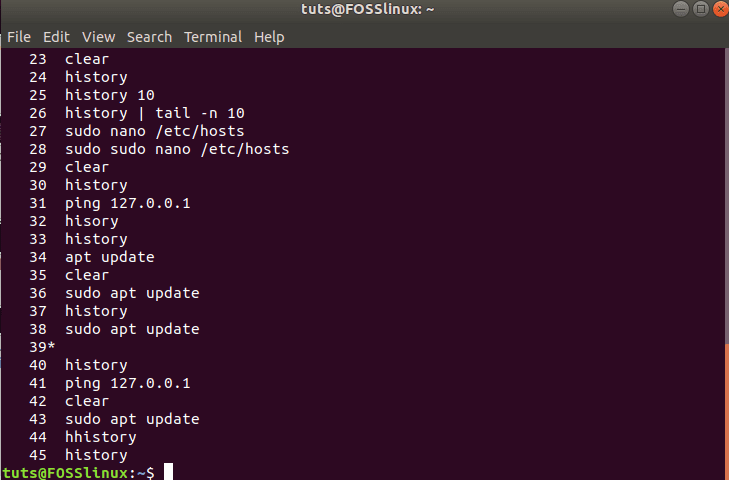
finding history command to delete
To get rid of this misspelled command, I will do the following on my terminal.
history -d 44
using event id to delete history command
Running the ‘history’ command again shows that the misspelled command was deleted.
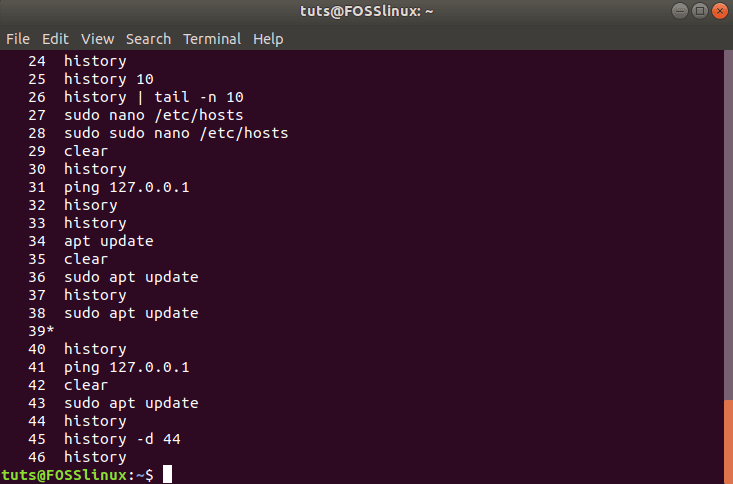
confirming the deletion of the history command
The deleting option does not just apply to a single command, as it also covers a range of commands. For instance, consider the following command.
history -d 10 20
This command will delete the history file entries from event id 10 to event id 20. Another history command to consider is the following.
history -d -6
This command will get rid of the last six commands you typed on the terminal stored in the history file.
If you want to clear everything from the history file list, you can mock the following command.
history -c

clear all history commands
Conclusion
You now have all the needed information to decide whether your terminal history should or should not repeat itself. For advanced users, there are instances where you might run an app through the terminal and might be prompted to leave a trail of sensitive information behind. The history file also stores such sensitive data. Therefore, it is good practice always to clear your history file before exiting the command line, especially in cases that lead to the storage of sensitive data. The history command gives you the power to relive the good times at the terminal and also fix your past command line mistakes.

