Creating or resizing hard disk partitions is usually considered a risky process. One wrongdoing can render the PC unbootable and then comes a lengthy process of recovery.
GParted is a free and open source utility that can simplify the partitioning process. Written in C++, GParted is GUI based and therefore beginner friendly and safe. GParted can be installed on most popular Linux distros including Ubuntu, Fedora, Arch Linux, and their derivatives via their software center. Alternatively, you can create a Live USB drive. Similar to any other partitioning software, the installed version is useful while partitioning a non-active hard disk, meaning hard disk not running the Linux distro you have booted into.
The GParted Live USB drive is extremely helpful when you want to resize the active partition. Head over to our tutorial on creating the GParted Live USB drive and come back with the bootable drive. Both versions are essentially the same when it comes to using it. If you are working with active partition, boot into the GParted Live USB drive and continue with the creating and resizing hard disk partitions.
Creating and Resizing New Partitions
Step 1) Launch GParted and enter the root password when prompted.
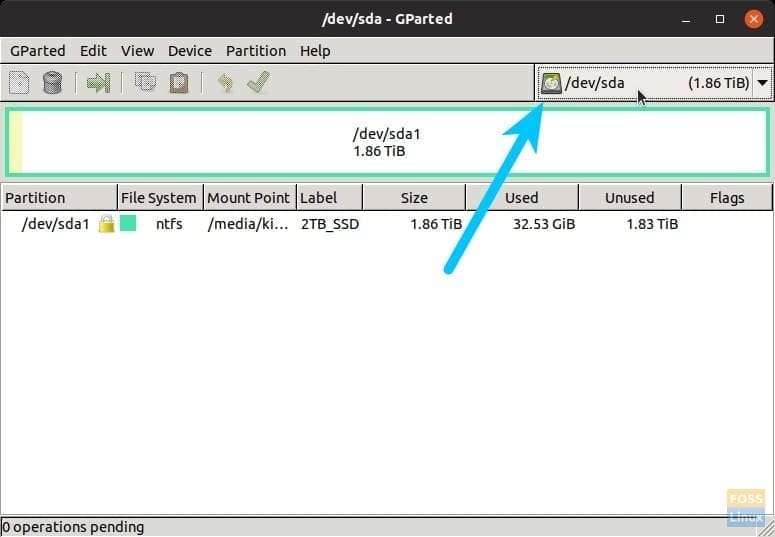
Step 2) Use the drop-down box to select the hard disk that you want to partition.
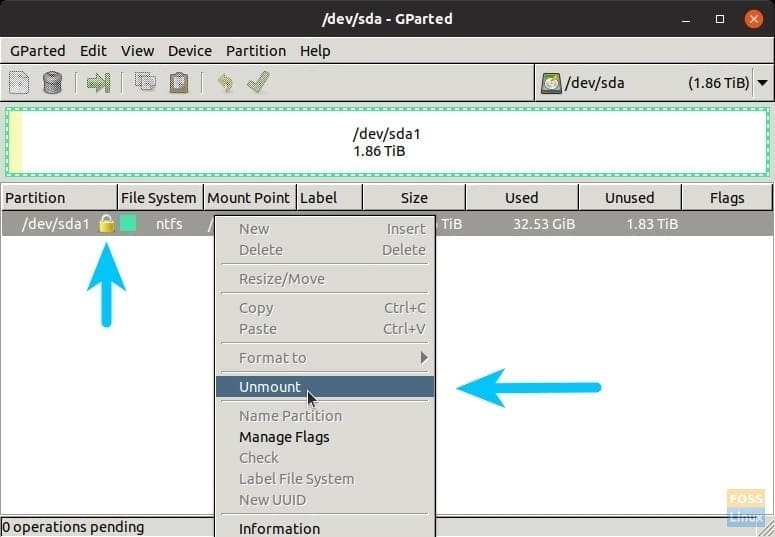
Step 3) If you see a lock icon next to the hard disk partition, it implies that the hard disk is currently mounted. You need to first unmount it. To do that, simply right-click on the partition and select “Unmount”. The lock should disappear. If you see any error “Couldn’t unmount..target is busy”, it could be because you are working on the active partition that is running the Linux operating system. You must use GParted Live USB drive in such case.
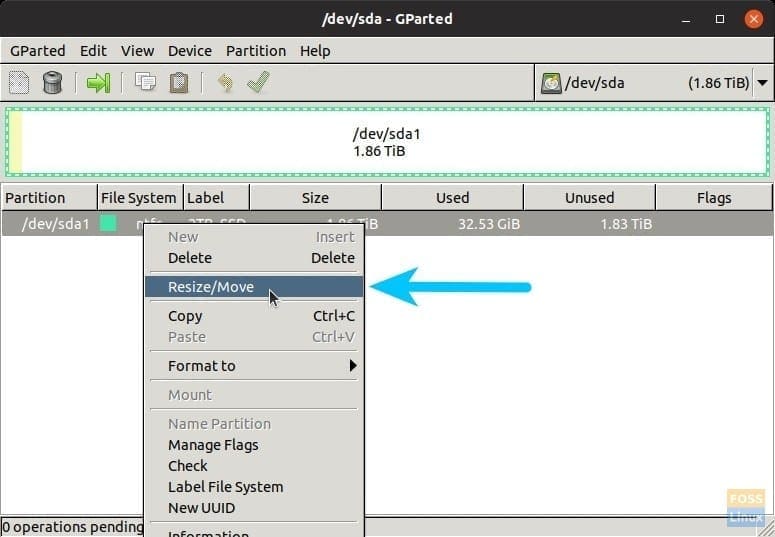
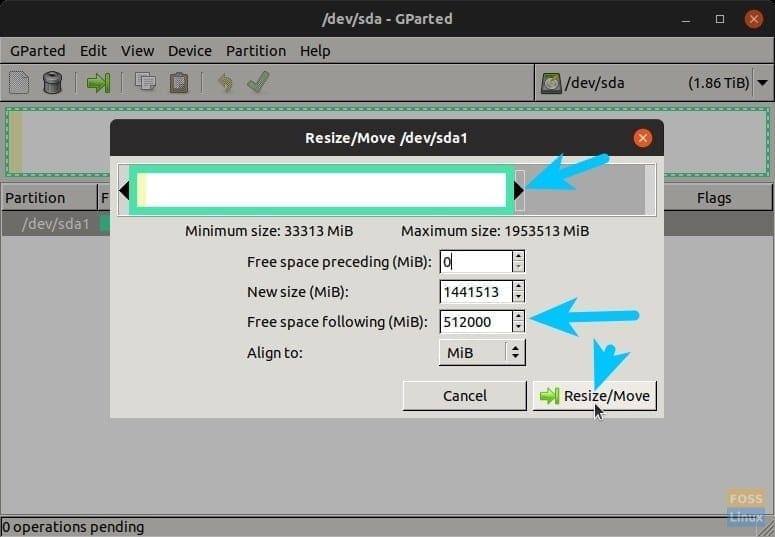
 Step 4) In order to create a new partition, right-click on the item and select “Resize/Move”.
Step 5) You can drag and resize or simply enter the partition size you need. For example, I’m entering 512000 (500GB) in the “Free Space Following (MiB)” box. This is the new partition size that’s going to get created. Click “Resize/Move” button.
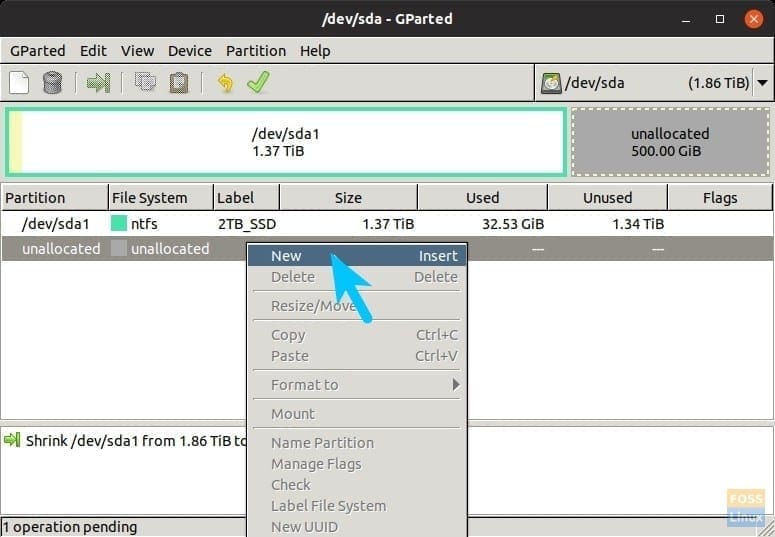
Step 6) You should see a new “Unallocated” partition created. This doesn’t have a file system yet. Right-click on it and select “New”.
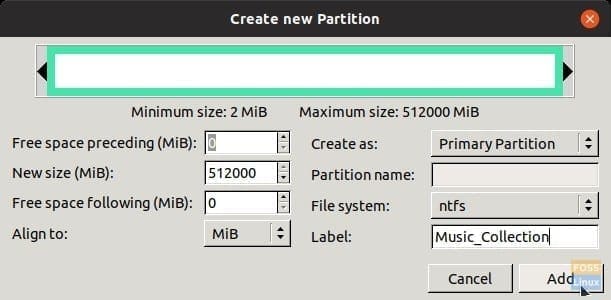
Step 7) You can format it to the file system you like. NTFS file system is the best bet for cross-platform operating systems including Windows. ext4 file system is great for Linux only systems. Label it to whatever you want and click “Add”.
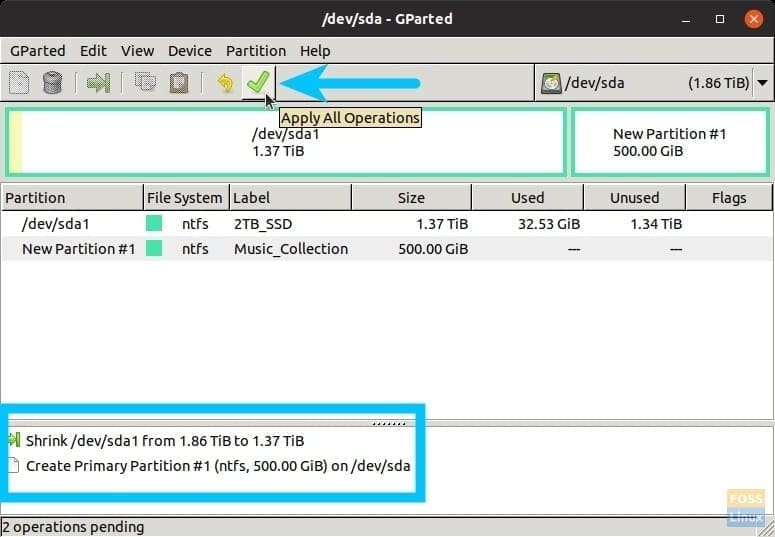
Step 8) Till this point all you did is only a preview. This is the last chance to review the changes you want to apply the changes before you commit. When you are sure about the changes, go ahead and click on the green check button followed by “Apply” to the warning message.
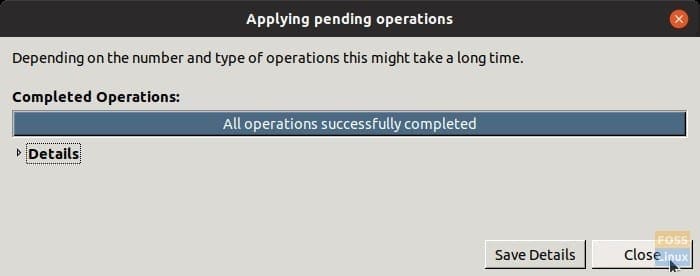
Step 7) Wait for the process to finish. When it’s complete, you should see new partition in the file manager.

2 comments
I’m a Linux newbie even though I’m 71 years old. I’ve never been computer savvy and didn’t like the Windows business model,being a disability pensioner with a very limited income. A friend told me about Linux and installed Ultimate Edition 2.9 onto my computer for me. After a while I switched to Linux Mint with the XFCE desktop and loved it. Whenever I need to know something I just ask Firefox and my help usually comes from one of your postings so may I say thank you very much for sharing your expertise. Studying your information makes me feel like a child being given knowledge by a wiser being.
Thanks!