Due to technological advancements, there have been increased piracy cases calling upon enhanced protection, and that is where Anonsurf comes in. Anonsurf allows routing of online traffic via the aid of the TOR network. It forces connections to the TOR channel and the i2p network.
The program has both the graphical interface and the command-line interface. Anonsurf is a ParrotSec script that involved the following developers; Lorenzo Faletra, Lisetta Ferrero, Francesco Bonanno, and Nong Hoang, who is responsible for the maintenance of the script. Anonsurf has enhanced security since anything you do on your computer is untraceable.
Under the pandora bomb, Anonsurf can kill dangerous applications; hence you should not worry about necessarily having a tor browser.
Running the Anonsurf’s Anon mode
Outlined below is a comprehensive guide on how to run Anonsurf’s Anon mode.
Step 1: Cloning
it would help if you cloned the Anonsurf repo from GitHub using the command-line below:
git clone https://github.com/Und3rf10w/kali-anonsurf.git

Clone the Anonsurf repo from GitHub
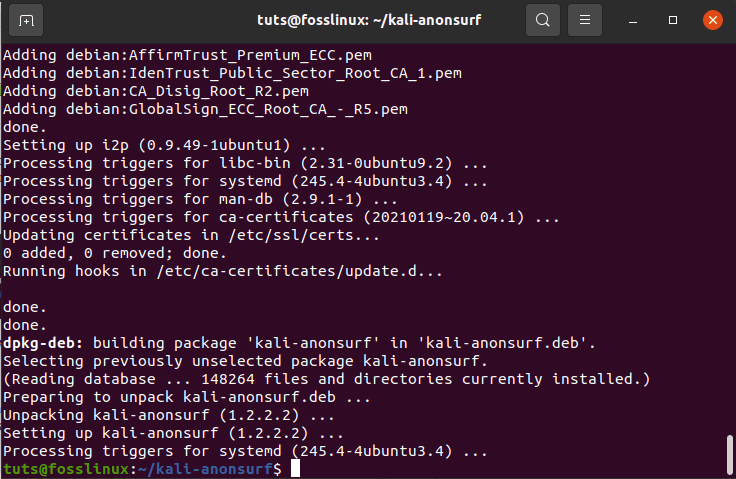
This process usually takes a few minutes, depending on your internet speed. Note that you will see a similar screen to the one above.
Step 2: Installation
After downloading the required modules, the next step is to find the folder containing the download (kali-anonsurf). You can do this using the following command-line:
cd kali-anonsurf

cd kali-anonsurf
The next step is to make the file executable by using the following command-line:
chmod +x installer.sh
After making the file executable, now run the installer using the command-line below. Remember to run the file as an administrator to avoid running into errors.
sudo ./installer.sh
Be patient while the file runs, as it takes some time to complete. This command adds keys, updates and helps install anonsurf in your computer. Take a cup of coffee and relax, as this process will take a while. After completion, you can go anonymous with a single command-line.

run ./installer.sh
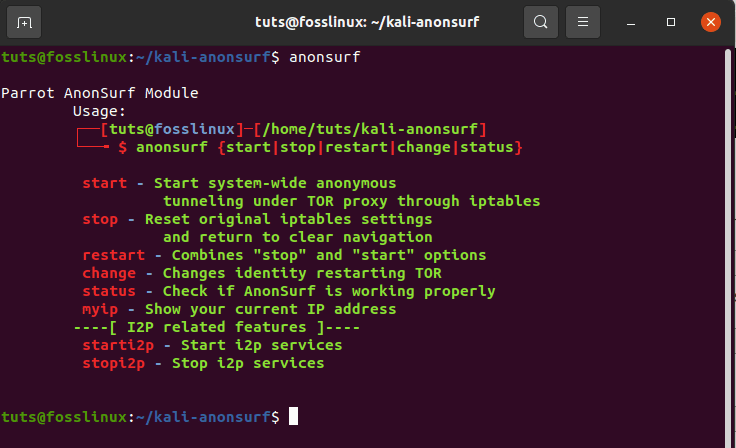
To ascertain that the installation was successful, use the command below:
anonsurf
If you have successfully installed anonsurf, a similar screen to the one below will be shown.

Screen after successfully installing anonsurf
Now anonsurf has been successfully installed in your system, and you are good to go. Let us go anonymous. The following commands are useful whenever you are using or planning to use anonsurf.
- start – this command starts the anon mode
- stop – this command terminates the anon session
- restart – this command combines the stop and start options by restarting the session
- start-bridge – this command starts system-wide Tor tunnel using the Obfs4 bridge support
- changed – this command uses the restart command to change Tor identity.
- enable-boot – this command enables Anonsurf at boot. An alternate way of enabling anonsurf at boot is using systemctl enable anonsurf
- disable-boot – this command disables Anonsurf at boot. An alternate method of disabling anonsurf at boot uses systemctl disable anonsurf
- status – this command checks the current status of Anonsurf, and it aids in determining if it is working correctly. The Nyx application, in this case, is vital since it displays info about the Tor service, nodes, bandwidth, etc.
- myip – this command checks the IP address and verifies the Tor connection
- dns – this command replaces the current DNS with the OpenNIC DNS servers.
To start or initiate a secure Tor channel that redirects your traffic, use the command below. Note that the Tor channel changes your IP address at intervals of around five to ten minutes. Also, remember to run the command as root by using the sudo prefix. Parrot Os users can start the Tor channel by simply selecting start service.
sudo anonsurf start
you can check your anonsurf status at any time using the following command-line
anonsurf status
After checking the status of anonsurf, you can then end the connection using the stop command-line
sudo anonsurf stop
Anonsurf and proxychains are essential since they help in hiding the IP addresses. However, hiding the IP address only is not enough. That takes us to our next subtopic, which is changing the MAC address.
Every device has its own unique MAC address. The address is assigned to it by the manufacturer.
Whenever you are connected, the MAC address is stored in the router’s table. Due to this uniqueness, then your identity can be quickly unveiled whenever your MAC address leaks. To avoid being a victim, you can perform simple tricks such as changing your MAC address temporarily.
This is where the MacChanger comes into play. A MacChanger is a useful tool that changes the MAC address of a device to an anonymous MAC address until the next reboot.
To install the MacChanger, use the following command-line:
sudo apt install macchanger
After installing the MacChanger, you can now change the MAC address whenever you feel something is not right or someone is trying to invade your privacy.
Now let us discover how to alter the MAC address of a network device. Use the following command to check for devices available on your system. if you run into errors, first run the following command to install net-tools
sudo apt install net-tools
Ifconfig
When you run the MacChanger command, you will notice the difference or change in addresses. For instance, let us change the MAC address of enp0s31f6 which is c8:5b:76:78:0a:b1, in our terminal.
Execute the command-line below:
sudo macchanger -r enp0s31f6
After executing the instructions, we can see that our initial MAC address c8:5b:76:78:0a:b1 has been changed to b2:b6:1d:09:59:df. This is a good measure to ensure your identity is not revealed to unknown users.
Conclusion
Anonsurf is not hard to use, and therefore, it is suitable for beginners. Don’t go looking for proxies anymore since anonsurf is here to offer your system’s ultimate protection. If you want to stay anonymous by routing your traffic via the Tor channel, this is your best solution.

