The information needed to monitor the execution of a program is stored in configuration files. To maintain an Ubuntu server or desktop or any other Linux system, Linux users, especially Linux administrators, must edit configuration files.
In fact, every Linux administrator must manually edit a configuration file at some stage. You can’t resist diving deep into the heart of one or more configuration files while setting up a web server, configuring a service to link to a database, modifying a bash script, or troubleshooting a network connection. Manually editing configuration files might seem like a nightmare to some people.
Wading through what seems to be endless lines of choices and feedback can lead to a rapid loss of hair and sanity.
Of course, this isn’t the case. Most Linux administrators, in reality, relish a good debugging or configuration challenge. It’s a lot of fun to sift through the details of how a server or piece of software works. This method, however, does not have to be a waste of time and resources. In reality, you have resources at your disposal that make editing config files a lot easier.
Editing Config Files on Ubuntu
In this article, we look at a couple of these tools to help you with some of your Linux admin responsibilities.
On Ubuntu, configuration files are stored as text files in subdirectories of the /etc folder and can be edited with text editors. In Linux-based operating systems, config files include:
- – host.conf,
- – hosts.resolv.conf,
- – networks,
- – syslog.conf
To make any changes to the configuration, open the file in a text editor and edit it. We explore how you go about editing config files in Ubuntu in various ways in this guide. The steps in this guide are tested on Ubuntu 20.04, but they should work with other Ubuntu versions.
First, we’ll go over the command-line tools that are essential for making configuration more effective. Then we will proceed to explore the graphical user interface tools.
The editors we will use include: Gedit Editor, the Nano Editor, the Vim Editor, using the Emacs Editor, and the Gvim Editor. Let’s take a closer look at these text editors now. You can conveniently edit files in the terminal using these editors. However, using the graphical interface is also a great alternative if you so wish.
Let’s get started.
diff command
You don’t know what you lack if you’ve never used the diff command. The essence of diff is straightforward: It compares two files and shows the variations between them. Allow me to demonstrate.
Let’s pretend you have two files. The first file contains the contents of main.html, and the second file contains contents of secondary.html
<html>
<head>
<title>Testing diff command!</title>
</head>
<body>
<h1>main.html</h1>
</body>
</html>
<html>
<head>
<title>Testing diff command!</title>
</head>
<body>
<h1>secondary.html</h1>
</body>
</html>
It would be effortless to open those two files and see the difference if that was all they contained. What if these lines of code are embedded deep among thousands of others, with comments and other choices interspersed?
That job suddenly becomes a little more difficult.
We can quickly find these variations thanks to diff. If we run the command diff main.html secondary.html in a terminal, we can see the output clearly showing the differences.
diff main.html secondary.html
The letters a, c, and d are what you’re looking for, where:
- a signifies that something has been added
- c indicates that something has changed
- d indicates that everything has been removed

diff command
In this case, 6c6 indicates that line 6 in the second file has been modified.
The diff performance is a little clumsy because it was designed to be read by the machine rather than humans. diff aims to display what needs to be done to the files to get them into sync. What’s interesting about the performance is that it will only show the lines that are different.
The file is similar in our case, except for the contents of lines six , which have “<h1>main.html</h1>” in one file but the other file contains “<h1>secondary.html</h1>”. It’s straightforward to find the discrepancies between two configuration files when you use diff.
Of course, the diff is much more complicated than that, but knowing how to use it in this basic way will save you a lot of time when comparing two files.
The diff production can become a little more complicated. Next, let’s use diff -c main.html secondary.html to check a new variation of the diff command. The c choice displays the output in context format, making it much easier to read.
diff -c main.html secondary.html
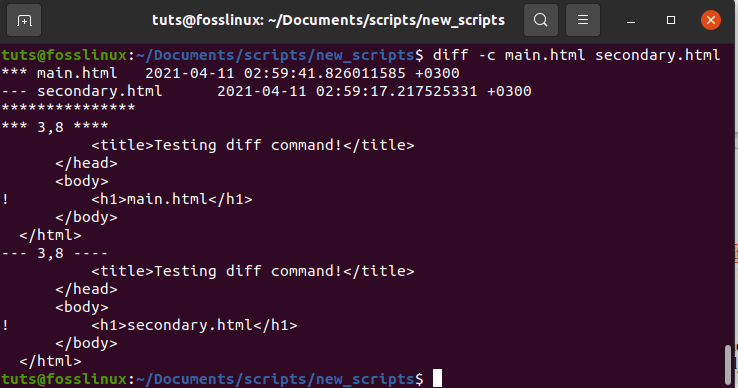
diff -c main.html secondary.html
We can see that lines with differences have an exclamation mark on the left side, as shown in the diagram above. Thus, these two files are not the same. You can now make the required adjustments.
The grep command
One of the first resources you can learn as a Linux administrator is the grep function. You’ll find yourself looking for the proverbial needle in a haystack if you don’t have it, particularly while digging through larger configuration files.
For example, suppose you want to change the DocumentRoot in your Ubuntu default Apache configuration file named 000-default.conf. You can either open /etc/apache2/sites-enabled/000-default.conf and scroll through before you find the entry, or use the grep -n DocumentRoot /etc/apache2/sites-enabled/000-default.conf as shown below.
grep -n DocumentRoot /etc/apache2/sites-enabled/000-default.conf

the grep command
Grep as a command is responsible for printing lines that fit a pattern. That’s what there is to it.
Also, grep will print the line number for which the pattern can be found if you use the -n option. DocumentRoot is located on lines 12 in the example above, according to grep.
If you use a text editor like nano, open the /etc/apache2/sites-enabled/000-default.conf file, scroll down a little, and press Ctrl-c to see what line number the cursor is on. Scroll down before you reach the line you want to alter. You can also use nano with the -c option to show the current line number without hitting the key combination when opening the file.
The grep command has a lot of strength. View the man page, and man grep to learn all there is to know about this useful method.
Nano Editor
Nano Editor is a program that allows you to create small files.
In several Linux distributions, nano is the easiest and most powerful built-in editor. It is unnecessary to master the Nano editor before using it, nor is it necessary to memorize the commands.
The commands are located on the screen’s bottom area and can be accessed by pressing the Ctrl key. To save a file, for example, press Ctrl+O.
Open the Terminal window by pressing the Ctrl+Alt+T key combinations to edit any config file. Navigate to the file’s location in the directory. Then type nano and the name of the file you want to edit.
$ sudo nano /path/to/filename/path/to/
Replace the actual file path of the configuration file you want to edit with /path/to/filename. Enter sudo password when asked for a password.
For example,
$ sudo nano /etc/apache2/sites-enabled/000-default.conf
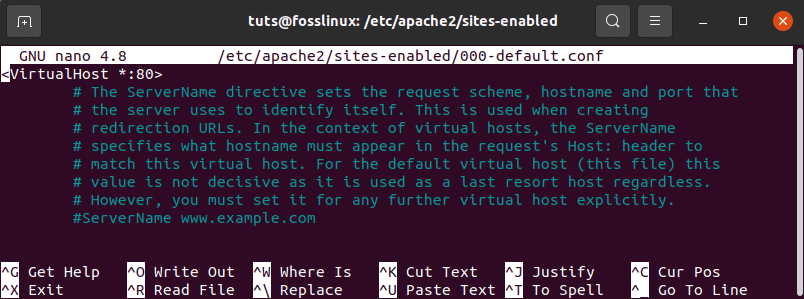
nano editor showing control commands
With Nano editor, you can now edit and modify the config file in the terminal.
Click Ctrl+O to save and Ctrl+X to exit the editor once you’ve finished writing.
Using the Vim Text Editor
Most Linux distributions have the Vim or Vi editor pre-installed. It has no obvious controls or prompts, making it a little more difficult for beginners. However, once you’ve mastered it, it’s the more effective and strong editing method. Vim allows you to edit and view several files at the same time.
To open a Vim editor file, click the Ctrl+Alt+T key combinations to pull up the Terminal window.
Then type vi as sudo, followed by the filename and the file path, for example:
sudo vim /path/to/filename/
Replace the actual file path of the configuration file you want to edit with /path/to/filename. Enter sudo password when asked for a password.
For example,
$ sudo vim /etc/apache2/sites-enabled/000-default.conf
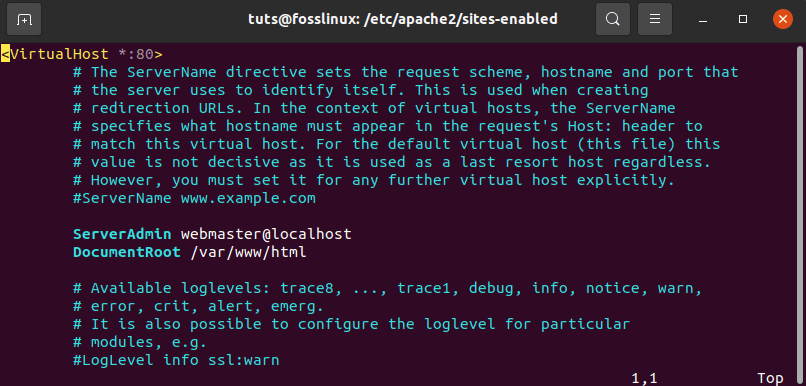
editing 000-default.conf using vim editor
Then use the Vim editor to make changes to the file. When you open the editor, you’ll find that you’re in command mode. The following are the steps to edit a file in the Vim editor:
To make changes to the file, To enter insert mode, press I on your keyboard. From here, you can edit like you would in a regular editor.
When you’re finished editing, press Esc to exit this mode will put you back into normal mode.
- In command mode, select w to save the file.
- In command mode, select:q to exit the editor.
- To save and quit all of the above actions at the same time, select:wq.
Find a strong Graphical User Interface
Some people would rather use a graphical user interface (GUI) than use the command line. While I strongly advise that you learn how to work with the command line, there are times when a graphical user interface (GUI) will greatly simplify the process.
Take the Gedit text editor, for example. Set the highlighting of the syntax on the fly with this GNOME-friendly editor to fit the configuration file you’re working with.
Assume you’re using Gedit to open /etc/apache2/sites-enabled/000-default.conf . Since this is just a simple text file, Gedit will open it in Plain Text mode. In other words, there is no syntax highlighting.
You can pick the sort of syntax highlighting you want from the drop-down menu in the bottom toolbar. When you change the language to PHP, anything that might be considered a PHP feature will be highlighted.
There are several good editors out there that can help you simplify complicated configurations. Please start with the tool that came with your computer and see how it works. If not, go to your package manager and see if there’s one that could work for you, such as Sublime Text, Geany, or Leafpad.
Using Emacs as a Text Editor
Emacs is a text editor as well, but it is not a built-in one. You must use the Ubuntu Terminal to install it manually. It has a built-in web browser, calculator, calendar, terminal, and many other features.
Press the Ctrl+Alt+T key combinations to open Terminal and install the Emacs editor. In the terminal, install emacs as sudo with the following command:
sudo apt-get install emacs
You can open and modify any config file in it once the installation is complete.
To open a config file in the emacs editor, type emacs followed by the filename and the path as shown below:
emacs /path/to/filename
Replace the actual file path of the configuration file you want to edit with /path/to/filename. Enter sudo password when asked for a password.
$ sudo emacs /etc/apache2/sites-enabled/000-default.conf
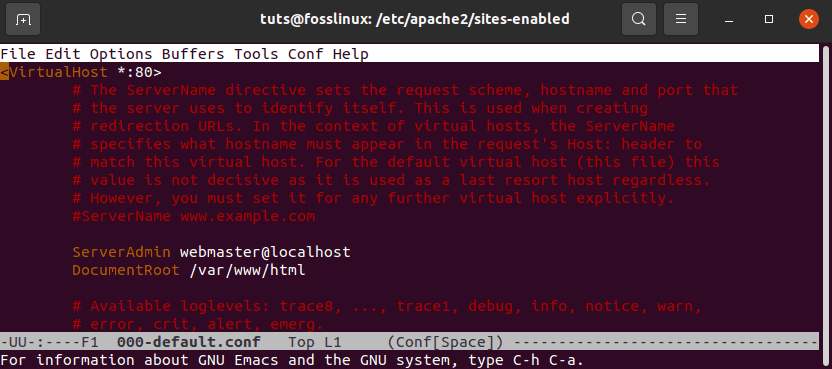
edit 000-default.conf with emacs
As usual, edit the file and save it using the toolbar.
Edit the file as if it were a regular text file. Then save the file by pressing Ctrl+X. On the other hand, use Ctrl+C if you intend to save the file. Select y to save, and exit the editor.
Using the Editor Gedit
Gedit is the Gnome desktop environment’s default text editor. It has tabs so that you can open several files in different tabs. As opposed to other text editors, it is the simplest and easiest to use.
Open terminal by pressing the Ctrl+Alt+T key combinations to edit a config file in a text editor.
Then, as sudo, run the following command:
gedit /path/to/filename
Replace the actual file path of the configuration file you want to edit with /path/to/filename. Enter sudo password when asked for a password.
$ sudo gedit /etc/apache2/sites-enabled/000-default.conf
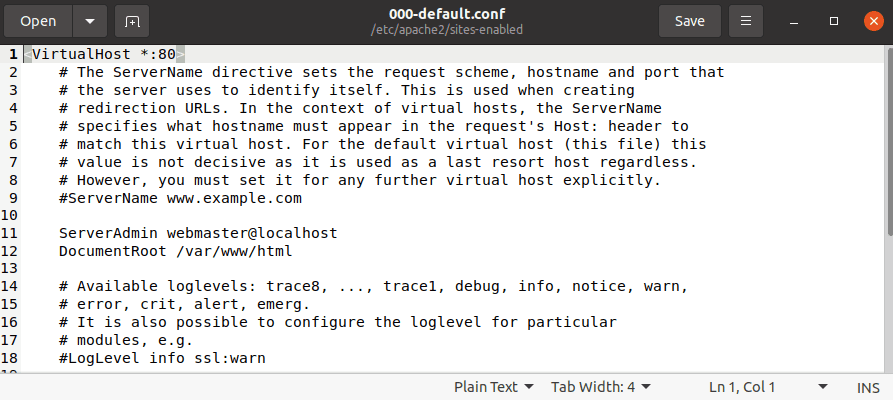
edit 000-default.conf using Gedit editor
It’s similar to Windows’ notepad editor. You can start typing or editing as soon as the editor window opens, regardless of the mode. When you’re done editing, click Ctrl+S to save the file.
Using the Gvim Text Editor
Gvim is a graphical user interface for the Vim editor. Press Ctrl+Alt+T to open Terminal and install Gvim. To begin the installation, type the following command in the terminal if you are using older versions of ubuntu.
$ sudo apt-get install vim-gnome
However, as per vim-gnome is not available as from ubuntu 19.10. Thus, for versions from Ubuntu 19.10 onwards, run the following command-line
$ sudo apt install vim-gtk3
You can open and modify any config file in it once the installation is complete. To open any config file in Gvim, type the following command in the terminal with sudo:
gvim /path/to/filename
$ sudo gvim /etc/apache2/sites-enabled/000-default.conf
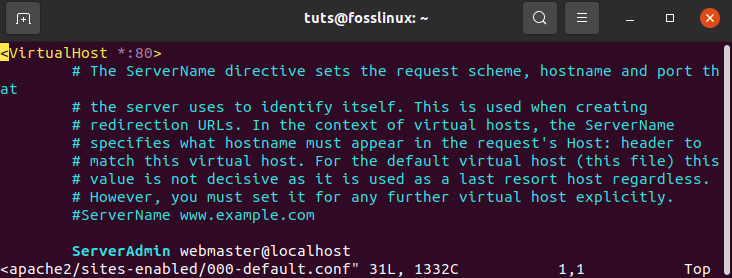
edit 000-default.conf using Gvim text editor
To enter insert mode, click I. From there, you can edit the file.
You can use the toolbar in Gvim editor to do stuff like save a file, undo, redo, find a keyword, and so on, just like any other GUI program.
So there are some basic editors you can use to modify config files in your Ubuntu operating system quickly and securely. However, note that you will require administrator privileges to effect the necessary changes needed for you to edit any text files as the root user.

