Manjaro just dropped the latest version of its beginner-friendly Arch-based distro – Manjaro 21.0 Ornara, and we are hyped. Over the years, the distro has attracted many users by delivering an easy-to-use, intuitive user experience that’s backed by the power of Arch Linux. And now, with their latest Ornara update, the distro just got even more user-friendly and perfect for everyday use.
The last time we covered a Manjaro release was when Manjaro 19.0 Kyria came out but didn’t cover a proper in-depth review. We did, however, cover a thorough review of Manjaro Architect, but it’s a CLI net-installer and not ideal for beginners and regular users who need a GUI for their workflow.
Manjaro 21.0 Ornara is an operating system that’s feature-rich, stable, and comes with an intuitive user interface that will appeal to the masses. And so, for this read, we have put together a detailed review going over Manjaro 21.0 Ornara, its features, installation process, and quick first impressions.
Manjaro 21.0 Ornara: Key Features and What’s New
First things first, let’s go over the main features of Manjaro Linux to understand who it’s for and what makes it great. We will also touch on some of the feature updates and new options with the Manjaro 21.0 Ornara release.
Arch Made Beginner-Friendly
Manjaro is based on Arch, which means you get access to all the amazing features associated with Arch starting with access to cutting-edge software. However, Manjaro offers a heavily modified Arch with tons of bells and whistles they added themselves.
Arch is generally labeled as a “hard” distro because it only gives you access to a command-line and barebone utilities to let you build your own personal Linux system. Manjaro takes this Arch base, and adds on top of that, a bunch of GUI elements and loads more utilities making it extremely beginner-friendly and ready to go right out of the box.
Here is an in-depth read on Manjaro vs. Arch – Differences You Should Know that you might find useful.
Rolling Release Model
The Manjaro project uses a Rolling Release Development Model.
This means that your Manjaro system will continuously and frequently receive updates and upgrades to keep the system up-to-date. This is in strict contrast to the traditional Point Release Development Model, where you need to reinstall the newer OS version over the previous one.
Here is more information about the Manjaro Rolling Release model, its benefits, and its disadvantages.
ARM-Friendly
Manjaro is not limited to X86 architecture and also supports ARM architecture.
You can install Manjaro on a PineBook Pro, Raspberry Pi, Rock Pi 4, and other single-board computer systems.
Easily Install Any Driver and Kernel
With Manjaro, you get access to the Manjaro Settings Manager. It comes with a hardware detection tool called MHWD that automatically detects new hardware and will download the necessary drivers to run it smoothly on your system.
Using the same app, you can also browse and download the Latest, Real-Time, and LTS kernels on your system with a click of a button.
We have covered the Manjaro Settings Manager app in more detail in a later section.
Access to AUR & Pamac Package Manager
Since Manjaro is based on Arch, you get access to Pacman – Arch’s command-line package management tool and AUR – Arch User Repository, the largest repository for any distribution.
However, on top of Pacman, Manjaro also introduces Pamac – their own GUI-based package manager that gives you access to AUR (Arch User Repository) and Flatpak, and Snap.
All the Apps You Need Right Out of The Box
Different people have different opinions on distributions that bundle in tons of apps. Some say – bloatware, while others say – thank you. Now, regardless of which faction you fall into, Manjaro has got you covered.
When downloading the Manjaro ISO, you will find two options – there’s the regular “Download” option, and then there’s the “Minimal Download” option.
With the Minimal download, you will get access to the distro and the basic desktop environment, and that’s it – no other additional software. Whereas with the regular download, you will get access to a bunch of pre-installed software packages, making your system ready for work right out of the box.
In case you are wondering, we have covered all the major apps that ship with Manjaro 21.0 Ornara in a later section.
Revamped Desktop Environments
Manjaro Linux officially supports 3 desktop environments – XFCE, KDE Plasma, and GNOME, and you can download Manjaro in any of these 3 flavors.
With Manjaro 21.0 Ornara, you have the option to choose between XFCE 4.16, KDE Plasma 5.21, or GNOME 3.38. You can check out this article to learn about what’s new in each of these flavors of Manjaro.
You can also get Manjaro sporting other desktop environments like Awesome, Budgie, Bspwm, Cinnamon, i3, LXQt, LXDE, Mate, and Openbox. However, all of these are community maintained and not officially supported.
Furthermore, at the time of writing, most of the community-supported versions of Manjaro are still on version 20.0 besides Cinnamon and i3.
Improved Calamares Installer
In comparison to Arch and its text-based command-line installer, installing Manjaro is a breeze thanks to the Calamares installer. There is also Manjaro Architect, which is a terminal-based installer, but miles more intuitive compared to Arch.
Now, with Manjaro, you get a slightly modified version of Calamares, bringing in a couple of new bells and whistles.
There is now a GeoIP-powered table of “best guess” languages which enables the installer to automatically select the geographically appropriate language by default depending on the location you picked. There’s also a “best guess” keyboard mapping tool that allows you to provide input in your native language.
Manjaro 21.0 Ornara: Installation
Now that you have a basic idea of the different features and options the new Manjaro 21.0 Ornara brings to the table let’s now go over its installation process.
Note: For this tutorial, we will be installing the KDE Plasma flavor of Manjaro 21.0 on VirtualBox. However, the steps will be similar for other flavors of Manjaro 21.0 as all of them use the same Calamares installer.
VM Specifications: 3*CPU Cores (AMD Ryzen 2200G and 4GB RAM)
After booting up the installation ISO, the following screen will appear:
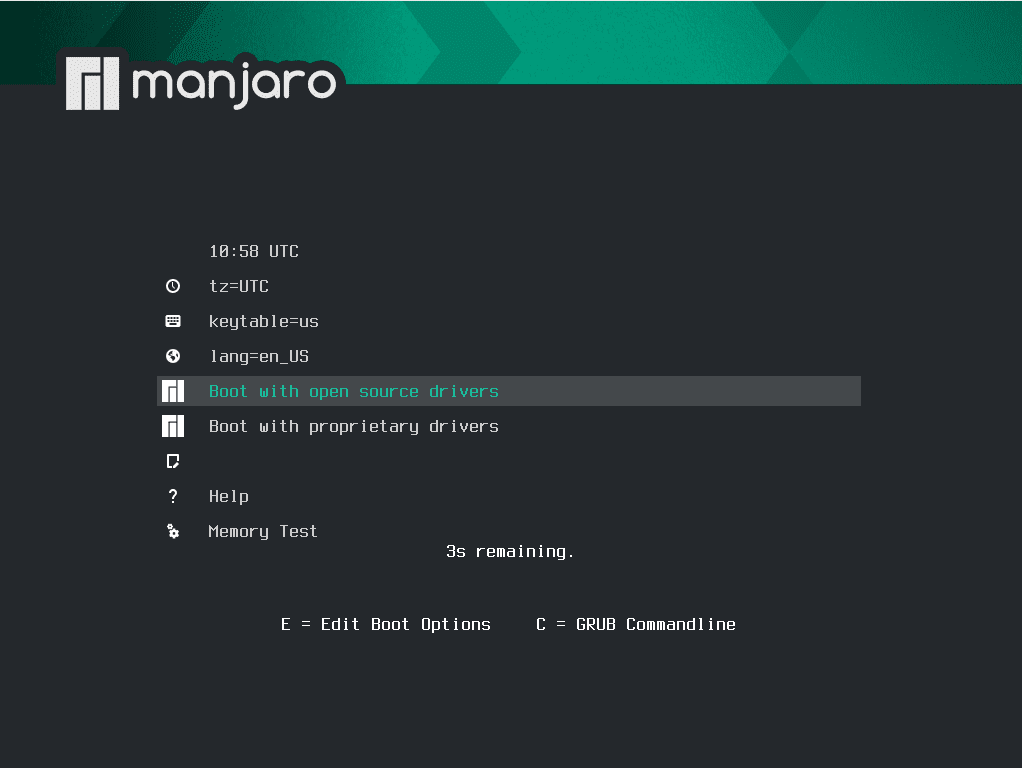
Manjaro First Boot Screen
From here, you can either choose to boot with open-source drivers or proprietary drivers – which is mainly for Nvidia users.
After selecting your preferred option, the system will run some tests and boot you to the Manjaro live environment. Here you will be greeted by the Manjaro Hello app, as shown in the image below.
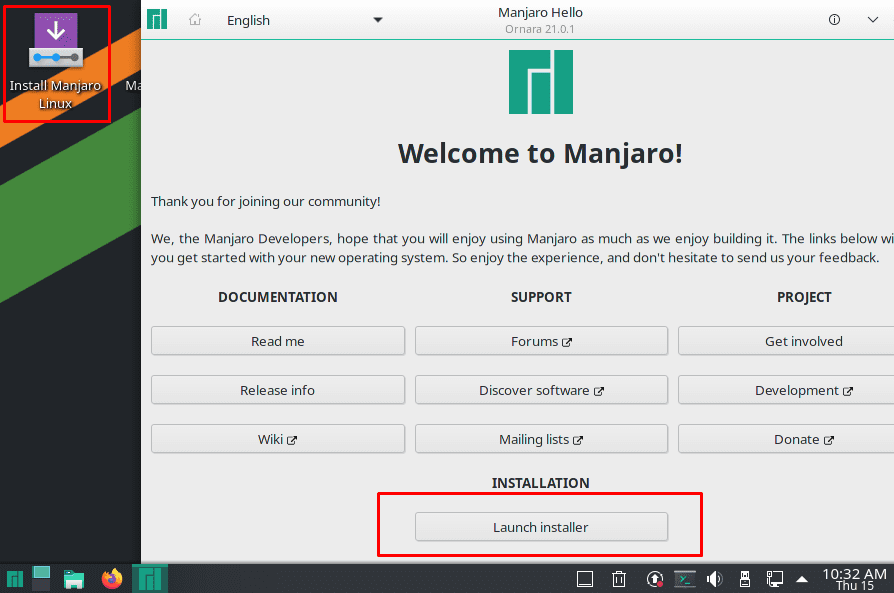
Manjaro Hello App
As you can see, you can either launch the installer straight from the Manjaro Hello app or use the dedicated app on the desktop. Alternatively, you can check out the various links provided within the Hello app if you are new to Manjaro.
We are going to go straight ahead with the distro installation. All the other options are available post-installation through the Hello app as well.
Now hitting the “Launch installer” button will bring up Manjaro’s customized version of the Calamares installer.
The best thing about Calamares is that it breaks down the entire installation process into intuitive segments and shows all the steps up-front on the left-side menu.
Welcome: At first, you are greeted with the Welcome screen. Here you get to select the right language for the distro.
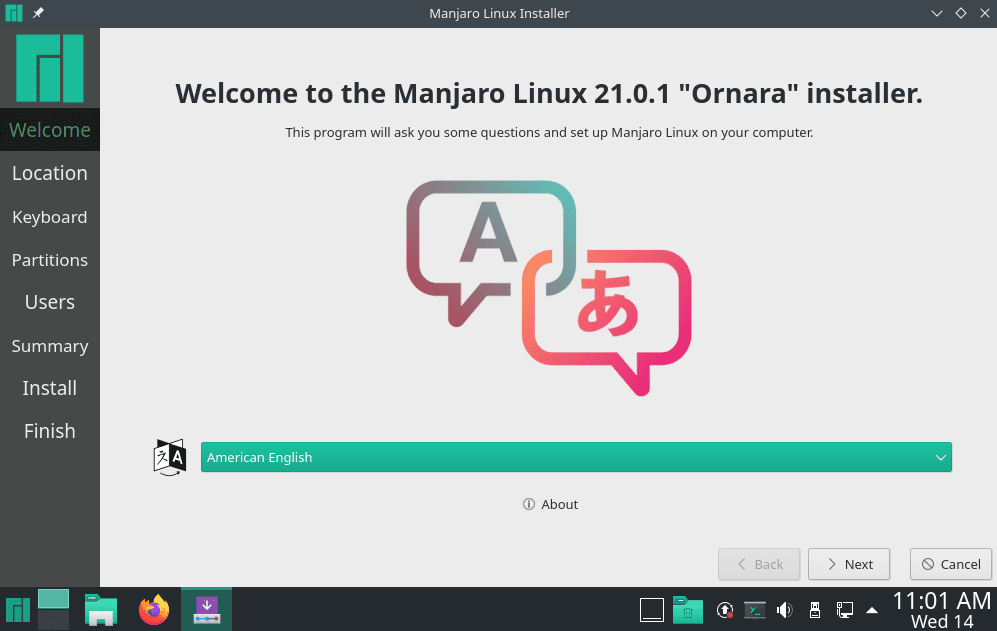
Manjaro Linux Installer – Welcome
Location: Next up is the location section. By default, it is set to New York, but you can easily change that using the graphical location picker or the drop-down menus provided below.
Also, notice how after selecting the location, the system language and time/date settings are automatically updated to that specific location. This is thanks to the new “best guess” features we discussed earlier.
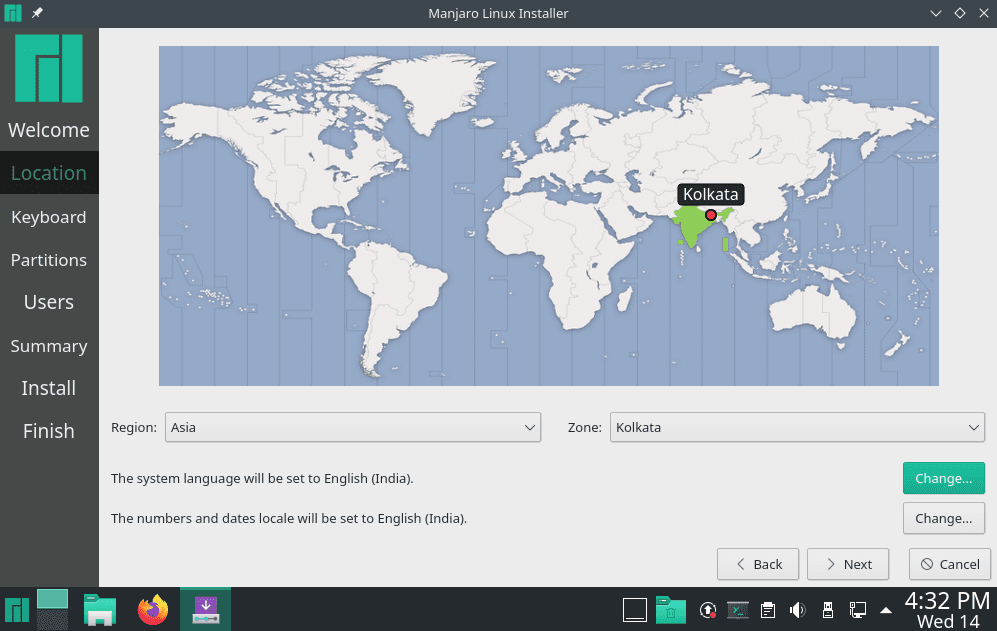
Manjaro Linux Installer – Location
Keyboard: After the location, the section comes to the keyboard segment. Depending on the location you picked, the installer will suggest you a keyboard layout particular to your location. But you can easily change the style and layout as shown in the image. There is also a keyboard model picker as well.
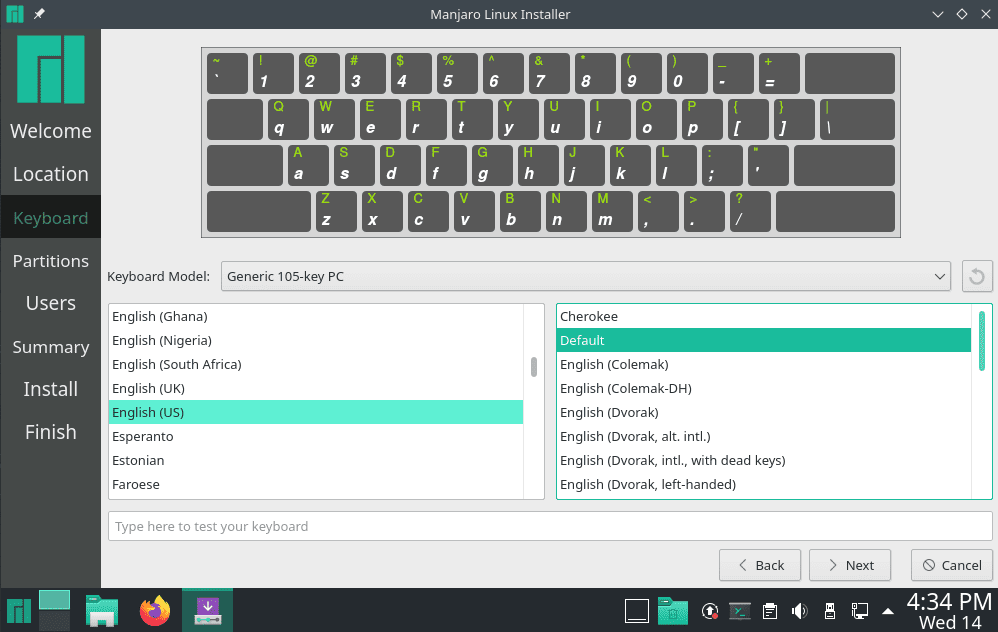
Manjaro Linux Installer – Keyboard
Partitions: Next is the partition section where you need to select the storage device to install Manjaro.
As you can see, there is a drop-down menu at the top which lets you pick the storage device where you wish to install Manjaro. Beneath it, you will find the option to either “Erase disk” and install Manjaro over it, where the installer will automatically create the partitions for us. You can, however, pick whether you want to have Swap using the drop-down.
Alternatively, there is a “Manual Partitioning” option where you get full control to create and resize the partitions according to your needs.
For this tutorial, we have gone with the “Erase disk” option.
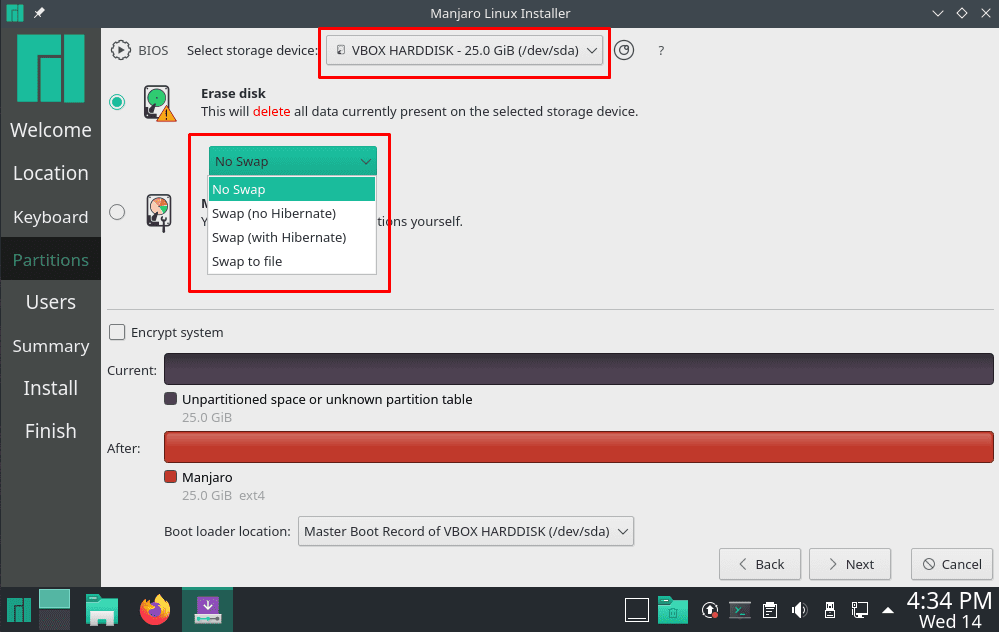
Manjaro Linux Installer – Selecting Install Partition
Users: Once you have selected the partition, it is time to configure a new username and a password for that user name. From here, you can also set whether you wish to use the same password for the administrator or set a different password.
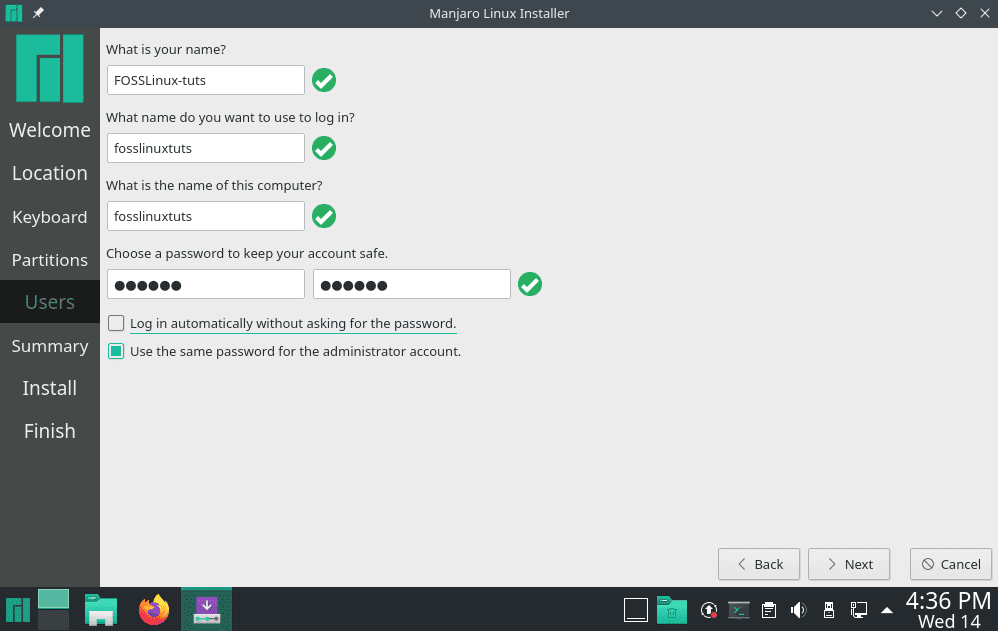
Manjaro Linux Installer – User Creation
Summary: Finally, we come to the Summary section, which will give us a quick overview of all the options we have selected thus far. If you notice anything off, you can go back and make the appropriate changes.
If everything looks fine in the Summary section, click on the Install button to begin the installation process.
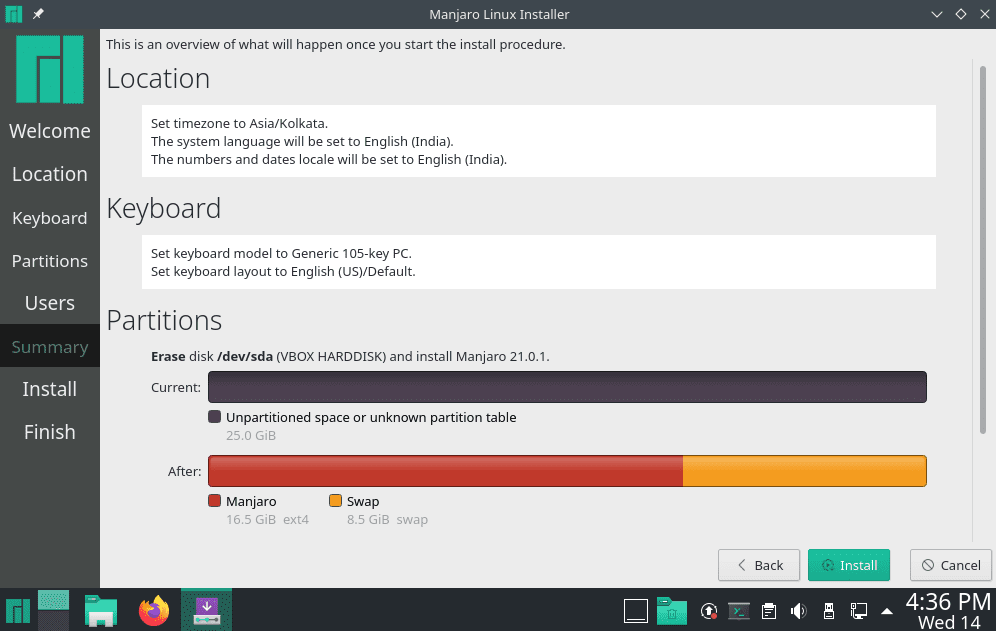
Manjaro Linux Installer – Installation Summary
Install: Now that you have arrived at the Install section, it’s time to wait and let the Installer set up the operating system. Do note the time taken to complete the installation is going to depend on your system configuration.
Even while installing it on a VM with limited system resources, the entire installation took less than 5 minutes which is super fast compared to other Linux installations we covered using the same configuration.
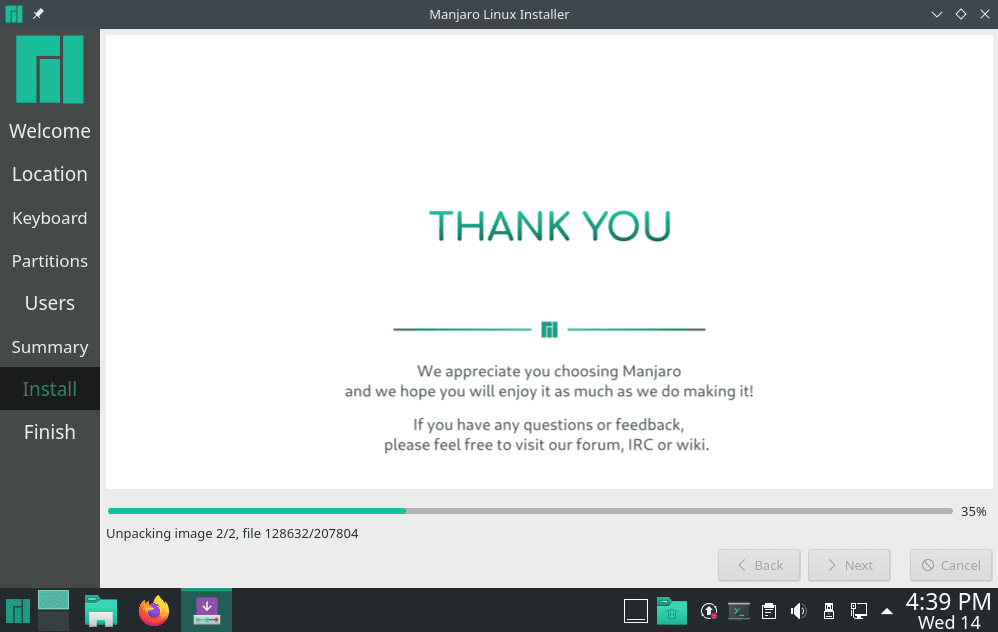
Manjaro Linux Installer – Installation
Finish: Once installation is complete, you will get the following screen. You can either check the “Restart Now” box and hit Done to reboot your system and log in to your new Manjaro operating system. Or, you can leave the installer and hang out a while more in the Manjaro live environment.
Note: Don’t forget to remove the installation media when you reboot your new Manjaro system. Otherwise, you will get stuck in an installation loop, automatically booting back into the USB.
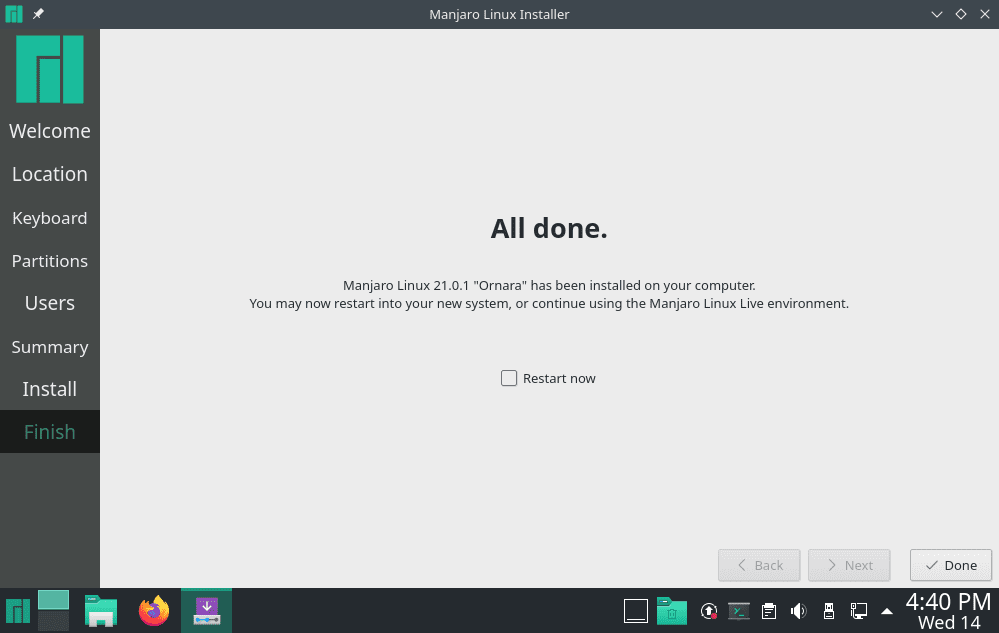
Manjaro Linux Installer – Install Complete
After following the above-mentioned steps, you have completed a fresh installation of Manajaro 21.0 Ornara.
How to Upgrade to Manjaro 21.0 Ornara?
Some of you might already be on an existing building of Manjaro (before Ornara, Manjaro 20.2 Nibia) and wish to upgrade to the latest version. Well, that’s super simple as Manjaro is a rolling distribution.
You can either head on over to the Software Update program and use it to upgrade to the latest build.
Alternatively, you can type in the following command in the terminal:
$ sudo pacman -Syu
It is unlikely that you will run into any issues while upgrading Manjaro, and the entire process should be as smooth as butter.
Manjaro 21.0 Ornara with KDE Plasma: First Boot Impressions
Now that you have successfully installed and booted into your new Manjaro 21.0 KDE desktop, it’s time for a quick desktop tour and overview of the distro.
Disclaimer: Because we have installed Manjaro 21.0 Ornara on VirtualBox, we are perfectly aware that it might cause some stutters and hiccups here and there. As such, we won’t be too critical of its performance. The main focus of this section is to give you a feel for the distro about how it looks and its various features.
Manjaro 21.0 Ornara KDE Plasma Desktop Overview
Booting into the system, you will be first greeted with the system lock screen as shown below:
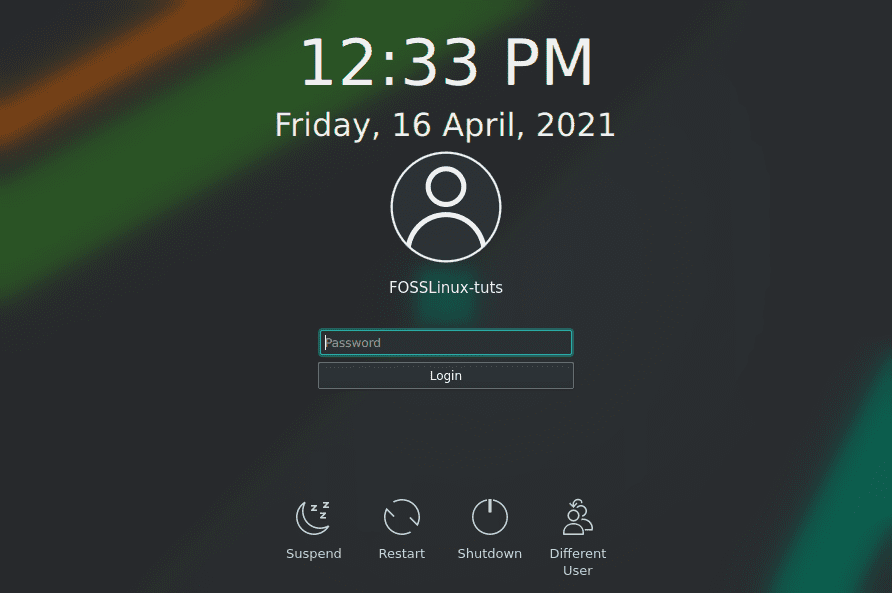
Manjaro 21.0 Lock Screen
From here, you can select your user and enter the corresponding password to log in to the system. Again, you will be greeted by the Manjaro Hello app, presenting you with tons of useful links and resources to learn how to use your new operating system.
Also, notice how an Application button replaces this time, the Launch Installer button.

Welcome to Manjaro!
You can click this button and be taken to the following screen:
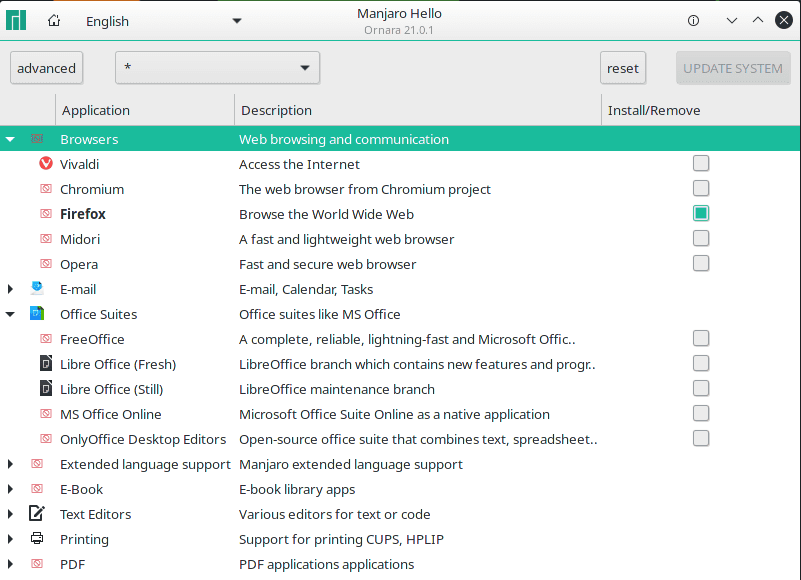
Manjaro Hello – Quick App Installer
As you can see, you will be presented with a wide category of applications to quickly select apps that you think you will need and have them installed on your system.
Moving on, here is how the desktop environment is going to look on the first boot:
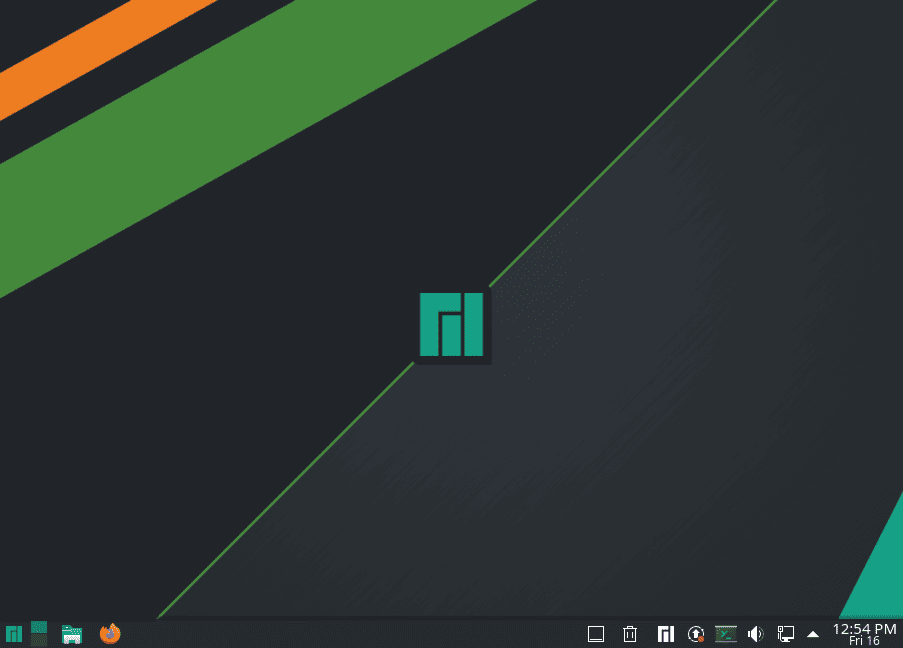
Manjaro 21.0 KDE Desktop
Manjaro 21.0 Ornara has done some excellent theming on top of the desktop environment (in this case, KDE 5.21), starting from the wallpaper, icons, and panel. Even the application launcher button is customized with a Manjaro logo.
If you head on over to System Settings > Appearance, you will find that Manjaro 21.0 uses Breath2 as their default theme, whereas with Vanilla KDE Plasma, you get the Breeze theme by default.
Overall, it is a clean, sleek, and minimal experience right out of the gate. Also, since we are dealing with KDE Plasma, almost every aspect of the distro can be easily tweaked and customized thanks to all the powerful customization tools built-in.
Now coming to some of the new features that come with Manjaro 21.0 is the new Two-Column Application launcher with application categories to the left and the corresponding apps under the categories showcased on the right:
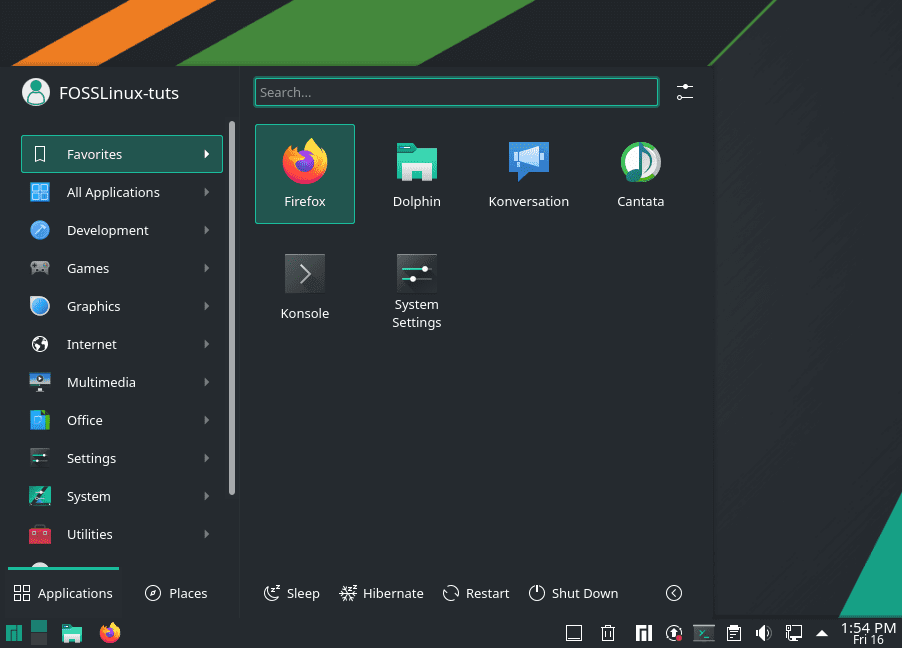
Manjaro 21.0 New Applications Menu
This is essentially one of the new features introduced with KDE Plasma 5.21.
However, as always, you can right-click on the Application menu and hit “Show Alternatives…” to access other Application Menu styles if you don’t like this one.
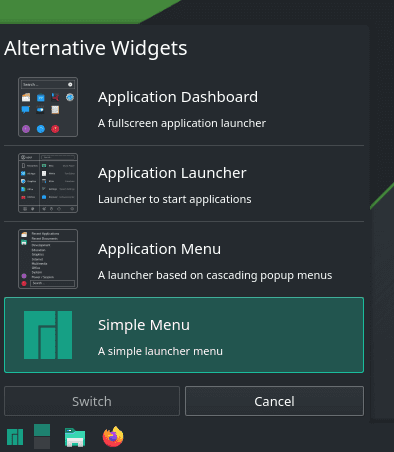
Application Menu Alternative Styles
Other than this, the Media Player widget has got an update and now comes with an extra header tab that will show you a list of applications that are playing music on the system. There is even an option to control the media volume of each of the apps separately, which is a super nifty feature.
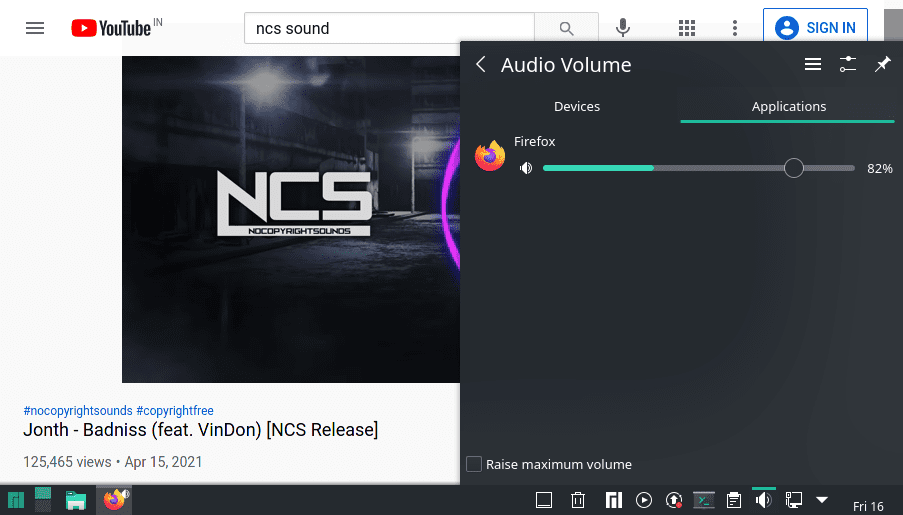
Revamped Media Player Widget
Other than this, we also see a bunch of improvements in the System Settings app and a revamped System Monitor app that we are going to touch on in the following sections.
Revamped System Monitor App
The Plasma System Monitor sees a lot of improvement with new features and options.
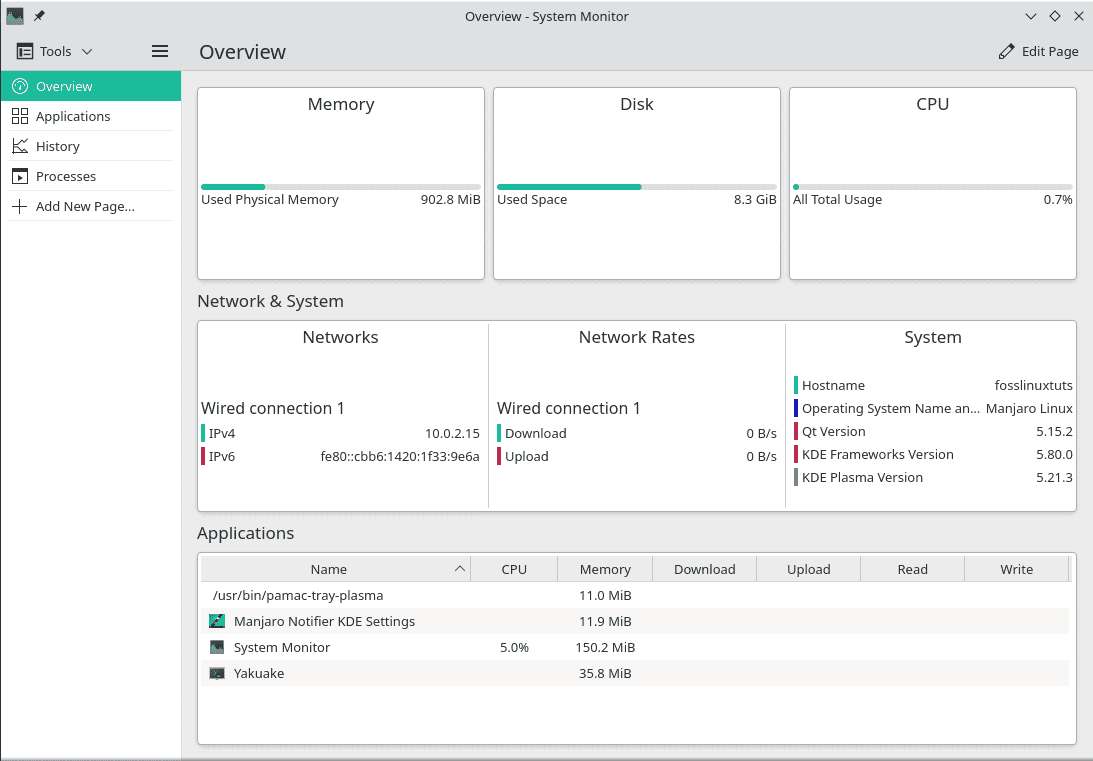
Manjaro 21.0 Ornara – System Monitor
As you can see, the Overview screen gives a graphical representation of the current Memory, Disk, and CPU usage.
Following that, we have the Network & System section to see the various network connections, the network rates (network speeds), and some important system information like the Hostname, Operating System, Qt version, and the KDE Framework and Plasma version.
Just beneath it, you have a quick overview of all the applications that are running on the system. However, if you want more detailed information on the running apps, then simply head on over to the Applications section from the lefthand sidebar.
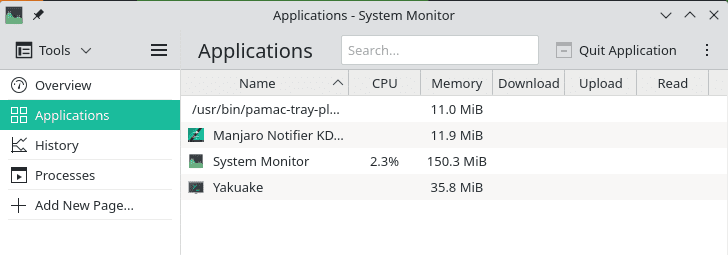
System Monitor – Applications
Then there is the History section that will give you an idea of the system resource usage over time.
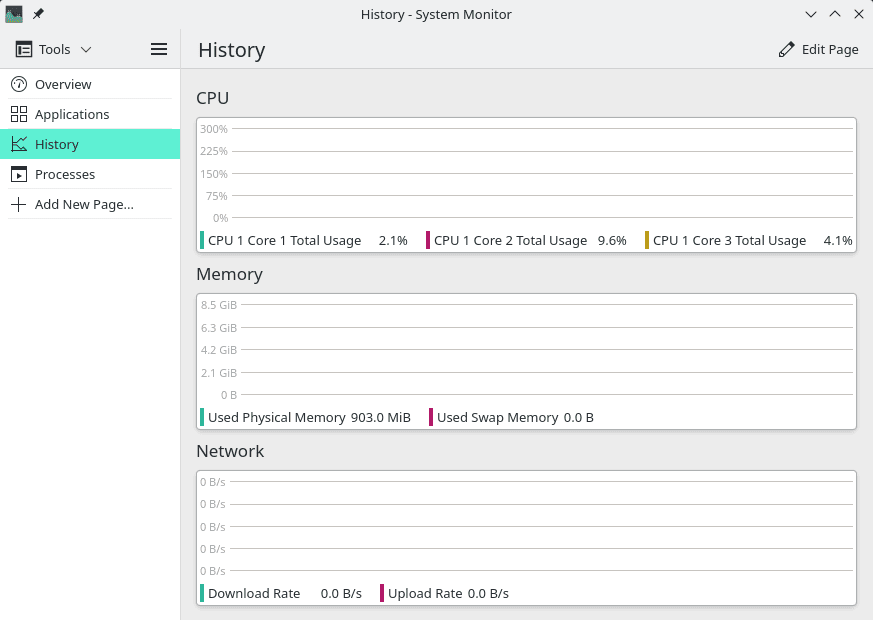
System Monitor – History
And finally, we have the Processes section, which shows all the running system-level processes, so you get a graphical view of everything that is going on.
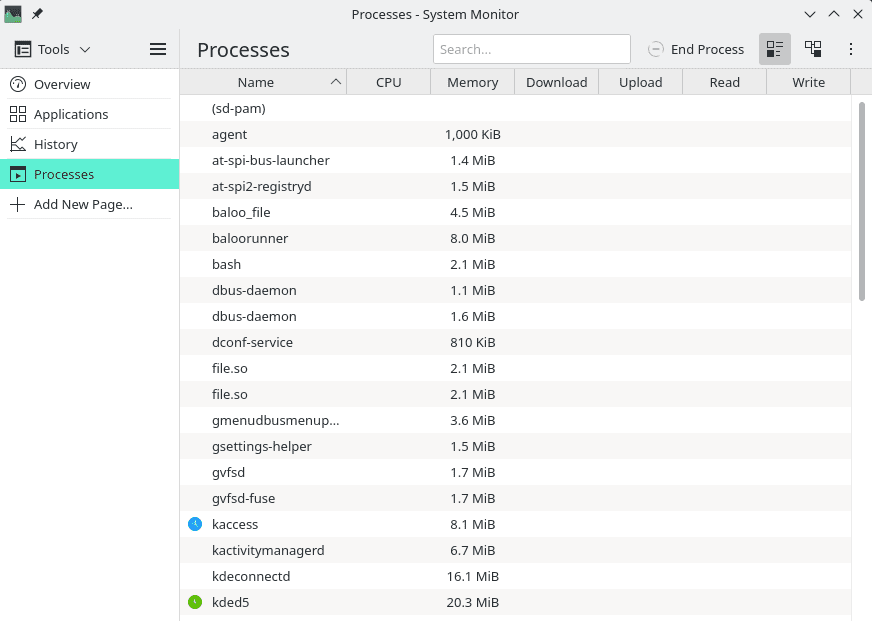
System Monitor – Processes
There is also an “Add New Page” that will let you set up a new page to monitor a particular process on your system. The below image showcases all the sensors that you can integrate into the System Monitor using this feature:
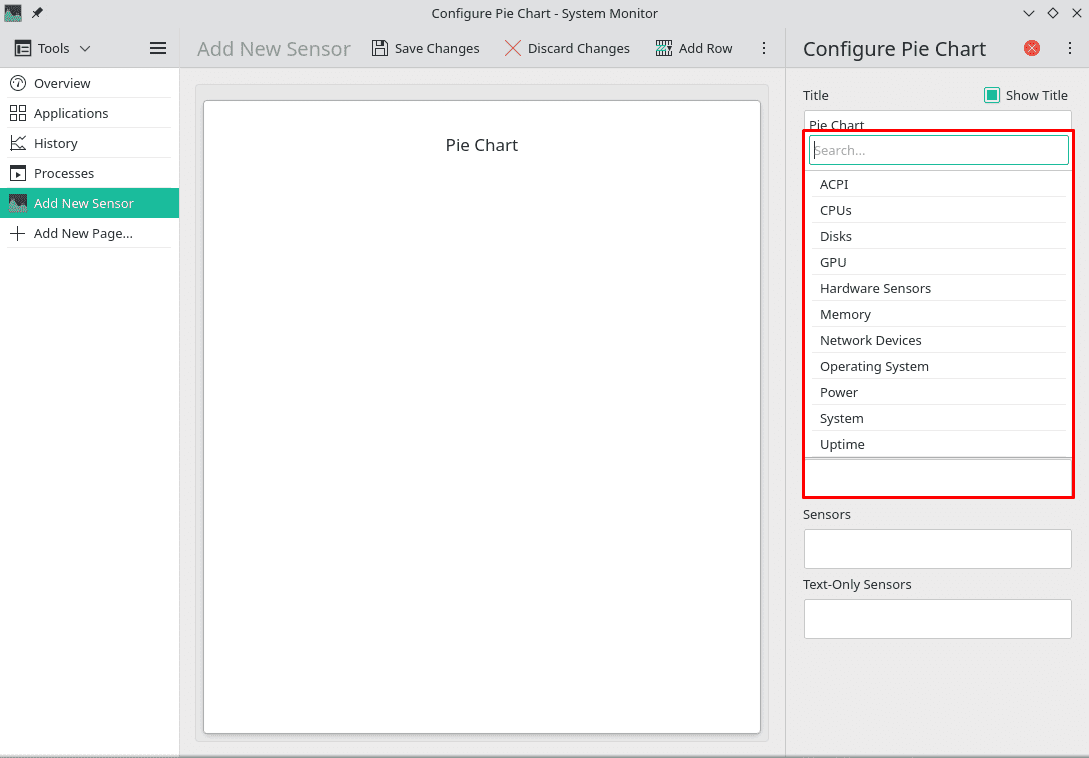
Add a New Sensor to System Monitor
Manjaro Settings Manager and Kernel Swapping
The Manjaro Settings Manager makes it super convenient to tweak some settings graphically – which in most other distros require access to the terminal.
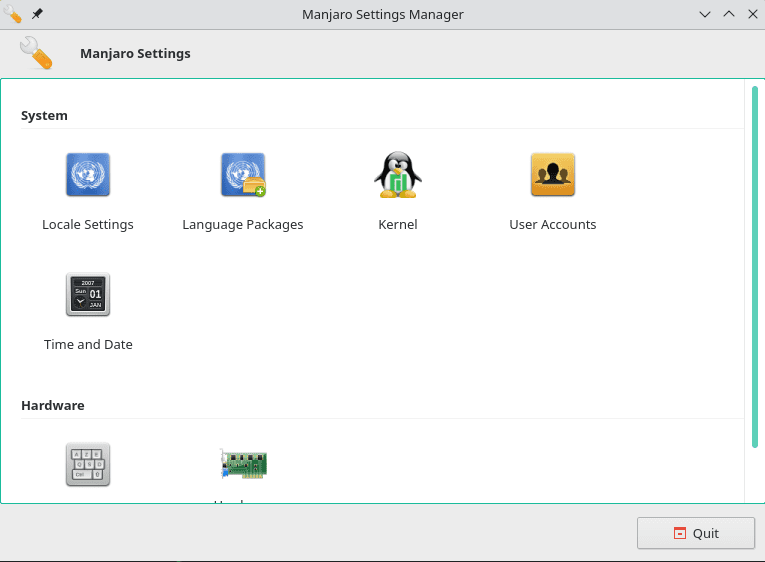
Manjaro Settings Manager
This includes changes to the Locale Settings, Language Packages, install drivers, and even install/uninstall different Kernels for your Manjaro OS.
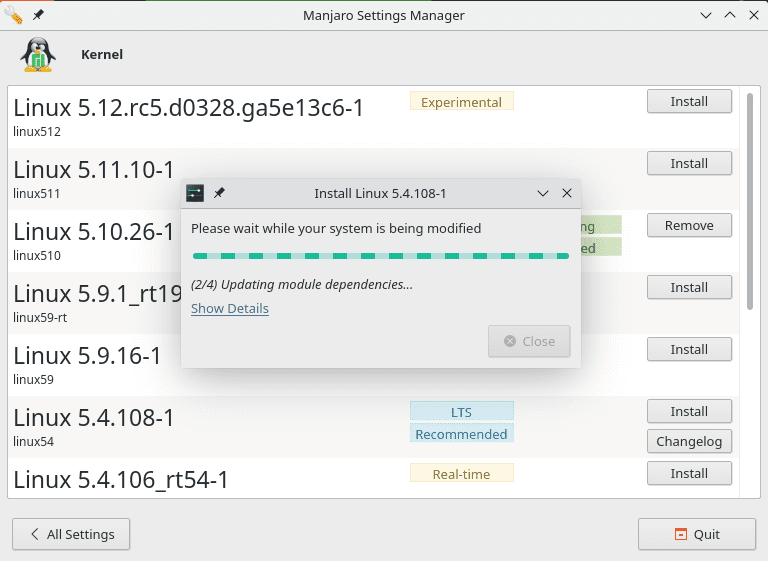
Installing Linux Kernel 5.4 LTS
For example, Manjaro 21.0 Ornara comes with the Linux Kernel 5.10. However, it is always recommended that you have the latest LTS version installed on your system. This can be done by searching for it on the Kernel settings page and hitting the “Install” button. Similarly, you can also uninstall Kernels by hitting the “Remove” button.
Pre-Installed Applications
Here is a quick look at some of the notable apps that comes with the distro pre-installed:
- Browser – Mozilla Firefox
- Terminal – Konsole
- File Manager – Dolphin
- Gaming – Steam
- Image Viewer – Gwenview (Default KDE App)
- Document/PDF Viewer – Okular
- Torrent Client – qBittorrent
- Email Client – Mozilla Thunderbird
- Music Player – Cantata
- Video/Media Player – VLC
Apart from these, many more system apps come with the KDE desktop environment like KCalc, Kate text editor, and a bunch of Qt software – which is expected since much of KDE is built upon Qt.
Note that Manjaro doesn’t offer any Office apps pre-installed – neither LibreOffice nor FreeOffice. If you want an Office Suite, you will need to download it using Pamac or Manjaro Hello > Applications > Office Suites.
Closing Thoughts
And this brings us to the end of our review of Manjaro 21.0 Ornara. As you can see, it’s a modern, sleek, and beginner-friendly distro bundled in with all the apps you need right out of the box. This is definitely one of the most beginner-friendly distros out there and definitely recommended if you are just getting started with Linux.

3 comments
https://sourceforge.net/projects/manjarolinux-community/files/deepin/21.0.2/
The down side is that it doesn’t have a searchable app/software store. So if you need something equivalent to skype, you’re out of luck unless you manually install it via terminal but that’s not an option for new comers.
This is incorrect. The package manager (both GUI & command line) supports AUR (Arch User Repository), which has for example Skype as you are mentioning. https://aur.archlinux.org/packages/skypeforlinux-stable-bin/