Retroarch is an open-source, cross-platform front-end for games, video games, media applications, and emulators. It is fast, lightweight, and does not have dependencies. This application enables the user to run a wide range of consoles and computers via its slick graphical interface.
In addition, its simple GUI makes it much easier and more manageable. Advanced Retroarch features include; shaders, rewinding, netplay, run ahead, blind accessibility, and machine translation. This guide will show how to install and use Retroarch on Linux operating systems.
Linux has several options one can use to install RetroArch in a Linux environment. First, you will download and use Cores that are available from the Online Core Updater.
A key point to note is, only the core packages available in the PPAs will be updated once new updates are released. However, the packages not present in the PPAs will not be available for installation.
Retroarch is an emulation tool that allows users to emulate various consoles, such as Sega Genesis, Nintendo Wii, and the Commodore 64. The emulation of the consoles is made possible with the help of the package installer that is used in installing the apps.
Installing RetroArch on Ubuntu
Ubuntu’s software repositories have the current version of the Retroarch emulation tool. At times, you need to use the developers’ PPA to get the latest version of Retroarch. Run the command below to install the Retroarch PPA onto your Ubuntu operating system.
sudo add-apt-repository ppa:libretro/stable
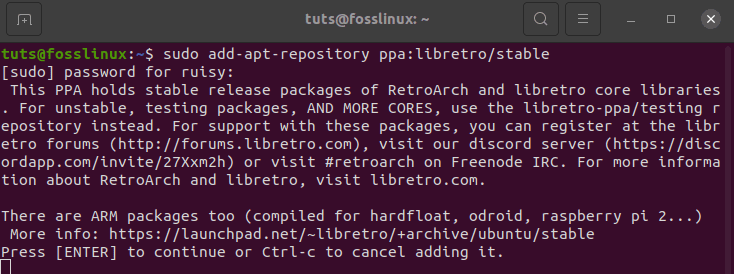
How to install retroarch PPA on ubuntu
The next step is to update your Ubuntu OS. You can do so by executing the command line below:
sudo apt update
Alternatively, you can also upgrade your system to make sure all applications are up to date. Execute the following command to upgrade your OS:
sudo apt upgrade –y
Finally, now let us install Retroarch into our Ubuntu System. Open your terminal, copy/paste, and execute the following command:
sudo apt install retroarch -y
Installing RetroArch on Debian
To install Retroarch on Debian, we will first install and enable Snap. Snap is an application packaged with all the required dependencies to run on Linux distros from a single build.
Snaps can be easily installed from the Snap Store. Alternatively, you can install snap on Debian 9 and above using the command lines below:
sudo apt update
sudo apt install snapd
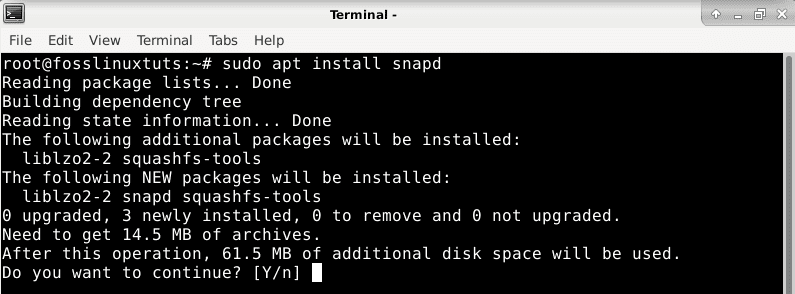
Installing snapd
sudo snap install core

Install core
After installing snap now install the Retroarch application using the command below:
sudo snap install retroarch
Installing RetroArch on Arch Linux
Generally, Retroarch is the official Arch Linux repositories that can be installed with PacMan. The Pacman package manager is helpful while installing the Retroarch repositories on Arch Linux.
Open your terminal, copy/paste, and execute the following command:
pacman -S retroarch
Next, you will import the PPA key using the command below:
sudo apt-key adv -- keyserver keyserver.ubuntu.com --recv-keys 3B2BA0B6750986899B189AFF18DAAE7FECA3745F
After installing Retroarch, use the apt command to install the RetroArch application
sudo apt update
sudo apt install retroarch libretro-*
Alternatively, you can enable snap then install using Retroarch. This can be done using the command below:
git clone https://aur.archlinux.org/snapd.git
cd snapd
makepkg -si
After enabling snap, you need to enable the systemd unit, which manages snap communications. execute the command below:
sudo systemctl enable --now snapd.socket
Use the command below to enable classic snap support. This is done by adding a symbolic link in between, as shown in the code
sudo ln -s /var/lib/snapd/snap /snap
Finally, install Retroarch by executing the following command
sudo snap install retroarch
Installing Retroarch on Fedora
Fedora users are not left out since there is a workaround to install the Retroarch emulator. Most people find it hard, but don’t worry since we are here to simplify your complexities. The primary reason why installing this application seems hard is that the Fedora DevOps’ has not included its repositories.
To install the application, stick to the guide below. For this application to work with your Fedora, we shall use third-party repositories. Open the terminal and input the following command to add the repositories.
Note: we shall use the wget command to download the required repositories to your Fedora operating system.
Execute the command below:
wget https://github.com/rpmsphere/noarch/raw/master/r/rpmsphere-release-29-2.noarch.rpm
After successfully downloading the third part repositories into your Fedora OS, we shall use the operational command DNF for installation. Open your terminal, copy/paste, and execute the following command:
sudo dnf install rpmsphere-release-29-2.noarch.rpm
Once the installation is successful, you will now proceed to the final stage, installing Retroarch into your Fedora Operating system. We shall do this with the assistance of the DNF package manager. Open the terminal and execute the command below:
sudo dnf install rpmfusion –y
Installing Retroarch on OpenSUSE
OpenSUSE does not have Retroarch repositories, making it hard to install the application directly using the default application manager (Zypper). Hence in such an instance, we shall use the snap package manager to install the application into our operating system.
The Snap package manager contains the Retroarch application making it easier to install it to OpenSUSE. If you don’t have the snap package manager in your OpenSUSE OS, follow the installation instructions below:
Add the snappy repository to your OpenSUSE operating system using the command below:
sudo zypper addrepo --refresh https://download.opensuse.org/repositories/system:/snappy/openSUSE_Leap_15.2 snappy
After downloading the repository, we shall then import its GPG key:
sudo zypper --gpg-auto-import-keys refresh
To now include the new snappy repository into our system, we shall upgrade the package cache
sudo zypper dup --from snappy
Install snap into OpenSUSE using the command:
sudo zypper install snapd
After ensuring that snap is installed into your OpenSUSE operating system, you will dive into the final step, installing Retroarch using the installed snap package manager. You can do so using the command line below:
sudo snap install retroarch
once the process is complete, you will have to perform the following steps to enable and start the snapd service;
sudo systemctl enable --now snapd
Additionally, Tumbleweed users need to run the following command to enable and start the snapd.apparmor service:
sudo systemctl enable --now snapd.apparmor
Finally, make sure that the RetroArch snap is installed, then connect all the required peripherals to your OpenSUSE operating system before executing the command below:
sudo snap connect retroarch:raw-usb && sudo snap connect retroarch:joystick
Installing RetroArch with Flatpak
Users who are using unsupported Linux distros will resolve to use flatpack. This is because Flatpak gives the user an option to get Retroarch update releases continually. First, add the Flathub repository if you don’t have it. You can do so using the command line below:
flatpak remote-add --user --if-not-exists flathub https://flathub.org/repo/flathub.flatpakrepo
The next step is to install Retroarch with the help of Flatpak
flatpak install --user flathub org.libretro.RetroArch
Retroarch allows you to append the flathub repository. This is a great unique feature offered by this emulator.
How to use the Retroarch application
Navigating the Retroarch application
To open the Retroarch application, navigate to the “Games” section. The application falls under the games section since it is a graphical application.
PSP and PS3 users should be very lucky since the Retroarch application is similar to the PS3 or PSP interface. The application contains a heading list that is categorized across the top. Each categorized heading includes a list of options beneath it. You have no reason to worry since navigating the Retroarch application is as easy as ABC.Use your keyboard/gamepad directional keys to navigate the Retroarch application.
The first column in the application contains the game controls and all that you need to acquaint yourself with to get the game up and running. The second column contains the settings options and controls. The two mentioned columns are the basic controls one should know before navigating to gameplay in Retroarch.
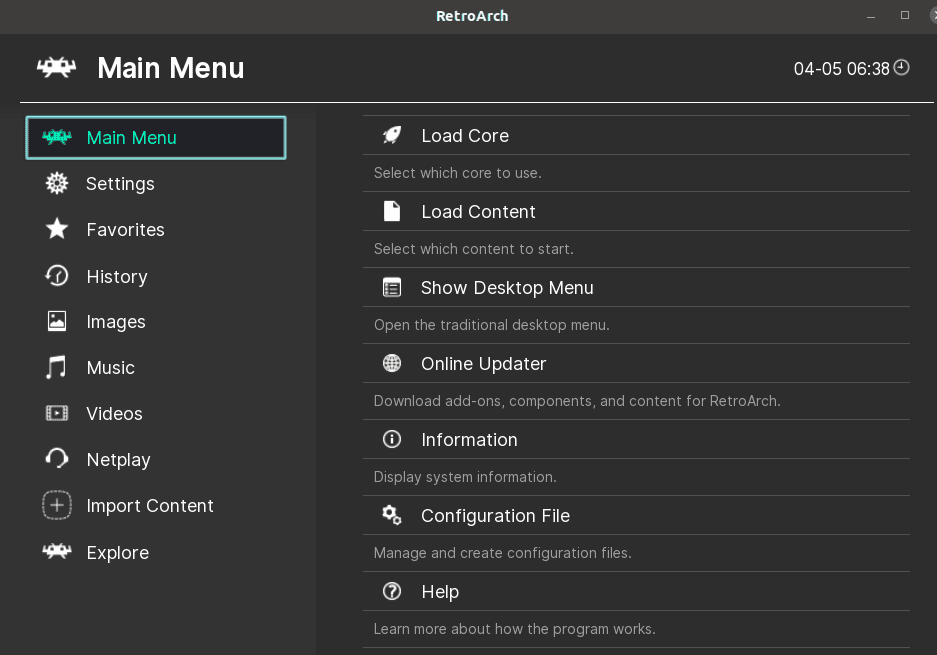
game control Main Menu
Nonetheless, the game console has other columns that aren’t that significant though they aren’t useless. For instance, a scan and import option enables users to import games and save their progress.
Gameplay with Retroarch
This section will help you know the easiest ways to add games to RetroArch. This process is easy, and it should be an easy go-to for any user. To add a game, we shall use the import option. A + icon represents the import option in Retroarch. Click the “+” icon, then select the “ <Scan Directory> option.
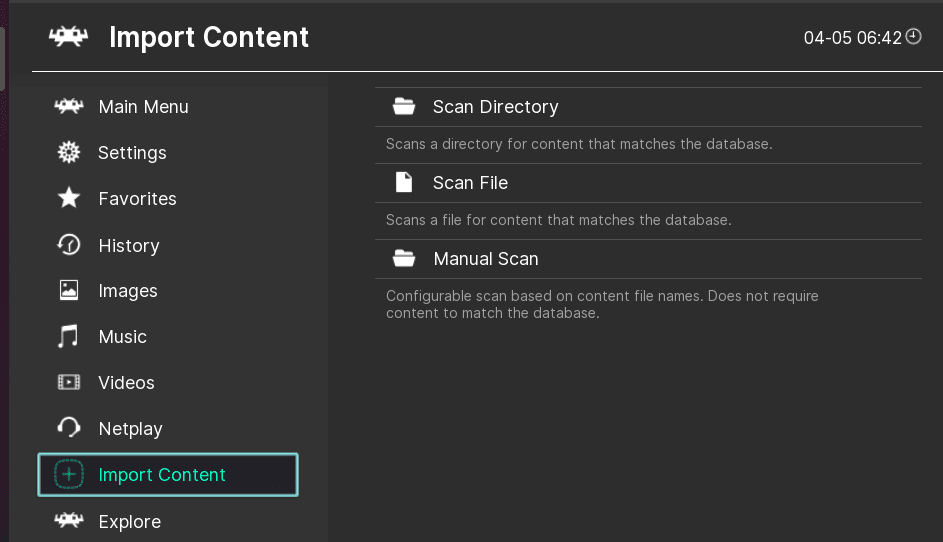
How to import the game and scan directory option.
The next step is to search for the folder that contains your ROMS. While in this directory, select the “Scan This Directory” option. Relax and wait, as this process might take a second or two. This is the period when Retroarch sorts and pulls out the appropriate and compatible games.
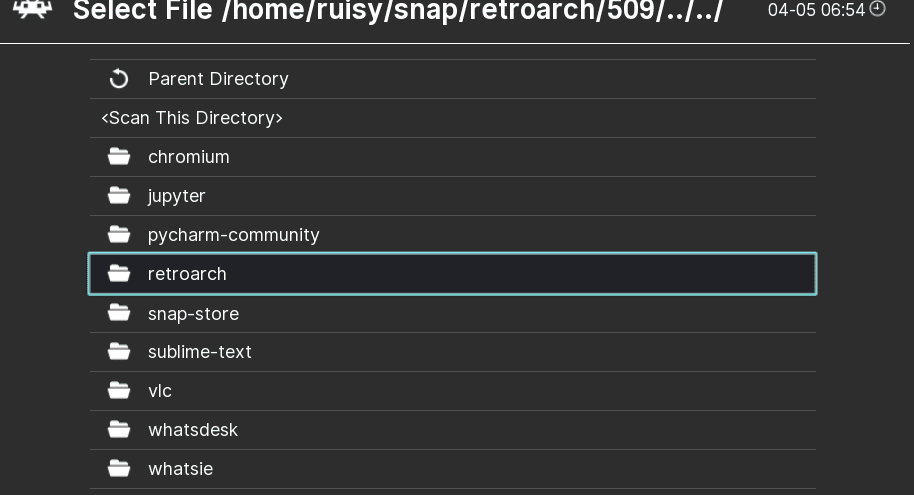
Navigation to scan directory
First-time game running on Retroarch
If you look at the top column listing, you will see a new available console. This displays the console that you imported your games from. You will notice that the console contains a similar icon to a controller icon.
Hover your gamepad or mouse to the icon, and you will see a drop-down menu list, select the option to play. Your game will start shortly, depending on the speed and capacity of your laptop. Your game will start, play and enjoy gaming on the Retroarch application.

