This article will cover the steps needed for you to update your Kali Linux system repo. The Kali Linux Operating system is Debian-Linux-based. The distribution comes with several advanced tools meant for streamlined utilities, accuracy boosting, quick and easy execution of pen-testing, and social engineering tools.
Like any other Linux distro, Kali supports audio play files, office, web browsers, programming software, and other software supported by either major OSs (Windows and macOS). Additionally, the OS comes with a Kali NetHunter App Store used in easing browsing, installation, and keeping your apps up to date.
Kali Linux comes with a large set of tested and pre-installed applications, making it simpler for use than other systems. The system was officially released into the market in 2013 as a complete re-branding of Backtrack Linux with a GNOME UI. Their developers ripped all the unwanted stuff off Backtrack by getting rid of junky utilities and updating the useful ones in the white-hat community.
To add on, the OS includes slightly over 600 completely free tools. It also has an open-source Git tree that is publicly available. It is a well-known OS among Cybersecurity professionals.
After that overview of Kali Linux, let us get into updating our Linux repositories.
Updating Kali Linux
Below is a step-by-step process to aid in updating your Kali system.
Note: We hope that you have Kali Linux OS installed on your PC. However, our complete guide on installing Kali Linux will really help if you haven’t installed it.
Alternatively, you can install Kali Linux on the virtual box if you already have a primary OS and would love to have another OS running on your PC.
Step 1: Configure Kali Linux Repositories
The first step is configuring the Kali repositories before updating them. Double-check that your sources.list file at/etc/apt/sources.list has all the relevant repositories. Be sure only to use the official Kali repositories. This is because the unofficial repositories can endanger your system security.
grep -v '#' /etc/apt/sources.list | sort -u
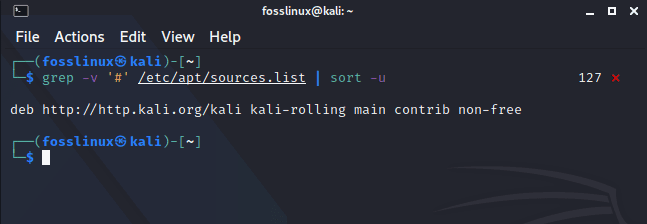
relevant sources list link
After running that command, you will see a link displayed below it. Once copied and pasted on the browser, will redirect you to the official relevant repositories of Kali Linux.
Step 2: Starting the Update Process.
To update the Kali Linux system, we will first need to update the package indices list. To do this, copy and paste the following command in your terminal:
sudo apt update
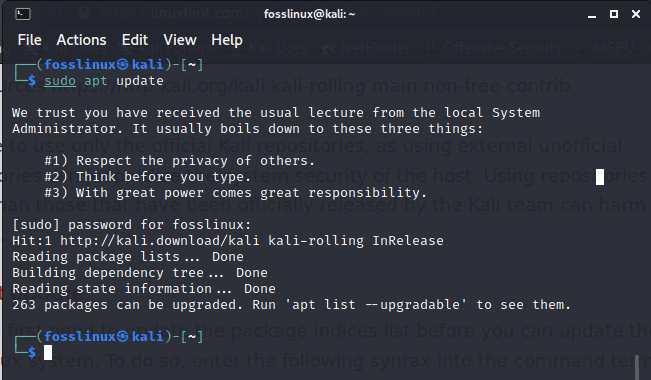
updating the system
After that, you can go ahead and check for the updates that have been released by keying the following command in your terminal:
apt list --upgradable
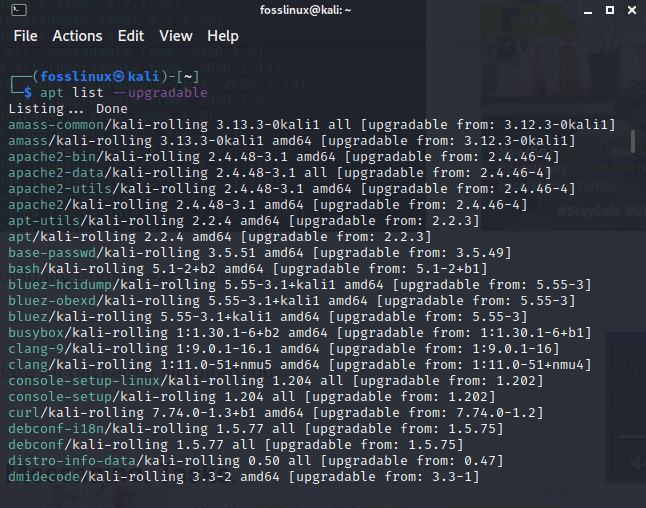
checking released upgrades
Upon running this command, you will see all the packages that can be upgraded. There are two ways to update them. First, you can update an individual package by entering the following command into your terminal:
apt install PACKAGE-NAME
Secondly, you can enter one command that can update all the packages simultaneously:
sudo apt upgrade
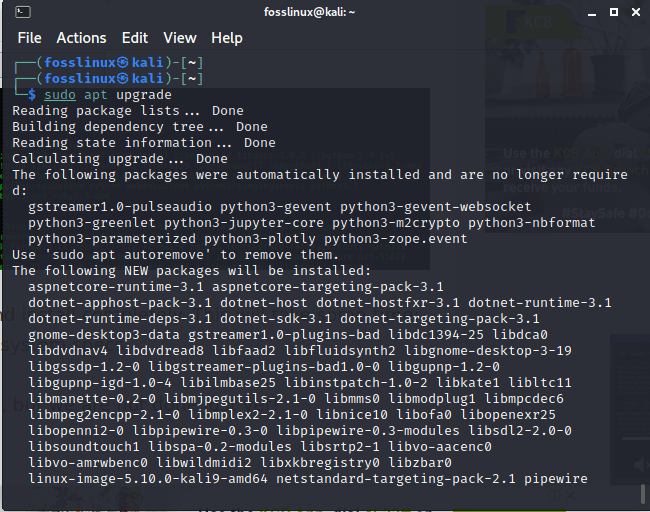
upgrading the system
After running the command to update a single package or update all the packages, you will wait for the updates to automatically download and install completely. This will take several minutes depending on the speed of your internet and your machine’s specs.
We still have a few steps to cover once the updates have finished installing.
Step 3: Updating Held-Back Packages
A time it could be that you have not actually updated all the packages. This is because some of them may not be listed. This issue mostly arises due to package dependency issues or other package-related issues.
You can counter check whether your system has any form of shortcomings in the updates you previously did by entering the following command in your terminal:
sudo apt upgrade

final check in case of shortcomings.
The procedure of downloading the with-held packages for penetration testing and other software/tools is the same as the one used for downloading the listed packages. Copy and paste the following command to individually download each package:
sudo apt install PACKAGE-NAME
or enter the command below to download all the packages at once:
sudo apt dist-upgrade

update all command
Step 4: Uninstalling Outdated Packages
After you have completed checking out the held-back packages, you can remove all the obsolete packages on your system using the following command:
sudo apt autoremove
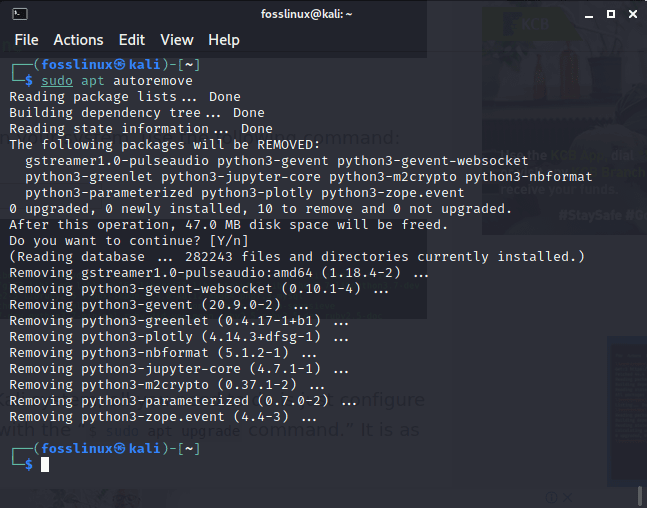
uninstalling outdated packages
Final Thought
In summary, the article has optimally covered steps on how you can upgrade your Kali system. Here, all you need to do is configuring the repositories and install them in your system using the “sudo apt update and sudo apt upgrade” command. The process is as simple as that.
Note that you should be mindful when you are using third-party repositories. This is because of the potential risks that it poses to your Kali system. These risks may cost you to install the OS repeatedly, which means you will lose all your data and files unless backed up. Finally, we looked at how we can free up some space in our hard disk drive by deleting the outdated packages using the “sudo apt autoremove command.” Having gone through all that, we hope you find this article useful, and if you did, please let us know in the comment section below.

