Discord is a fast messaging and digital distribution platform that users can use to communicate with voice calls, video calls, text messaging, media, and files in private chats or as a part of communities called “servers.” Servers are persistent chat rooms and voice chat channels accessed via invite links. It runs on Windows, macOS, Android, iOS, Linux, and web browsers.
Recording Discord audio on Linux
The most suitable way to record audio on Linux is by the aid of the OpenBroadcaster Software, commonly referred to as OBS. The primary reason Linux users love using OBS is that it provides the ability to add multiple sound sources, including external speakers, microphones, and many others that will be used to record audio.
The Craig bot can also record audio on Discord on Linux. However, if you are not the server owner, you can’t use Craig. Apart from OBS, there are alternate ways of recording audio, such as Audacity or podcasts.
To record audio on Discord on Linux, follow the guides and methods shown below:
Recording Discord audio with OBS on Linux
OBS is among the most popular tools for recording audio from Discord on computers. It is free, but donations can be made to the website to motivate the developers and help keep the website active. To install OBS on Linux, use the apt-get command as shown in the code syntax below:
sudo apt-get install obs-studio
The above command will run and install OBS on your Linux OS. Once it has been installed, follow the guide provided herein:
Discord has a server dedicated to this tool to join, record, stream, and communicate with other users. To record with OBS, use the following process:
- Open OBS and click the “+” icon on the bottom of the “Sources” section.

+ Sign
A new menu will appear on the screen. Click on “Audio Output Capture.”
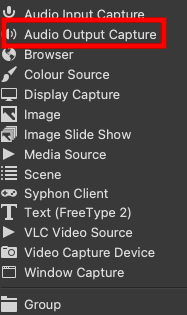
Audio Output
- You will need to name the desktop audio source in the new window then click on “OK” to save your choice.
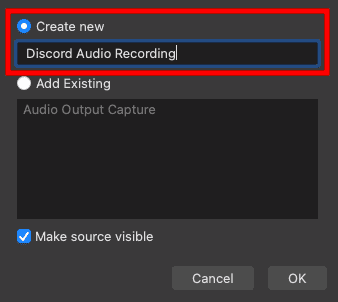
Rename Output
In “Properties,” select whether to use earphones or speakers in the drop-down menu, then click “OK” to save.
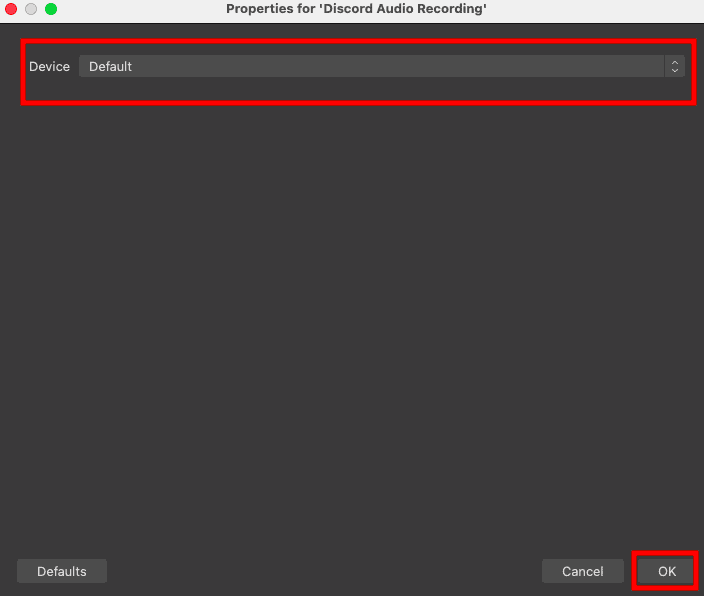
Select Output
- This step is not mandatory, but testing the tool before recording is advisable to ensure that everything works perfectly. To do this, you have to navigate to the “Audio mixer,” where you will be able to see audio slides.
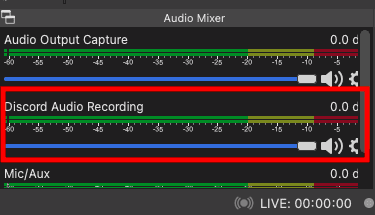
Audio Mixer
If OBS picks any sound, these slides will move. You can play music on the computer to run the test. You can also adjust the recording volume during this step.
- Now that you’re ready to record your audio go to the lower right corner of the screen and select “Start Recording.”
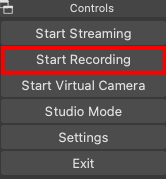
Start Recording
You’ll also find “Settings” here, which you may use to choose a different file format to save your recordings.
- When you’re finished, go to the top of the screen and select “File,” then “Show Recordings” to see all of the files you’ve recorded.
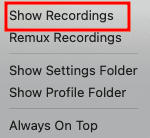
Show Recordings
They’ll generally be blank video files with only audio, and you’ll be able to tell which ones they are by the time and date in the file name.
That’s all. You have successfully recorded audio using OBS on Linux.
Recording Discord audio with Audacity on Linux, Windows, and macOS.
Another free tool for recording audio on Discord is Audacity. It works with various operating systems, including Mac OS, Windows, and Linux. So it’s pretty suitable for a wide range of file formats and the ability to record from different sources.
You can’t go wrong with Audacity if you want a realistic tool to record a podcast if you’re the only speaker. However, remember that only one individual can be recorded at any given moment. It’s not designed for multi-speaker recording. Here’s how to use Audacity to record:
- Download Audacity into your PC, then install it. Next, launch the software and when the main window opens, click on “Edit.”
- Click on “Preference,” then select “Devices.” Next, pick your microphone as the recording device from the menu.
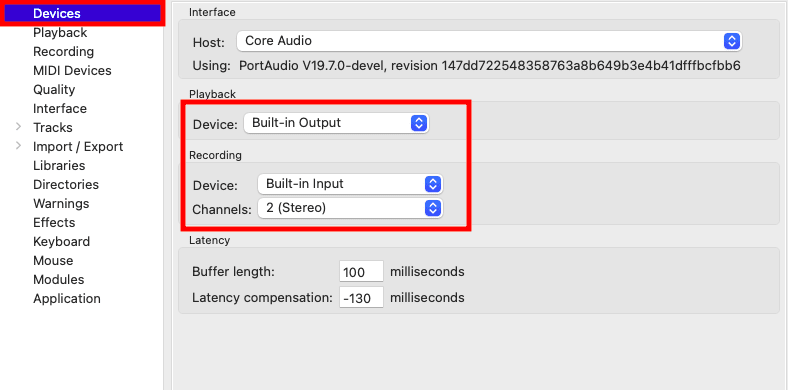
Devices
- You will now open Discord then join a voice channel. Select the red button to start recording.

Record
Once you’ve finished recording, click the black square button to stop it. Next, click “Export” to choose a spot to save your file.

Stop recording
Recording Discord audio with Windows Xbox Game bar on Windows
To record discord audio with your windows game bar on Windows, use the following simple instructions:
- Press the “Windows key” and then “G” to open the game bar using your keyboard. Select the audio you want to record. The audio section is on the left of the options screen that appears. To switch on the microphone while recording, select the microphone icon above.
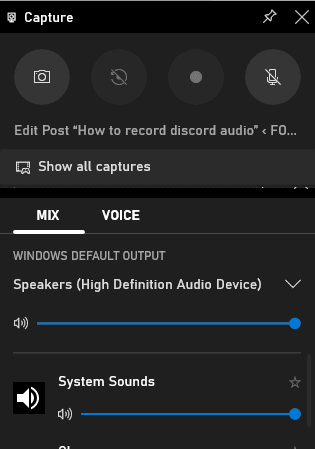
Xbox Game bar recording
- Press the Windows key + Alt + R keyboard combination or click the “Record” button to begin recording.
- To stop recording, click on the icon on the top right corner. The file will automatically be saved on your computer.
Recording Discord audio with Elgato on Windows
Elgato Sound Capture is also an excellent option for people looking to record Discord audio. It’s simple to use and great for capturing gaming, but you must first set up the hardware and software before recording audio. Download the Elgato Game Capture HD program and connect the hardware to the device where you want to record the sound. GG

Game Capture HD Program
After that, follow the steps below to setup up the software for recording:
- First, run the Elgato Sound Capture HD software and click on “Settings.” Then, from the top bar, select “Team Chat.”
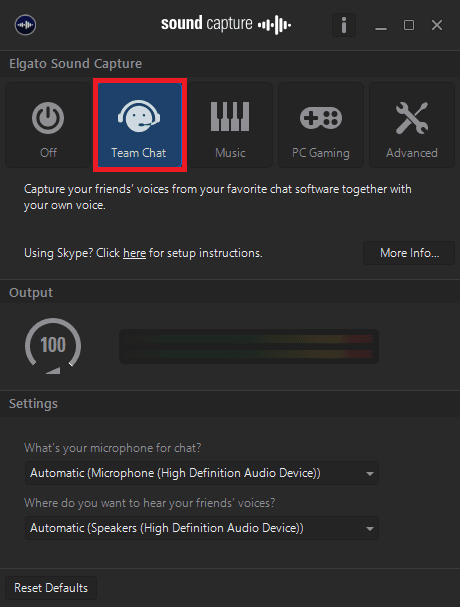
Team chat
- To change the settings, use the drop-down menu. To set up your microphone, first, select the desired audio input.
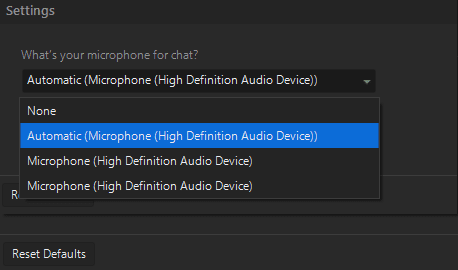
Select Microphone
- The next step is to choose the correct output so that you can hear other speakers as well.
- You can now close the program while keeping the Elgato Game Capture software open to monitor your recording.
You have the option of sharing your recordings on social media or saving them to your PC in a variety of formats, including MP4. Press the red record button in the lower-left area to begin recording.
Recording Discord audio on iOS devices
If you use an iPhone or iOS device to access Discord, the platform’s built-in recording feature might not work. But fear not, there are ways to record audio utilizing Craig, Discord’s recording bot.
One of Craig’s most prominent features is recording many speakers simultaneously and saving the files independently. You won’t have to waste time manually reducing and altering the files, but you’ll still have the option if you need it. Craig is one of the most outstanding selections for podcasts and other uses. However, before you begin recording, double-check that all people involved are aware of the recording. Below are steps on how to use Craig:
- Before anything, you will need to create a Discord server first. After doing this, navigate to the Craig Bot official website, then tap the option labeled “Invite Craig to your Discord server.”
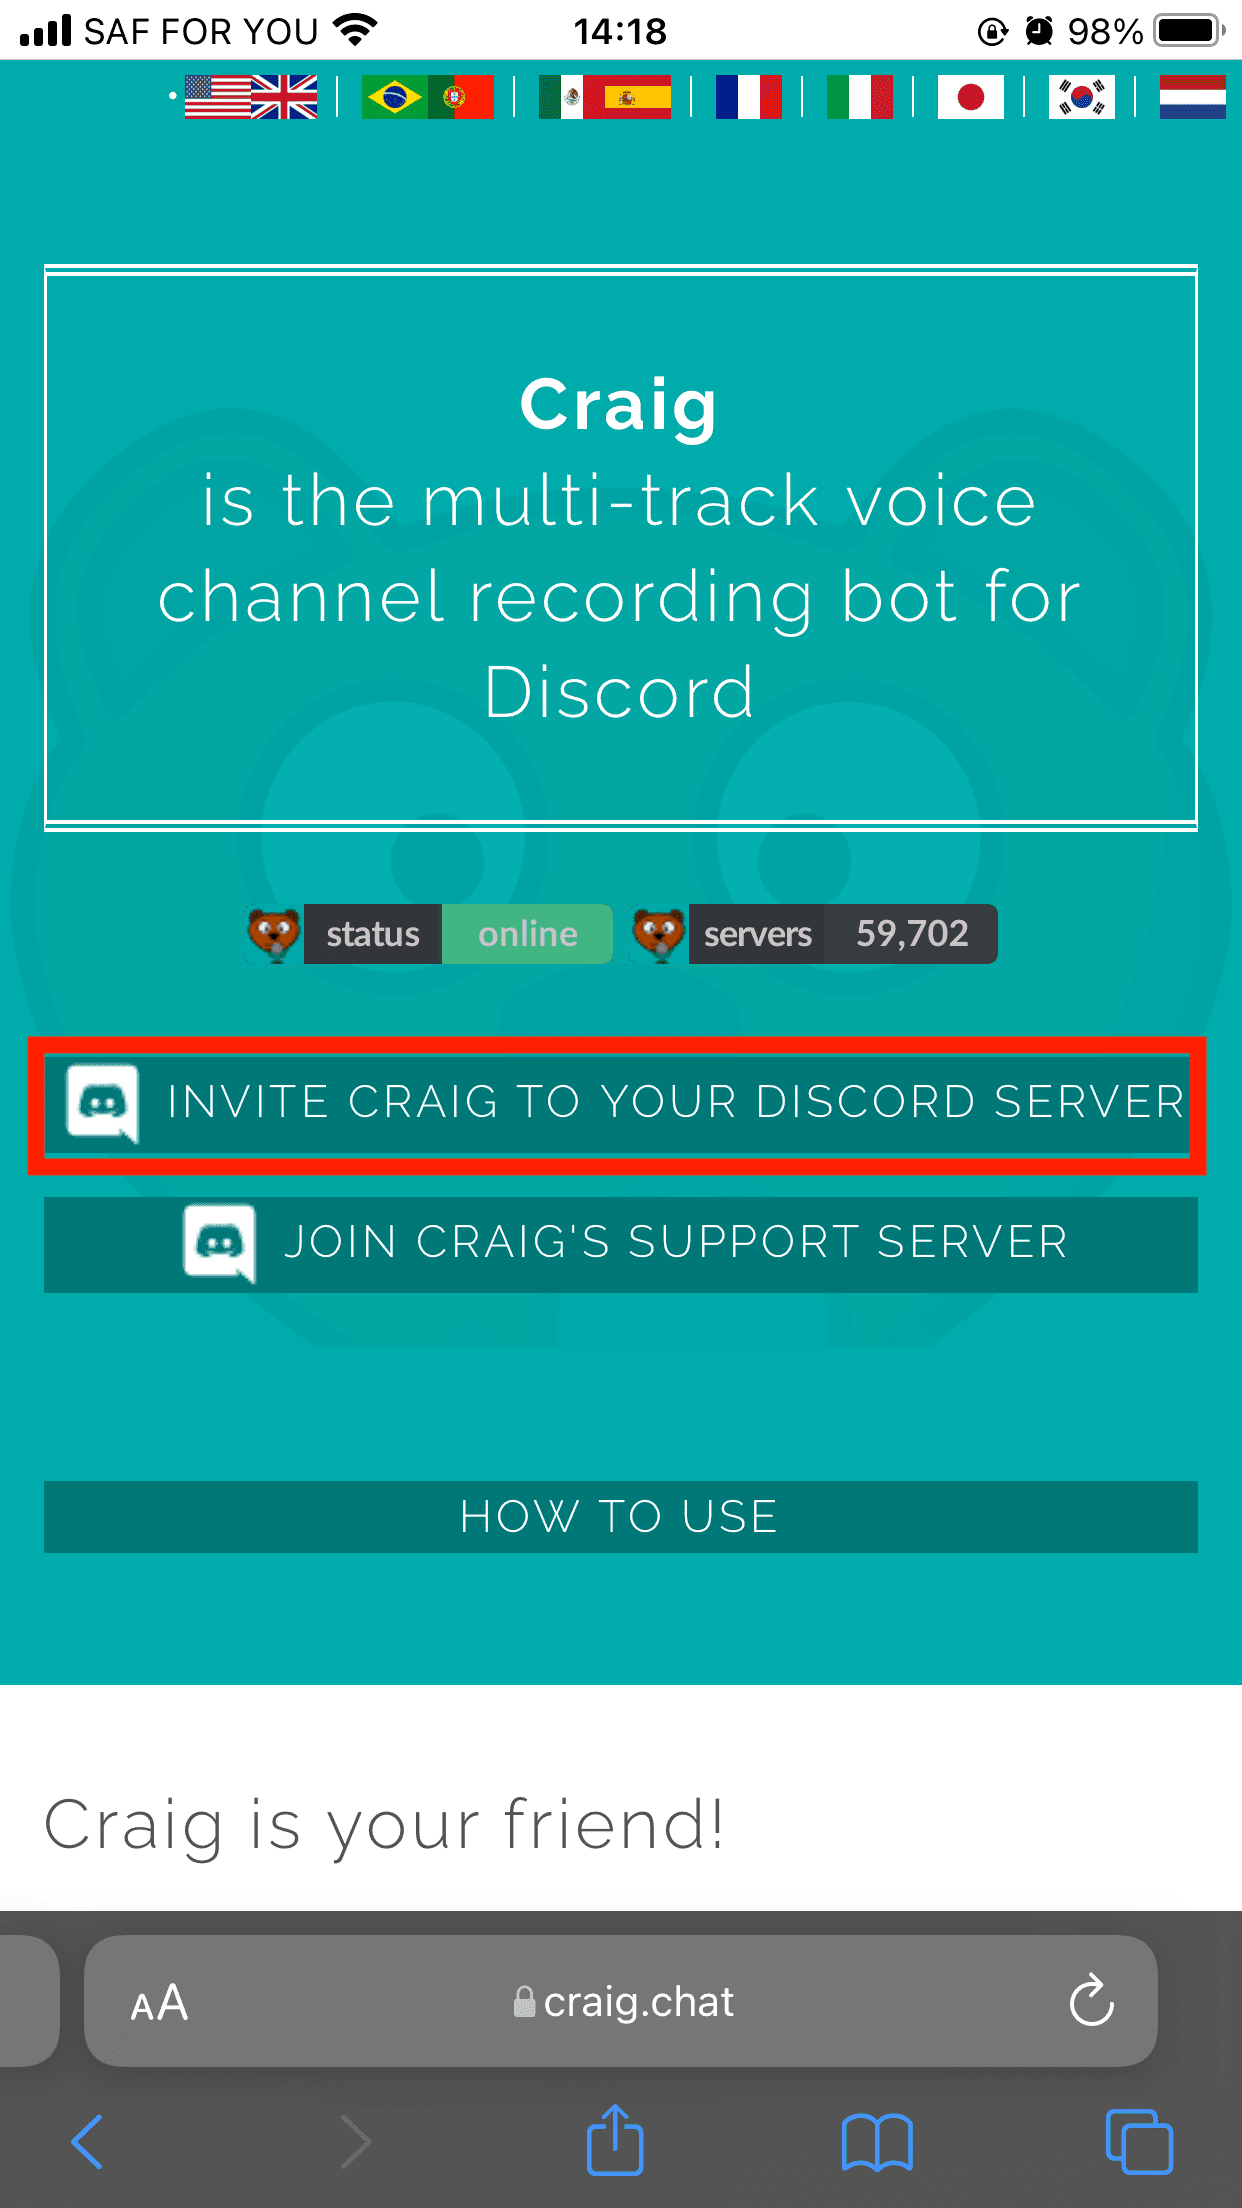
Invite Craig
You should then Log in to use the bot.
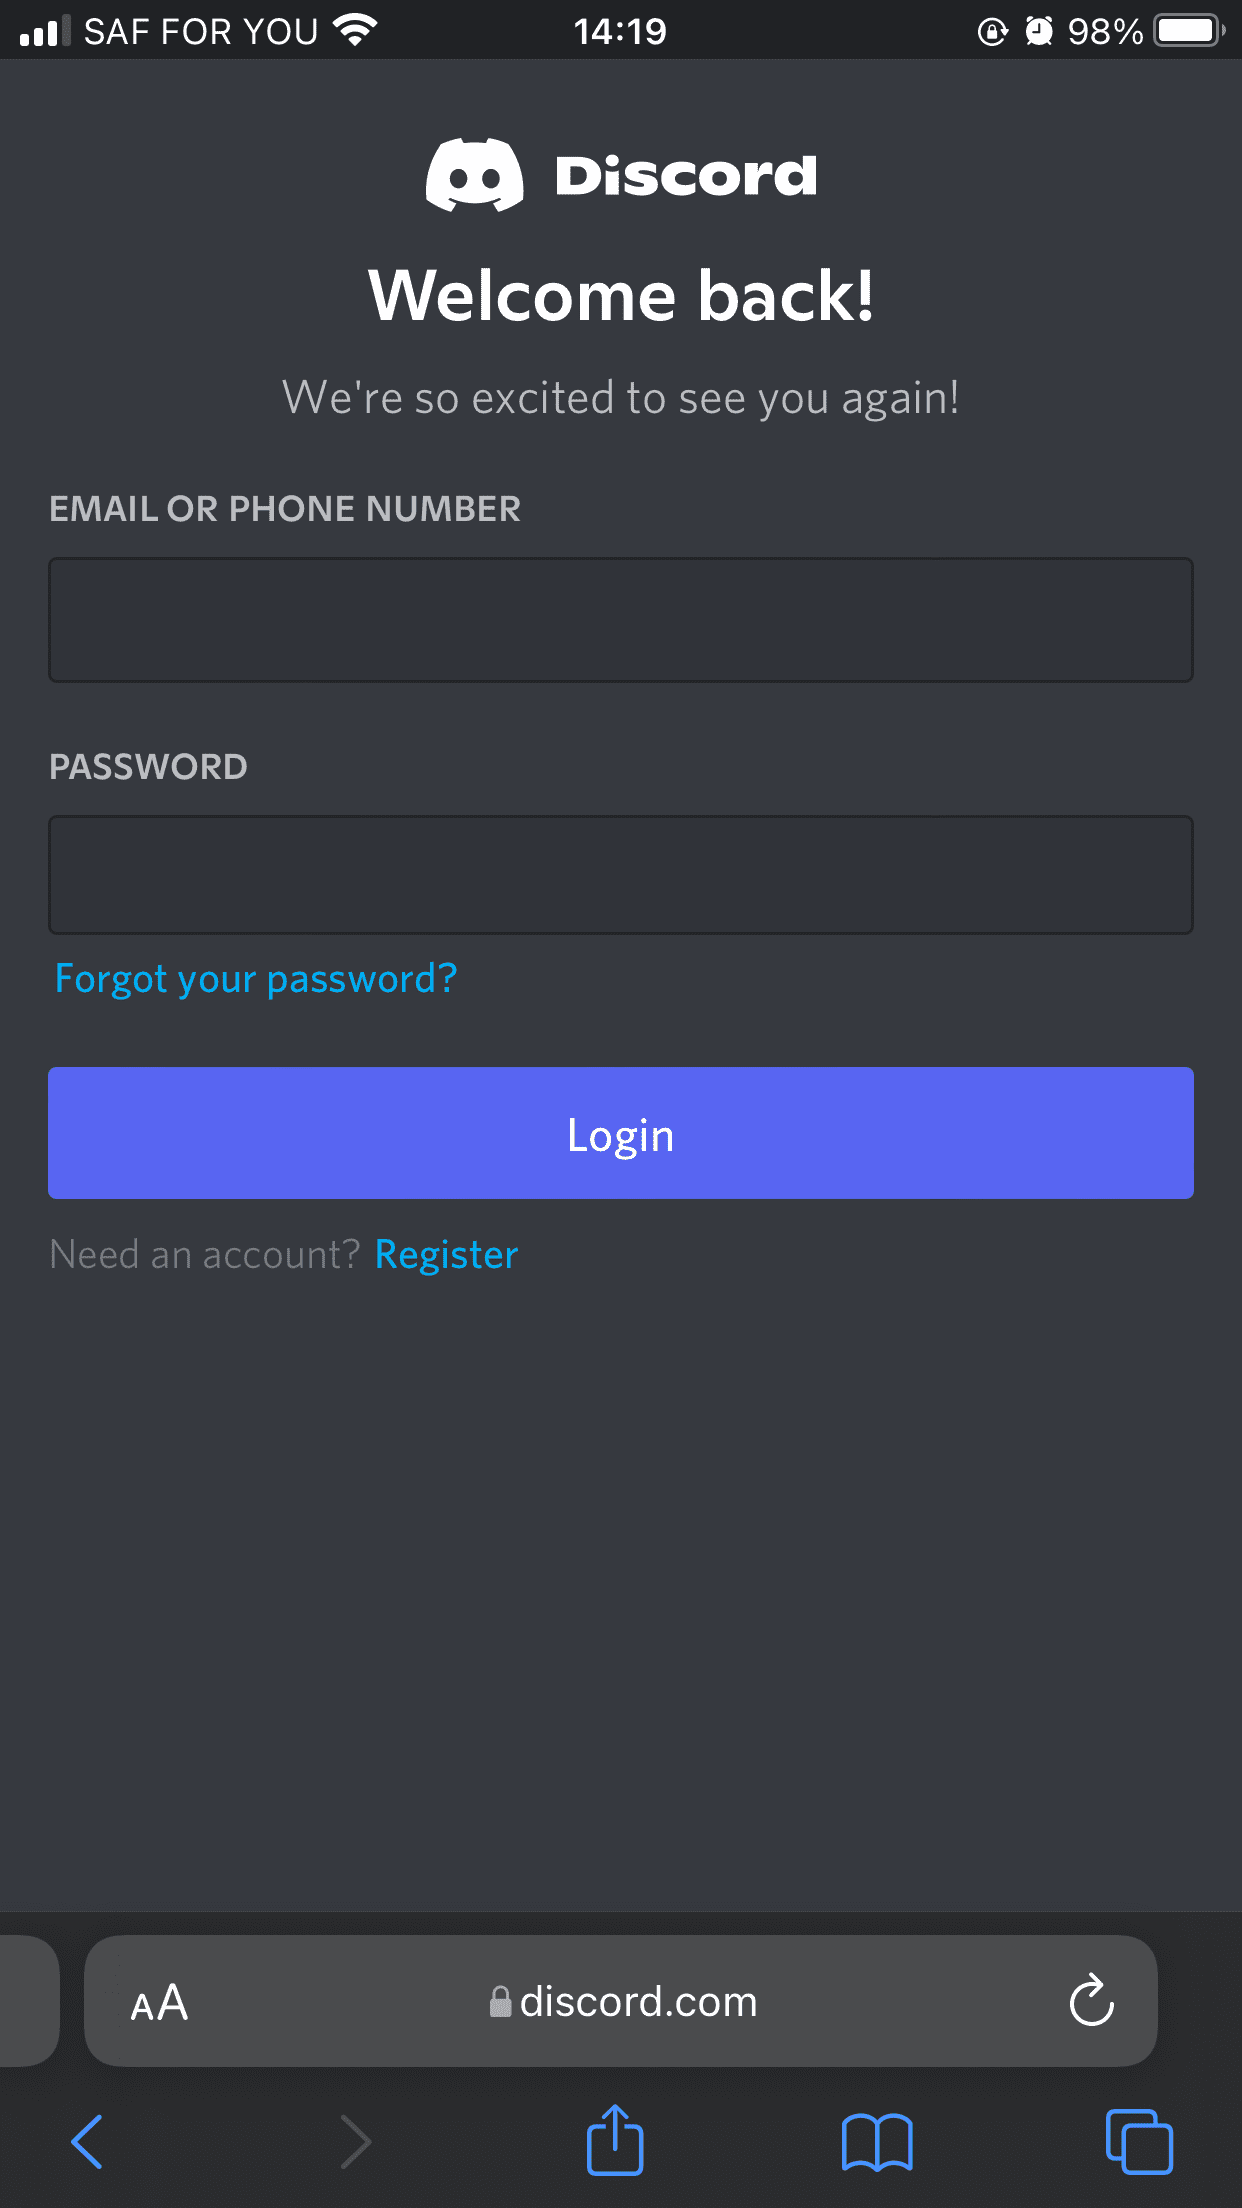
Login
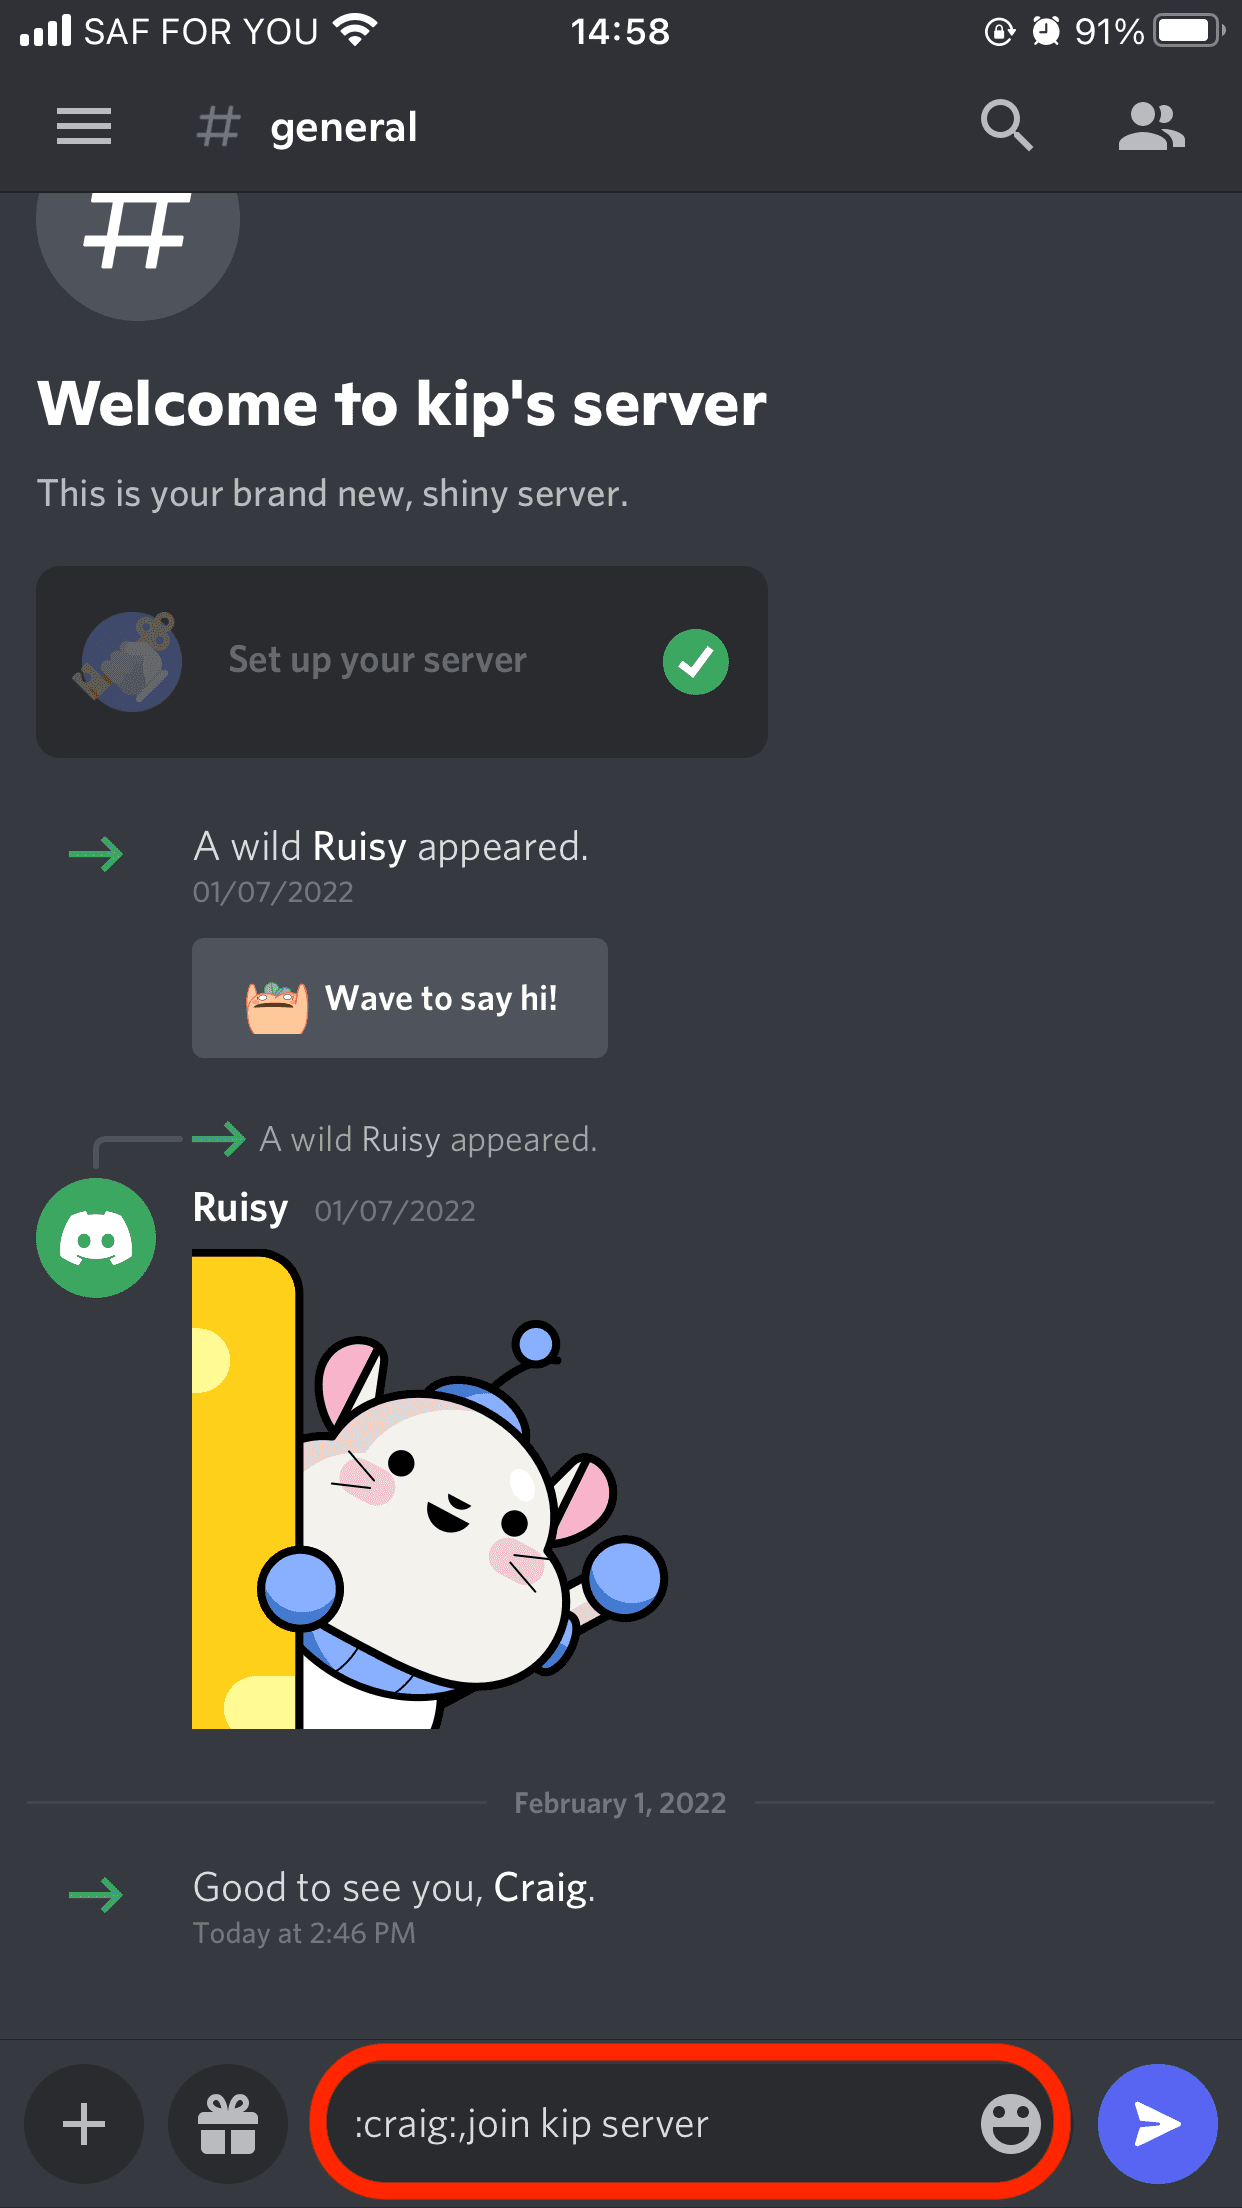
- Invite the bot to the server you created by entering the command:
:craig:, join(name of your server)
Example:
:craig:, join kip server
Join Craig
Craig will then start recording your desired voice chat.
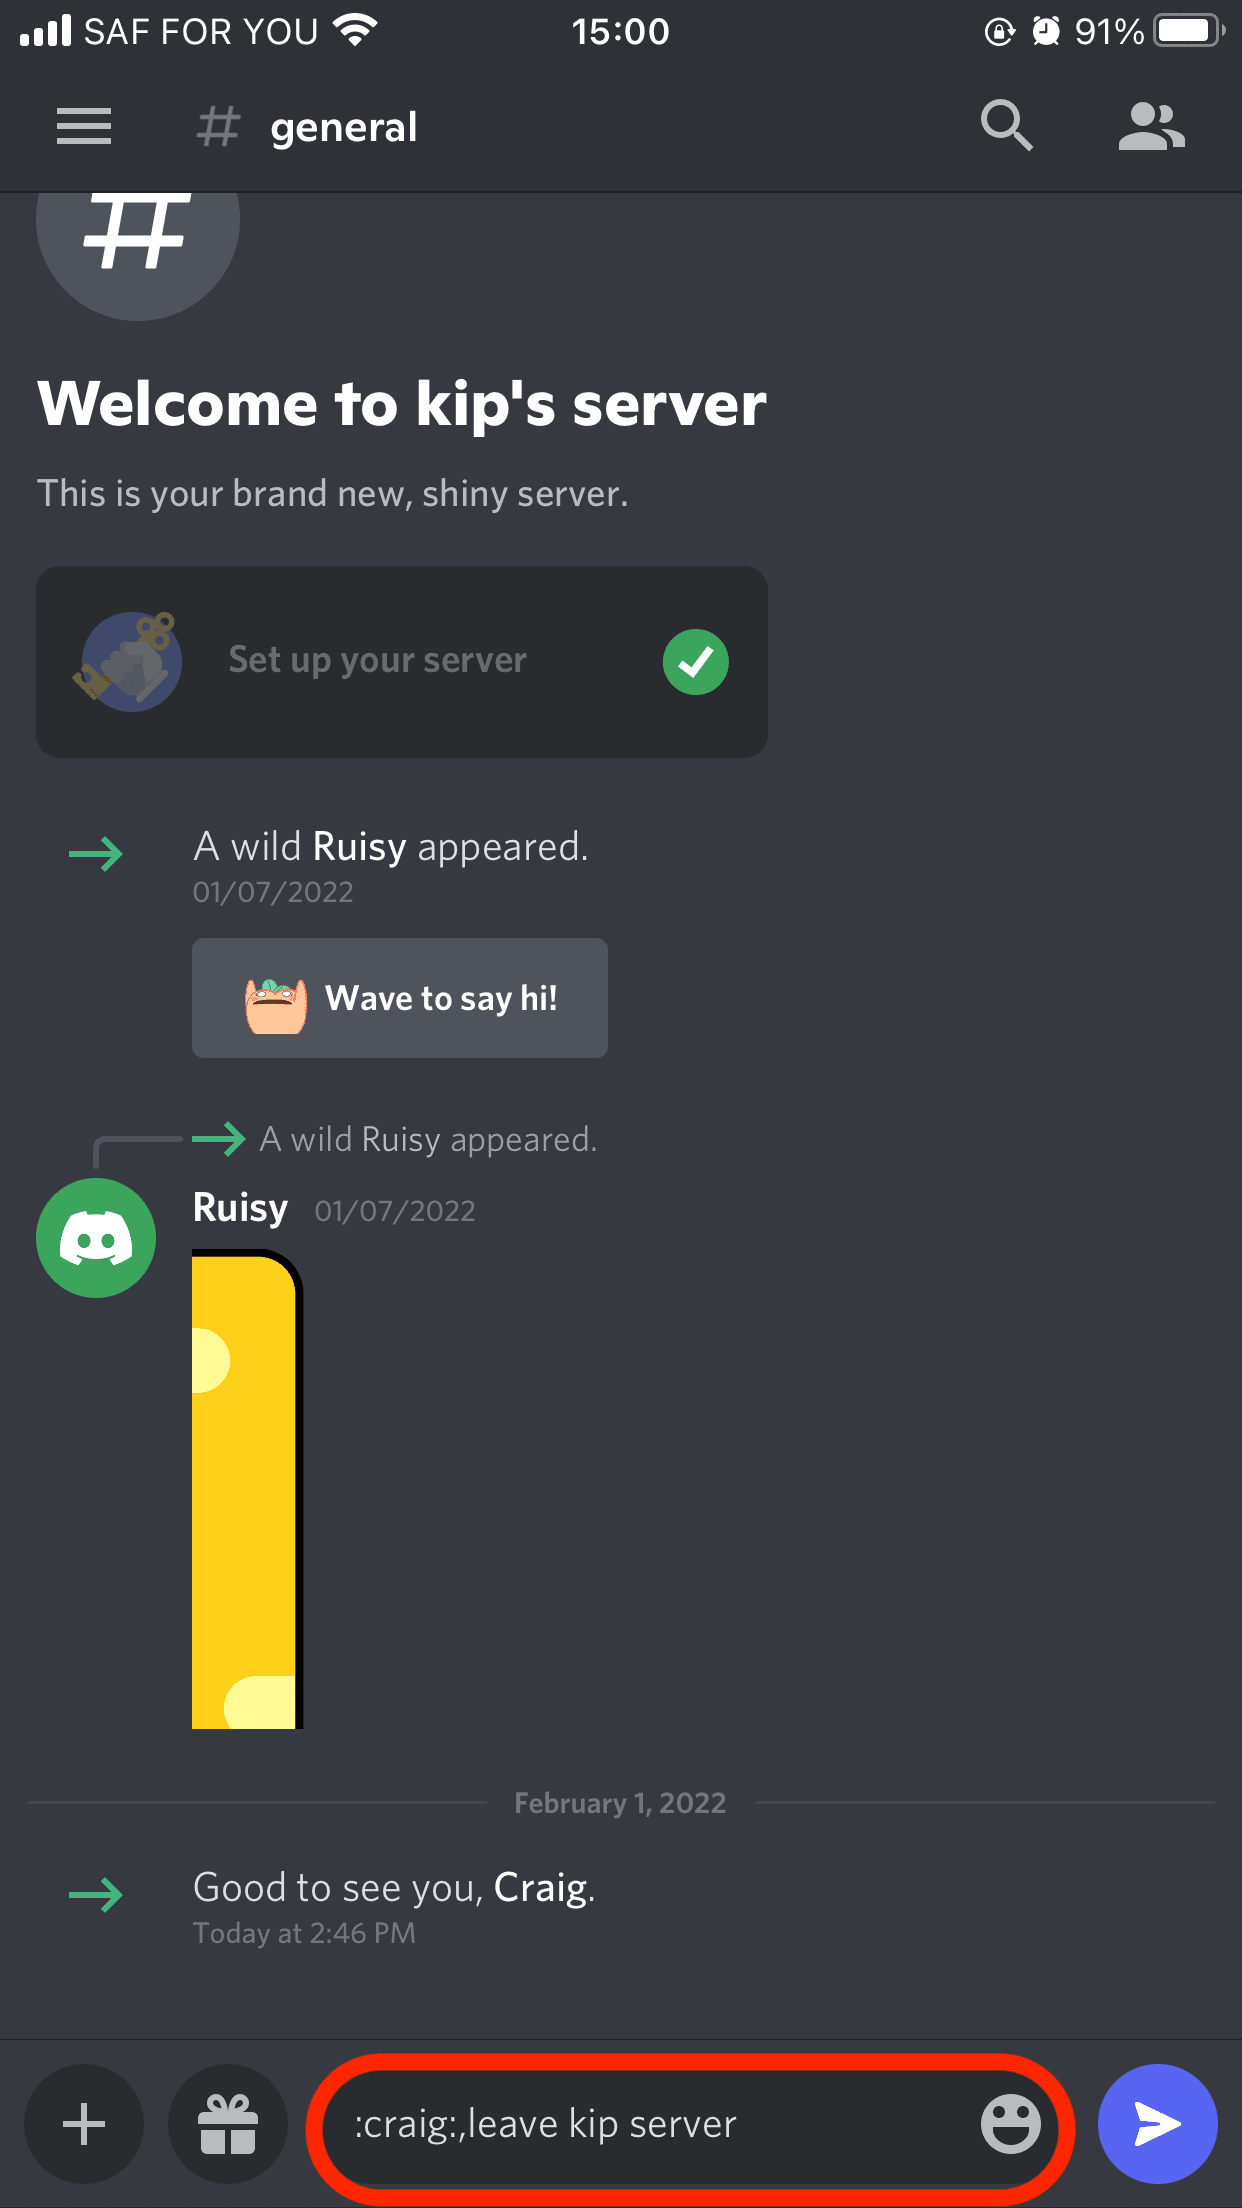
- When done recording, enter the command:
:craig:, leave(name of your server)
Example
:craig:, leave kip server
Leave Craig
This code will complete the recording, and a link to tap and download the audio file will be sent to you. Choose either AAC or FLAC, and the audio will be saved directly to your device, where you can edit it.
Recording Discord audio on Android
The Craig bot discussed in iOS devices also performs the same functionalities on Android devices; therefore, it won’t be a challenge in Android if you know how to use Craig on iOS.
As discussed before, Craig can only record audio if you are the server admin. However, with Android users, there is a lot of flexibility as you can record audio on Discord using other applications downloaded from the Google Play Store. A popular app used to record audio is Camstia, which is excellent for recording tutorials. You will still have to separate the audio from the video if you only need the sound.
Recording audio for a podcast
Depending on the program you choose to record Discord audio, you can make fantastic podcasts with this platform. It’s no surprise that podcast authors love it because it gives them so many options for creating while also saving time. Various tools provide various features and editing options. You can download individual speakers as separate files, so you don’t have to edit the entire recording many times. On the other hand, you can record a complete show and then alter it as needed while maintaining a single file.
You can also choose a convenient format in which to save the recording. This ensures that all of your platforms and tools are compatible, and you won’t need to employ a converter.
Conclusion
You can see that Discord chat recordings can be used for various purposes. Your options are nearly limitless, ranging from gaming to informative and motivational podcasts. But, of course, it’s up to you to determine how you’ll use the recording and which of the options offered is best for you. Fortunately, your device is not limited since there are solutions for many devices, including phones, tablets, and desktops.

