Every now and then there may be a need to give your users the ability to securely upload files to your web server. This is typically done using Secure File Transfer Protocol (SFTP), which uses SSH to provide encryption. In such scenario, you may have to give your users SSH logins.
That’s where the trouble begins. By default settings, SSH users will be able to view the entire filesystem. This is not what you want. Don’t you?
Restrict Access to Home Directories with SFTP Jails
In this Terminal Tuts, we are going to guide you on how to configure OpenSSH to restrict access to the home directories.
1. Configuring OpenSSH
Before modifying the sshd config file, we advise taking a backup just in case you needed the original later on. Launch Terminal and enter the following command:
sudo cp /etc/ssh/sshd_config /etc/ssh/sshd_config.Backup
Let’s start modifying it. Open the sshd_config file using vim.
sudo vim /etc/ssh/sshd_config
Add the following line. If there is an existing subsystem sftp line, go ahead and modify it to match it.
Subsystem sftp internal-sftp
Next, add the following lines to the end of the file.
Match group securegroup
ChrootDirectory %h
X11Forwarding no
AllowTcpForwarding no
The final edited file should look like this.
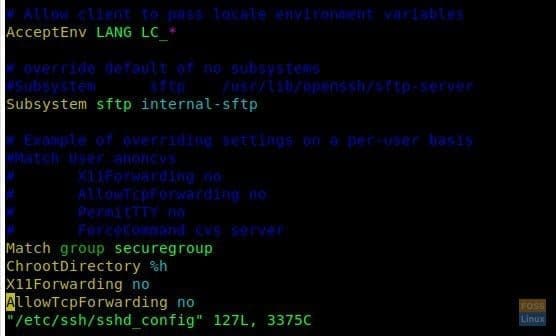
Edited File
When you are done, save and close the file.
Restart SSH for the new settings to take effect.
sudo systemctl restart sshd
2. Creating Group & User
Let’s create a group so that you can simplify managing the permissions. To create a new group for users:
sudo addgroup --system securegroup
Create a user named ‘sftpuser’ using adduser command and add it to the securegroup we created.
sudo adduser sftpuser --ingroup securegroup
Go ahead and add existing users to the group using usermod command.
sudo usermod -g securegroup sftpuser
3. Managing Permissions
The fun part begins now. We are going to restrict writing access to the HOME folder of a jailed SFTP user.
Start by changing the sftp user Home directory ownership using chown command.
sudo chown root:root /home/sftpuser
Modify the sftp user home directory permissions by using chmod command.
sudo chmod 755 /home/sftpuser
Now we are going to create a folder for sftpuser:
sudo cd /home/sftpuser
sudo mkdir uploadfiles
Modify the folder ownership.
sudo chown sftpuser:securegroup uploadfiles
The user should be able to access the account using SFTP and can upload documents to a given directory.
4. Verify SFTP
To verify everything is working as intended, use an FTP client like Filezilla and login to the server. Enter server IP, user name and password. Port should be 22. You should not be able to access the home directory with the restricted user account.
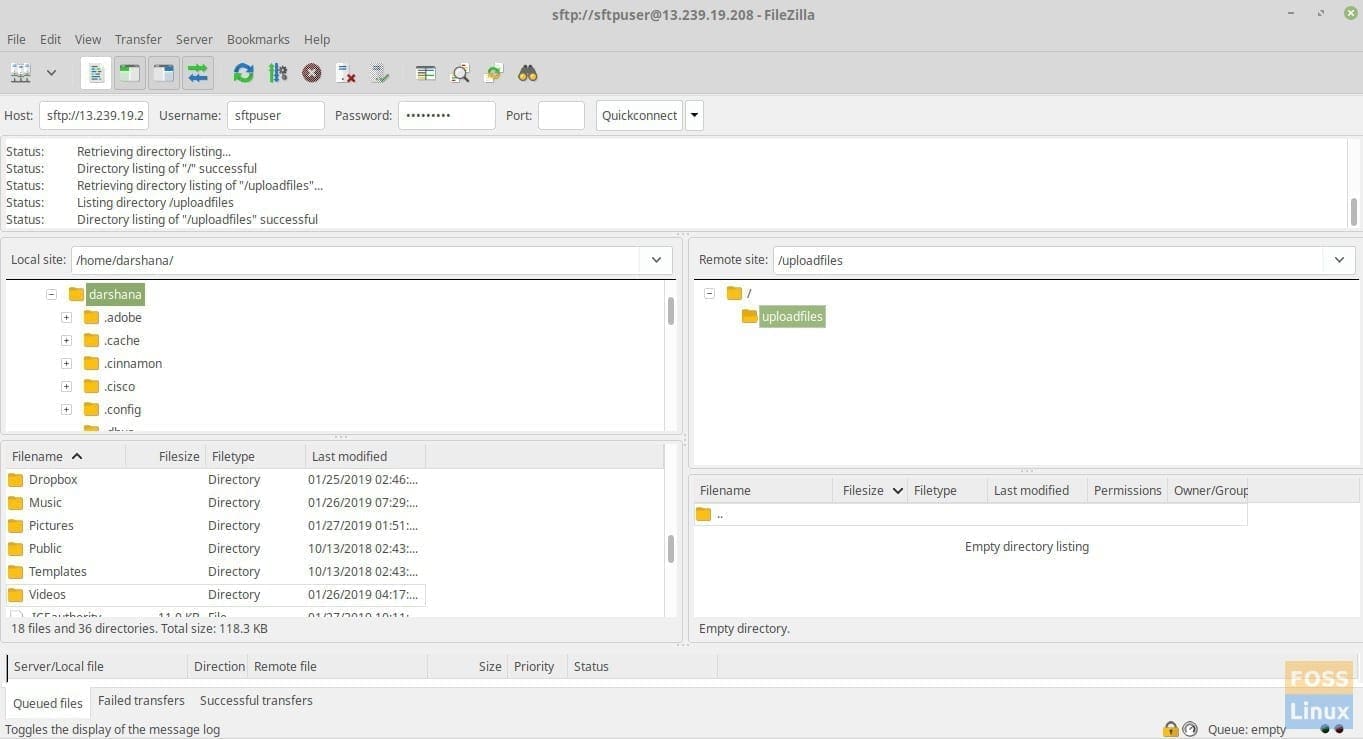
SFTP
5. Additional Configurations
During a situation where your client wants to upload files/images to someplace in the web document root, you can mount the needed folder to sftpuser folder. For example, we are going to mount /var/www/html/webapp/pub/media to sftpuser folder.
Our Media folder can be seen as follows:
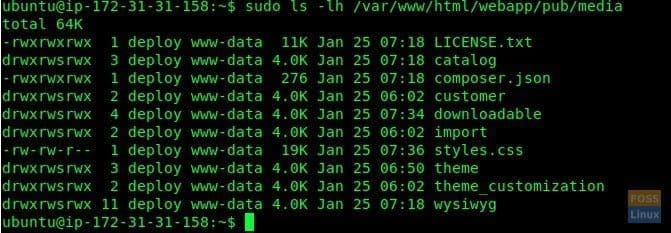
Media Folder
Here we are using a bind mount to mount folder.
sudo mount -o bind /var/www/html/webapp/pub/media /home/sftpuser/uploadfiles/
This will be temporary and permission will reset after reboot. To make it permanent, you need to edit the fstab file as follows:
sudo vim /etc/fstab
Add the following line to file.
/var/www/html/webapp/pub/media /home/sftpuser/uploadfiles/ none bind 0
Save and exit the file. Try using your favorite SFTP client and log in as a sftpuser. You should be able to see the media folder contents.
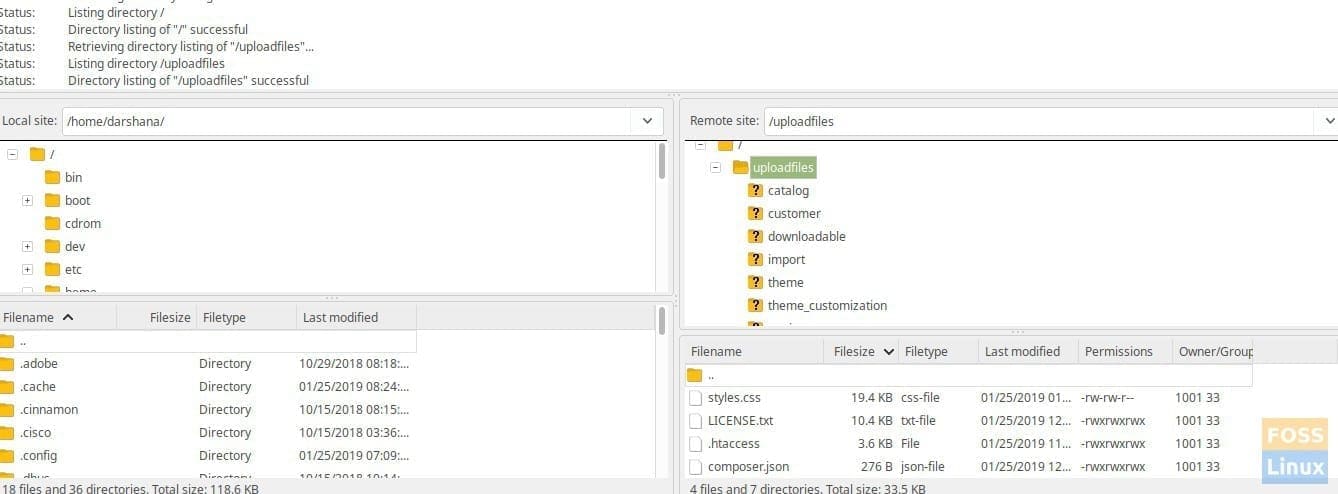
After Directory Mount
That’s it for today. You should have by now learned how to configure and verify a Jail SFTP user. Feel free to ask any questions you have in the comments below.

