Discord is a robust chat application with over 100 million daily active users. The software allows its users to communicate via text or voice messages. Earlier, this application was mainly used by gamers but had later become a household name, being utilized by employees and families alike.
This utility software is one great way to stay connected with family and friends. If you, for instance, want to share audio files with them, you can upload them from your PC or mobile as long as you have the Discord app set up. This article will give the procedure of sharing sound on Discord via audio and live streaming.
With that covered, let us get right into it.
How to share sound on Discord
Discord users have two ways of sharing sound with others:
- Via audio file.
- Via live streaming.
Don’t stress yourself about the two approaches, as this article will extensively cover all of that for you.
How to share sound via audio file
Here are the fundamental steps in sharing sound on Discord via an audio file.
Step 1: Open Discord
First things first, open/launch Discord on your system by clicking on “Activities” and then type in “Discord” in the search bar; such an icon will appear, click on it to open:
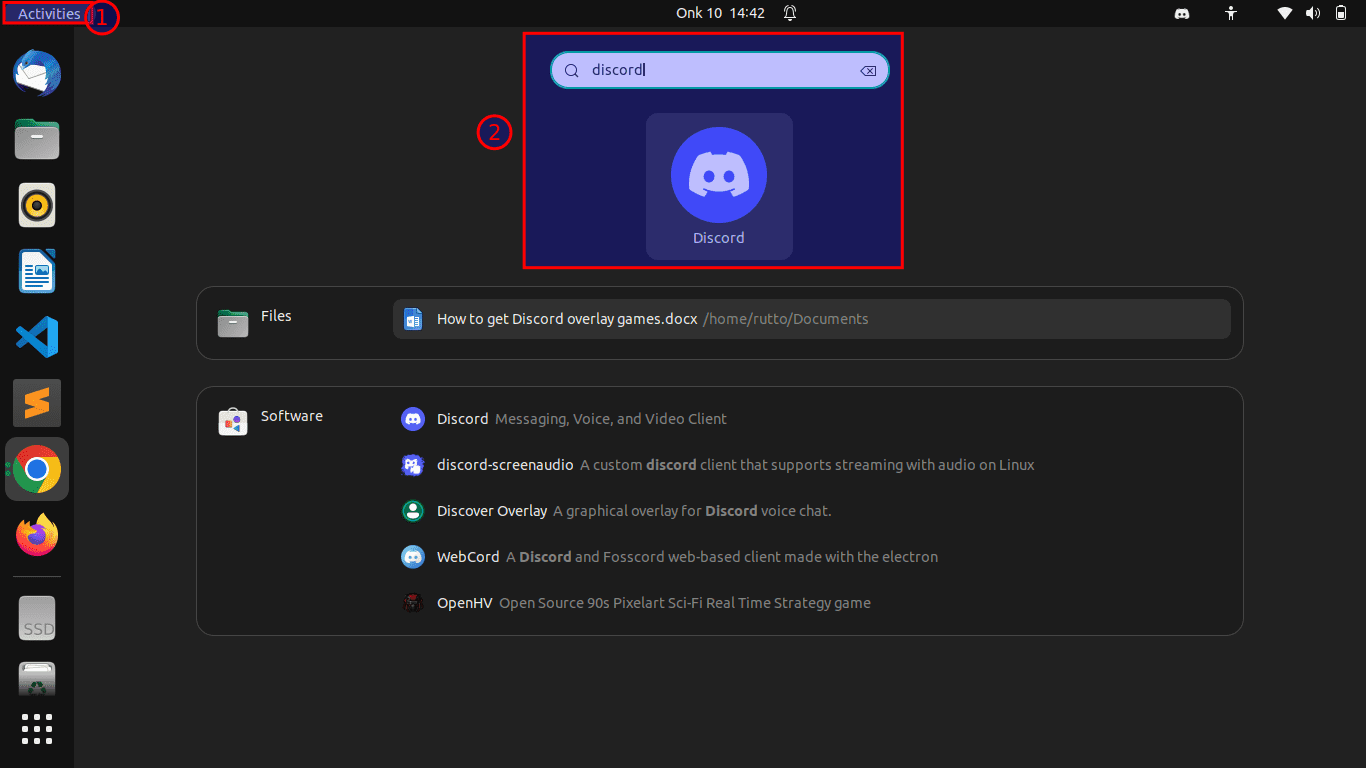
Open Discord
Step 2: Select the server
Next, select the server or private chat where you intend to share sound, and click on the plus “+” icon next to the text bar. For example, we want to share the audio file in the “fosslinux” server:
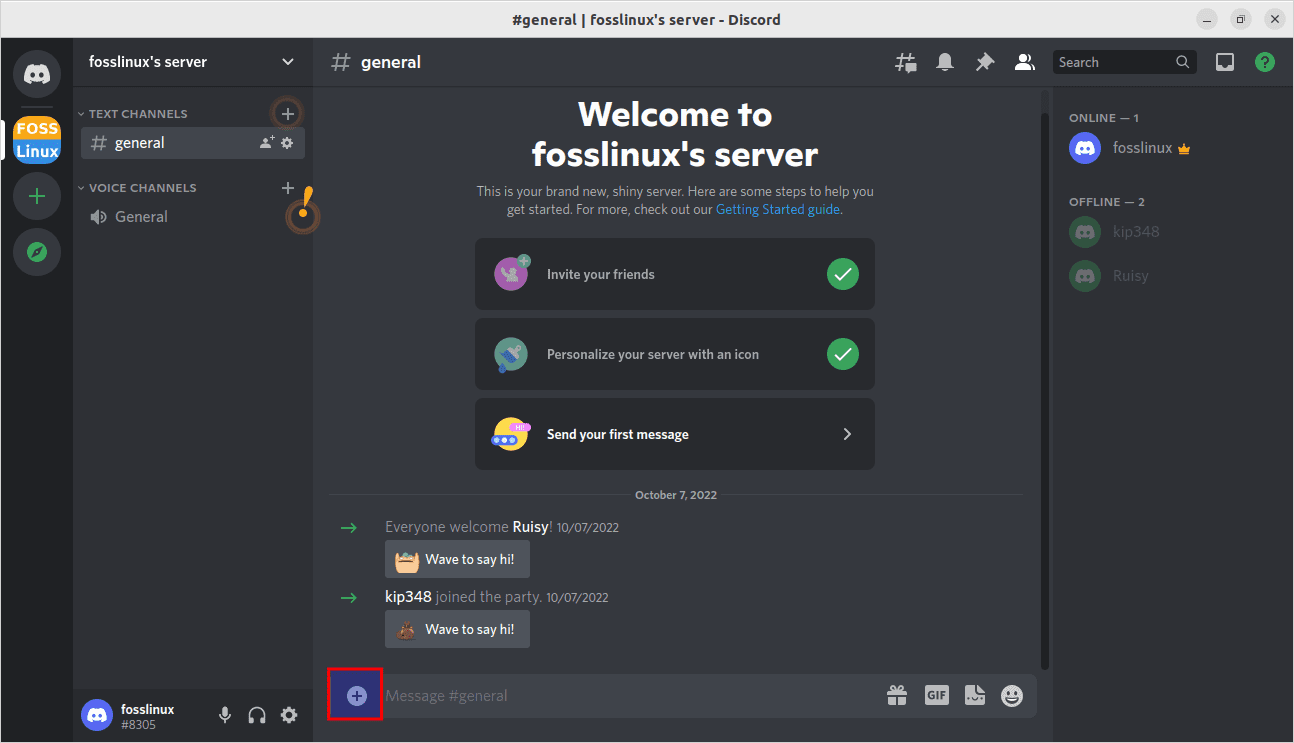
Click on “+”
Click on the “Upload a file” option from the opened pop-up menu as highlighted below:
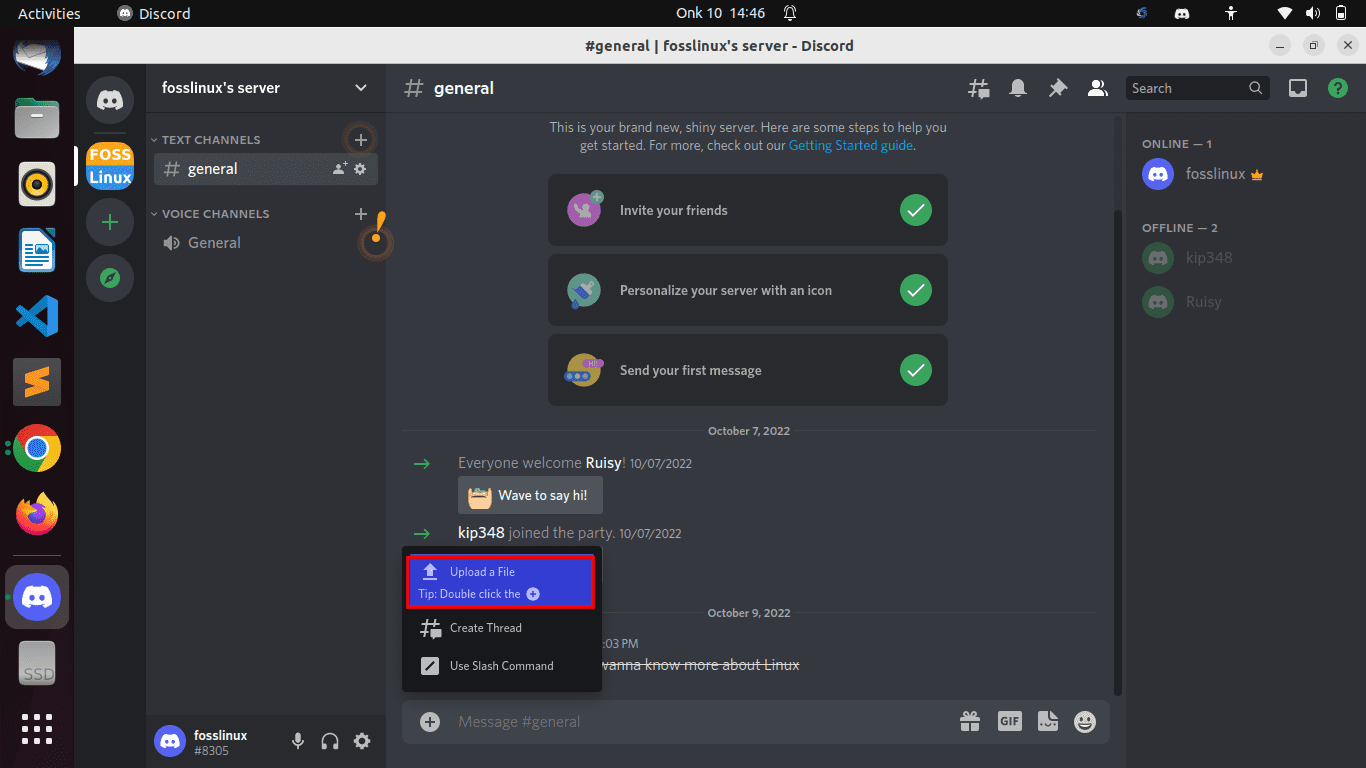
Click on the upload file option
Step 3: Select the audio file
In the next step, proceed and select the audio file which you want to share and click on the “Open” button as marked in the following snapshot:
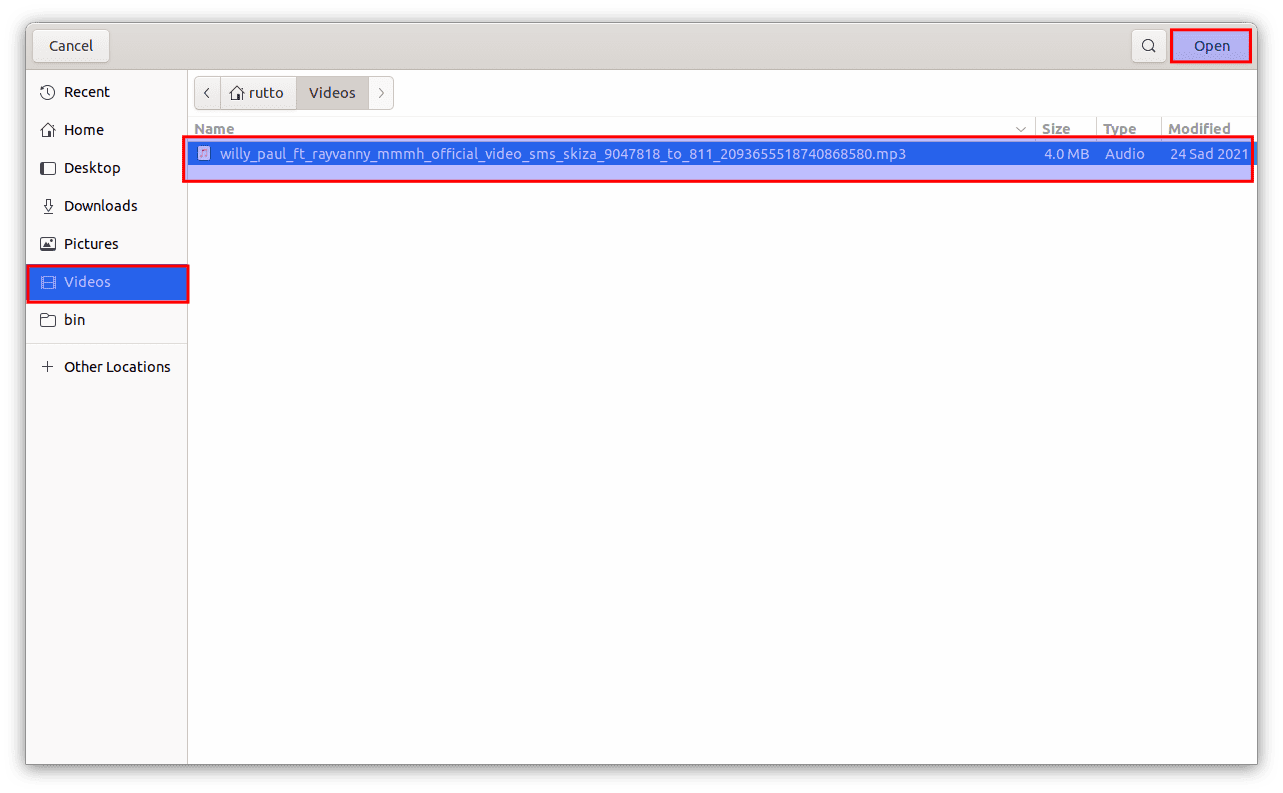
Select an audio file
Step 4: Add text and share audio
You can opt to send an audio file with text, which is optional. Type the message in the text bar with the attached file and hit the “Enter” button to affirm that you want to share it with a server member:
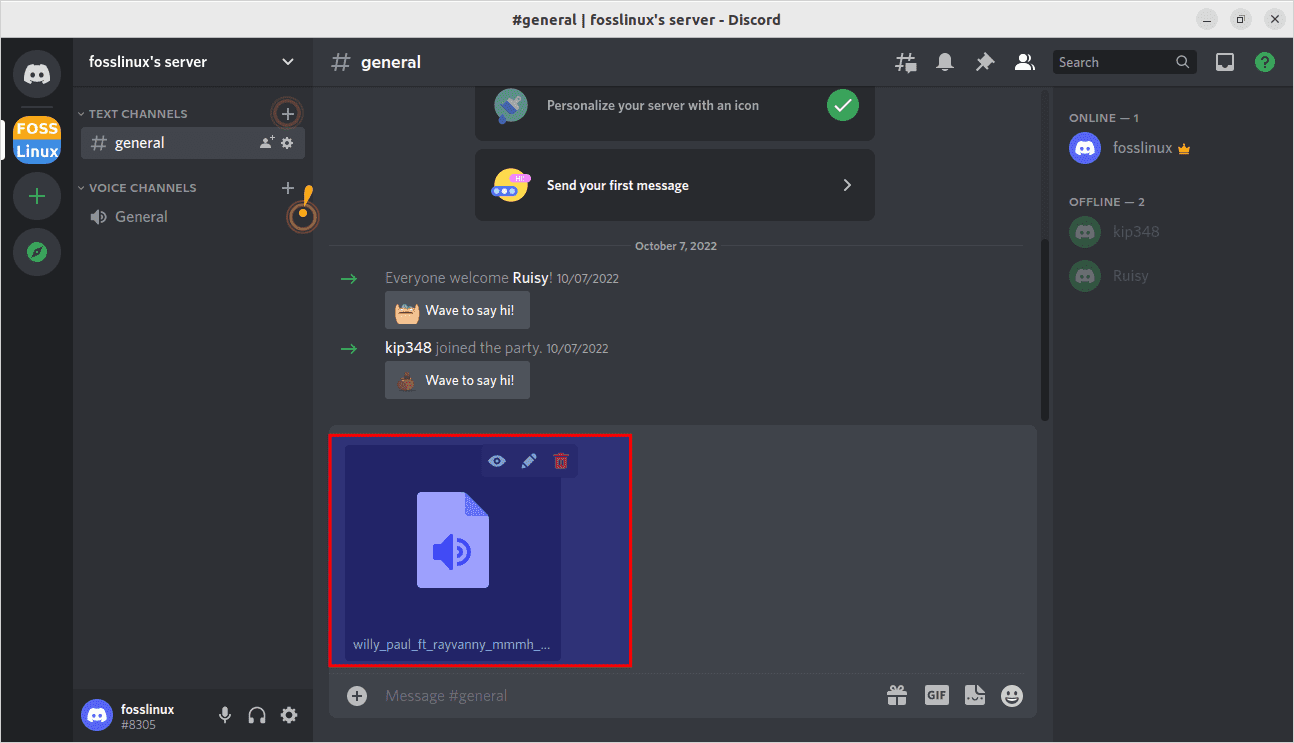
Audio file uploaded
As seen above, the attached audio file is shared, and all server members are permitted to play and download it.
That is covered; let us move further and look at another method for sharing sound through live streaming on your Discord utility software.
How to share sound via live streaming on Discord
Here is a steady breakdown of how to share sound via live streaming on Discord.
Step 1: Select the server
First, click on the server you intend to share sound while live streaming. For this event, we have selected the “fosslinux” server and set its “General” voice channel as highlighted below:
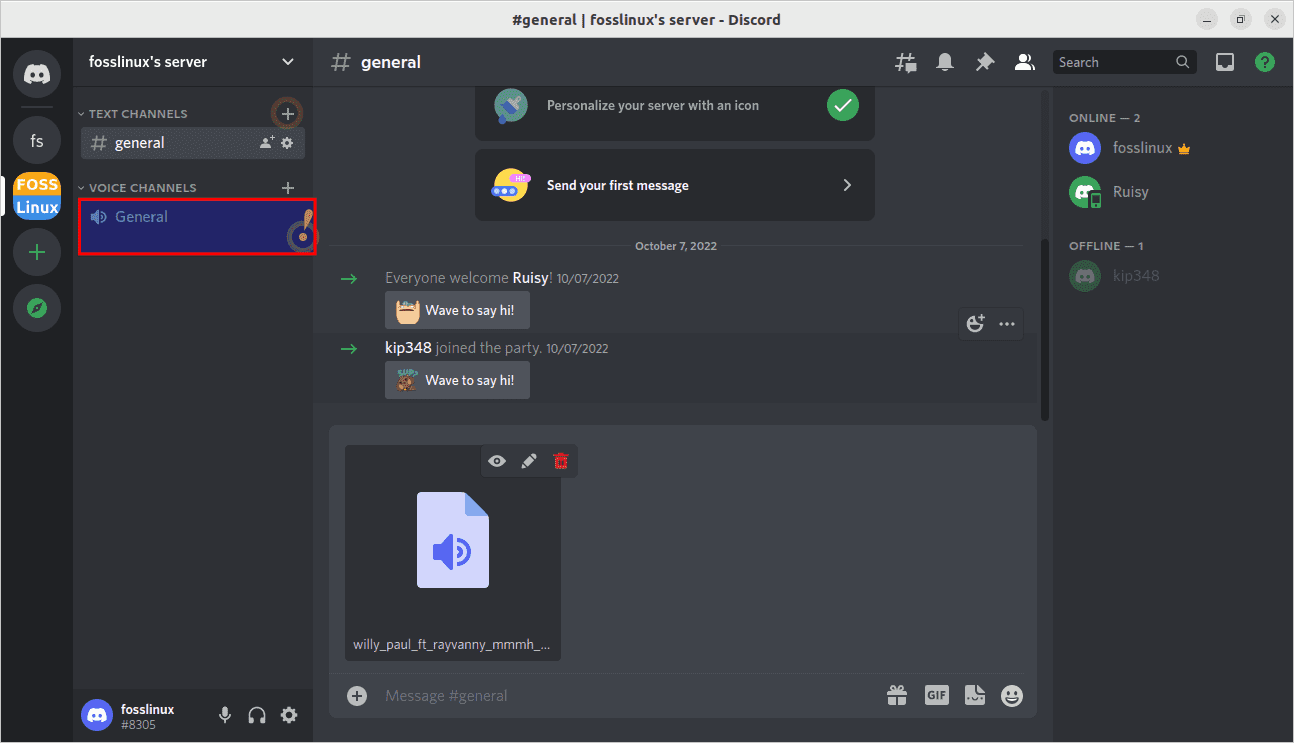
Select general
Step 2: Share the screen
Next, click on the monitor icon from the navigated bar located before the username at the bottom left side of the Discord main screen:
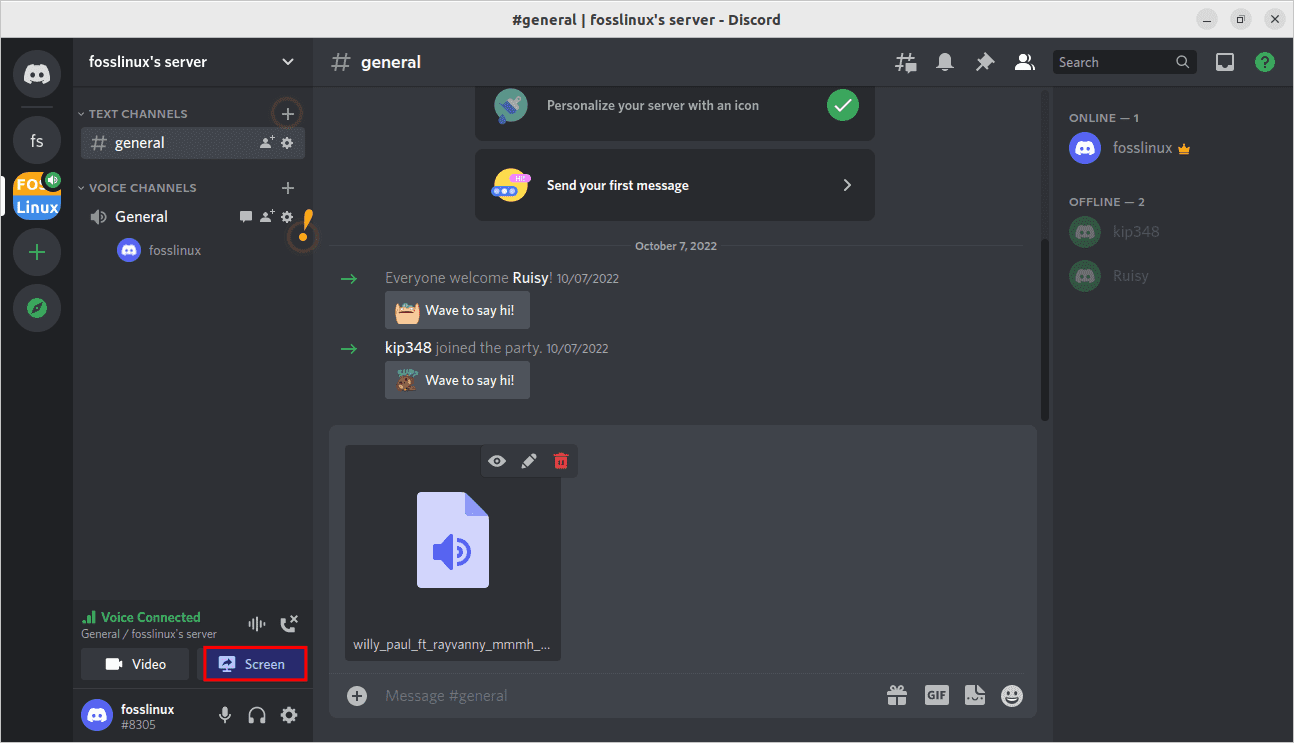
Click on the screen icon
Under the “Applications” tab, select the screen which you want to share while streaming:
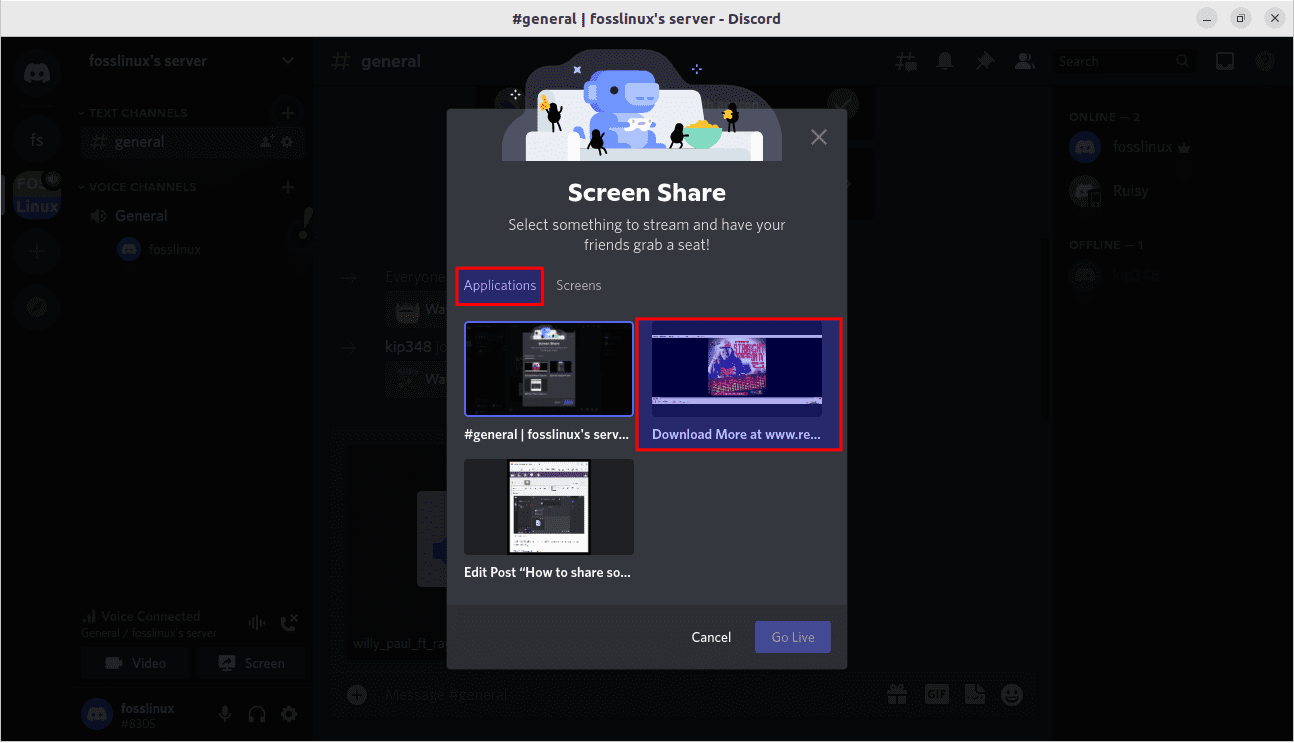
Click on the Applications section
Step 3: Set streaming quality
You can set the “Stream quality, frame rate, and resolution” to your preference. After selecting the aforementioned options, click on the “Go live” button as shown below:
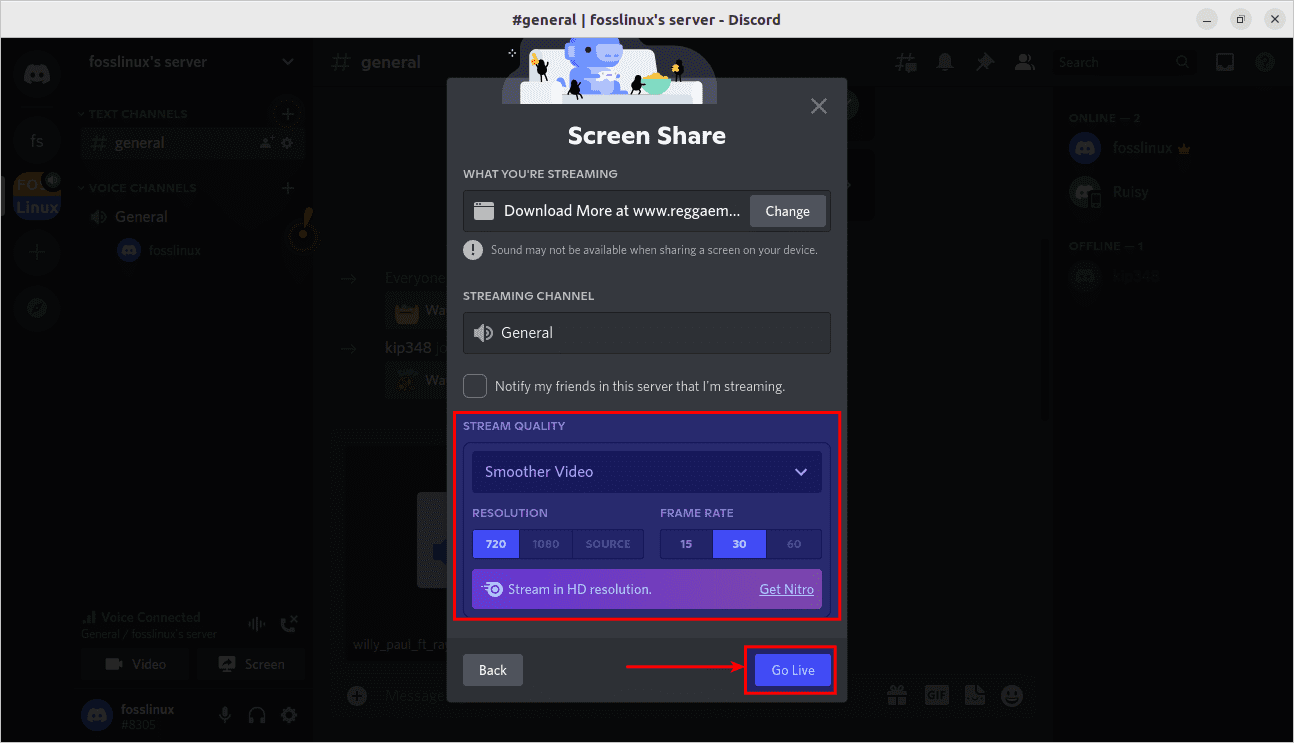
Stream quality checks
As a result, your system sound and the streaming program audio will all be shared on Discord. To stop the streaming, click on the “PC with an X” icon highlighted below:
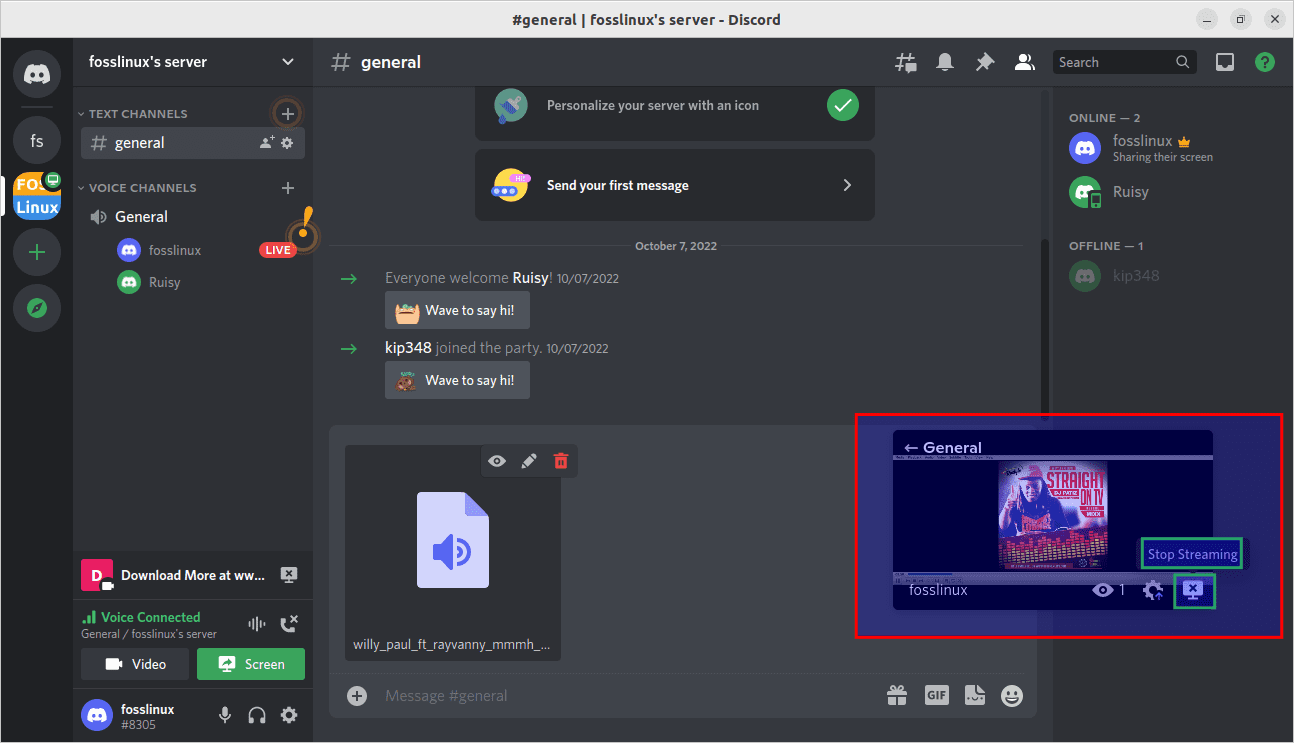
Live streaming in the process
And there you have it, guys!
Final Thoughts
There are two ways to share sound on Discord: sharing sound while live streaming or sharing the audio file in the text bar. The first method allows you to select the private chat or server to share audio. After that, you can click on the plus “+” icon, choose the audio file from the system, upload it, and send it using the text bar. On the other hand, you are allowed to share sound on Discord while live streaming.

