Linux Mint is a community-driven Ubuntu-based Linux distribution packed with various free and open-source software. It can give complete multimedia capability out-of-the-box for those who opt to incorporate proprietary software such as multimedia codecs. So you decided to try out Linux by installing Linux Mint alongside Windows?
And for some reason, you’ve decided to undo everything, including uninstalling Linux Mint, cleaning up grub (bootloader), and reverting your PC to its previous Windows-only state? Since I’m a Linux enthusiast, I’m assuming you’re starting over because something went wrong when you were experimenting with Linux, and you want to start from scratch.
Completely uninstalling Linux Mint from your PC
Are you seeking an efficient method to completely remove Linux Mint and delete all its files from your computer? Don’t worry; this article will give comprehensive steps for uninstalling Linux Mint entirely from your PC.
Possible reasons why you might need to uninstall Linux Mint
- Linux Mint fails to load properly
- Mint does not support most of your essential day-to-day software.
- You are unable to execute the terminal in your Linux Mint OS.
- Constant reboots without prior warnings.
- You want to revert to Windows, and your priority is to do away with the Linux Mint installation.
Linux Mint can be uninstalled because of numerous other issues. However, it is vital to note that an incomplete Linux Mint uninstallation may also cause multiple problems and complications. Therefore, it is crucial to uninstall Linux Mint correctly and erase all of its data. To do so, follow this guide to the latter.
We will learn how to completely uninstall any Linux operating system from a PC using Windows. This is a technique consisting of two steps:
- Delete Linux Partition
- Remove Linux Operating System from EFI System Partition.
You’re probably wondering what an EFI System Partition is. The EFI system partition (ESP) is a storage partition utilized by computers adhering to the Unified Extensible Firmware Interface (UEFI). UEFI firmware loads files from the ESP to launch Windows or Linux(ubuntu/fedora/mint) operating systems when a machine is booted.
Uninstalling Linux Mint from your PC
Before uninstalling Linux Mint, ensure that you have backed up any personal downloads and data on an external hard drive or USB before removing Linux Mint! I am sure you will, but if you are in a hurry and forget to create a backup, please go ahead ASAP!
Let’s begin the uninstallation process by following the steps provided herein:
Step 1: Log into Windows in Administrator mode.
Step 2: Right-click the windows symbol in the bottom left corner. Here you will see options like:
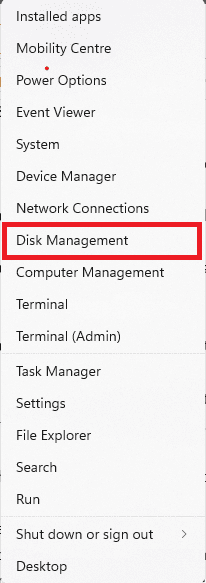
Disk management
Step 3: Open Disk Management
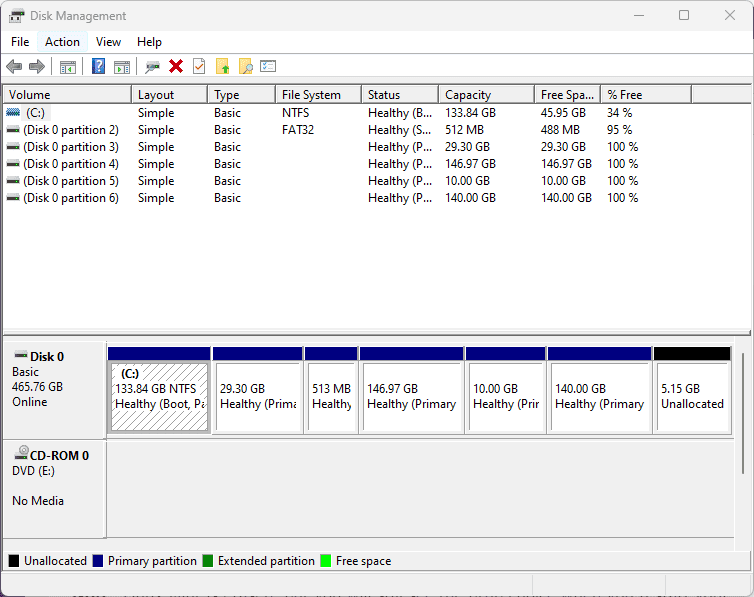
Launch Disk management
Step 4: Delete the partition that does not contain a letter (such as (C:) or is not an NTFS partition and is larger than 1GB.
You have now successfully deleted the Linux Mint partition.
Note: Linux Mint is erased, but you will still see the grub choice when you restart your computer; therefore, we must also uninstall Linux OS from the EFI System Partition. To do so, follow the steps provided herein:
Step 1: Launch the Command Prompt (Administrator mode) as shown in the image below:
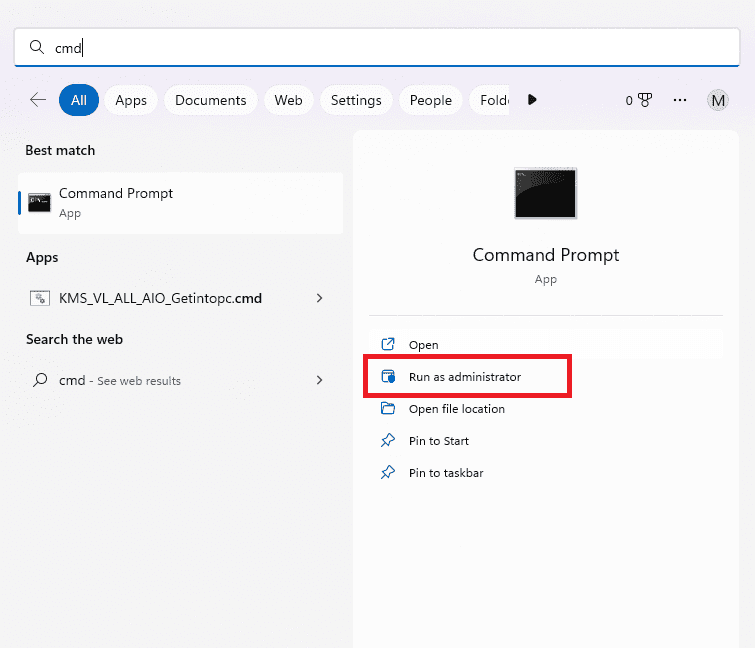
Launch CMD as admin
Step 2: Execute the following instructions
Note: It is important to note that the line following ‘#’ is “commented out,” meaning they are there purposely to describe the line of code provided.
> diskpart

> list disk       # This command selects the primary disk

> select disk 0   # disk 0 is is the primary disk

> list partition   # list all the present partitions in the selected disk
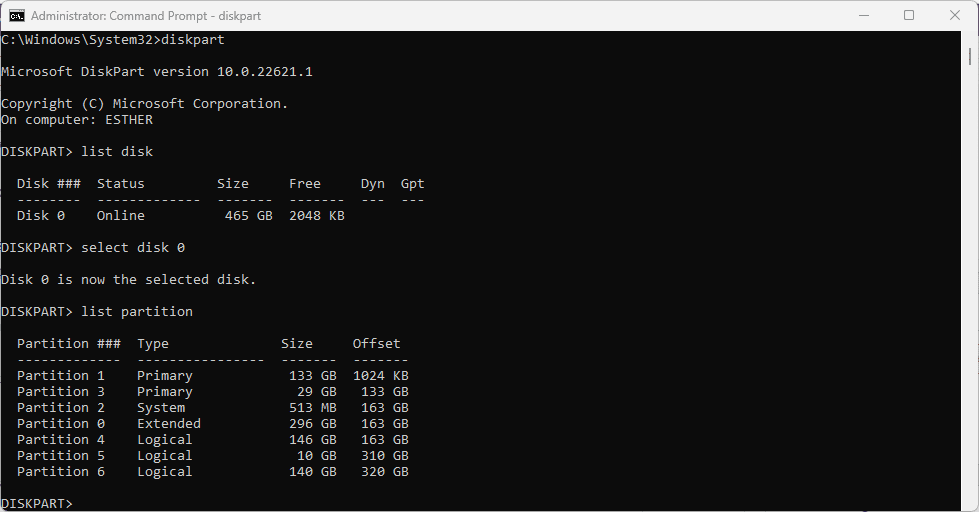
Diskpart list disk and partitions
Note: Check and confirm from the command above that which is the system partition. For instance, in our case, the system partition is “Partition 2.”
> select partition 2  #This command selects the system partition

> assign letter=y     #This command will assign the letter to the EFI partition, which will be mounted and found in Windows explorer. To quickly access Windows explorer, strike the "windows+E" keys simultaneously.

>exit    #This command exits diskpart

>y:      # This command will select the newly mounted disk y:

> dir  # This command will display content in the selected disk.

> cd efi #Navigate to the EFI partition

>dir   #display content in the EFI partition
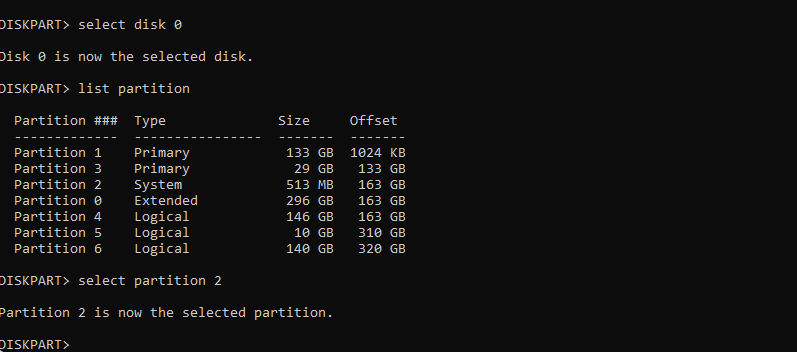
Select EFI partition
Note: You can now see the OS check
>rd mint /S    #if Linux os is Mint

>y               #This command prompts the user to confirm the delete process.
Alternatively, you can use the method highlighted below to restore the Windows MBR boot grub loader.
Linux Mint installs the GRUB bootloader to determine which operating system will be booted. Now that you want to uninstall Linux Mint, GRUB is no longer required, and your computer should boot directly into Windows, as it did before you installed Linux Mint. We will remove GRUB and restore Windows MBR in this phase (Master Boot Record).
Start Microsoft Windows
Type “Recovery” into the program’s search box and choose “Recovery Options.”
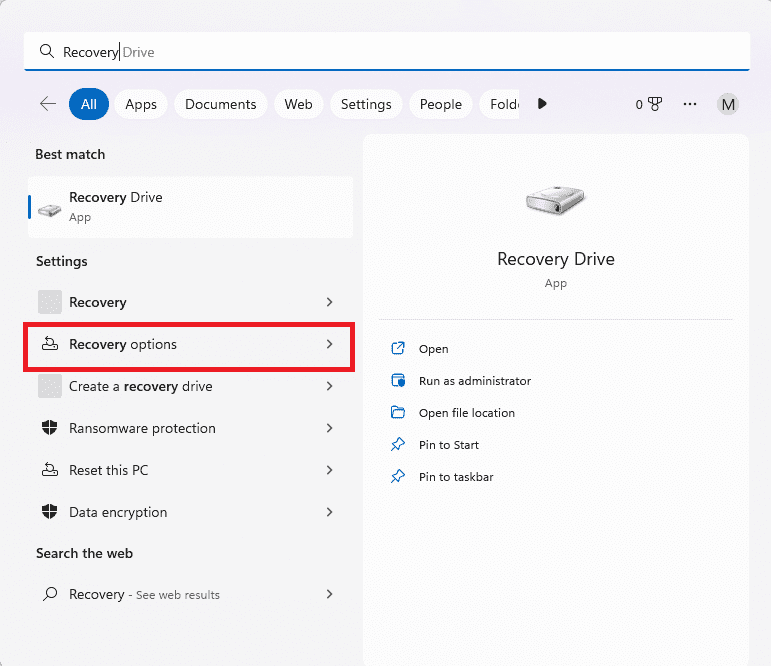
Recovery Options
You should be in the ‘Recovery’ area on the left side of the page. In the ” Advanced startup box,” select “Restart now.”
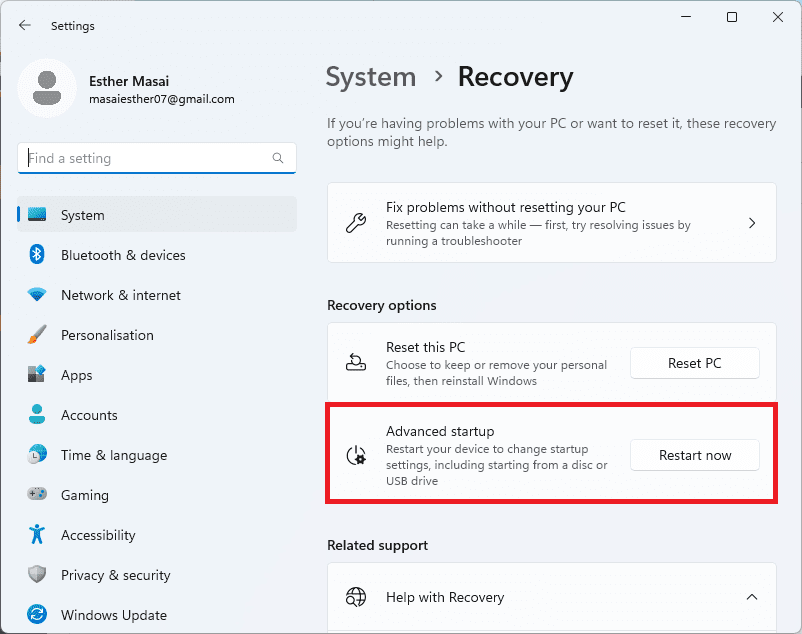
Choose Restart Now
Select “Troubleshoot”

Troubleshoot
Select “Advanced Options”
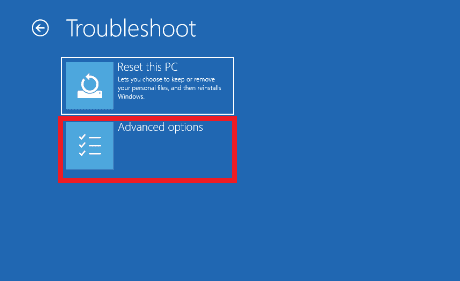
Advanced Options
Select “Command Prompt”
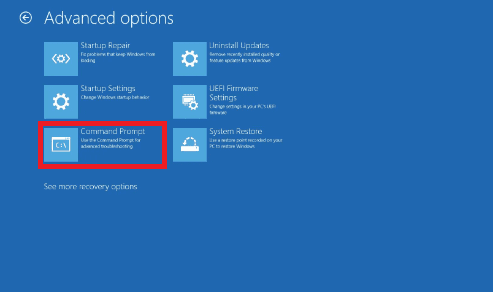
Command prompt
Our PC will once more boot into GRUB. Choose Windows and proceed. Windows will start Command Prompt and prompt for authentication. The user must possess administrative privileges.
In the Command Prompt (CMD), type the following command and press the “Enter” key: The message ‘The operation performed successfully’ should appear. This signifies that GRUB has been removed and replaced by Windows Master Boot Record.
bootrec /fixmbr

Bootrec fix MBR
Input “exit” and press enter.
exit
Click “Shut down your PC.”
Now, power on the computer. Your machine should now boot directly to Windows.
That’s it. Linux Mint has been completely uninstalled from your PC.
Wrapping up
This brief guide has covered all the aspects required to know when you want to uninstall Linux Mint from your PC. The two significant steps are deleting the Linux partition and restoring the Windows boot grub loader by deleting the Linux EFI. I hope you can uninstall Linux Mint from your PC without any strain. Were you able to successfully remove Linux Mint? Please tell us in the comments below. Again, I hope you found the guide helpful.

2 comments
Thanks, that worked well. Now to reclaim that unallocated disk storage.
Useful Guide, worked to fix my issues.
If you’re stuck on the GNU GURP boot try ‘exit’ to leave it, worked to get to windows in my case.