In this day and age where video-sharing websites like Youtube are getting the most attention, it is hard for an internet user to resist uploading something to these platforms. Since nobody likes videos that seem unprofessional, you would need video-editing software to edit your raw videos.
If you happen to be using any Linux-based operating system, you can check out our 10 Best Video Editing Software for Linux. Still not impressed? Well, let me introduce you to Avidemux then. Its main functions include cutting, filtering, and encoding, which we’ll discuss in a bit more detail in this article. It is also worth mentioning that just like every other software discussed at FOSSLinux, you can get Avidemux for free.
Avidemux Features and installation
Cutting Videos
If you’re enthusiastic about cutting videos for some reason, Avidemux could become your go-to software for this purpose. With this freeware, you will be able to delete, copy, paste, and save a specific part of a video.
Filters
Avidemux comes with a bunch of visual effects that you can add to your videos to make them fancier. Moreover, these filters are not limited to video-only. The software offers different audio filters as well.
In particular, the software allows users to resize and sharpen, and add color profiles to videos. In addition to that, it is also possible to adjust their audio volume.
Encoding
Undoubtedly, the most significant feature of Avidemux is encoding. For those of you who are unaware of encoding, it is simply the process of converting a video into your desired format — something we all do quite often.
Video Formats
If you’re dealing with AVI, MPEG-2, MP4, FLV, Matroska, H.264, and H.265 video formats, Avidemux should be good to go. However, the software could have problems while processing the latest open formats, such as AV1, VP8, VP9, WebM, and Opus.
Command-Line Mode
GUIs may look modern, but some people would instead go for simplicity. Considering it, the developers of Avidemux made it controllable through the terminal. Linux enthusiasts would love this! And, so would users who are just tired of the usual graphical interfaces.
Availability
Apart from supporting Linux-based operating systems, Avidemux can also run on Windows, BSD, and Mac OS X.
Other Features
You thought this was it? No, there’s more. Avidemux offers some other useful features such as:
- Support for scripting
- Muxing and demuxing
- Subtitle processing
- Deinterlacing
Installation
First Method
The complete set of instructions for installing Avidemux is available here. However, if you’re facing any difficulties with that procedure, let me guide you through it.
Initially, you’d have to download Avidemux. Clicking this link would do the trick.
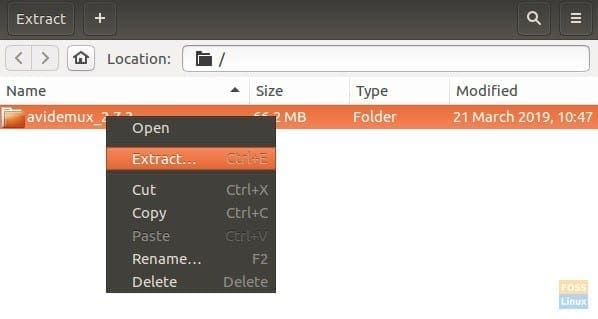
Once you have it downloaded, you’ll need to extract the folder. Nothing your archive manager isn’t capable of doing.
Avidemux-Installation
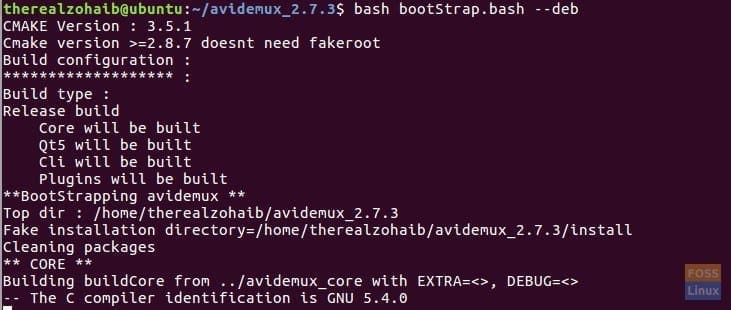
After extracting the files, you’ll need to compile all the components of Avidemux. Accordingly, you’d have to open the Linux terminal in your Avidemux folder and run the following command:
bash bootStrap.bash --deb
This command is for compiling Avidemux with Qt 4. However, if you prefer Qt 5, you can run this command:
bash bootStrap.bash --deb --enable-qt5
If you’re a CLI enthusiast, add ‘–with-cli’ at the end of the commands mentioned above to get the CLI version of Avidemux.
For the sake of simplicity, I went with the first command.
Avidemux-Installation
Once the compilation has completed, you can start using Avidemux.
Second Method
Since the first method can seem a bit time-consuming to some people, I decided to discuss another way that is quite simpler than the other one.
For those of you who are not that excited about compilation, the developers have included a universal binary file which you can download here.
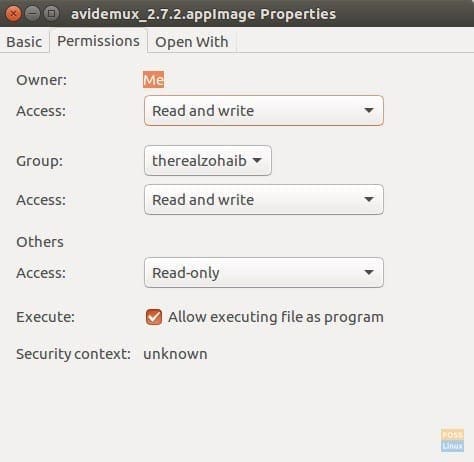
Once you’ve downloaded it, go to the file’s properties then permissions and check the ‘allow executing as program’ option.
Executing the AppImage
Afterward, you need to change permissions of this file through Linux terminal.

You can change the file location in the above command, and you’ll be good to go.
After this procedure, you can just double-click the Avidemux image file to open it.
Usage
Cutting Videos
With the user-friendly GUI of Avidemux, cutting videos doesn’t require any hard to follow methods.
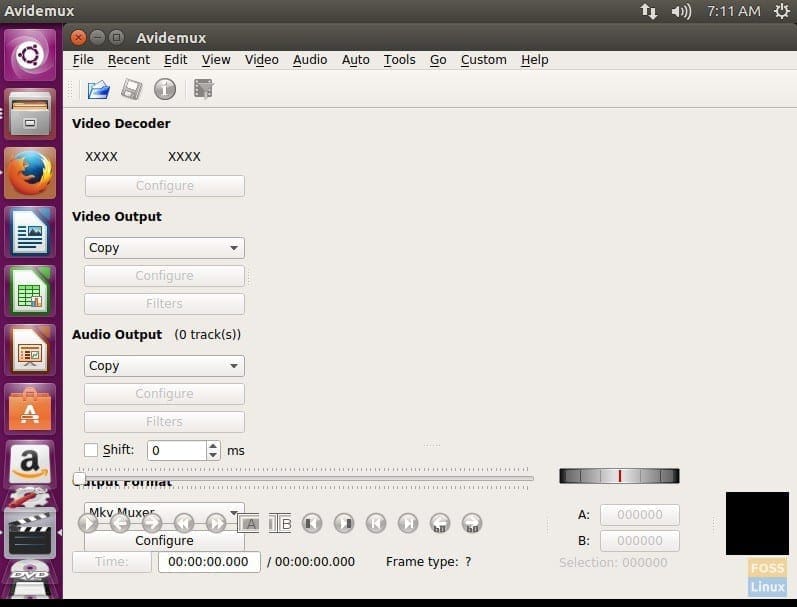
Just open the file of your choice by clicking the blue folder located at the top-left corner. Once you’ve opened it, you should get something like this.

Except for the late keyboard cat, everything should be the same.
You can cut this video by determining its starting and ending point, which can be done by the ‘A’ and ‘B’ buttons right below the play bar.

When done with the selection, save the video by clicking the ‘floppy’ button and you’ll get the trimmed version of it. Yes, cutting videos are this simple with Avidemux.
Adding Filters
As you would have guessed, adding filters is just as easy as cutting videos. You can choose from a bunch of filters related to transforming, interlacing, colors, noise, sharpness, subtitles, and many other things.
Initially, you’d have to click the ‘Filters’ button placed right beneath the ‘configure’ one. Afterward, you will see this window.

Just right-click on any one of the filters and add them. Avidemux will ask you for a bit more info depending on the filter you choose.
Encoding Videos
Changing file formats of your videos is also incredibly comfortable. Apart from the video format, you can also change the audio format with the help of Avidemux.
Select the video and audio formats of your output video from ‘Video Output’ and ‘Audio Output’ sections, just like I have in the screenshot below.
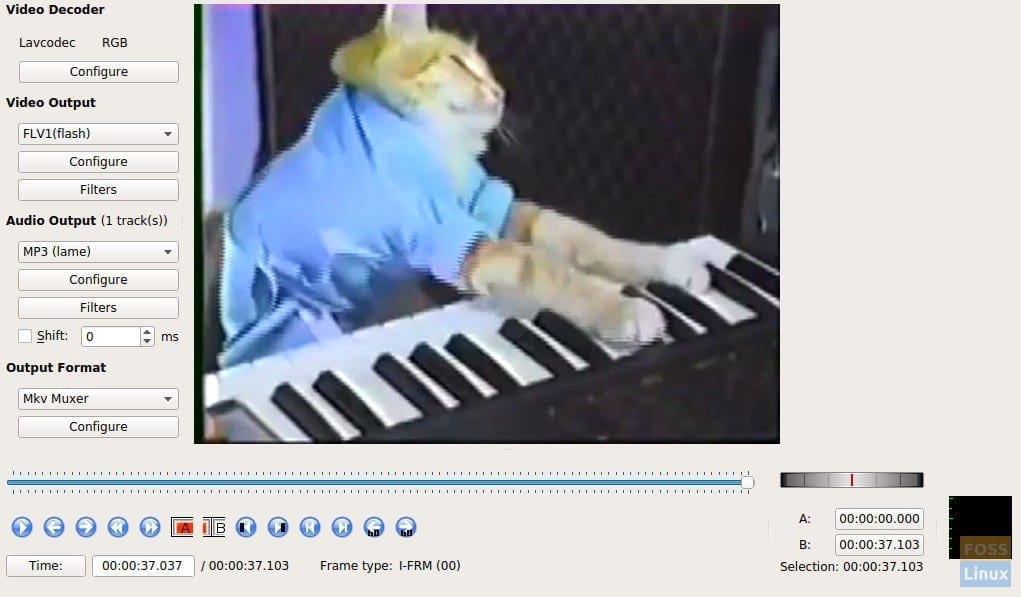
Once done, just save video to have it converted into your desired format.
Conclusion
If you’re looking for a simple and user-friendly freeware to either cut, filter, or encode your videos, Avidemux is sure to put an end to your search. Although it offers only basic video-editing, it redeems itself with its CLI-mode and scripting capabilities.
Encountered any issues with installing or using this software? Mention it in the comments so FOSSLinux could have a look.

